Table of contents
- This episode: AWS App Runner. In this Hello, Cloud blog series, we're covering the basics of AWS cloud services for newcomers who are .NET developers. If you love C# but are new to AWS, or to this particular service, this should give you a jumpstart.
- AWS App Runner: What is it, and why use It?
- Our Hello, App Runner Project
- One-time Setup
- Where to Go From Here
- Further Reading
This episode: AWS App Runner. In this Hello, Cloud blog series, we're covering the basics of AWS cloud services for newcomers who are .NET developers. If you love C# but are new to AWS, or to this particular service, this should give you a jumpstart.
In this post we'll introduce AWS App Runner and use it to host a simple .NET "Hello, Cloud" web app container. We'll do this step-by-step, making no assumptions other than familiarity with C# and Visual Studio. We're using Visual Studio 2022 and .NET 6.
AWS App Runner: What is it, and why use It?
AWS App Runner is a new AWS compute service introduced in 2021. AWS describes it as "a fully managed service that makes it easy for developers to quickly deploy containerized web applications and APIs, at scale and with no prior infrastructure experience required". If you've got a web application or web service, such as a web site, API, or microservice, it's a candidate for App Runner.
App Runner is limousine service for container web apps. When AWS describes App Runner as "fully managed", they aren't kidding: if you want every last detail handled for you, App Runner is your service. Like AWS Lambda, your only responsibility is to supply your code. Like AWS Lambda, you won't have (or need) visibility into the underlying EC2 instances and infrastructure that your service runs on. Unlike AWS Lambda, you're hosting a full web app or web service, not just a function.
If you're not container-savvy, that's nothing to worry about. As you'll see in our Hello, Cloud tutorial, the AWS Toolkit for Visual Studio will create a container for your web app/service automatically when we publish to AWS. If you already use containers, you can bring your existing containers. App Runner will do everything else, managing TLS, a load balancer, health checks, and auto-scaling for you. Under the hood, App Runner is running your container with AWS Fargate on Amazon ECS, but you won't ever interact with those services directly.
At the time of this writing, AWS App Runner is available in these regions: US East (N. Virginia), US East (Ohio), US West (Oregon), Europe (Ireland), and Asia Pacific (Tokyo). If you're used to working in a different region, plan the location of your App Runner services and companion AWS services, such as a database, with that in mind.
Our Hello, App Runner Project
We’re going to create a .NET 6 web app project, see it work locally, then publish to AWS. The AWS Toolkit for Visual Studio will containerize the app and host the container in AWS App Runner—where we’ll run it on Linux.

One-time Setup
To experiment with AWS App Runner and .NET, you will need:
- An AWS account, and an understanding of what is included in the AWS Free Tier.
- Microsoft Visual Studio 2022. If you're using an older version of Visual Studio you won't be able to use .NET 6.
- AWS Toolkit for Visual Studio. Configure the toolkit to access your AWS account and create an IAM user.
- Docker Desktop. If you already have Docker, be aware that you need version 17.05 or later.
Step 1: Create a Policy for the AWS Toolkit User
In order to leverage the AWS Toolkit's integration with AWS fully, including creating and publishing App Runner services, you'll need to create an IAM policy that adds the necessary permissions for role and instance profile actions. In this step, you'll create a new policy in AWS, then add it to your AWS Toolkit for Visual Studio user.
Important: You should always follow the principle of least privilege when it comes to security. This blog series assumes you are working in your own developer account for learning purposes and not working with anything production-related. If you're using an organization-owned AWS account, you should coordinate with your security principal on IAM settings.
- Sign in to the AWS console. Select the region at top right you want to be working in. That's usually what's nearest your location, but it must be a region that currently offers AWS App Runner (here's a list). We're using US West (Oregon).
- Navigate to the Identity and Access Management (IAM) area of the AWS Console. You can enter iam in the search box to find it.
- Click Policies.
- Click Create Policy.
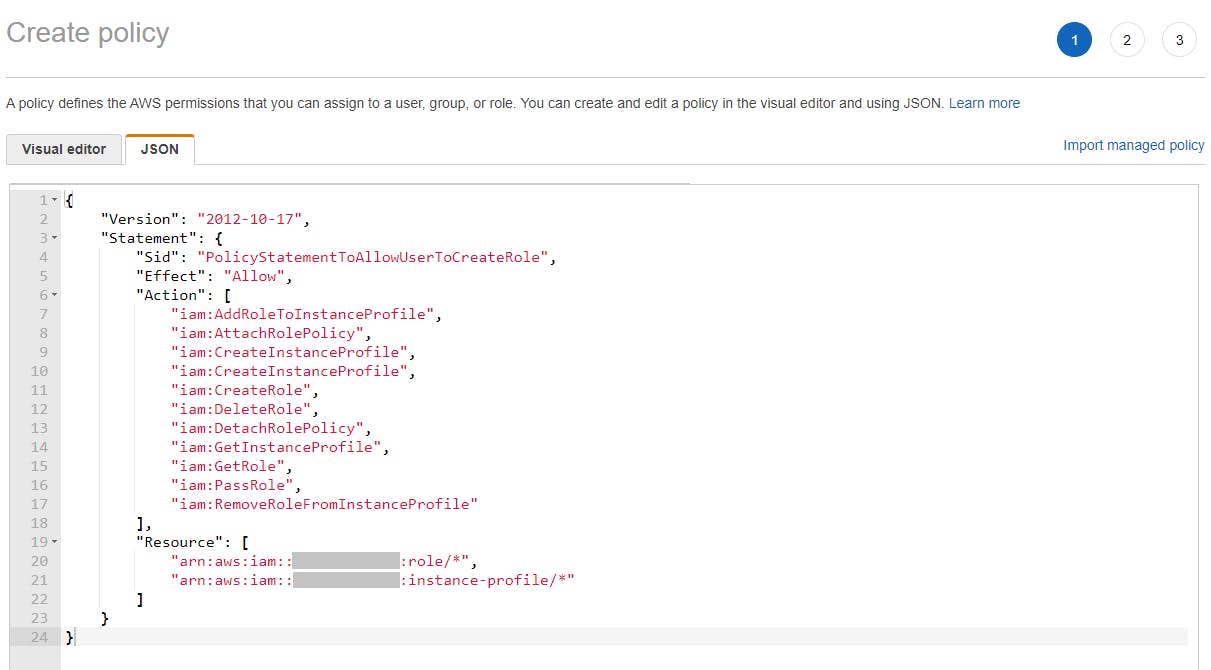
- Click the JSON tab, and enter the policy JSON at the end of this step, replacing [account-number] with your AWS account number.
- Click Next:Tags.
- Click Next:Review.
- Enter the name IAMPublish and click Create policy.
- Navigate to IAM > Users and select the username you use with the AWS Toolkit for Visual Studio (you created this user when you installed and configured the toolkit).
- If not already assigned, add the built-in PowerUserAccess permission. The PowerUserAccess permission provides developers full access to AWS services and resources, but does not allow management of users and groups.
- Add the new IAMPublish permission.
{
    "Version": "2012-10-17",
    "Statement": {
        "Sid": "PolicyStatementToAllowUserToCreateRole",
        "Effect": "Allow",
        "Action": [
            "iam:AddRoleToInstanceProfile",
            "iam:AttachRolePolicy",
            "iam:CreateInstanceProfile",
            "iam:CreateInstanceProfile",
            "iam:CreateRole",
            "iam:DeleteRole",
            "iam:DetachRolePolicy",
            "iam:GetInstanceProfile",
            "iam:GetRole",
            "iam:PassRole",
            "iam:RemoveRoleFromInstanceProfile"
        ],
        "Resource": [
            "arn:aws:iam::[account-number]:role/*",
            "arn:aws:iam::[account-number]:instance-profile/*"
        ]
    }
}
Your AWS Toolkit for Visual Studio user now has the permissions it needs to create and publish to AWS App Runner.
Step 2: Create Web App Project
In this step you'll create a sample .NET 6 web app project using the dotnet command.
- Open a command/terminal window and create a folder for the project. CD to the folder.
Use the dotnet new command below to create a default web app project.
dotnet new webapp -n hello-apprunner
Step 3: Build and Test the Local Service
In this step you'll build and test the app locally in Visual Studio.
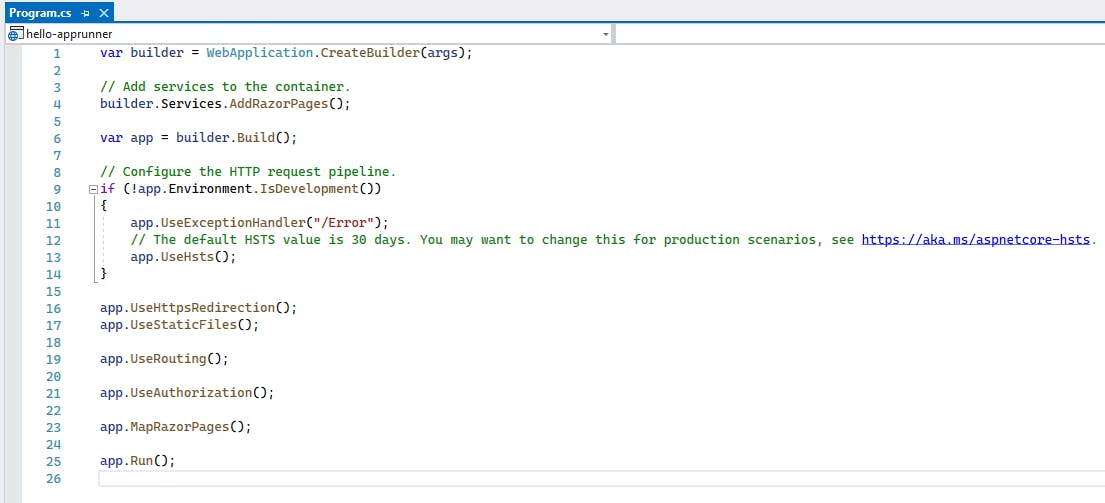
Open the hello-apprunner project you just created in Visual Studio and briefly inspect the project files and code. If you view the Program.cs, you'll see how minimal the generated .NET 6 code is.
Click the Run button -or- press F5 to build and run the project.
- The web app should come up in your browser, with a welcome page.
 This is a very simple web app, but it will do for a Hello, Cloud project. Let's move it to AWS App Runner.
Step 4: Publish the .NET Project to AWS App Runner
Next, we'll both create the AWS App Runner service and deploy it to AWS right from Visual Studio.
- In Visual Studio, go to the AWS Explorer and select the same region you selected in Step 1.
- In Visual Studio, right-click the hello-apprunner project and select Publish to AWS.
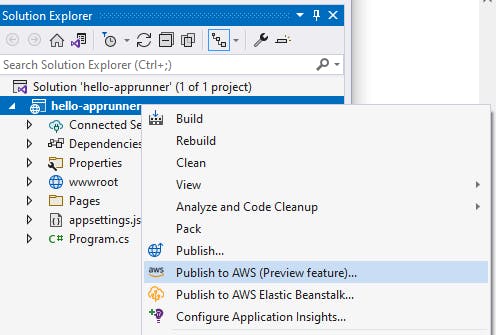
- If you are prompted about switching to a new AWS publishing experience, click Switch to new experience. We will be using the new AWS publishing experience here.
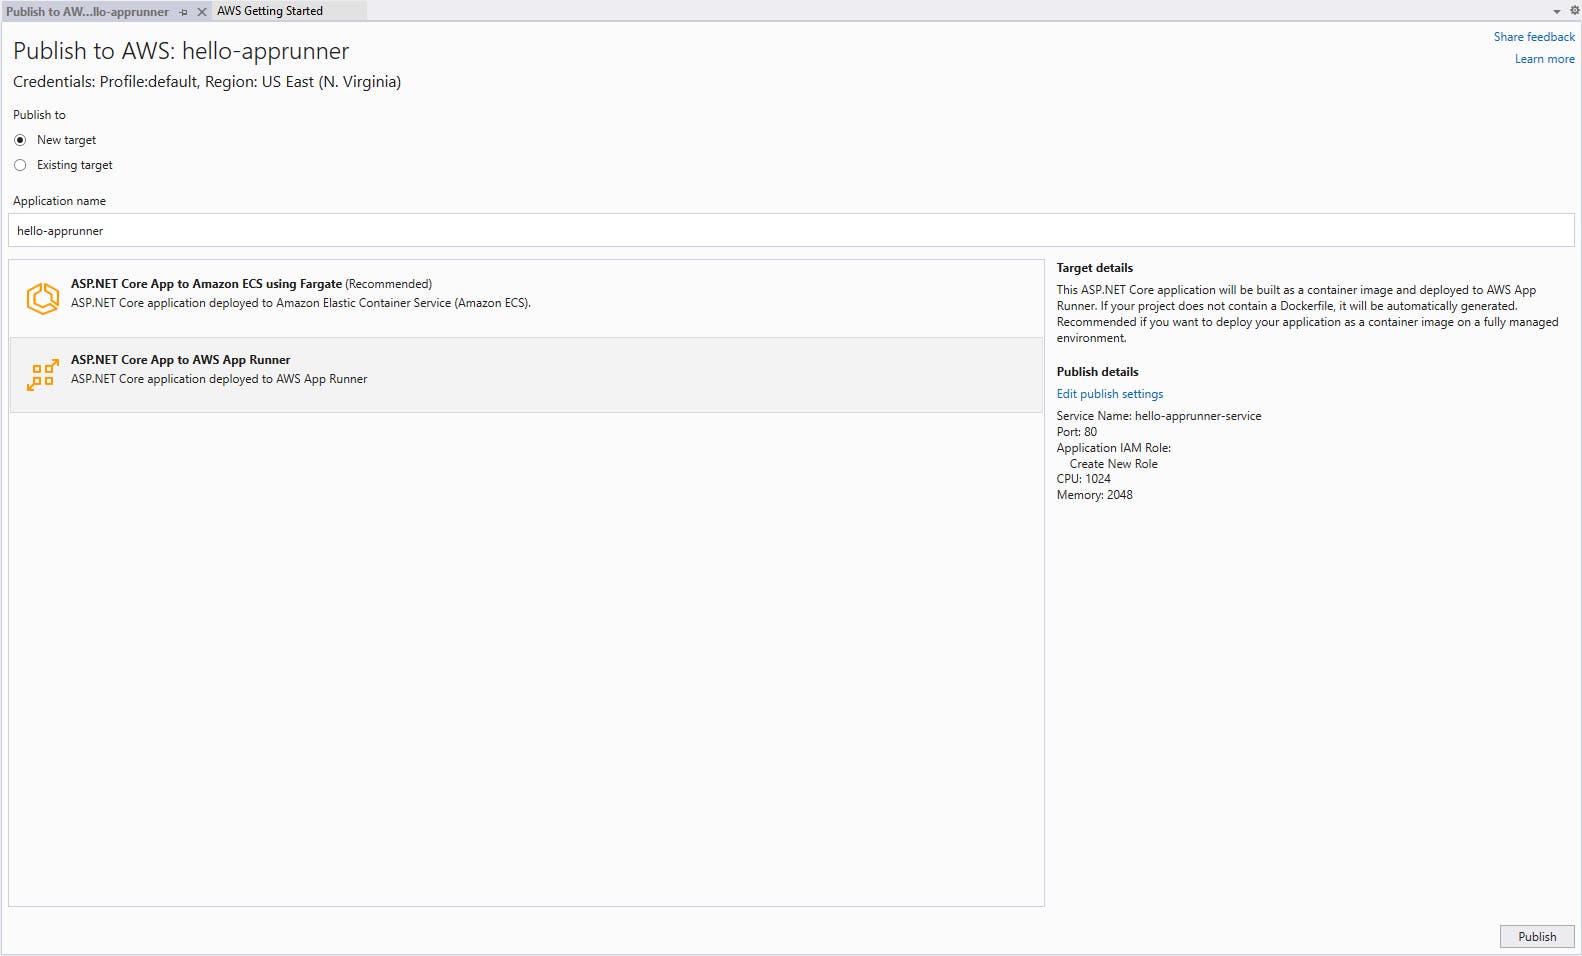
- For Publish to, select New target.
- Set Application name to hello-apprunner.
- Select the option ASP.NET Core App to AWS App Runner.
- Read through the Publish details text and take note of what the publish action will do. The ASP.NET core application will be built as a container image and deployed to AWS App Runner under application name hello-apprunner and service name hello-apprunner-service.
- Click the Publish button at lower right.
Wait while the publish action proceeds.
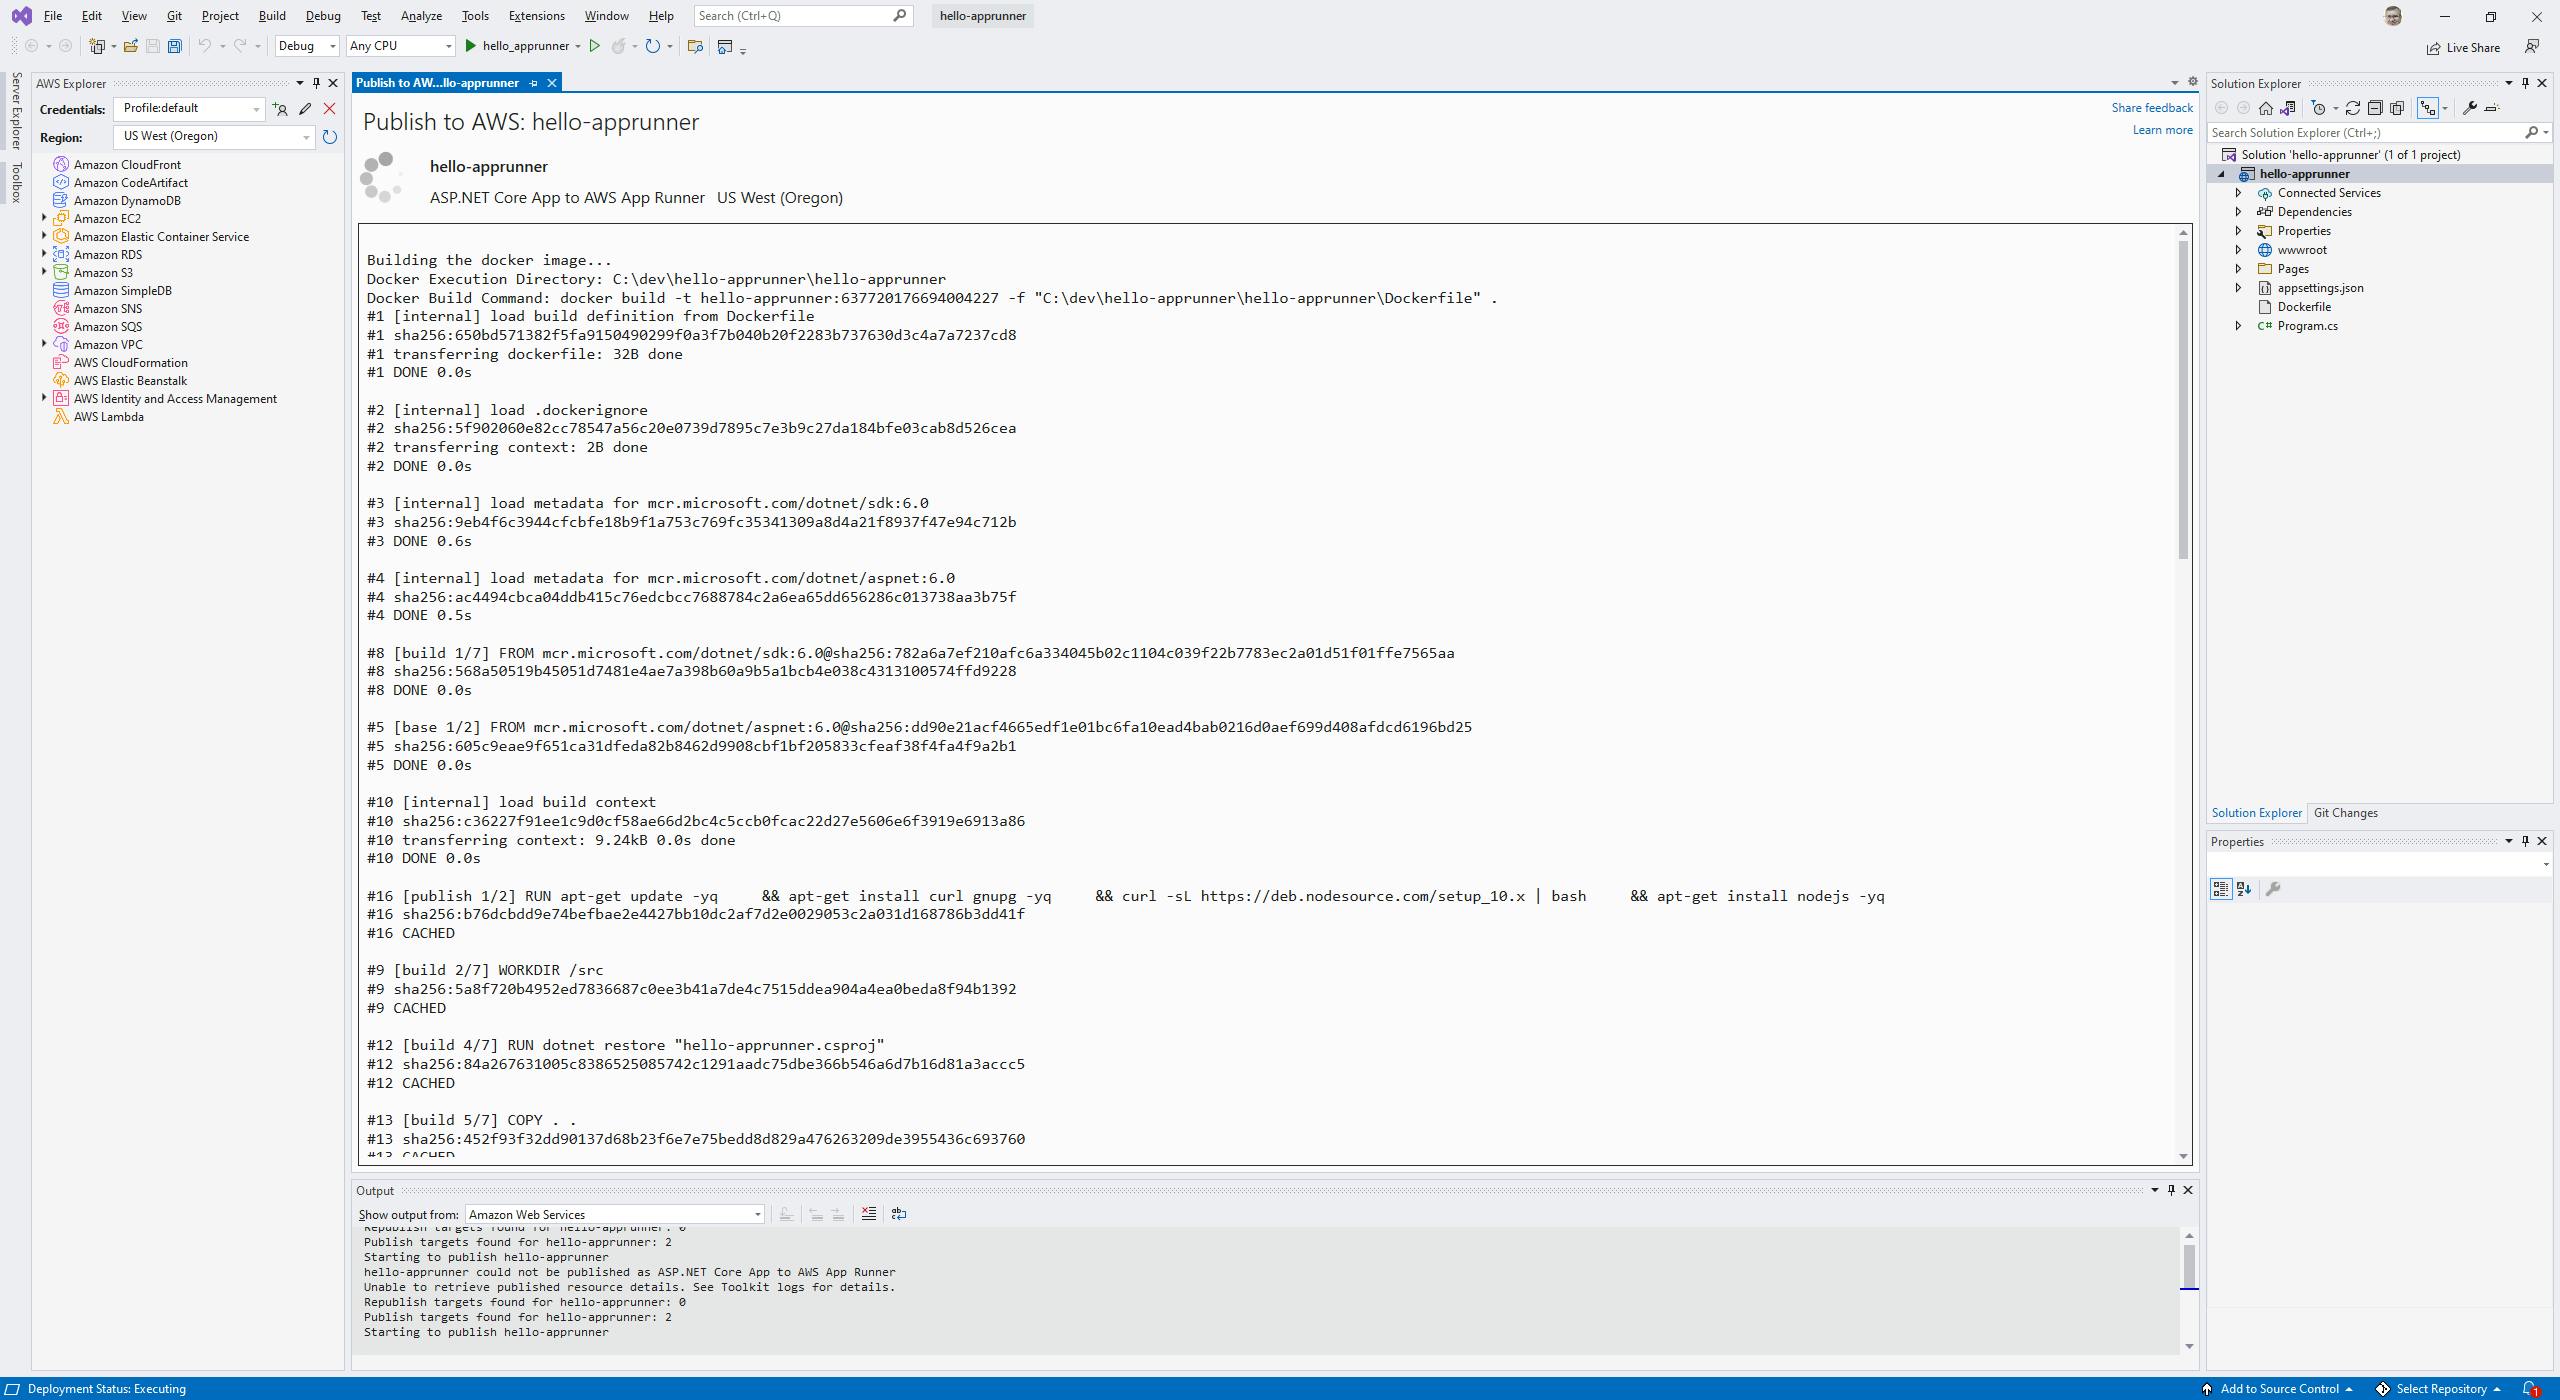 If any issues prevent the publish from succeeding, you'll need to diagnose them and take corrective action. If you receive a Docker error, check that you have version 17.05 or later. The publish output is very detailed for a reason: if something fails, you'll know exactly why. For example, you might see a CREATE_FAILED or DELETE_FAILED somewhere, with a message that your VS Toolkit user doesn't have a needed permission such as iam:CreateRole. If you get an error like that, you'll need to add or extend a policy with that permission and attach it to your VS Toolkit for AWS user. We anticipated those policies earlier in Step 1.
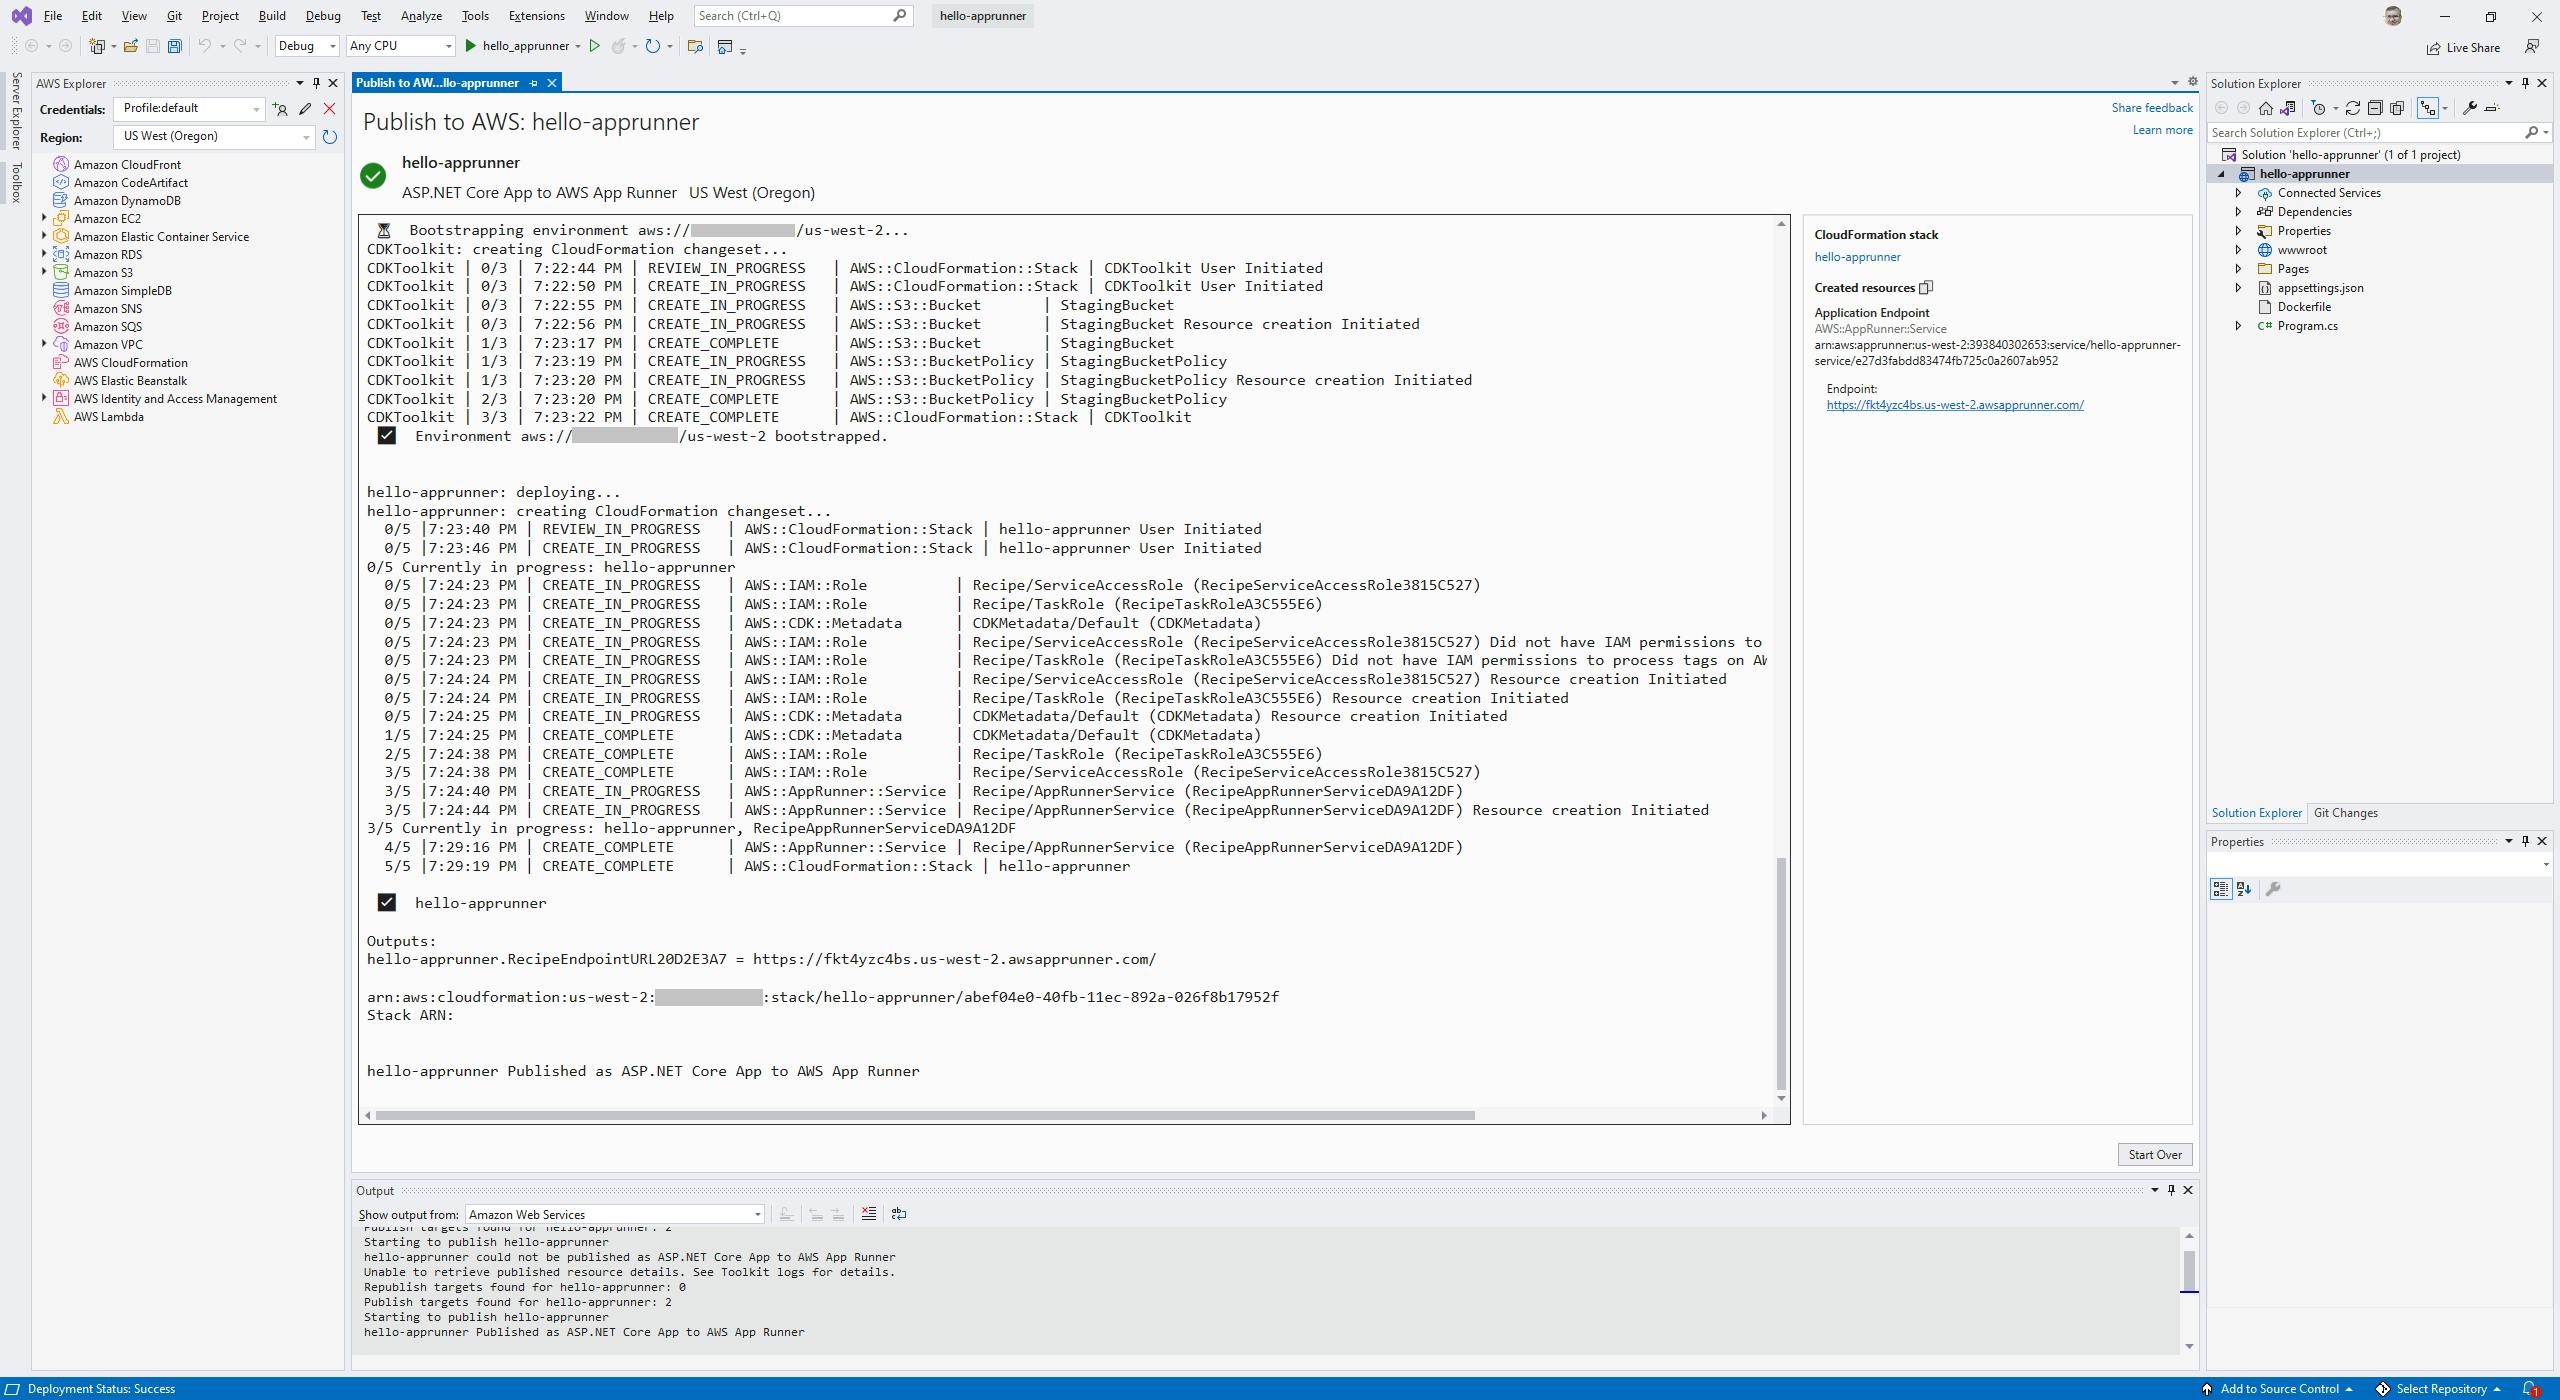
The publish is complete when a green check mark is displayed at the top, and this appears at the end of the publishing log:
hello-apprunner Published as ASP.NET Core App to AWS App Runner
Step 5: Review and Test Web App in AWS
Let's see what was created in AWS App Runner and try it out.
- In the AWS console, navigate to the AWS App Runner area. You can enter app runner in the search box.
- You should see a hello-apprunner-service listed, with status Running, and a default domain with a URL similar to https://[identifier].us-west-2.awsapprunner.com

- Click the URL to test the service.
- Your app opens in another browser tab, with SSL. We're off and running with App Runner!

Go back to the AWS console and click the hello-apprunner-service name to see its detail. Let's explore what's here.
a. In the Service overview section, you see your app's status (Running), the default domain URL, the Amazon Resource Name (ARN) of the service, and a "Source" URL. That last one takes you to the container in Amazon Elastic Container Registry (ECR).
b. The Logs tab shows your application execution log.
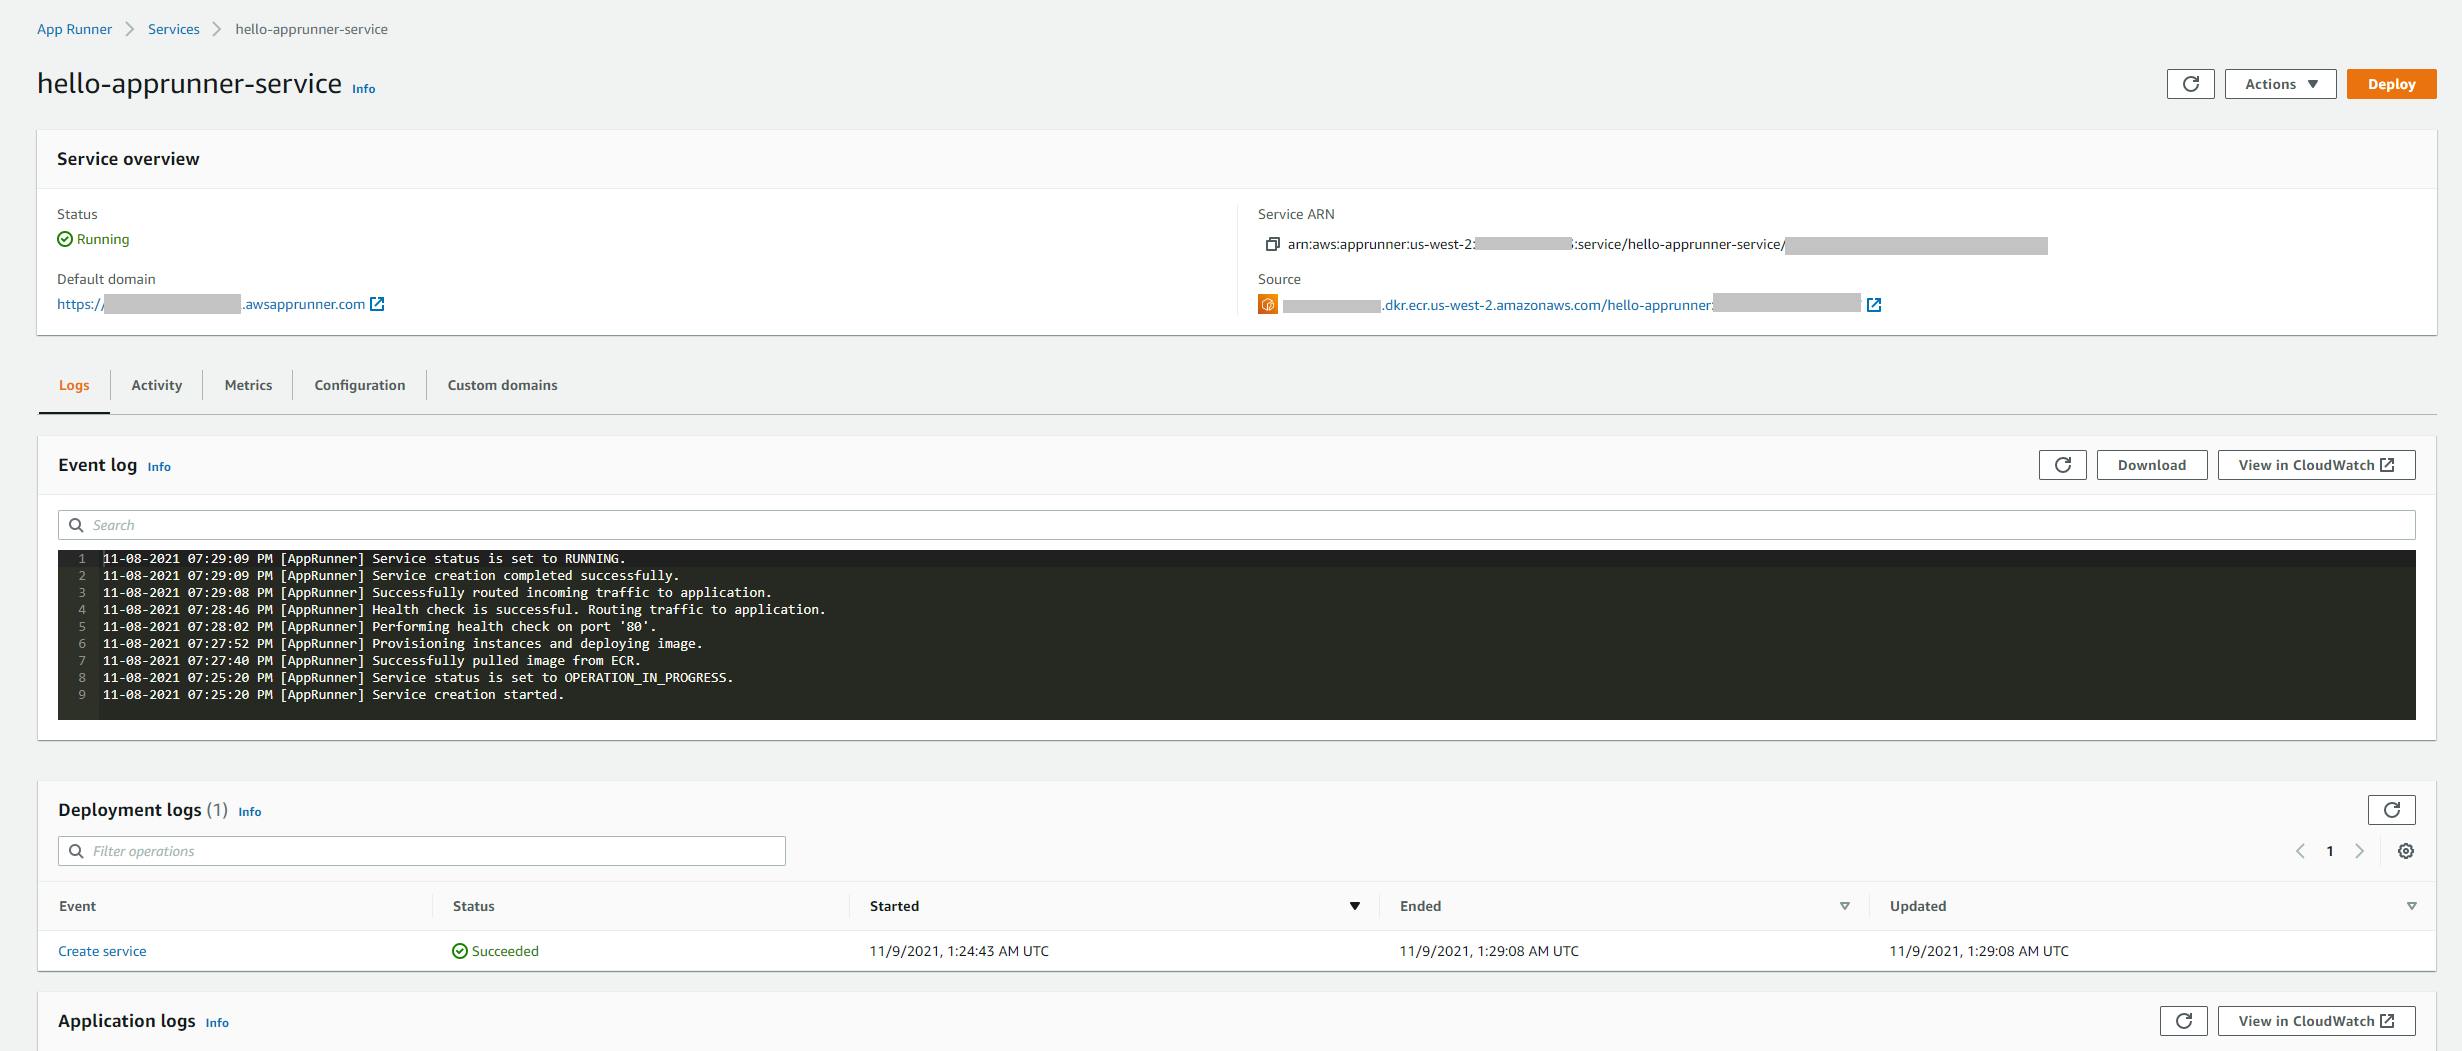 c. The Activity tab reveals the history of your service.
 d. The Metrics tab reveals your service metrics, including requests, responses, latency, and number of active instances. There's not much to see at present, but with some actual traffic this will be valuable.
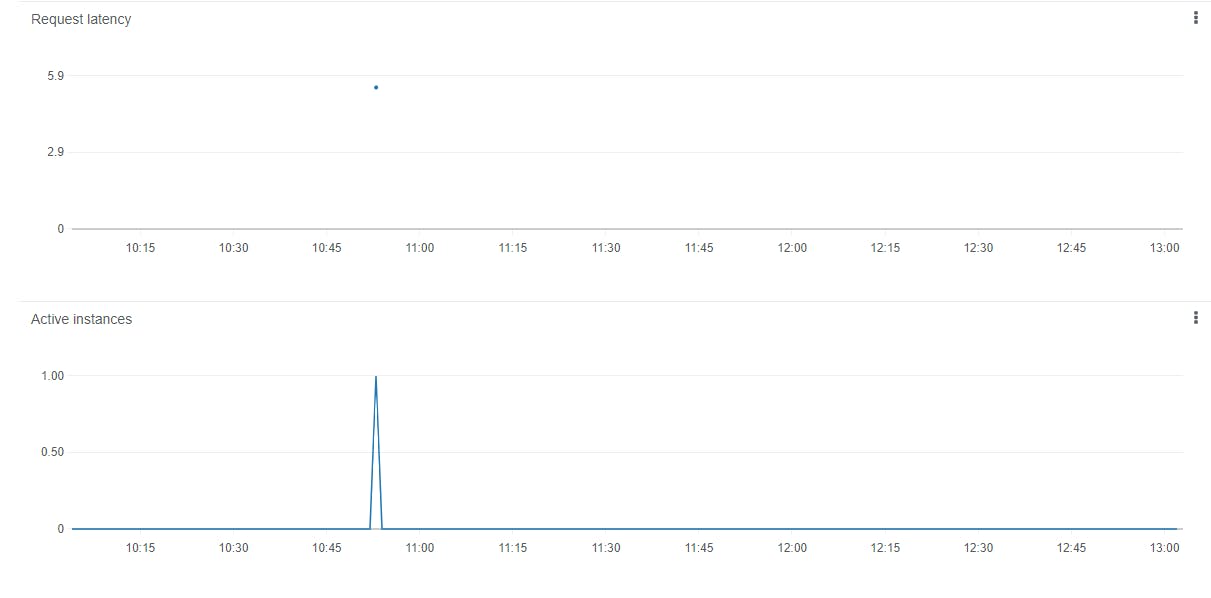 e. The Configuration tab displays your service configuration details, including number of virtual CPUs and memory, auto-scaling, health check, and security. Click Edit to modify your configuration. If you need to, you can exercise control over the number of virtual CPUs and memory per instance, set environment variables, customize auto-scaling, configure health checks, use a custom IAM role, or use a custom encryption key.
f. The Custom domains tab is where you can link a custom domain that you own to your service.
That's it, we're done! Congratulations on getting a web app containerized and running in AWS App Runner.
Step 6: Shut it Down
When you're finished with it, delete the hello-apprunner-service in AWS. You don't want to accrue charges for something you're not using.
- In the AWS console, navigate to AWS App Runner.
- Select the hello-apprunner-service service.
- From the Actions drop-down, select Delete and confirm.
- Wait for the service to terminate and confirm the service is no longer listed in the console.
Where to Go From Here
What should be coursing through your neurons right now is 1) how easy this all was and 2) how completely your service is managed in AWS. In this tutorial, you created a .NET 6 web application and swiftly deployed it to AWS App Runner using Visual Studio 2022 and the AWS Toolkit for Visual Studio. No knowledge of infrastructure or configuration decisions were demanded of you.
App Runner set up and manages everything, including TLS. There are other AWS compute services that handle varying degrees of management for you, but App Runner is the epitome of "leave the driving to us". That lets you concentrate on your application and your business instead of infrastructure.
Further Reading
AWS Documentation
.NET on AWS
Containerizing Complex Multi-tier Windows Applications using AWS App2Container
Blog
AWS App Runner: From Code to a Scalable, Secure Web Application in Minutes by Martin Beeby
