

Table of contents
- This episode: Amazon SQS. In this Hello, Cloud blog series, we're covering the basics of AWS cloud services for newcomers who are .NET developers. If you love C# but are new to AWS, or to this particular service, this should give you a jumpstart.
- Amazon SQS: What is it, and why use It?
- Our Hello, SQS Project
- One-time Setup
- Where to Go From Here
- Further Reading
This episode: Amazon SQS. In this Hello, Cloud blog series, we're covering the basics of AWS cloud services for newcomers who are .NET developers. If you love C# but are new to AWS, or to this particular service, this should give you a jumpstart.
In this post we'll introduce Amazon SQS and use it in a "Hello, Cloud" .NET program. We'll do this step-by-step, making no assumptions other than familiarity with C# and Visual Studio. We're using Visual Studio 2022 and .NET 6.
Amazon SQS: What is it, and why use It?
"An Englishman, even if he is alone, forms an orderly queue of one." —George Mikes
Amazon Simple Queue Service (SQS) is a message queuing service. Message queues are a kind of middleware. AWS describes SQS as "a fully managed message queuing service that enables you to decouple and scale microservices, distributed systems, and serverless applications."
Queues and Message Queuing
A queue is merely a waiting list, and you've encountered them all your life. If you've ever waited in line for movie tickets, the line is a queue. Americans say "waiting in line", the British say "waiting in queue". The basic idea of a queue is that the first person in line is the next to be served (First-In, First-Out), but that's not always the case. Some queues can't guarantee precise ordering. Some queues reorder based on priority, such as when you're waiting for a restaurant table and the next table assignment must consider party size.
In software, message queues combine the idea of queues with messages. For example, a web storefront can accept orders and send order messages to a queue, where they accumulate. An order fulfillment program can process the orders by receiving order messages from the same queue.
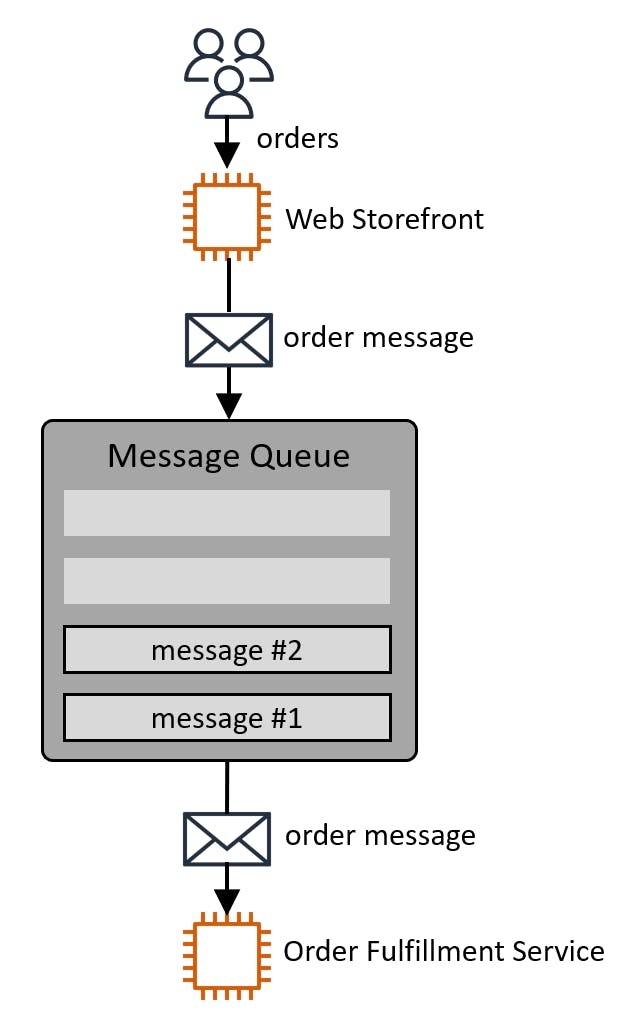
Message queues are called middleware because they sit between software programs and allow them to coordinate activity. This arrangement of message producers and message consumers connected by message queues is a thing of beauty for enterprise production environments. It provides significant benefits:
- Decoupling. In the example we just gave, the order fulfillment program doesn't need to keep pace with the web storefront, since orders reside in the queue until they can be processed. The web storefront doesn't even need to know where the order fulfillment program is or what tech stack it's built on: the two programs' sole point of connection is the message queue.
- Reliability. Let's say you need to take the order processing program offline for maintenance or to resolve an issue. That doesn't complicate life for the web storefront at all: it keeps humming along, queuing orders. When the order processing program comes back up, it resumes processing queued orders. No orders have been lost.
- Granular scalability. If the order fulfillment program isn't processing as many orders per hour as we would like, we can simply have multiple instances of them running, feeding from the same queue like a litter of puppies.

One of the nice things about message queues is that just about any kind of software component can use them, including container applications, serverless functions, microservices, and legacy applications. Now that we understand some basics about message queues, let's get specific about SQS.
Amazon SQS
SQS has two kinds of queues, Standard and FIFO. Standard queues perform the best, but their ordering is best-effort and messages are delivered at least once (meaning it's possible for a message to be processed more than once). FIFO queues guarantee exact ordering and exactly-once processing at a slightly higher price.
| Standard Queue | FIFO Queue | |
| Performance | Unlimited Throughput | Up to 300 messages/second |
| Delivery | At Least Once | Exactly Once |
| Ordering | Best-effort | First-in, First-out |
In SQS you are billed on requests. Sending a message, receiving a message, and deleting a message are all examples of requests. You can batch up to 10 messages or 256KB in a single request, and that costs the same as a single message. The AWS Free Tier gives you 1 million free requests a month!
An SQS message can be up to 256KB of text, in any format such as JSON or XML. Be aware that each 64KB chunk of a message counts as one request in the pricing model, something you'll want to keep in mind as you estimate costs for your messaging needs. There is no imposed limit on the number of messages you can store in a queue.
Our Hello, SQS Project
We’re going to create a queue in the AWS console and see how we can monitor it. Then, we'll create two .NET 6 console programs. One will simulate a storefront, using the AWS SDK for .NET to send queue messages (our message producer). The other will simulate an order fulfillment service, using the SDK to receive queue messages (our message consumer).
One-time Setup
To experiment with SQS and .NET, you will need:
- An AWS account, and an understanding of what is included in the AWS Free Tier.
- Microsoft Visual Studio 2022. If you're using an older version of Visual Studio you won't be able to use .NET 6.
- AWS Toolkit for Visual Studio. Configure the toolkit to access your AWS account and create an IAM user.
Step 1: Set Permissions for the AWS Toolkit User
In order to perform this tutorial, your AWS Toolkit User / default AWS profile needs the necessary permissions for SQS queue operations. In this step, you'll update permissions for your AWS Toolkit for Visual Studio user.
Important: You should always follow the principle of least privilege when it comes to security. This blog series assumes you are working in your own developer account for learning purposes and not working with anything production-related. If you're using an organization-owned AWS account, you should coordinate with your security principal on IAM settings.
- Sign in to the AWS console. Select the region at top right you want to be working in. We're using US West (N. California).
- Navigate to the Identity and Access Management (IAM) area of the AWS Console. You can enter iam in the search box to find it.
- Click Users on the left panel and select the username you use with the AWS Toolkit for Visual Studio (you created this user when you installed and configured the toolkit).
- If not already assigned, add the built-in PowerUserAccess permission. The PowerUserAccess permission provides developers full access to AWS services and resources, but does not allow management of users and groups.
Your AWS Toolkit for Visual Studio user now has the permissions it needs to perform SQS queue operations.
Step 2: Create an SQS Queue
In this step, you'll create an SQS queue. In a later step we'll also create a queue programmatically.
- In the AWS console, navigate to Simple Queue Service. You can enter sqs in the search bar.
- Select Queues from the left panel and click the Create queue button.
On the Create queue page, enter/select the following:
a. Type: Standard
b. Name: hello-sqs
Leave the other settings defaulted but take note of what you can control.
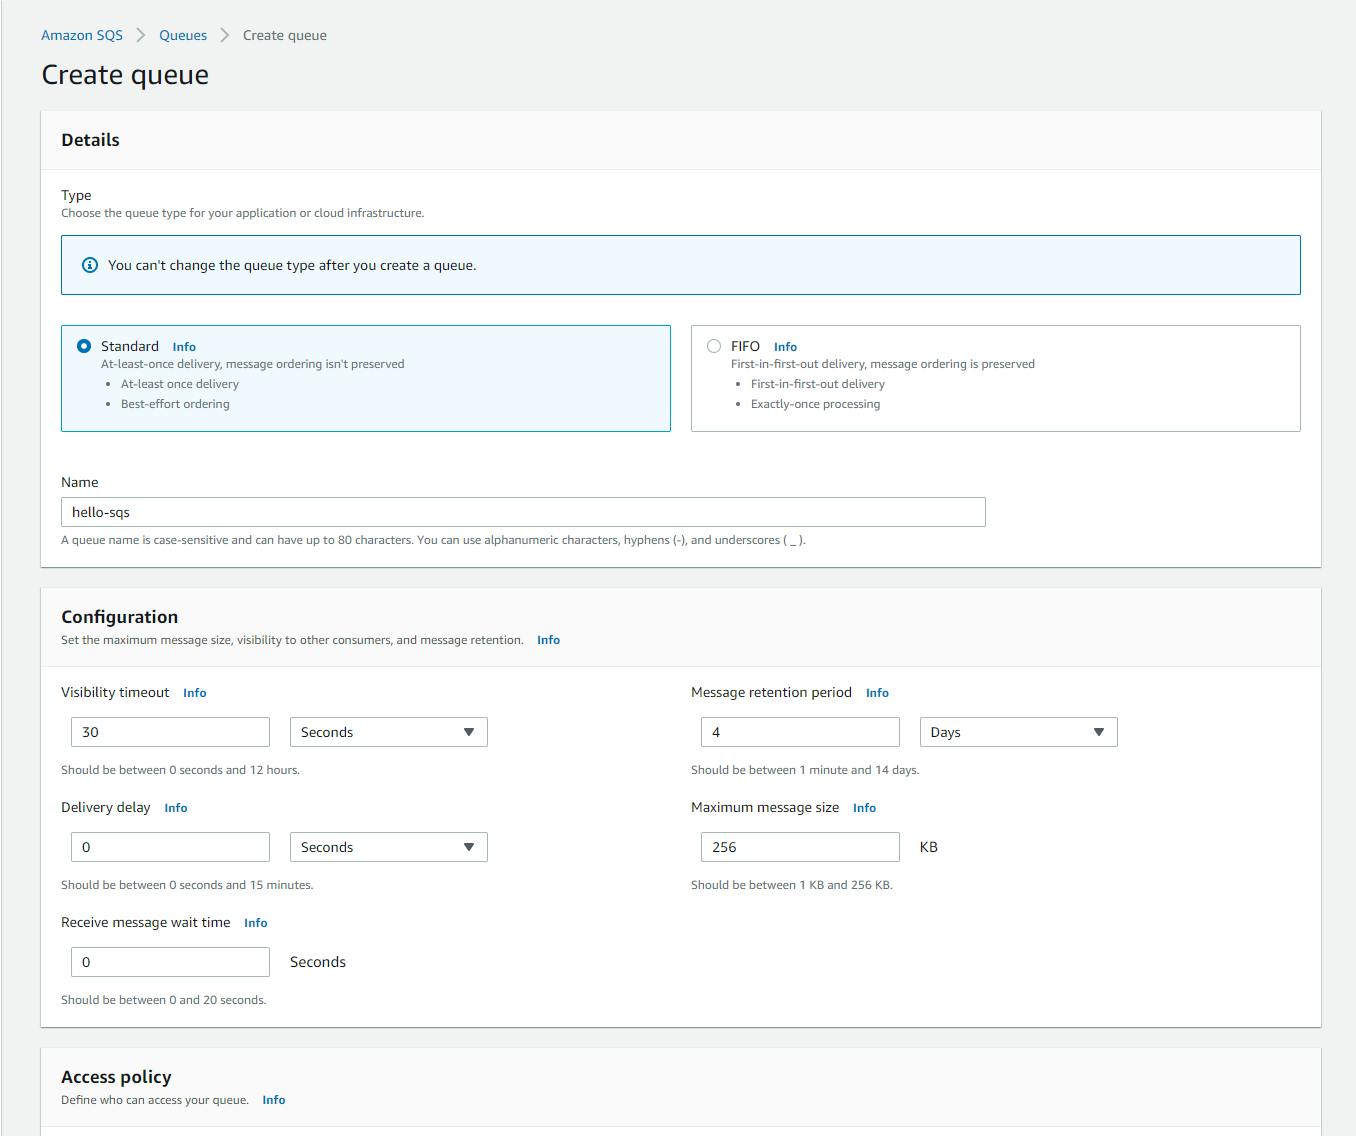
Click the Create queue button at the bottom of the page, and wait for a confirmation message that the queue has been created.
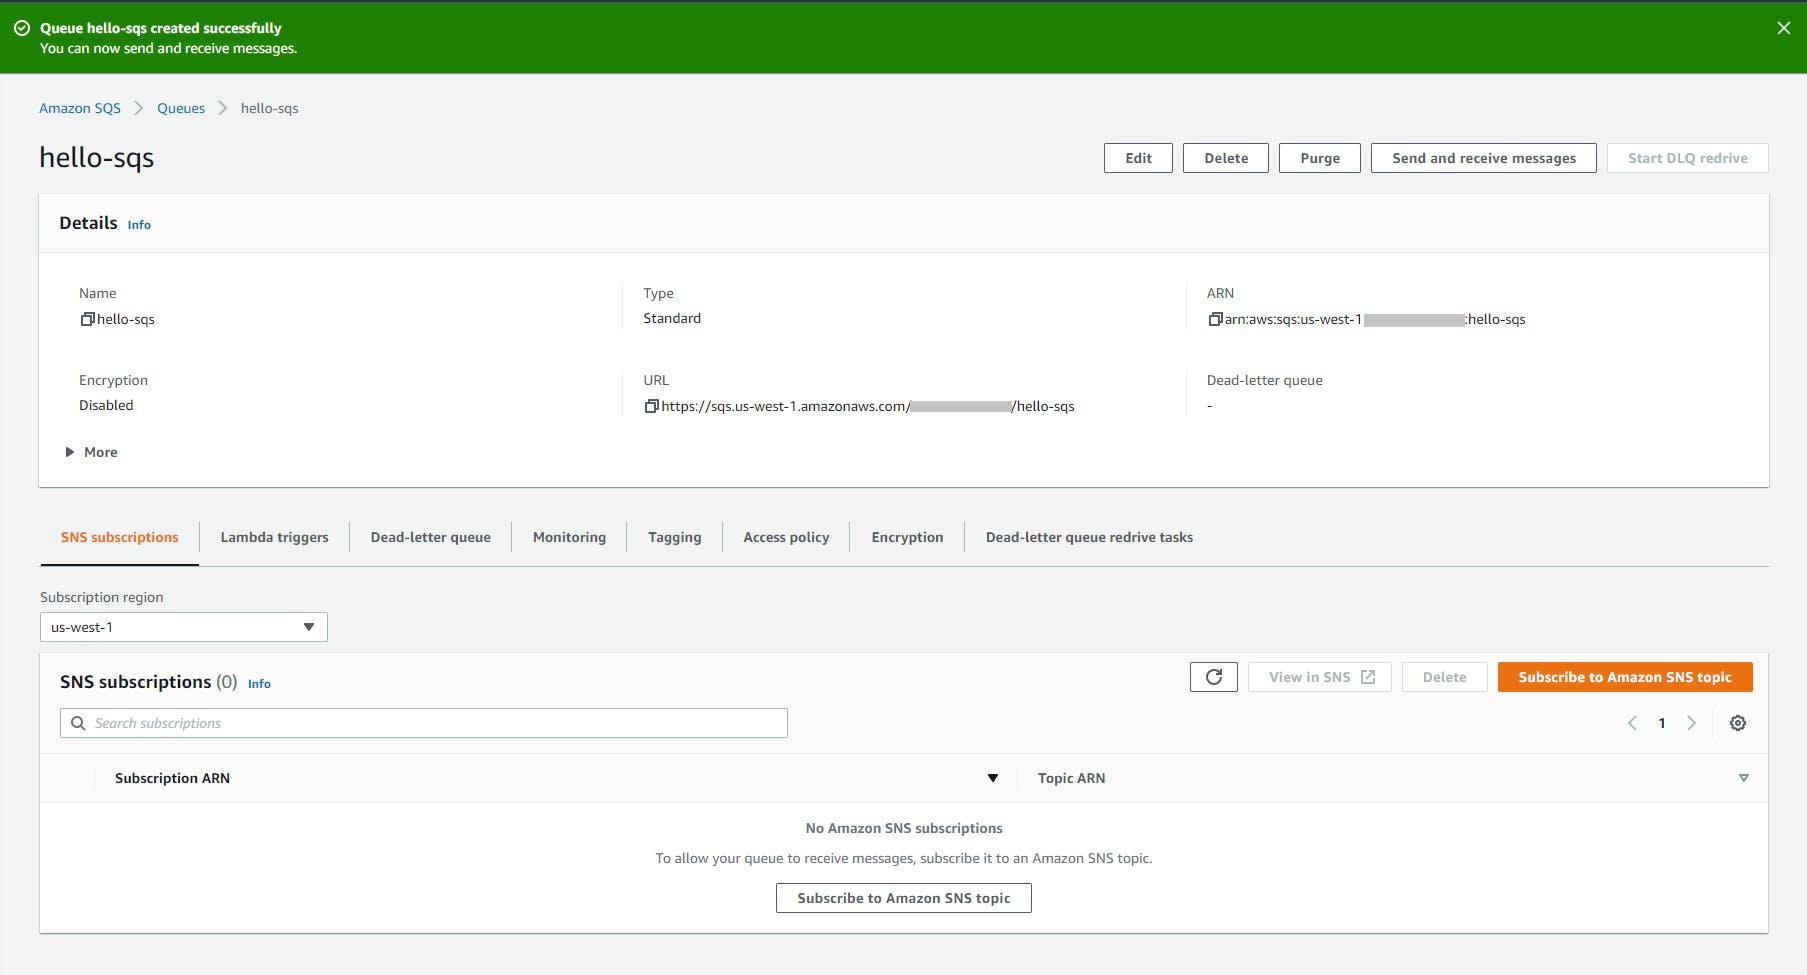
Step 3: Send and Receive Messages in the AWS Console
Now we'll work with the queue using the AWS console.
Click the Send and Receive Messages button at top right.
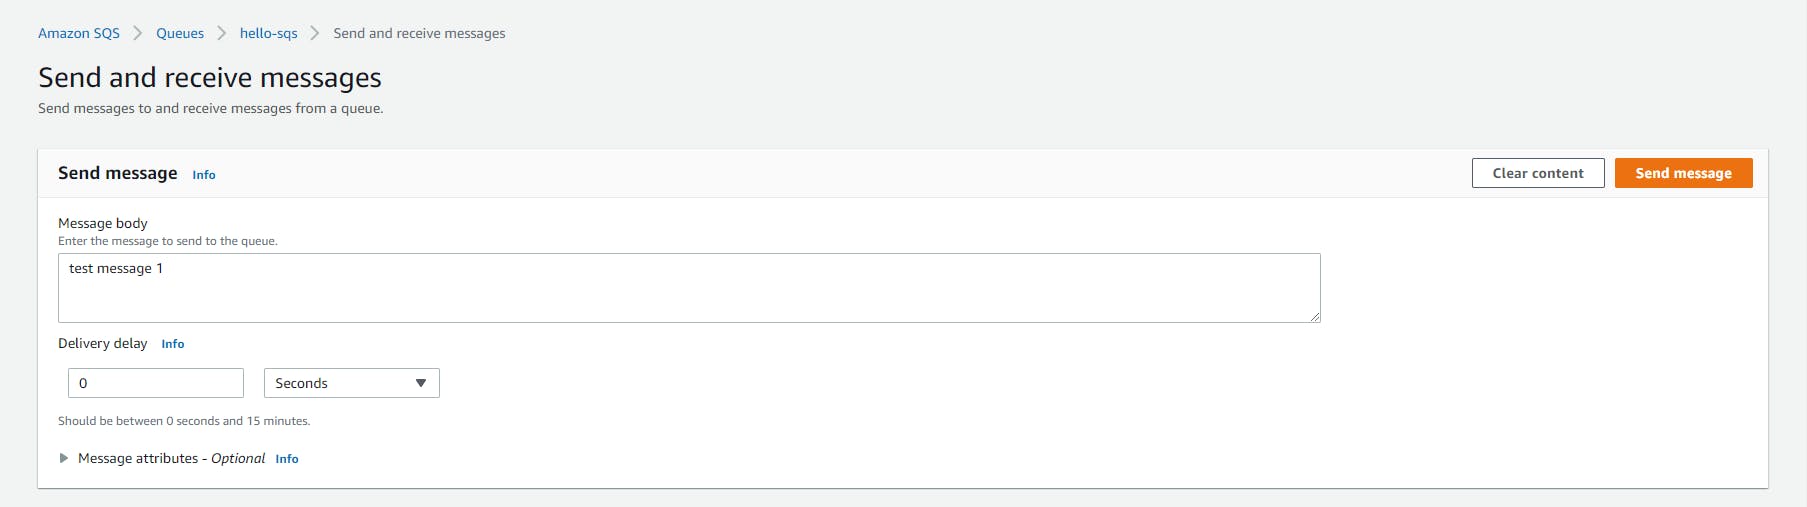
On the Send Message panel, enter some text in the Message body box and click Send message. You'll see a confirming message that the message has been sent.
On the Receive messages panel, click the Poll for messages button at right.
You see a message listed with a recent timestamp. Click the Stop polling button.
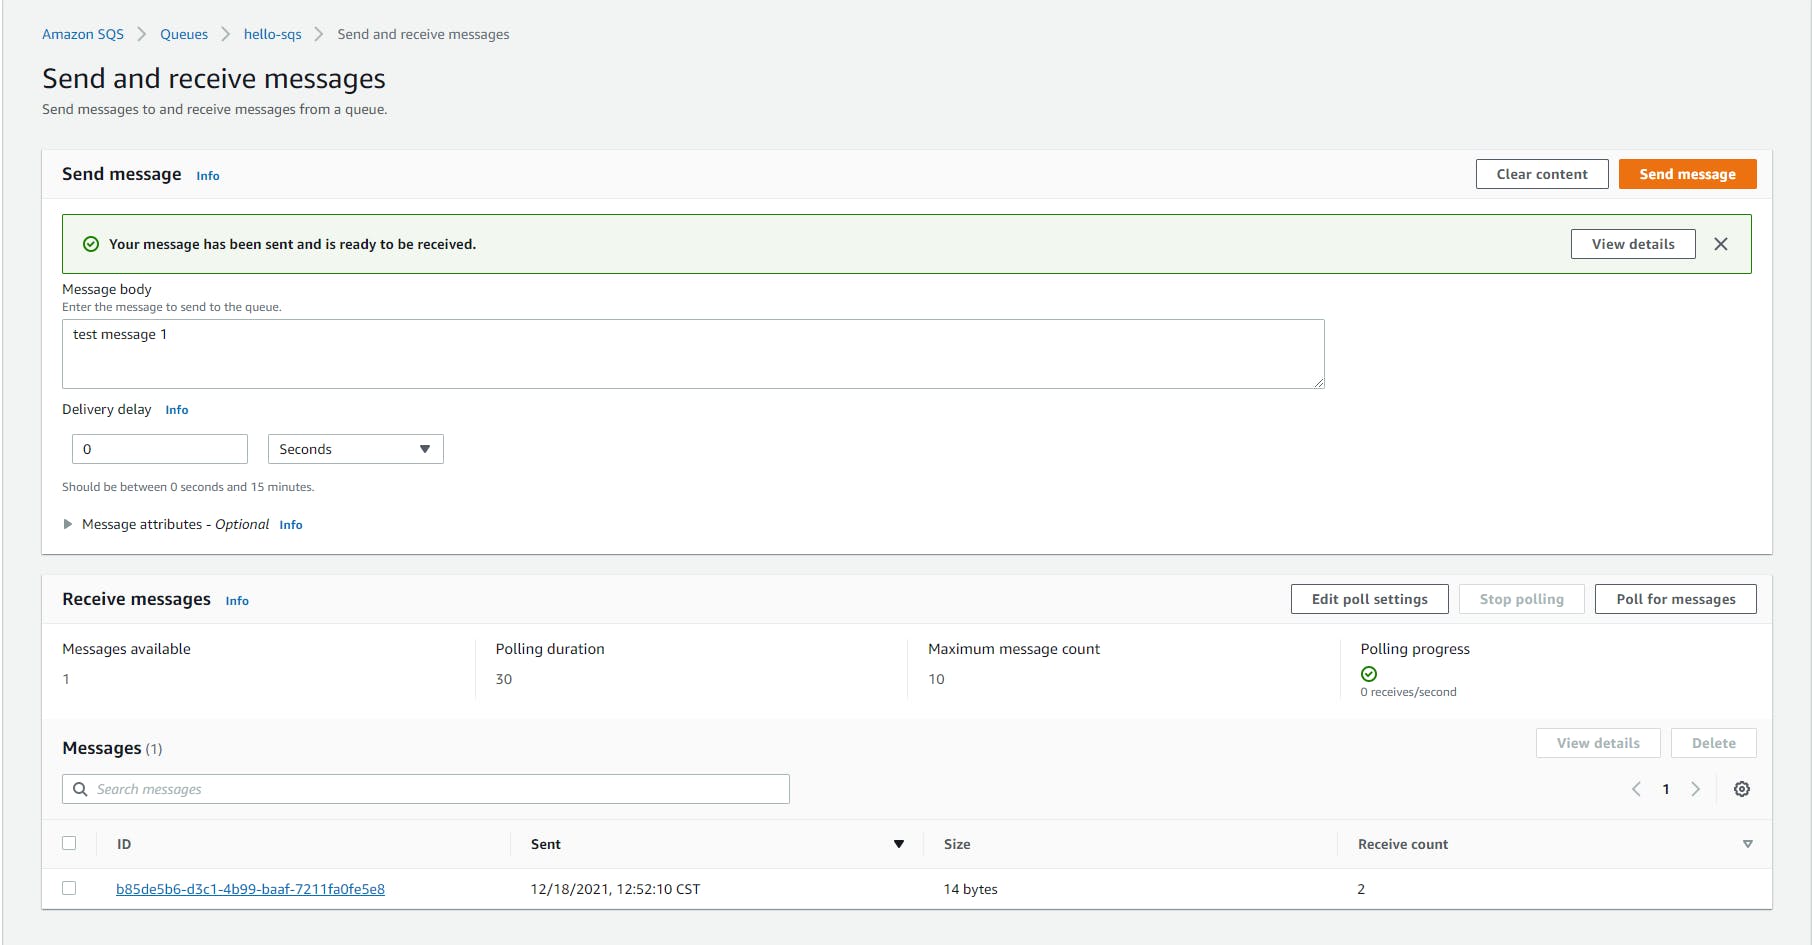
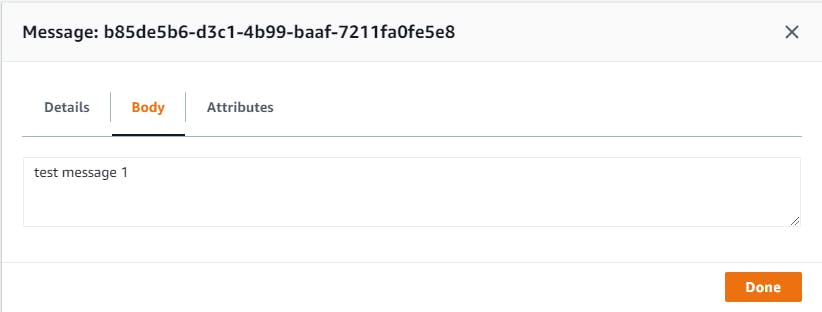
Click on the listed message ID. Now you see the message body, with the message you entered earlier. Click Done.
Select the message and click the Delete button to delete it.
Optional: experiment sending and receiving different kinds of messages. Remember, a message can be any kind of text, including JSON or XML.
Step 4: Create a .NET 6 Console Program for Creating Orders
In this step, we'll create the first of 2 .NET console programs. This first one will simulate a web storefront by creating orders and sending them to an orders queue. We'll create the queue automatically in code if it doesn't exist.
Open a command/terminal window and CD to your development root folder.
Enter the dotnet new console command below to create a new .NET 6 console program named hello-sqs-store.
dotnet new console -n hello-sqs-store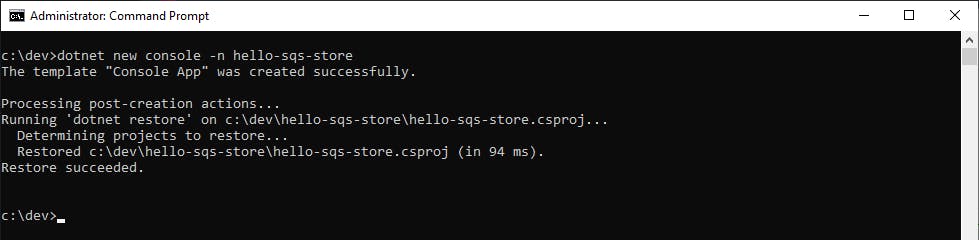
Launch Visual Studio and open the hello-sqs-store project.
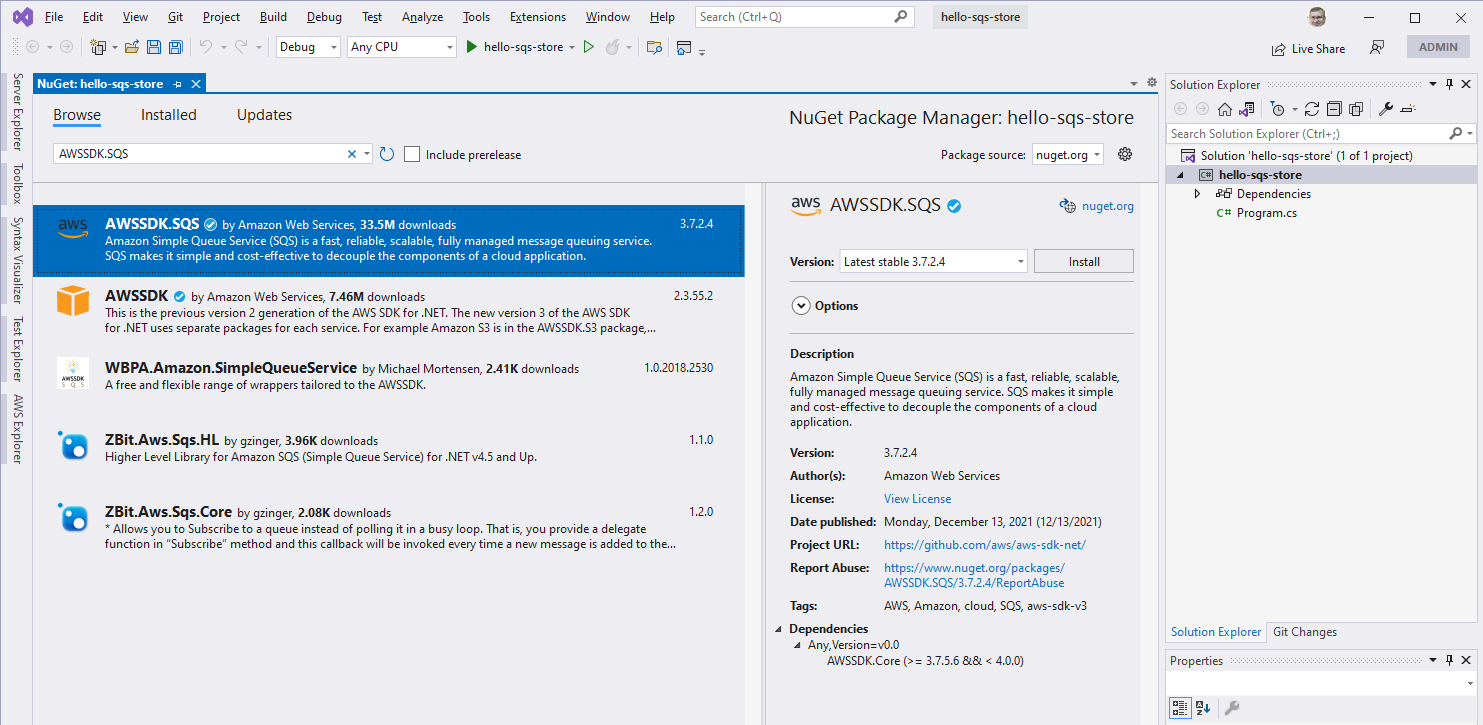
In Solution Explorer, right-click the hello-sqs-store project and select Manage NuGet Packages....
Find, select, and install these NuGet packages:
a. AWSSDK.SQS
b. System.Text.Json

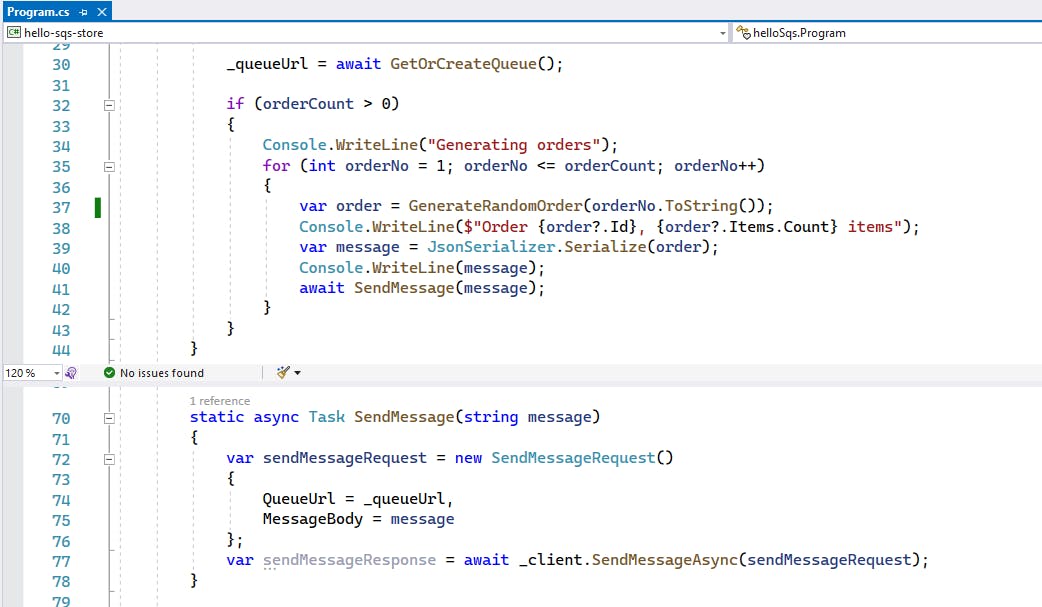
Open Program.cs in the code editor, and replace it with the code below at the end of this step. Save your changes
In a command/terminal window, CD to the project location and run the program with dotnet run. The orders queue is created.

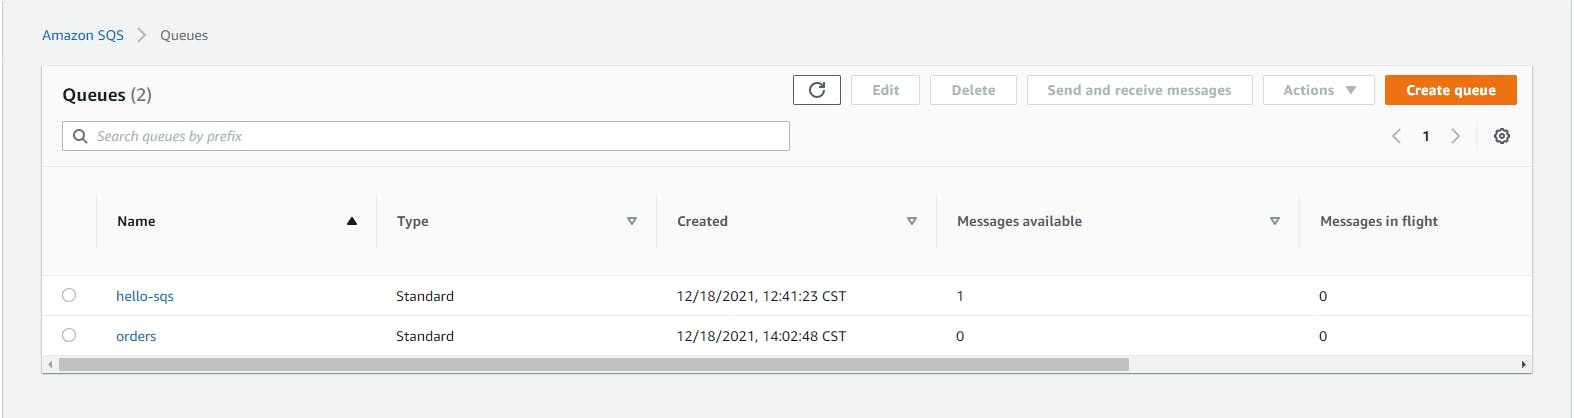
You can verify the orders queue exists in the AWS console by refreshing the Queues page.
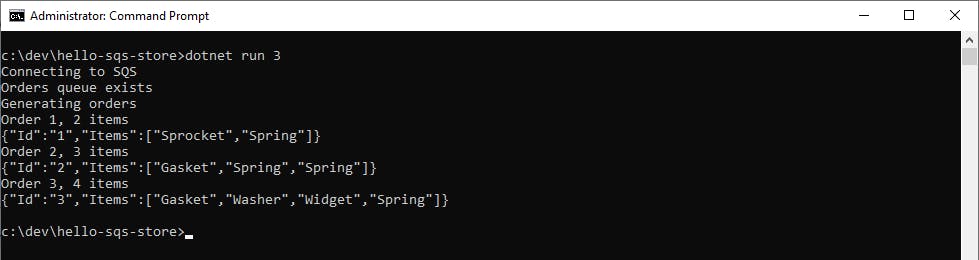
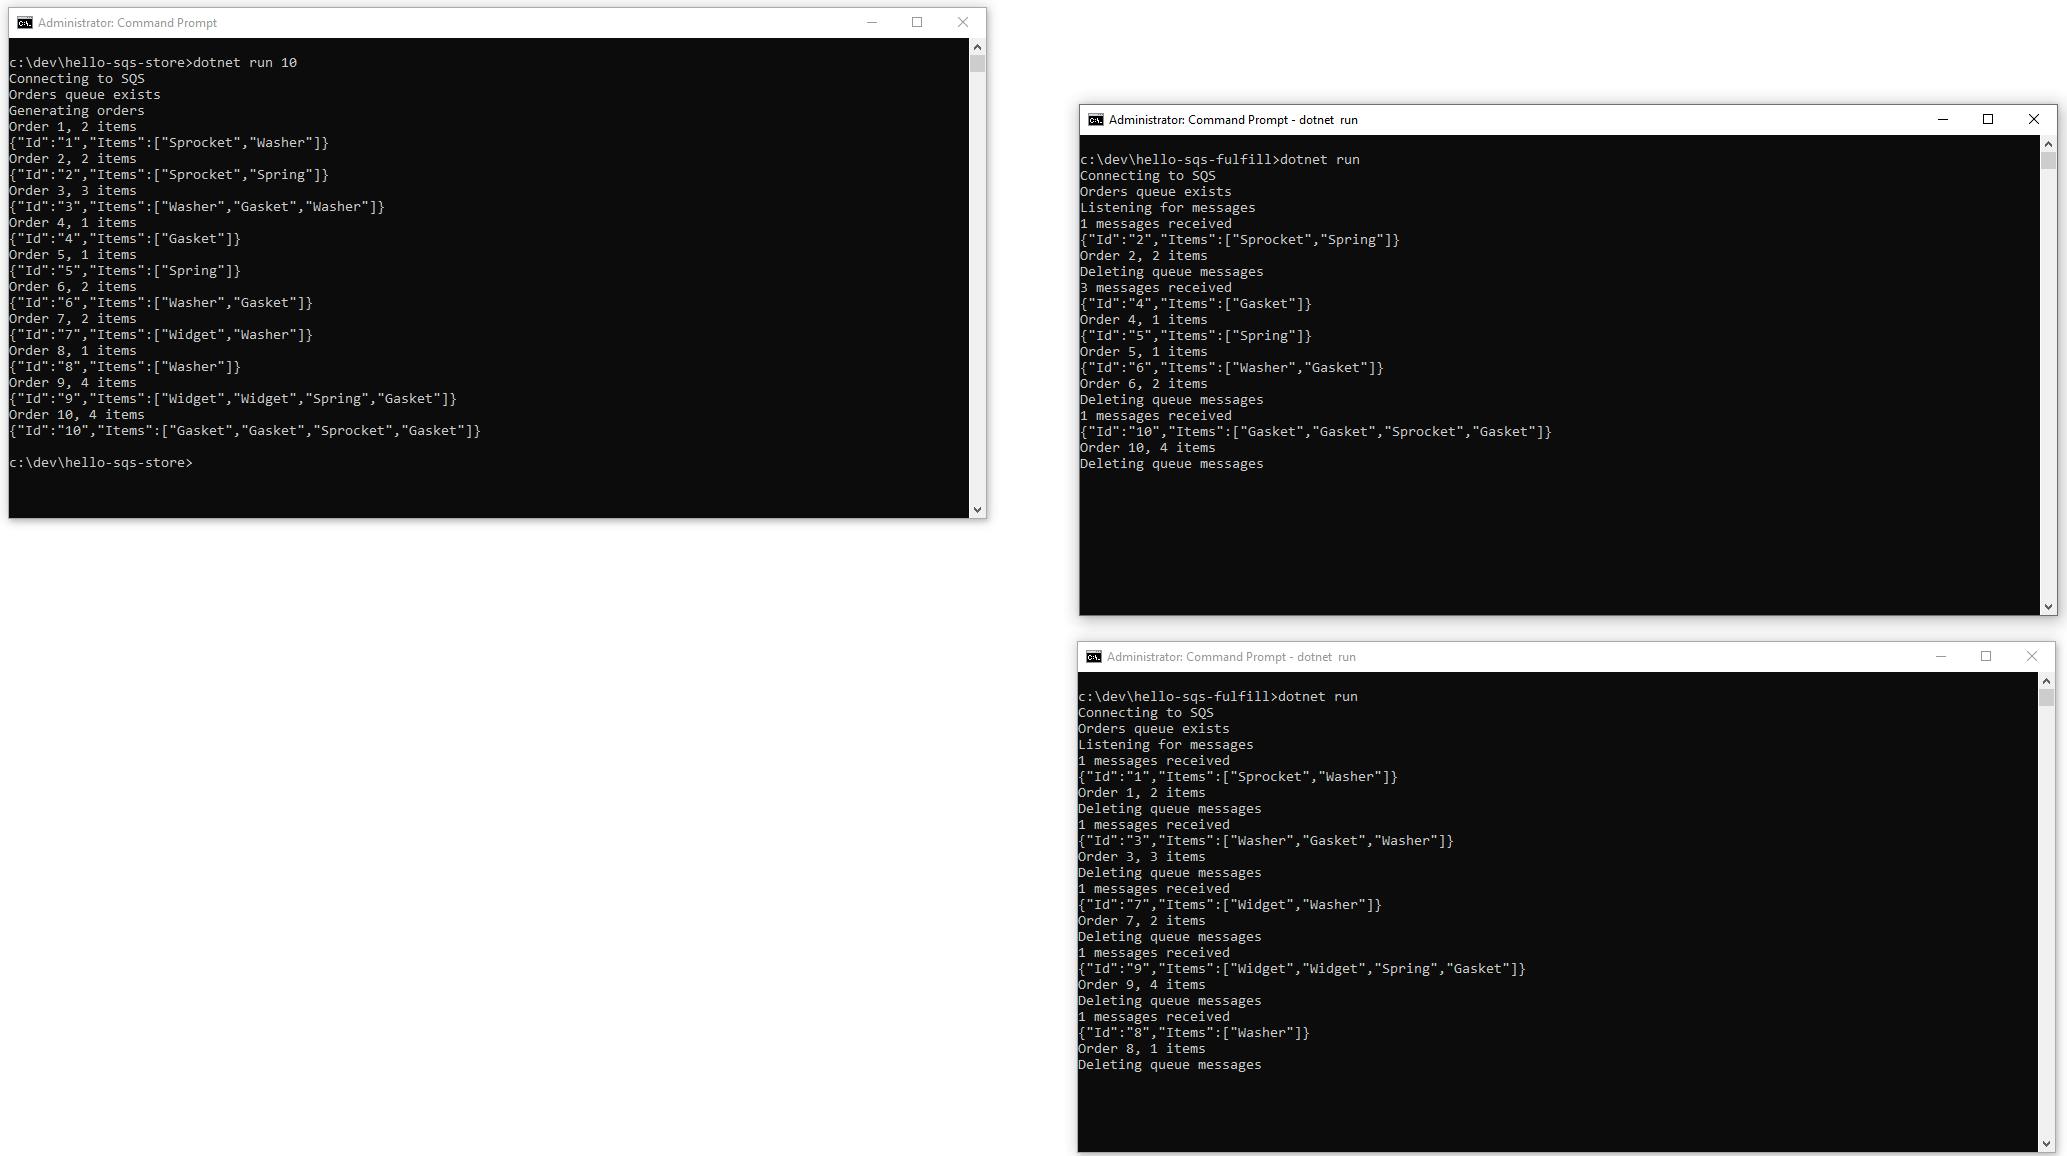
Now to generate some orders. Back in the command/terminal window, run the command dotnet run 3. 3 orders should be sent to the orders queue.
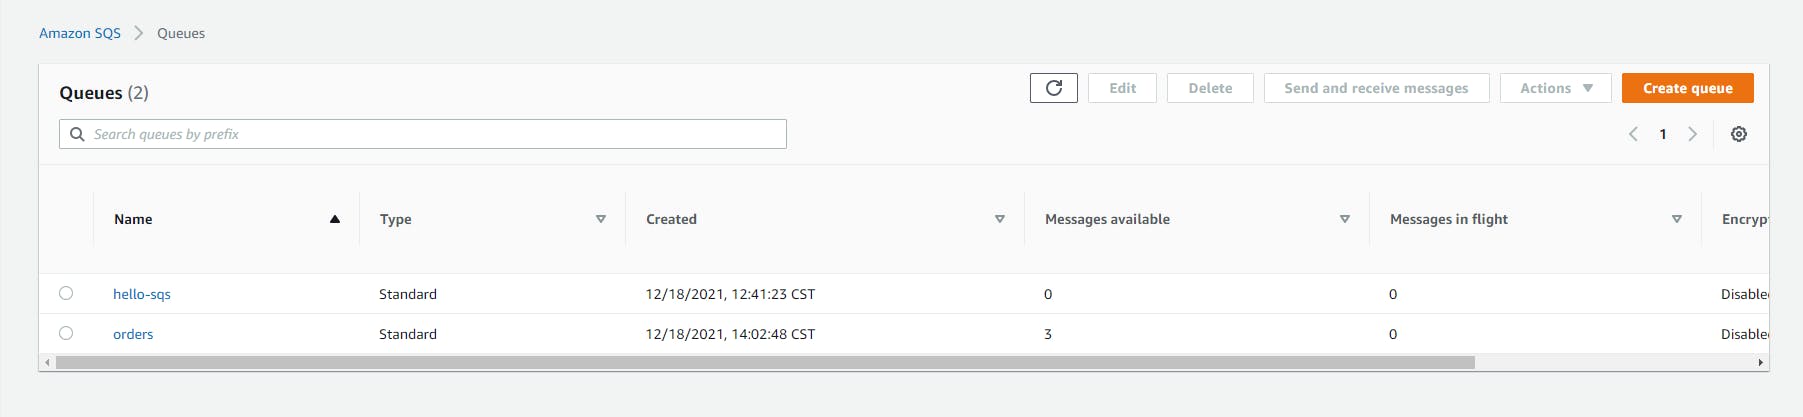
You can confirm messages are waiting in the orders queue in the AWS console, by selecting or refreshing the Queues view.
We're halfway done. We've created a message producer program that generates orders and sends them to our orders queue. We still need a message consumer program to retrieve those messages and process orders.
Program.cs
using System;
using System.Text.Json;
using Amazon.SQS;
using Amazon.SQS.Model;
namespace helloSqs
{
class Program
{
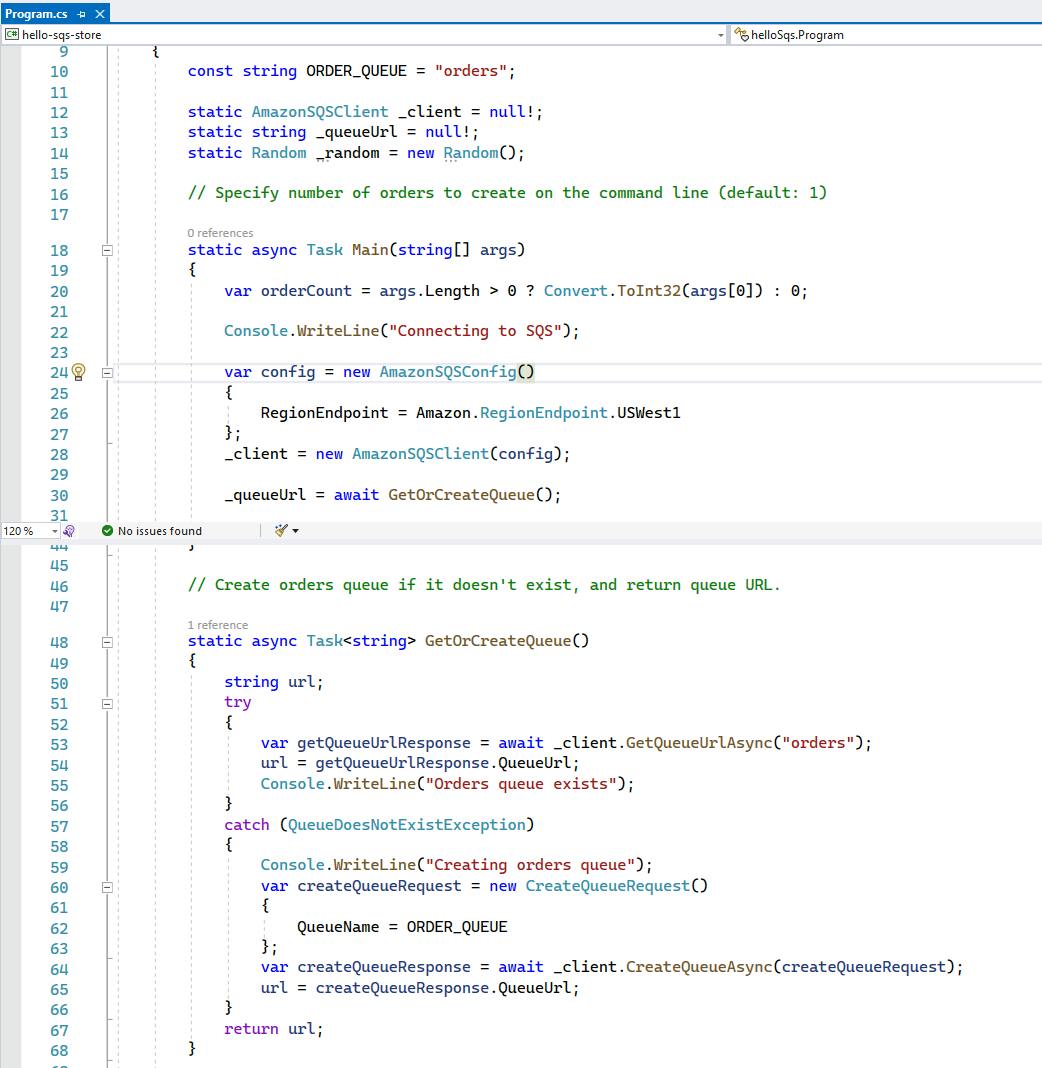
const string ORDER_QUEUE = "orders";
static AmazonSQSClient _client = null!;
static string _queueUrl = null!;
static Random _random = new Random();
// Specify number of orders to create on the command line (default: 1)
static async Task Main(string[] args)
{
var orderCount = args.Length > 0 ? Convert.ToInt32(args[0]) : 0;
Console.WriteLine("Connecting to SQS");
var config = new AmazonSQSConfig()
{
RegionEndpoint = Amazon.RegionEndpoint.USWest1
};
_client = new AmazonSQSClient(config);
_queueUrl = await GetOrCreateQueue();
if (orderCount > 0)
{
Console.WriteLine("Generating orders");
for (int orderNo = 1; orderNo <= orderCount; orderNo++)
{
var order = GenerateRandomOrder(orderNo.ToString());
Console.WriteLine($"Order {order?.Id}, {order?.Items.Count} items");
var message = JsonSerializer.Serialize(order);
Console.WriteLine(message);
await SendMessage(message);
}
}
}
// Create orders queue if it doesn't exist, and return queue URL.
static async Task<string> GetOrCreateQueue()
{
string url;
try
{
var getQueueUrlResponse = await _client.GetQueueUrlAsync("orders");
url = getQueueUrlResponse.QueueUrl;
Console.WriteLine("Orders queue exists");
}
catch (QueueDoesNotExistException)
{
Console.WriteLine("Creating orders queue");
var createQueueRequest = new CreateQueueRequest()
{
QueueName = ORDER_QUEUE
};
var createQueueResponse = await _client.CreateQueueAsync(createQueueRequest);
url = createQueueResponse.QueueUrl;
}
return url;
}
static async Task SendMessage(string message)
{
var sendMessageRequest = new SendMessageRequest()
{
QueueUrl = _queueUrl,
MessageBody = message
};
var sendMessageResponse = await _client.SendMessageAsync(sendMessageRequest);
}
static Order GenerateRandomOrder(string id)
{
var items = new List<string>();
for (int i = 0; i < _random.Next(5) + 1; i++)
{
switch (_random.Next(5))
{
case 0:
items.Add("Widget");
break;
case 1:
items.Add("Sprocket");
break;
case 2:
items.Add("Gasket");
break;
case 3:
items.Add("Washer");
break;
case 4:
items.Add("Spring");
break;
}
}
Order order = new Order()
{
Id = id,
Items = items
};
return order;
}
}
public class Order
{
public string Id { get; set; } = null!;
public List<string> Items { get; set; } = null!;
public Order() { }
public Order(string id, string[] items)
{
Id = id;
Items = new List<string>(items);
}
}
}
Step 5: Create a .NET 6 Console Program for Processing Orders
In this step, we'll create our second .NET console program. This one will simulate processing orders by retrieving orders from the orders queue.
Open a command/terminal window and CD to your development root folder.
Enter the dotnet new console command below to create a new .NET 6 console program named hello-sqs-fulfill.
dotnet new console -n hello-sqs-fulfill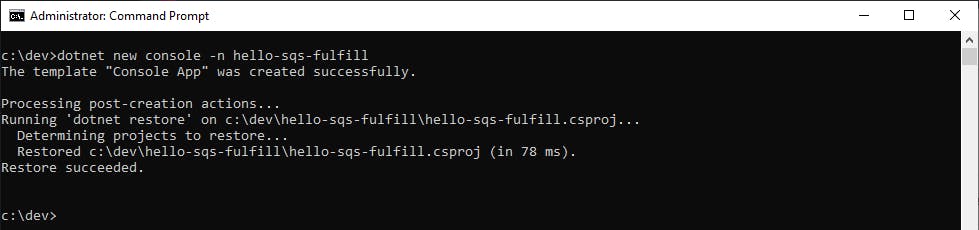
Launch Visual Studio and open the hello-sqs-fulfill project.
In Solution Explorer, right-click the hello-sqs-fulfill project and select Manage NuGet Packages....
Find, select, and install these NuGet packages:
a. AWSSDK.SQS
b. System.Text.Json
Open Program.cs in the code editor, and replace it with the code below at the end of this step. Save your changes
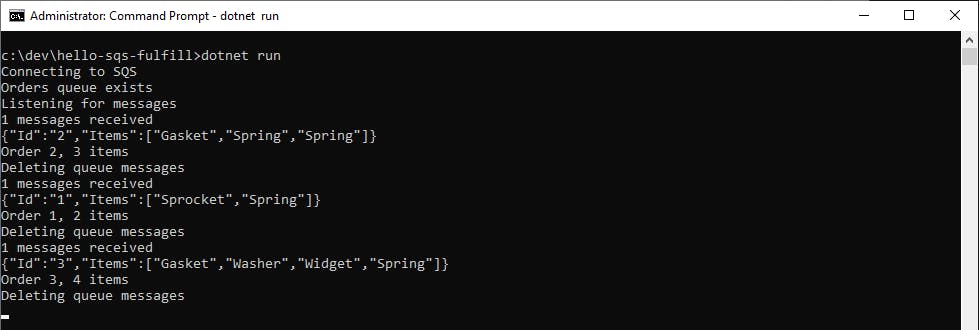
In a command/terminal window, CD to the project location and run the program with dotnet run. The program enters a loop where it waits endlessly for messages.
3 messages should be received and deserialized into orders.
Experiment sending and receive messages. If you like, you can open multiple command/terminal windows and have several instances of hello-sqs-fulfill running. Send a batch of messages with hello-sqs-store and see how the messages are distributed across the consumers.
When you're done, stop the program(s) (Control-C on Windows).
Congratulations! You've created a queue, sent order messages to it from one program, and consumed order messages from another program.
Program.cs
using Amazon.SQS;
using Amazon.SQS.Model;
using System.Text.Json;
namespace helloSqsFulfill
{
class Program
{
const string ORDER_QUEUE = "orders";
static AmazonSQSClient _client = null!;
static string _queueUrl = null!;
static async Task Main(string[] args)
{
Console.WriteLine("Connecting to SQS");
var config = new AmazonSQSConfig()
{
RegionEndpoint = Amazon.RegionEndpoint.USWest1
};
_client = new AmazonSQSClient(config);
_queueUrl = await GetOrCreateQueue();
await ProcessOrders();
}
// Create orders queue if it doesn't exist, and return queue URL.
static async Task<string> GetOrCreateQueue()
{
string url;
try
{
var getQueueUrlResponse = await _client.GetQueueUrlAsync("orders");
url = getQueueUrlResponse.QueueUrl;
Console.WriteLine("Orders queue exists");
}
catch (QueueDoesNotExistException)
{
Console.WriteLine("Creating orders queue");
var createQueueRequest = new CreateQueueRequest()
{
QueueName = ORDER_QUEUE
};
var createQueueResponse = await _client.CreateQueueAsync(createQueueRequest);
url = createQueueResponse.QueueUrl;
}
return url;
}
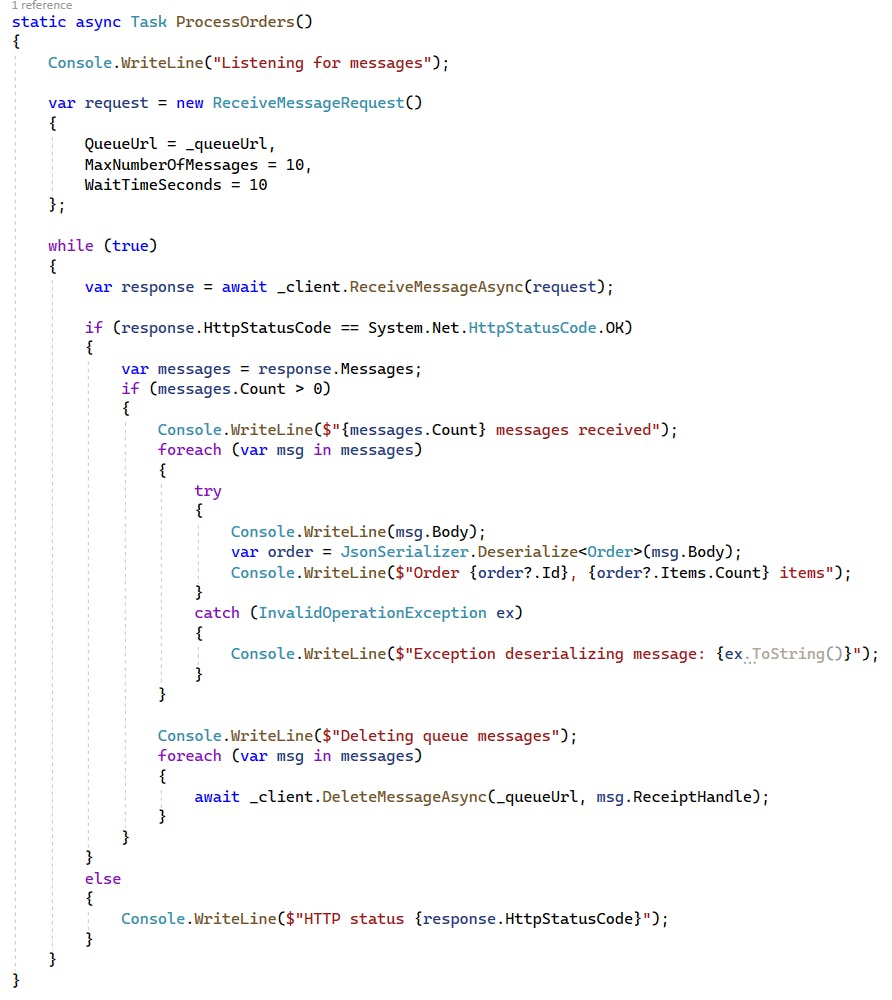
static async Task ProcessOrders()
{
Console.WriteLine("Listening for messages");
var request = new ReceiveMessageRequest()
{
QueueUrl = _queueUrl,
MaxNumberOfMessages = 10,
WaitTimeSeconds = 10
};
while (true)
{
var response = await _client.ReceiveMessageAsync(request);
if (response.HttpStatusCode == System.Net.HttpStatusCode.OK)
{
var messages = response.Messages;
if (messages.Count > 0)
{
Console.WriteLine($"{messages.Count} messages received");
foreach (var msg in messages)
{
try
{
Console.WriteLine(msg.Body);
var order = JsonSerializer.Deserialize<Order>(msg.Body);
Console.WriteLine($"Order {order?.Id}, {order?.Items.Count} items");
}
catch (InvalidOperationException ex)
{
Console.WriteLine($"Exception deserializing message: {ex.ToString()}");
}
}
Console.WriteLine($"Deleting queue messages");
foreach (var msg in messages)
{
await _client.DeleteMessageAsync(_queueUrl, msg.ReceiptHandle);
}
}
}
else
{
Console.WriteLine($"HTTP status {response.HttpStatusCode}");
}
}
}
}
public class Order
{
public string Id { get; set; } = null!;
public List<string> Items { get; set; } = null!;
public Order() { }
public Order(string id, string[] items)
{
Id = id;
Items = new List<string>(items);
}
}
}
Step 6: Code Walk-Through
Let's take a look at the .NET code to understand the SQS operations.
Both programs begin by instantiating an AmazonSQSClient object. We use our default configuration, which is tied to our AWS Toolkit for Visual Studio user, and specify the region in an AmazonSQSConfig object.
Both programs also check that the orders queue exist, and create it if missing. That's done in the GetOrCreateQueue method. We retrieve the queue URL, which we need for Send/Receive/Delete operations, with GetQueueUrlAsync. If that throws a QueueDoesNotExistException, we create the queue with CreateQueueAsync. Each of these AWS SDK for .NET methods follows a similar pattern, with request and response objects named [sdk-method]Request and [sdk-method]Response.
The hello-sqs-store program takes the number of orders to generate from the command line. Random orders are created as Order objects. To send an Order object as a message, we serialize it to JSON with JsonSerializer.Serialize. We then invoke SendMessageAsync to send a message to the orders queue, with the JSON as the message body. We're sending each message individually in this code, but it's advisable to batch messages when you can to reduce cost.
Over in hello-sqs-fulfull, we enter a loop that repeatedly checks for messages with ReceiveMessageAsync, specifying the maximum amount of messages we're willing to receive and maximum amount of time we're willing to wait. If we receive one or more messages, we deserialize them to Order objects with JsonSerializer.Deserialize. We also delete each processed message with DeleteMessageAsync. If we failed to do that, the messages would remain in the queue.
Step 7: Shut It Down
When you're done with your queues, delete them in the AWS console. You don't want to accrue charges for something you aren't using.
- In the AWS Console, navigate to Amazon SQS > Queues.
- Select the hello-sqs queue.
- Click the Delete button and confirm.
- Repeat #1-3 for the orders queue.
Where to Go From Here
In this tutorial, you created SQS queues and sent and received messages. We did this both manually through the AWS console and programmatically in .NET code. Despite its name, the Amazon Simple Queue Service has many features we haven't touched on but are important to understand, such as visibility timeouts and dead-letter queues. You'll want to read up on the service features, best practices, and pricing model as you experiment with it.
Message queues are a powerful integration pattern for connecting applications. If you want a good overview of enterprise application patterns, including message queue patterns, I recommend Gregor Hohpe's book, Enterprise Integration Patterns. In a more recent pattern, you can use SQS events to trigger Lambda functions.
Further Reading
AWS DOCUMENTATION
AWS SDK for .NET - Messaging using Amazon SQS
Videos
How to add a managed queue to a .NET application with Amazon SQS
AWS for Microsoft Workloads: How to integrate your .NET application with SQS
Blogs