Hello, MediaConvert!
Getting Started with .NET on AWS: AWS Elemental MediaConvert
Table of contents
- This episode: AWS Elemental MediaConvert and video transcoding. In this Hello, Cloud blog series, we're covering the basics of AWS cloud services for newcomers who are .NET developers. If you love C# but are new to AWS, or to this particular service, this should give you a jumpstart.
- AWS Elemental MediaConvert : What is it, and why use It?
- Our Hello, MediaConvert Project
- Where to Go From Here
- Further Reading
This episode: AWS Elemental MediaConvert and video transcoding. In this Hello, Cloud blog series, we're covering the basics of AWS cloud services for newcomers who are .NET developers. If you love C# but are new to AWS, or to this particular service, this should give you a jumpstart.
In this post we'll introduce MediaConvert and use it in a "Hello, Cloud" .NET program to transcode video. We'll do this step-by-step, making no assumptions other than familiarity with C# and Visual Studio. We're using Visual Studio 2022 and .NET 6.
AWS Elemental MediaConvert : What is it, and why use It?
"If a picture is worth a thousand words, a video is worth a million." —Troy Olson
Video has taken over as the most popular medium, especially with younger generations. From television to social media, video is everywhere. Consequentially, more and more organizations use video in their products, advertising, or education. For consuming video, a one-size-fits-all approach is doomed to failure: there is no single video encoding that will play well across the variety of connected devices and resolutions. To deliver video content with broadcast quality to a broad audience, transcoding is necessary. Transcoding converts video from one encoding format to another, in order to support varying resolutions and streaming bandwidth.
AWS Elemental MediaConvert (hereafter "MediaConvert") is a service that transcodes video. AWS describes it as "file-based video transcoding service with broadcast-grade features". With MediaConvert, you can create video-on-demand (VOD) content suitable for multi-screen delivery and broadcast, and do so at scale.
The "Elemental" in the AWS Elemental MediaConvert name refers to a family of AWS Elemental media services you can combine:
- MediaPackage prepares and protects video for deliver to Internet devices.
- MediaTailor is a linear channel assembly and personalized ad insertion service.
- MediaLive is a broadcast-grade live video processing service.
- MediaStore is a storage service optimized for media.
MediaConvert works with jobs. A job takes an input video and converts it to multiple outputs to support a variety of devices and resolutions. Many broadcast and Internet delivery formats are available. Your outputs can include stand-alone files, such as an MP4 file, and sets of files for adaptive bitrate streaming, such as an Apple HLS package. You work with jobs and files, and don't need to create or maintain any video processing infrastructure.
A simple workflow is to upload a source video to an input S3 bucket and launch a job. The job processes the input and generates transcoded video to an output bucket.

More complex workflows can involve AWS Step Function workflows for ingestion, processing, and publishing. Lambda functions can react to new input or output video files, and a CloudFront distribution CDN can be used for delivery.

MediaConvert has no minimum fees and offers both on-demand and reserved pricing. In on-demand-pricing, you are charged per minute of video output. Always check the current pricing model on the pricing page.
Our Hello, MediaConvert Project
We'll first create input and output S3 buckets, then write a .NET program that launches a MediaConvert job. The job will transcode a source video to MP4 and MOV formats.



Videos used in this tutorial were sourced from Wikimedia Commons. Links and attribution are listed in the steps below.
One-time Setup
For any of the tutorials in the Hello, Cloud series you need the following:
- An AWS account, and an understanding of what is included in the AWS Free Tier.
- Microsoft Visual Studio 2022. If you're using an older version of Visual Studio you won't be able to use .NET 6. If you use a different IDE, you may have to find alternatives to some tutorial steps.
- AWS Toolkit for Visual Studio. You'll need to configure the toolkit to access your AWS account and create an IAM user. Your default AWS profile will be linked to this user when running programs from the command line.
Step 1: Create AWS Buckets and IAM Role
In this step, you'll use the AWS management console to create S3 buckets for video files, and an IAM role. The role grants MediaConvert permission to access your S3 buckets.
Sign in to the AWS management console and select the region you want to work in. We're using us-west-2 (Oregon).
Create two S3 buckets:
A. Navigate to Amazon S3.
B. Create a bucket named hello-mc-input. If the bucket name is in use, try a variant. This is the bucket we will upload source videos to. Record the name of your input bucket.
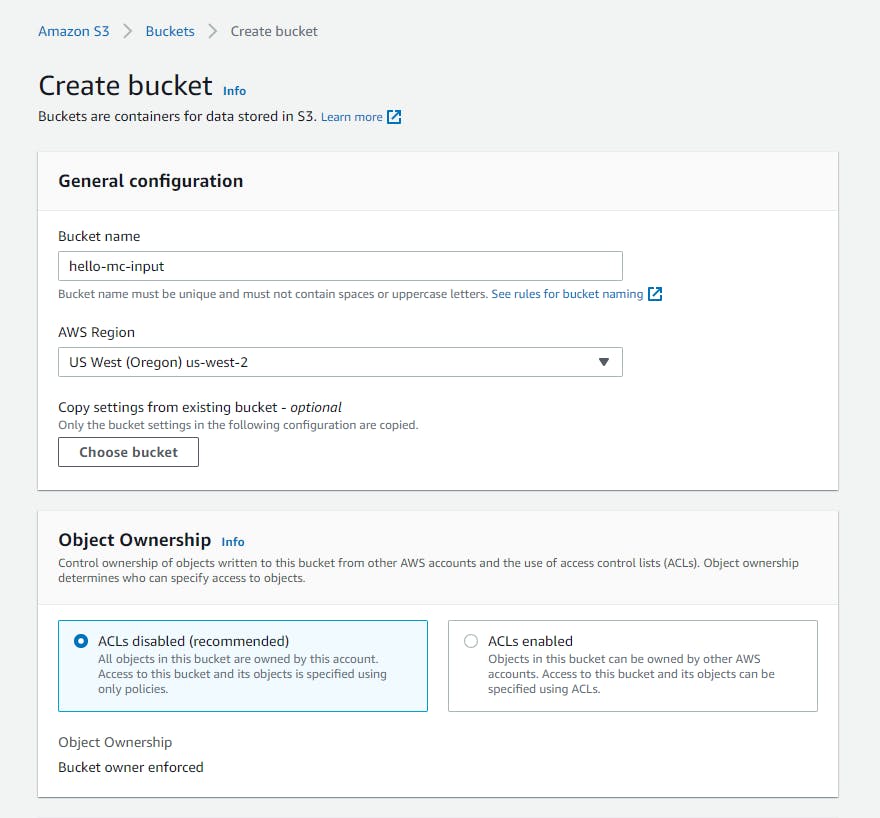
C. Create a bucket named hello-mc-output or similar. This is the bucket MediaConvert will output transcoded video to. Record the name of your output bucket.
Create an IAM role that will give MediaConvert permission to access your S3 buckets.
A. Navigate to Identity and Access Management (IAM).
B. On the left pane, select Roles then click Create role.
C. Select Trusted entity type AWS Service ad use case MediaConvert, and click Next until you reach the Name, review and create page.
D. For Role name, enter MediaConvertRole and click Create role.
E. Once the role is created, search for and select it. Record the role's Amazon Resource Name (ARN), which will be of the form
arn:aws:iam::XXXXXXXXXXX:role/MediaConvertRole.
Step 2. Write a .NET Program for Media Conversion
In this step you'll write a .NET 6 program that creates a MediaConvert job.
Open a command/terminal window and CD to a development folder.
Enter the dotnet new command below to create a console program named hello-mediaconvert.
dotnet new console -n hello-mediaconvertOpen the hello-mediaconvert project in Visual Studio.
In Solution Explorer, right-click the
hello-mediaconvertproject and select Manage NuGet Packages.... Find and install the AWSSDK.MediaConvert package.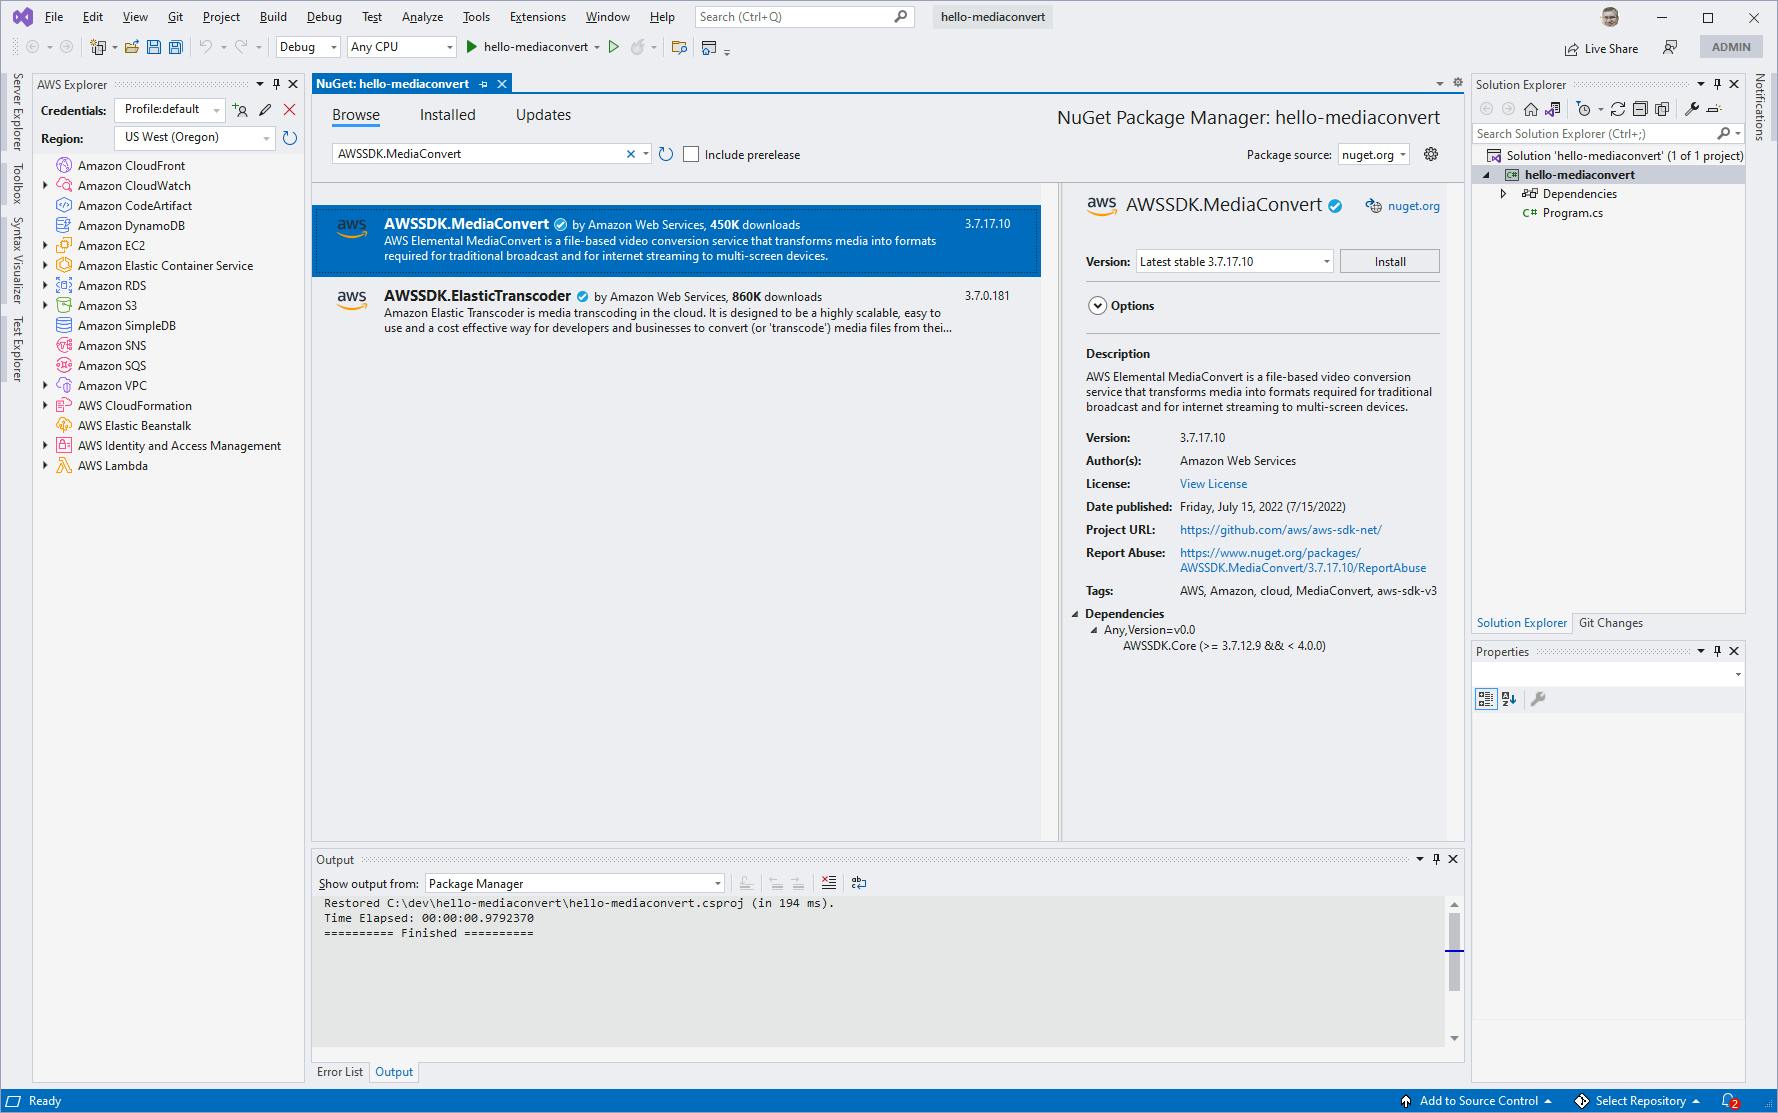
Open Program.cs in the editor and replace with the code at the end of this step.
a. set
mediaConvertRoleto the IAM role ARN you copied in Step 1.b. set
inputBucketto the input bucket name you used, with an s3:// prefix.c. set
outputBucketto the output bucket name you used, with an s3:// prefix.d. Set
regionto the region you're working in.Save your changes and ensure you can build the program.
Program.cs
using System;
using Amazon;
using Amazon.MediaConvert;
using Amazon.MediaConvert.Model;

RegionEndpoint region = RegionEndpoint.USWest2;
String mediaConvertRole = "your-MediaConvertRole-ARN";
String inputBucket = "s3://hello-mc-input";
String outputBucket = "s3://hello-mc-output";
String mediaConvertEndpoint = "";

if (args.Length==0)
{
    Console.WriteLine("Usage: dotnet run -- {s3-video-filename}");
    Environment.Exit(0);
}

var filename = args[0];
var prefix = filename.Substring(0, filename.LastIndexOf("."));

// Obtain the customer-specific MediaConvert endpoint and create MediaConvert client
AmazonMediaConvertClient client = new AmazonMediaConvertClient(region);
DescribeEndpointsRequest describeRequest = new DescribeEndpointsRequest();
DescribeEndpointsResponse describeResponse = await client.DescribeEndpointsAsync(describeRequest);
mediaConvertEndpoint = describeResponse.Endpoints[0].Url;
Console.WriteLine($"MediaConvert endpoint: {mediaConvertEndpoint}");
client = new AmazonMediaConvertClient(new AmazonMediaConvertConfig { ServiceURL = mediaConvertEndpoint });

// Create job request
CreateJobRequest createJobRequest = new CreateJobRequest();
createJobRequest.Role = mediaConvertRole;
createJobRequest.UserMetadata.Add("Customer", "Amazon");

JobSettings jobSettings = new JobSettings();
jobSettings.AdAvailOffset = 0;
jobSettings.TimecodeConfig = new TimecodeConfig();
jobSettings.TimecodeConfig.Source = TimecodeSource.EMBEDDED;
createJobRequest.Settings = jobSettings;

OutputGroup ofg = new OutputGroup();
ofg.Name = "File Group";
ofg.OutputGroupSettings = new OutputGroupSettings();
ofg.OutputGroupSettings.Type = OutputGroupType.FILE_GROUP_SETTINGS;
ofg.OutputGroupSettings.FileGroupSettings = new FileGroupSettings();
ofg.OutputGroupSettings.FileGroupSettings.Destination = outputBucket + "/" + prefix;

#region Video description
VideoDescription vdes = new VideoDescription();
vdes.ScalingBehavior = ScalingBehavior.DEFAULT;
vdes.TimecodeInsertion = VideoTimecodeInsertion.DISABLED;
vdes.AntiAlias = AntiAlias.ENABLED;
vdes.Sharpness = 50;
vdes.AfdSignaling = AfdSignaling.NONE;
vdes.DropFrameTimecode = DropFrameTimecode.ENABLED;
vdes.RespondToAfd = RespondToAfd.NONE;
vdes.ColorMetadata = ColorMetadata.INSERT;
vdes.CodecSettings = new VideoCodecSettings();
vdes.CodecSettings.Codec = VideoCodec.H_264;
H264Settings h264 = new H264Settings();
h264.InterlaceMode = H264InterlaceMode.PROGRESSIVE;
h264.NumberReferenceFrames = 3;
h264.Syntax = H264Syntax.DEFAULT;
h264.Softness = 0;
h264.GopClosedCadence = 1;
h264.GopSize = 90;
h264.Slices = 1;
h264.GopBReference = H264GopBReference.DISABLED;
h264.SlowPal = H264SlowPal.DISABLED;
h264.SpatialAdaptiveQuantization = H264SpatialAdaptiveQuantization.ENABLED;
h264.TemporalAdaptiveQuantization = H264TemporalAdaptiveQuantization.ENABLED;
h264.FlickerAdaptiveQuantization = H264FlickerAdaptiveQuantization.DISABLED;
h264.EntropyEncoding = H264EntropyEncoding.CABAC;
h264.Bitrate = 5000000;
h264.FramerateControl = H264FramerateControl.SPECIFIED;
h264.RateControlMode = H264RateControlMode.CBR;
h264.CodecProfile = H264CodecProfile.MAIN;
h264.Telecine = H264Telecine.NONE;
h264.MinIInterval = 0;
h264.AdaptiveQuantization = H264AdaptiveQuantization.HIGH;
h264.CodecLevel = H264CodecLevel.AUTO;
h264.FieldEncoding = H264FieldEncoding.PAFF;
h264.SceneChangeDetect = H264SceneChangeDetect.ENABLED;
h264.QualityTuningLevel = H264QualityTuningLevel.SINGLE_PASS;
h264.FramerateConversionAlgorithm = H264FramerateConversionAlgorithm.DUPLICATE_DROP;
h264.UnregisteredSeiTimecode = H264UnregisteredSeiTimecode.DISABLED;
h264.GopSizeUnits = H264GopSizeUnits.FRAMES;
h264.ParControl = H264ParControl.SPECIFIED;
h264.NumberBFramesBetweenReferenceFrames = 2;
h264.RepeatPps = H264RepeatPps.DISABLED;
h264.FramerateNumerator = 30;
h264.FramerateDenominator = 1;
h264.ParNumerator = 1;
h264.ParDenominator = 1;
#endregion VideoDescription

#region Audio description
AudioDescription ades = new AudioDescription();
ades.LanguageCodeControl = AudioLanguageCodeControl.FOLLOW_INPUT;
// This name matches one specified in the Inputs below
ades.AudioSourceName = "Audio Selector 1";
ades.CodecSettings = new AudioCodecSettings();
ades.CodecSettings.Codec = AudioCodec.AAC;
AacSettings aac = new AacSettings();
aac.AudioDescriptionBroadcasterMix = AacAudioDescriptionBroadcasterMix.NORMAL;
aac.RateControlMode = AacRateControlMode.CBR;
aac.CodecProfile = AacCodecProfile.LC;
aac.CodingMode = AacCodingMode.CODING_MODE_2_0;
aac.RawFormat = AacRawFormat.NONE;
aac.SampleRate = 48000;
aac.Specification = AacSpecification.MPEG4;
aac.Bitrate = 64000;
ades.CodecSettings.AacSettings = aac;

#endregion AudioDescription

#region Output group

Output output = new Output()
{
    NameModifier = "_1",
    VideoDescription = vdes,
    AudioDescriptions = new List<AudioDescription>(),
    ContainerSettings = new ContainerSettings()
    {
        Container = ContainerType.MP4,
        Mp4Settings = new Mp4Settings()
        {
            CslgAtom = Mp4CslgAtom.INCLUDE,
            FreeSpaceBox = Mp4FreeSpaceBox.EXCLUDE,
            MoovPlacement = Mp4MoovPlacement.PROGRESSIVE_DOWNLOAD
        }
    }
};
output.VideoDescription.CodecSettings.H264Settings = h264;
output.AudioDescriptions.Add(ades);
ofg.Outputs.Add(output);

Output output2 = new Output()
{
    NameModifier = "_2",
    AudioDescriptions = new List<AudioDescription>(),
    ContainerSettings = new ContainerSettings()
    {
        Container = ContainerType.MOV,
        MovSettings = new MovSettings()
        {
            CslgAtom = MovCslgAtom.INCLUDE,
        }
    }
};
output2.AudioDescriptions.Add(ades);
output2.VideoDescription = vdes;
ofg.Outputs.Add(output2);
createJobRequest.Settings.OutputGroups.Add(ofg);
#endregion Output group

#region Input
Input input = new Input();
input.FilterEnable = InputFilterEnable.AUTO;
input.PsiControl = InputPsiControl.USE_PSI;
input.FilterStrength = 0;
input.DeblockFilter = InputDeblockFilter.DISABLED;
input.DenoiseFilter = InputDenoiseFilter.DISABLED;
input.TimecodeSource = InputTimecodeSource.EMBEDDED;
input.FileInput = inputBucket + "/" + filename;

AudioSelector audsel = new AudioSelector();
audsel.Offset = 0;
audsel.DefaultSelection = AudioDefaultSelection.NOT_DEFAULT;
audsel.ProgramSelection = 1;
audsel.SelectorType = AudioSelectorType.TRACK;
audsel.Tracks.Add(1);
input.AudioSelectors.Add("Audio Selector 1", audsel);

input.VideoSelector = new VideoSelector();
input.VideoSelector.ColorSpace = ColorSpace.FOLLOW;

createJobRequest.Settings.Inputs.Add(input);
#endregion Input

// Create job

try
{
    Console.WriteLine("Creating MediaConvert job");
    CreateJobResponse createJobResponse = await client.CreateJobAsync(createJobRequest);
    Console.WriteLine("Job Id: {0}", createJobResponse.Job.Id);
}
catch (BadRequestException bre)
{
    Console.WriteLine($"BadRequestException: {bre.Message}");
    // If the endpoint was bad
    if (bre.Message.StartsWith("You must use the customer-"))
    {
        // The exception contains the correct endpoint; extract it
        mediaConvertEndpoint = bre.Message.Split('\'')[1];
    }
}
Understand the Code
The code looks pretty long, but that's mostly due to MediaConvert's large number of settings for video and audio. Our example and settings were derived from an example in the AWS documentation, but we could have configured our outputs in the AWS MediaConvert portal, generated JSON, and converted that to C# code.
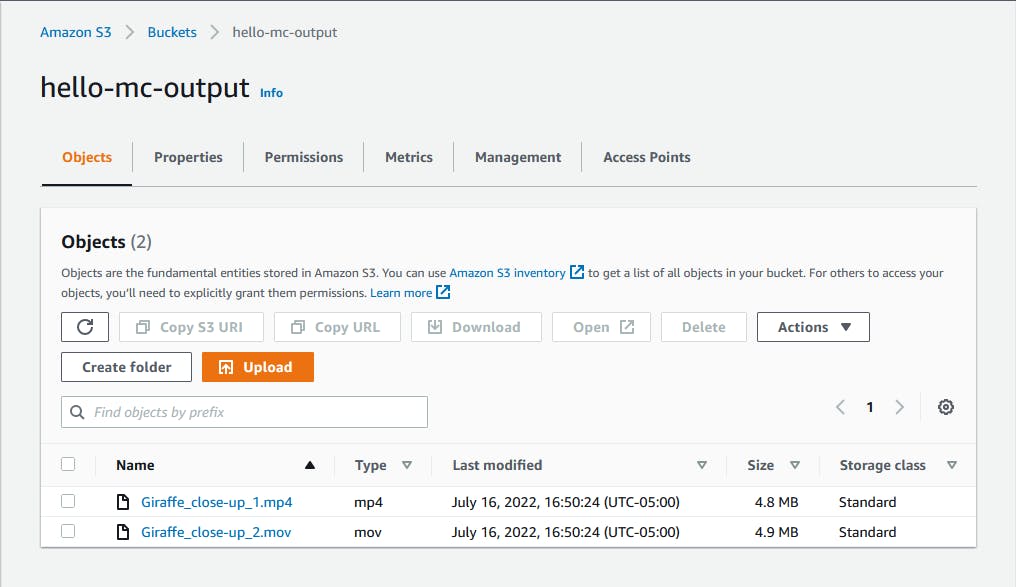
The code first checks for the expected filename parameter on the command line, assigned to filename. This is the name of the video file in our input S3 bucket. It's also used to set prefix, a prefix for the output files, minus the file type. If our input file is Giraffe_close-up.webm, the output files will have names like Giraffe_close-up_1.mp4 and Giraffe_close-up_2.mov.
Next, the MediaConvert endpoint is determined. MediaConvert client setup is a little different from most AWS services. To get our customer-specific endpoint, we first create an AmazonMediaConvertClient, passing in our region. From that, we call DescribeEndpointsAsync and take the first one. Now that we have our endpoint, we instantiate a replacement AmazonMediaConvertClient with the endpoint we just retrieved. Now we're ready to submit jobs.
The job request is most of the code, and region directives mark the major sections. It includes video settings, audio settings, an output group defining the output encodings to generate, and the input video. Creating a job is achieved with a call to CreateJobAsync, and the response includes an Id we display. The program exits here, and we must go to the AWS console to determine when the job has finished.
Step 3: Run the Program and Test Media Conversion
Now it's time to upload an input video, run our .NET code, and transcode video.
In the AWS management console, navigate to S3 and view your input bucket.
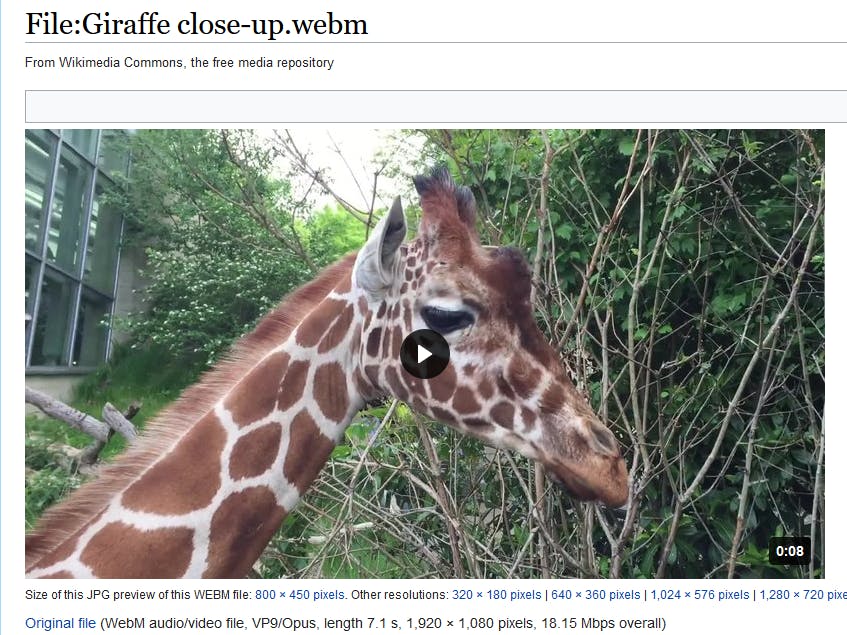
Upload a video to the S3 input bucket that you have rights to use. We're using the following full-resolution video from Wikimedia Commons, Giraffe close-up.webm from the Copenhagen zoo, Creative Commons Attribute-ShareAlike 2.0 Generic license.

Open a command/terminal window and CD to the project location.
Run the
dotnet runcommand with -- {filename} on the command line, where {filename} is the name of the video you uploaded to your S3 input bucket (use quotation marks if the name contains spaces):dotnet run -- "Giraffe_close-up.webm"The console output will confirm creation of the job.

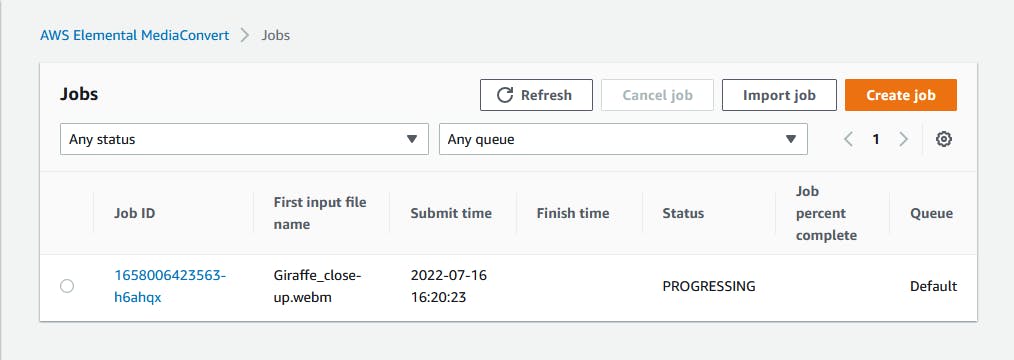
In the AWS console, navigate to MediaConvert and select Jobs from the left pane. You should see your job listed, with status PROGRESS, COMPLETE, or ERROR.
If your job is running successfully, you'll see a status of PROGRESSING:
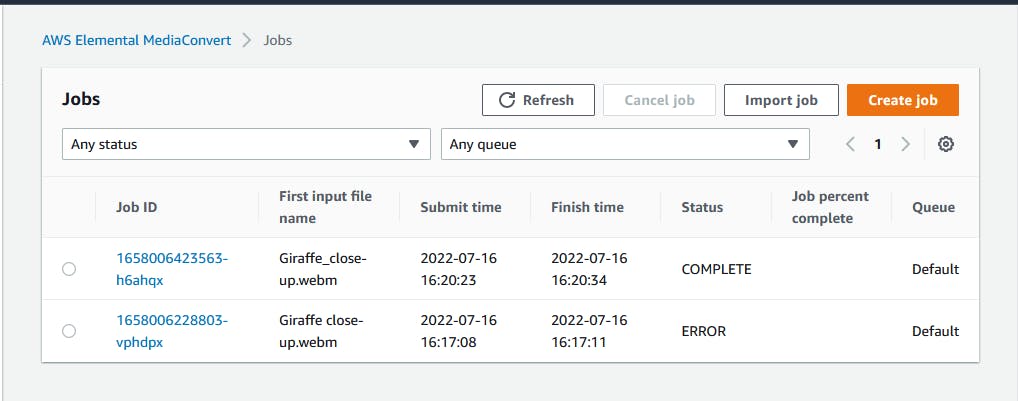
An error looks like this, and might occur if you misspelled your video name:

Wait for the job to complete, refreshing the view as needed.
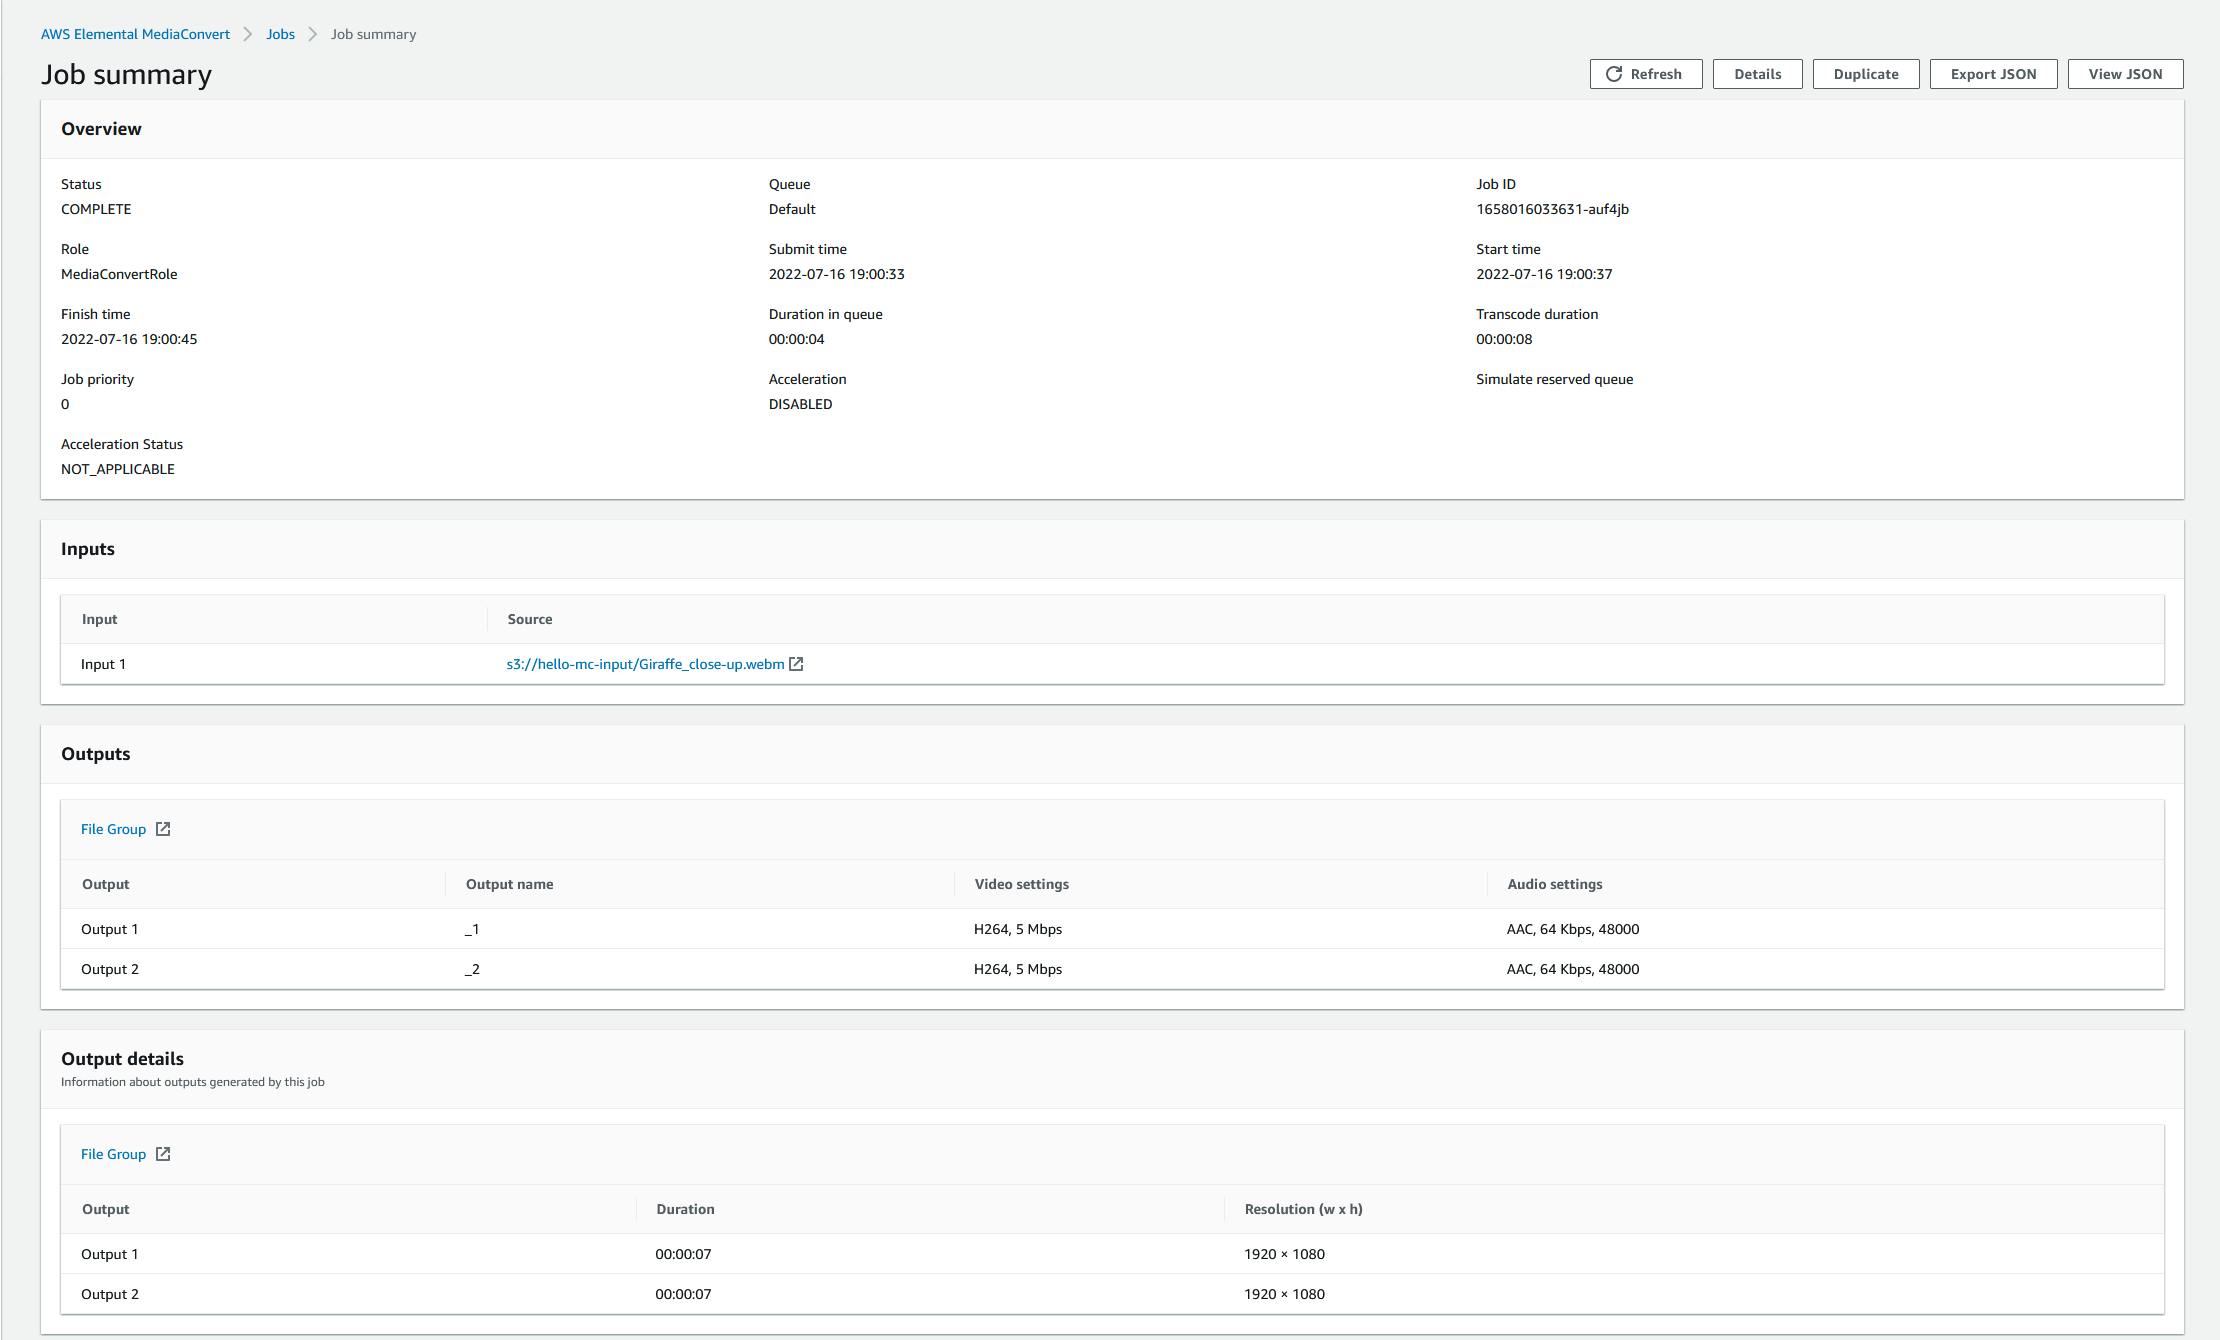
Click on the job name to see its detail. You see there are two outputs listed.
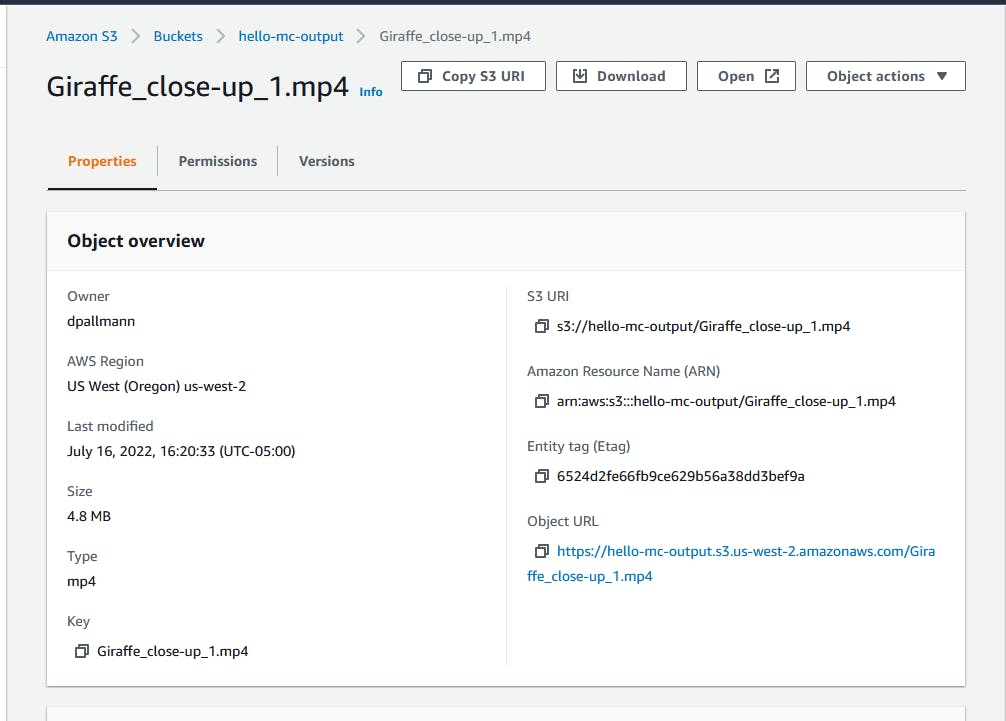
Navigate to S3 and view your
hello-mc-outputbucket, which was previously empty. There should now be two videos in the bucket, an .MP4 file and a .MOV file.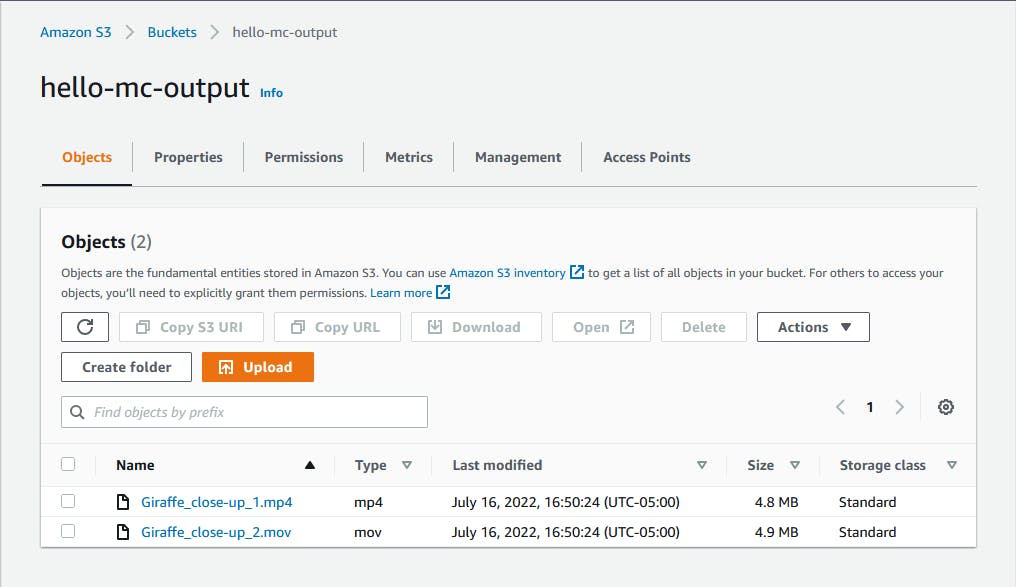
Download and play the .MP4 video.

Download and play the .MOV video.

Congratulations! You've performed video transcoding using AWS Elemental MediaConvert and the AWS SDK for .NET.
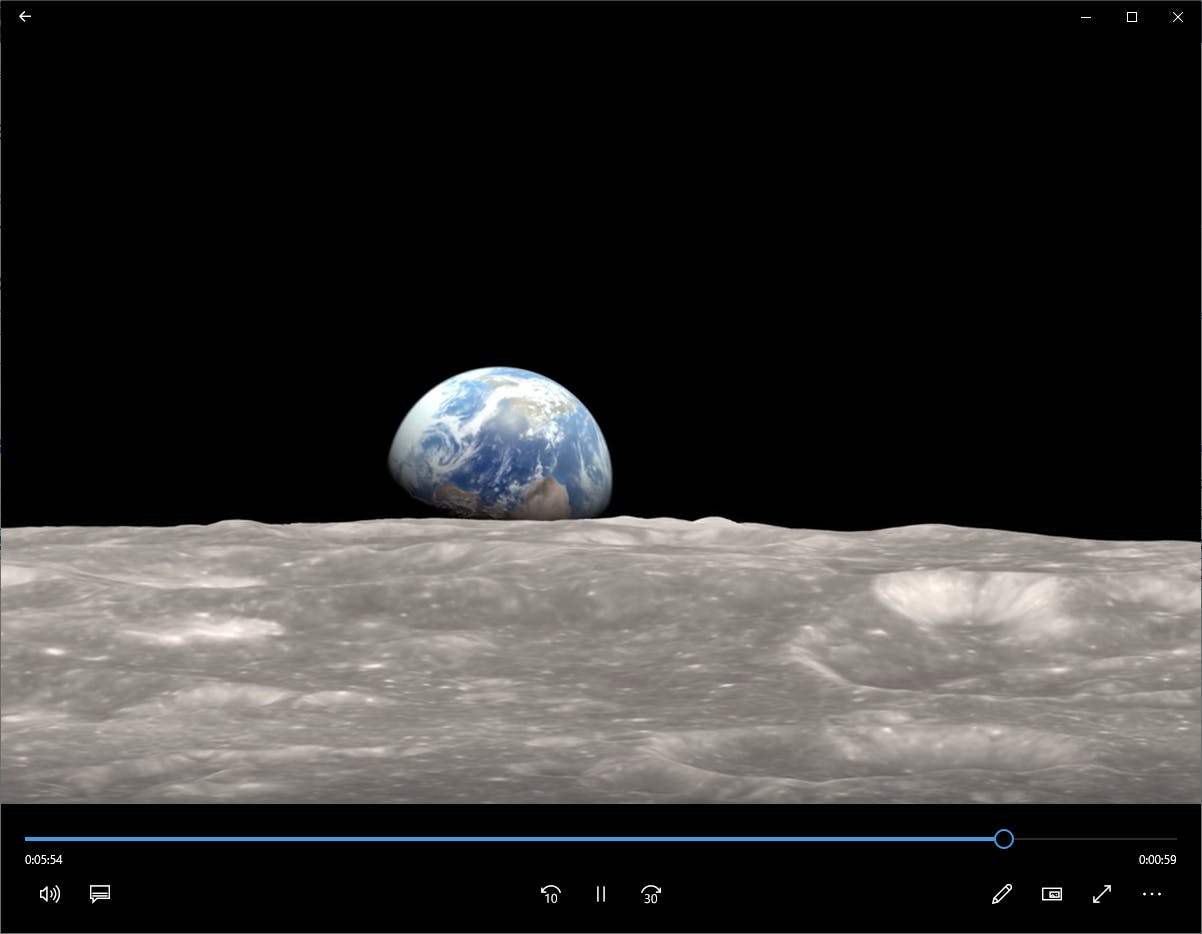
Try other video files, by repeating the above steps for a different source video. For example, NASA Earthrise - the 45th anniversary, NASA, public domain. Try multiple input videos in the same job.
Step 4: Shut it Down
When you're all done with Hello, MediaConvert, shut it down. You don't want to accrue charges for something you're not using.
In the AWS management console, navigate to Amazon S3.
Delete the objects in the input S3 bucket, then delete the bucket.
Delete the objects in the output S3 bucket, then delete the bucket.
Where to Go From Here
As video continues to grow in importance, so does the need for transcoding. AWS Elemental MediaConvert provides easy, on-demand transcoding with professional features for high-quality video.
In this tutorial, you created input and output S3 buckets and wrote a .NET program to launch MediaConvert jobs. You saw uploaded video files transcoded to multiple output formats. We used MediaConvert in the simplest way possible. We did not cover broadcast features like graphic overlays, content protection, multi-language audio, close captioning, or advanced transcoding. Look through the job templates in the AWS console to get a running start on your configuration. To go further, review the documentation, evaluate the features against your requirements, and experiment until you gain proficiency.
Further Reading
AWS Documentation
AWS SDK for .NET Documentation
Videos
How to convert video digital media files with AWS Elemental MediaConvert using AWS .NET SDK by Geoff Weinhold
Blogs
