Table of contents
- This episode: Amazon EventBridge and event-based processing. In this Hello, Cloud blog series, we're covering the basics of AWS cloud services for newcomers who are .NET developers. If you love C# but are new to AWS, or to this particular service, this should give you a jumpstart.
- Amazon EventBridge : What is it, and why use It?
- Our Hello, EventBridge Project
- Where to Go From Here
- Further Reading
This episode: Amazon EventBridge and event-based processing. In this Hello, Cloud blog series, we're covering the basics of AWS cloud services for newcomers who are .NET developers. If you love C# but are new to AWS, or to this particular service, this should give you a jumpstart.
In this post we'll introduce Amazon EventBridge and use it in a "Hello, Cloud" .NET program to connect software components using events. We'll do this step-by-step, making no assumptions other than familiarity with C# and Visual Studio. We're using Visual Studio 2022 and .NET 6.
Amazon EventBridge : What is it, and why use It?
"Not being able to govern events, I govern myself." —Michel de Montaign
Event-driven architectures use events to communicate between decoupled services. An event is simply a message that reflects a state change or an update, such as placing an order or running out of an item in inventory. Event-driven architectures are commonly used to interconnect microservices. With asynchronous, event-driven architectures, there are no point-to-point connections between software; instead, everything flows through a common event bus. You can easily add or remove software components without having to modify existing components.
Amazon EventBridge (hereafter "EventBridge") is a message service for event-driven applications. AWS describes it as "a serverless event bus that makes it easier to build event-driven applications at scale using events generated from your applications, integrated Software-as-a-Service (SaaS) applications, and AWS services". EventBridge can interconnect not only your own services, but also 90+ AWS services and 20+ SaaS applications.
This area was once the domain of on-premise Enterprise Service Bus products. EventBridge in the AWS cloud adds more capabilities and global reach, without having to manage servers. Typical message latency between sending and receiving an event is about half a second, but this can vary. EventBridge has an uptime SLA of 99.99% (4 9's).
You pay for events published in EventBridge. All state change events published by AWS services by default are free. Custom events, opt-in AWS service events, and third-party SaaS events are charged at $1 per million events published. Always confirm latest rates and terms on the pricing page.
Concepts
The core concept of an event bus is that you have a collection of decoupled software components that can have conversations using the publish-subscribe model. Any component can send messages to signal events. Any component can listen to events, filtered to what they are interested in.
Events are messages that signal a system's state has changed, such as completed delivery of a package. You'll typically have a variety of event types, each with its own attributes.
Producers (also called Sources) generate events. For example, an order service might generate new order events.
Consumers (also called Targets) receive event messages. For example, a delivery service might receive events about packages ready for delivery.
An event bus receives events from producers and routes them to consumers, using rules.
A rule matches incoming events against an event pattern and sends them to up to 5 targets (consumers). You can also have scheduled rules, which perform actions at regular intervals.
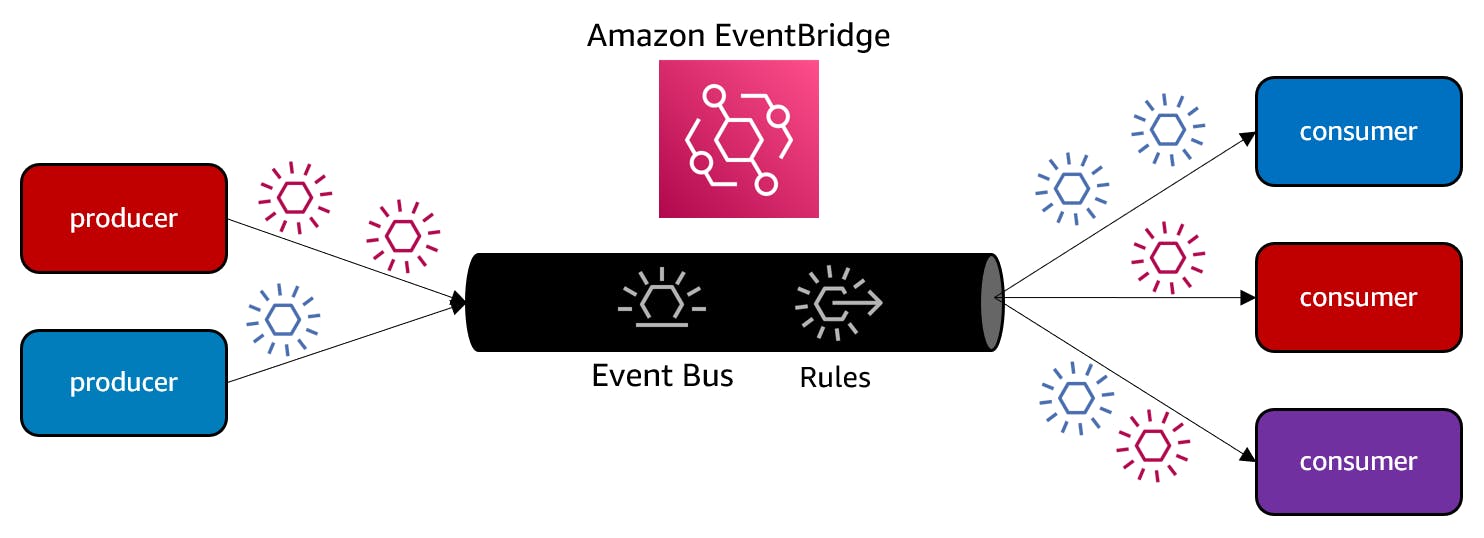
An event bus is limited to a single AWS region, but you can achieve routing across commercial AWS regions using global endpoints, which replicate events sent to an event bus to another event bus in a secondary region.
Our Hello, EventBridge Project
We will write a .NET producer program and a .NET consumer program, and connect them with EventBridge. We will also add CloudWatch Logs as another consumer. Each message sent by the producer will arrive at both consumers.


One-time Setup
For any of the tutorials in the Hello, Cloud series you need the following:
- An AWS account, and an understanding of what is included in the AWS Free Tier.
- Microsoft Visual Studio 2022. If you're using an older version of Visual Studio you won't be able to use .NET 6. If you use a different IDE, you may have to find alternatives to some tutorial steps.
- AWS Toolkit for Visual Studio. You'll need to configure the toolkit to access your AWS account and create an IAM user. Your default AWS profile will be linked to this user when running programs from the command line.
Step 1: Create Event Bus
In this step, you'll create an event bus in the AWS management console.
Sign in to the AWS console. At top right, select the region you want to work in. You can check supported regions for EventBridge on the AWS Global Infrastructure page. I'm using us-west-2 (Oregon).
Navigate to Amazon EventBridge. You can enter eventbridge in the search bar.
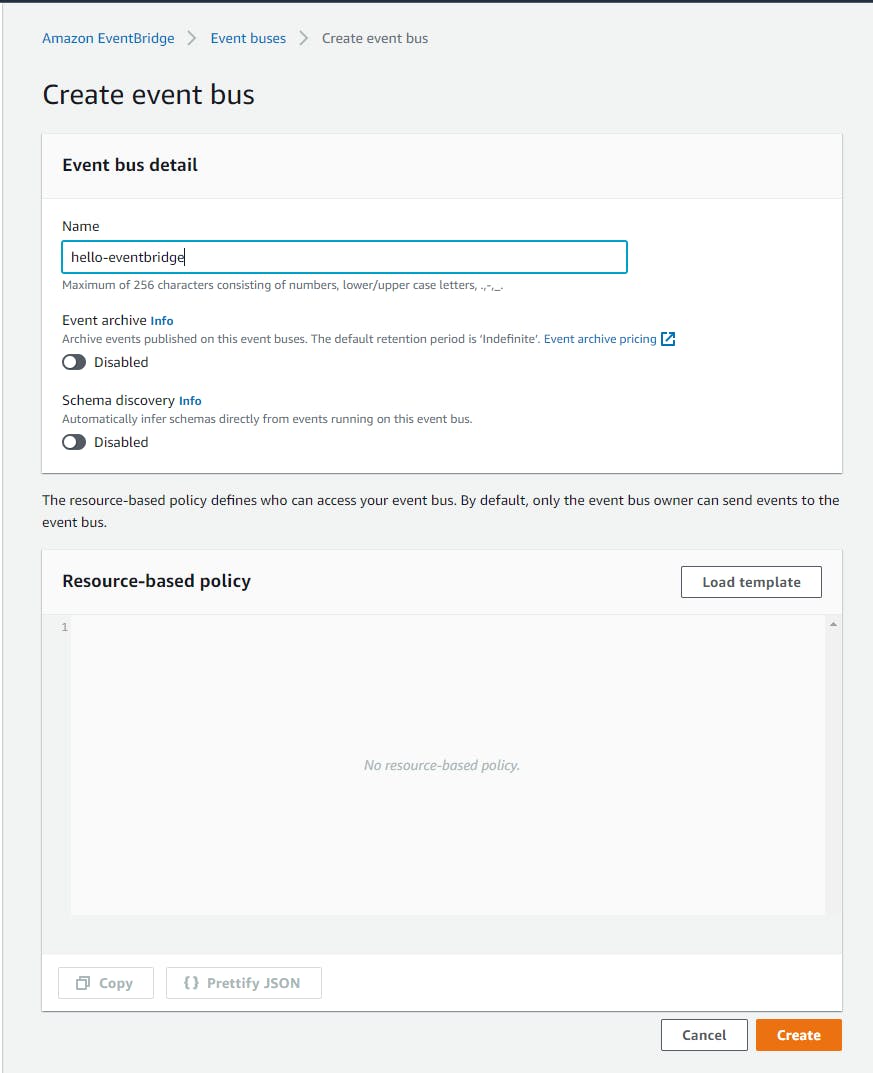
Select Event Buses and then Create Event Bus.
Name your event bus hello-eventbridge and click Create.

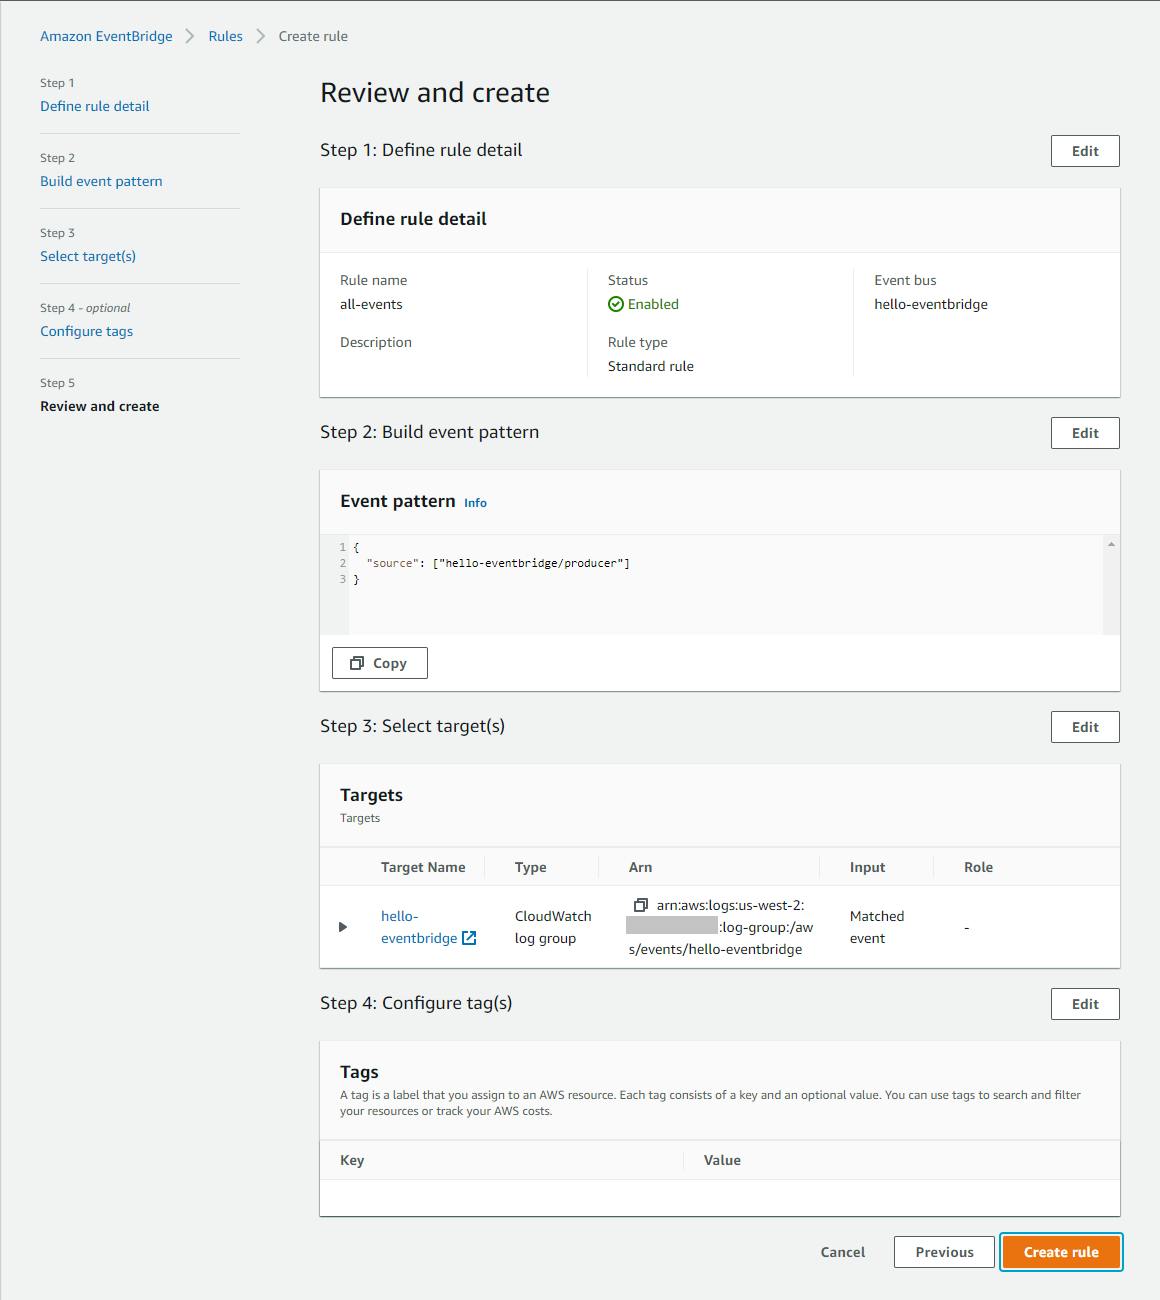
Create a rule that catches all events and sends them to a target:
A. On the left navigation pane, select Rules and click Create rule.
On the Step 1: Define rule detail page:
B. For rule name, enter all-events.
C. Under Event Bus, select hello-eventbridge.
D. Click Next.
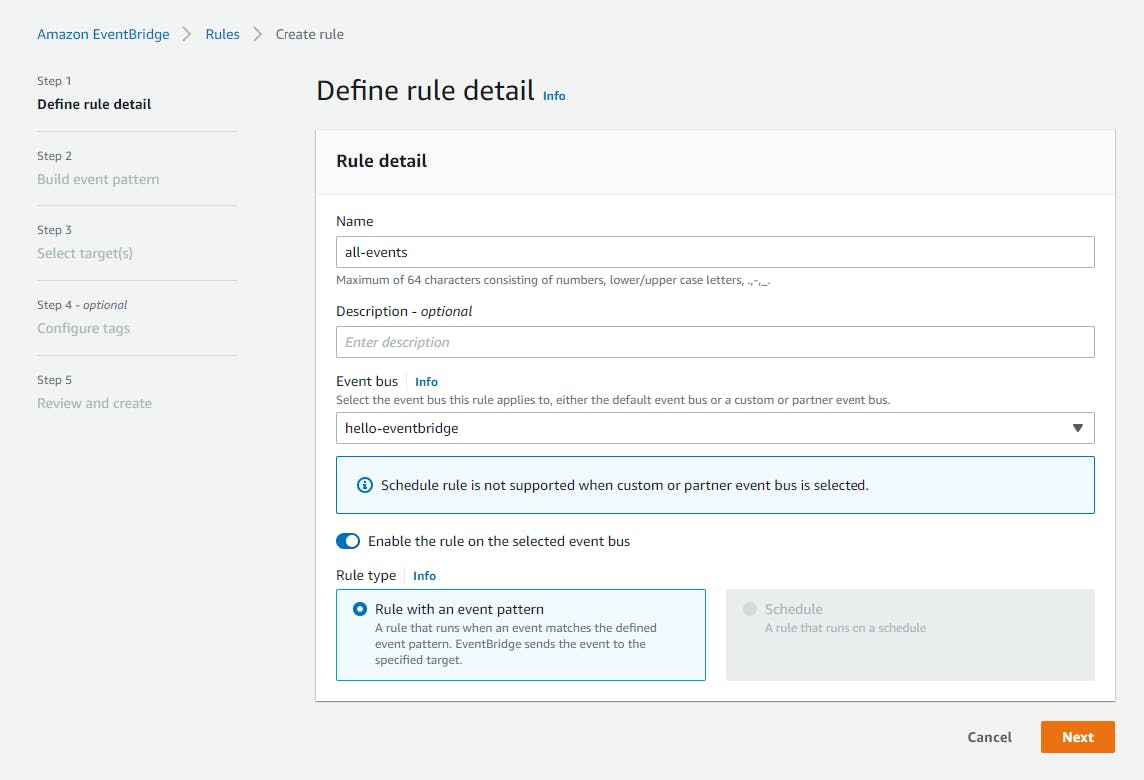
On the Step 2: Build event pattern page:
E. For Event Source, click Other.
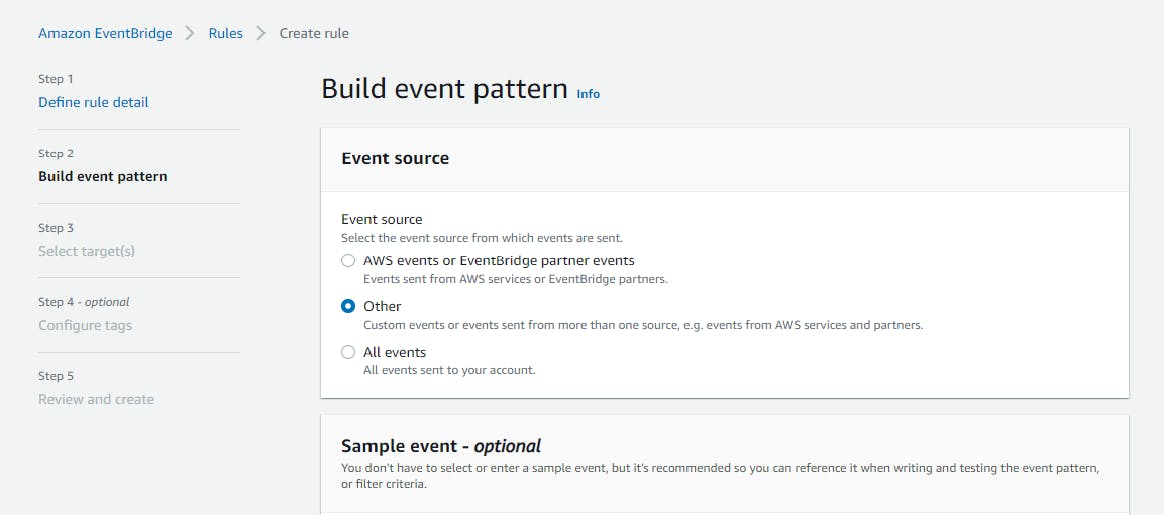
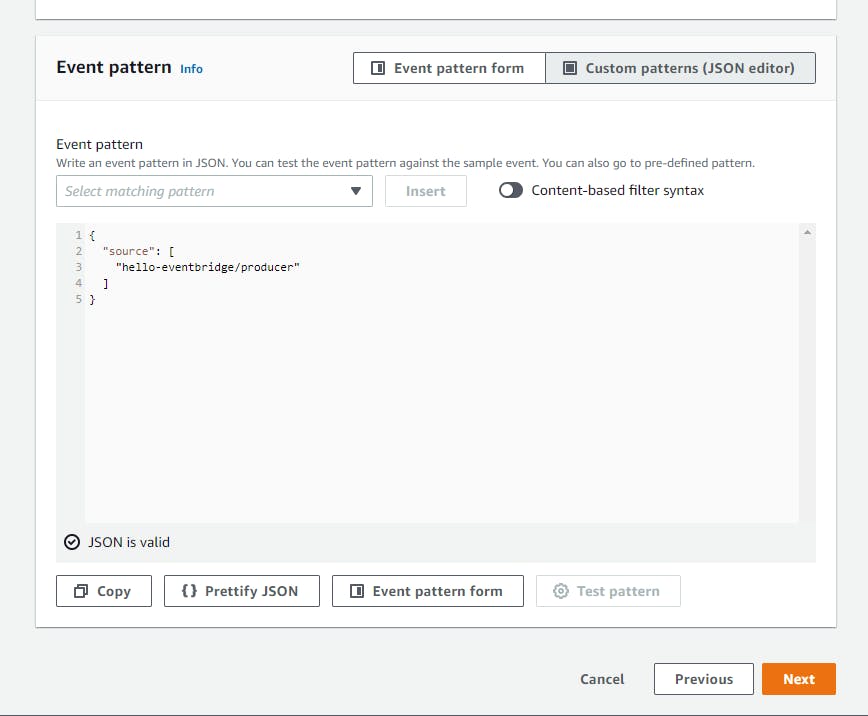
F. Under Event Pattern, enter the JSON below. This pattern will match all messages from source
hello-eventbridge/producer.{ "source": [ "hello-eventbridge/producer" ] }G. Click Next.
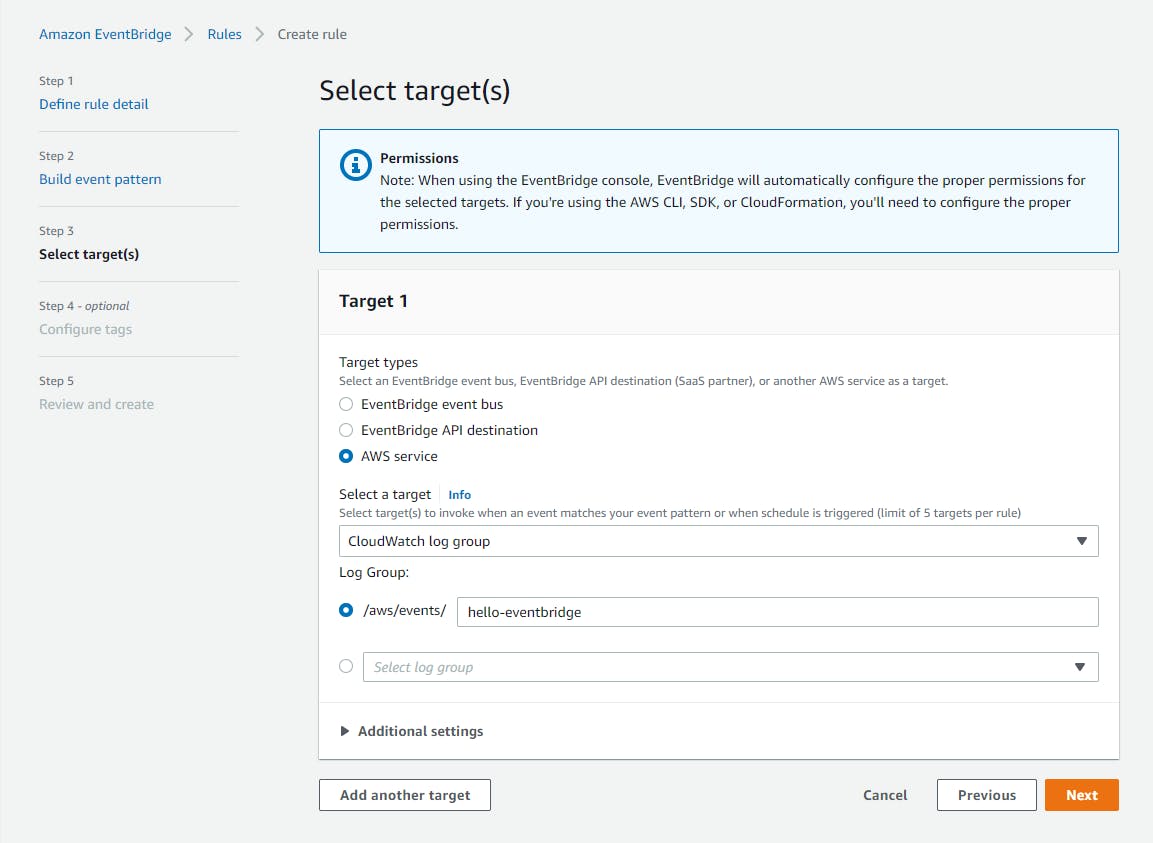
On the Step 3: Select targets page:
H. Select Target type AWS service.
I. Select target CloudWatch log group.
J. For Log Group, enter hello-eventbridge. This target configuration will send matching events to the Amazon CloudWatch log group
/aws/events/hello-eventbridge.K. Click Next and Next.
On the Review and create page:
L. Click Create rule.
Step 2: Create a .NET Product program
In this step, you'll create a .NET console program that will be a producer, writing events to the event bus.
In a command/terminal window, CD to a development folder.
Issues the
dotnet newcommand below to create a new console program namedhello-eventbridge-producer.
Launch Visual Studio and open the
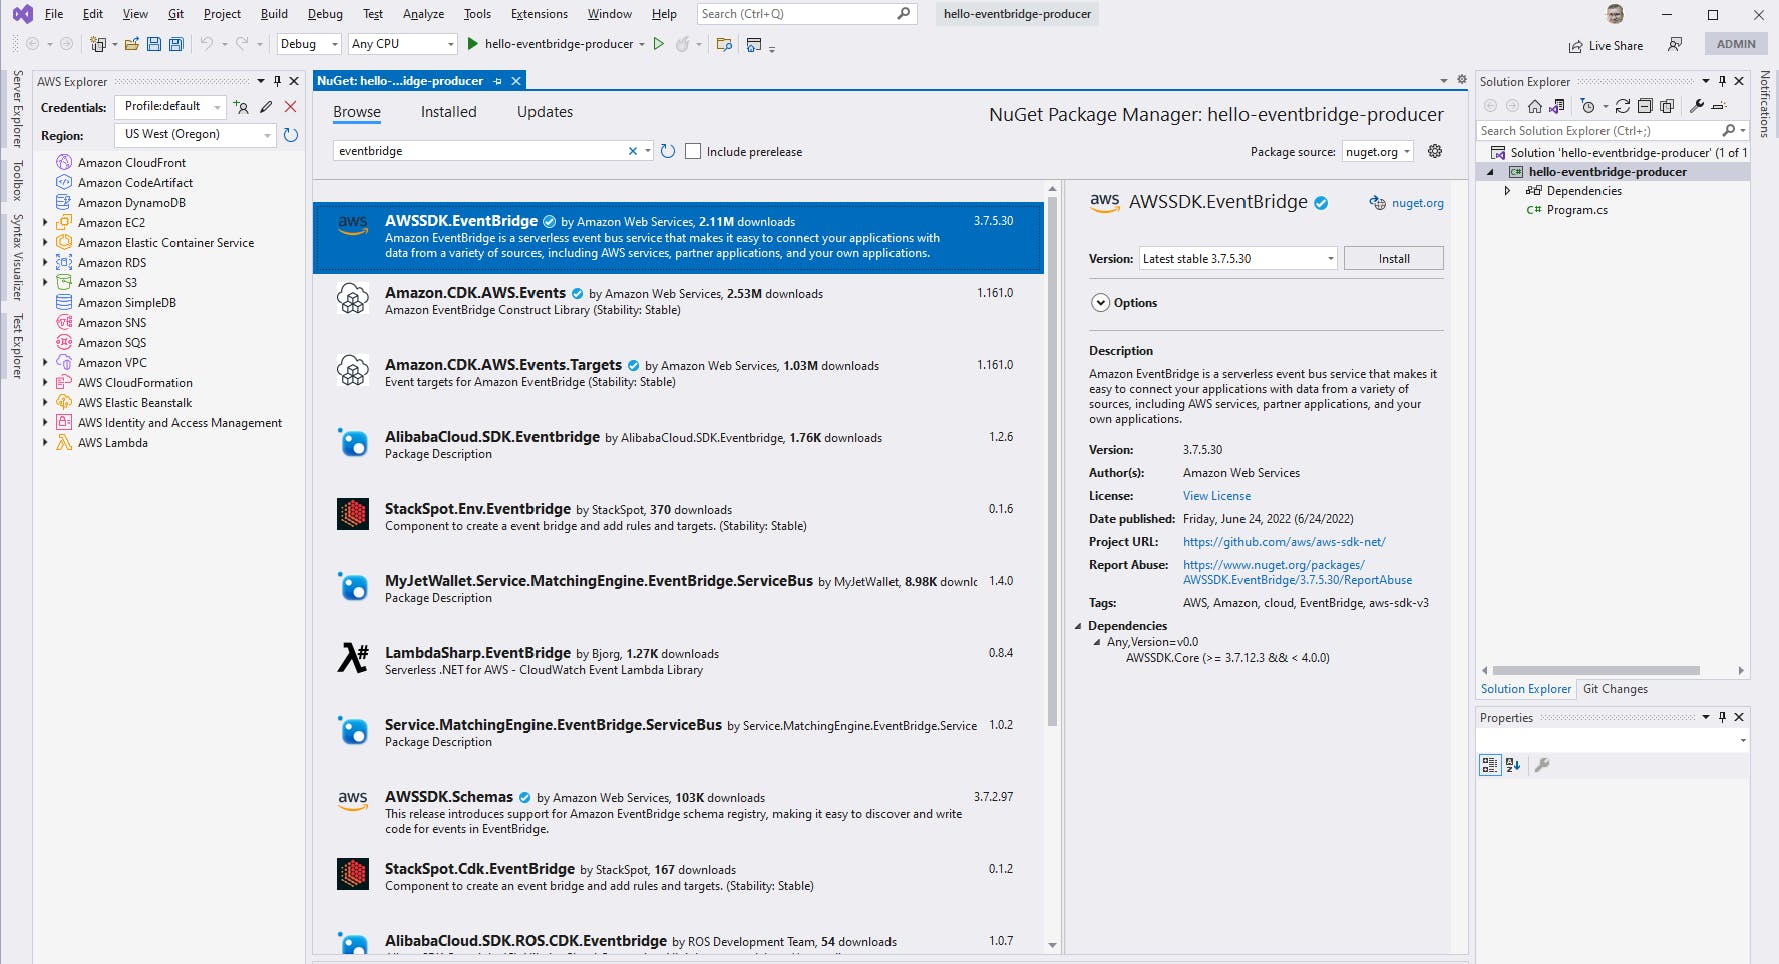
hello-eventbridge-producerproject.Add the AWSSDK.AmazonEventBridge package to the project.
Add a class file named
TestEvent. Open TestEvent.cs in the code editor and replace it with the code below at the end of this step. This class represents a test event.Open Program.cs in the code editor and replace it with the code at the end of this step. On line 7, update the RegionEndpoint to reflect the region you are using.
This code creates an
AmazonEventBridgeClientand uses it to publish an event, by creating aPutEventRequestsobject and passing it to thePutEventsAsyncmethod. The request specifies producer sourcehello-eventbridge/producer, the same source specified in our event pattern in Step 1.Save your changes and build the program.
TestEvent.cs
using System;
using System.Collections.Generic;
using System.Linq;
using System.Text;
using System.Threading.Tasks;

namespace hello_eventbridge_producer
{
    public class TestEvent
    {
        public string Id { get; set; } = null!;
        public string Message { get; set; } = null!;
        public DateTime Date { get; set; }
    }
}
Program.cs
using Amazon;
using Amazon.EventBridge;
using Amazon.EventBridge.Model;
using System.Text.Json;
using hello_eventbridge_producer;

var client = new AmazonEventBridgeClient(RegionEndpoint.USWest2);

var evt = new TestEvent()
{
    Id = Guid.NewGuid().ToString(),
    Message = "Test event",
    Date = DateTime.Now
};

var response = await client.PutEventsAsync(new PutEventsRequest()
{
    Entries = new List<PutEventsRequestEntry>
    {
        new PutEventsRequestEntry
        {
            DetailType = "test-event",
            EventBusName = "hello-eventbridge",
            Source = "hello-eventbridge/producer",
            Detail = JsonSerializer.Serialize(evt)
        }
    }
});

Console.WriteLine($"Sent test event {evt.Id} to event bus, response status {response.HttpStatusCode}");
Step 3. Test the Producer
In this step, you'll run the producer program and view the event received by CloudWatch Logs.
In a command/terminal window, CD to the project folder.
Run the command
dotnet run. You see confirmation in the console output that an event was published along with its ID.
Now, we'll check CloudWatch Logs to see if the event was received.
A. In the AWS console, navigate to Amazon CloudWatch.
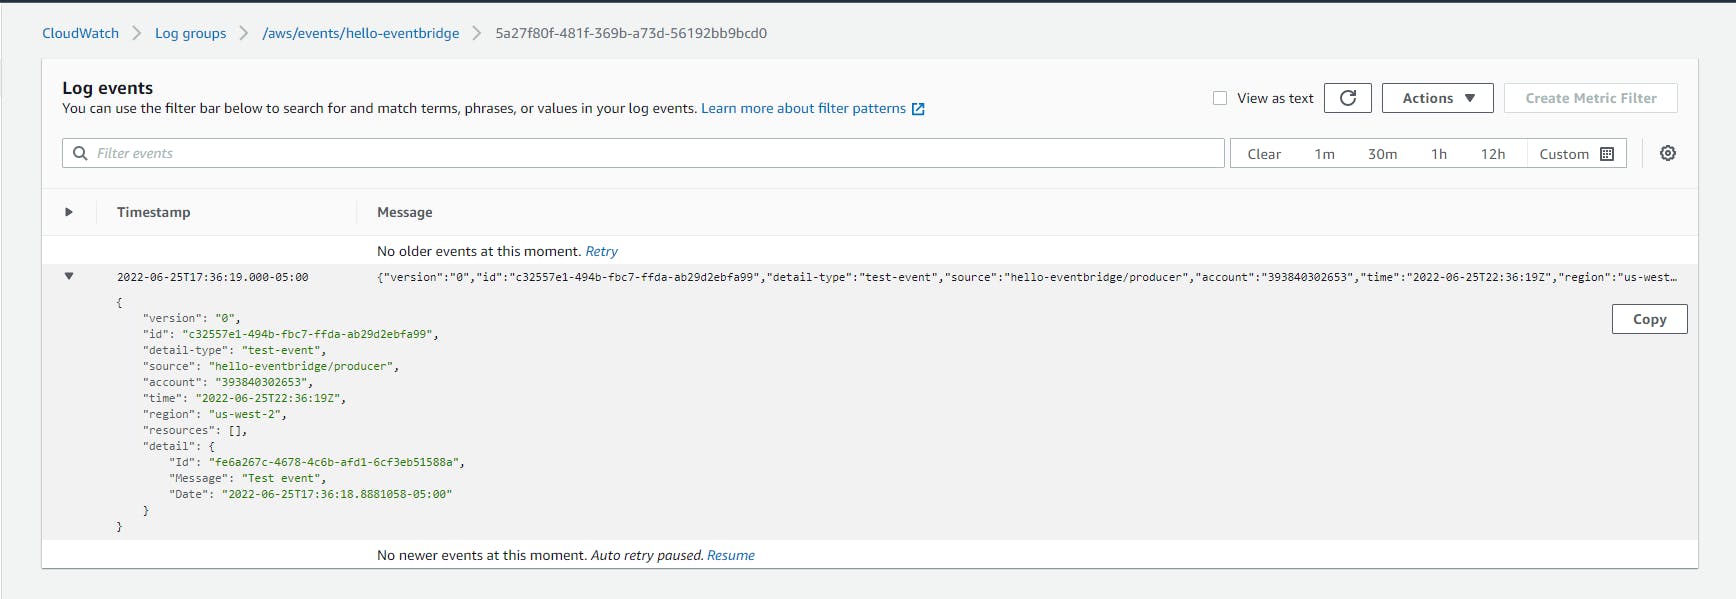
B. Select Log groups from the left panel. A group named `/aws/events/hello-eventbridge' should be listed.

C. Click
/aws/events/hello-eventbridge. A log stream should be listed.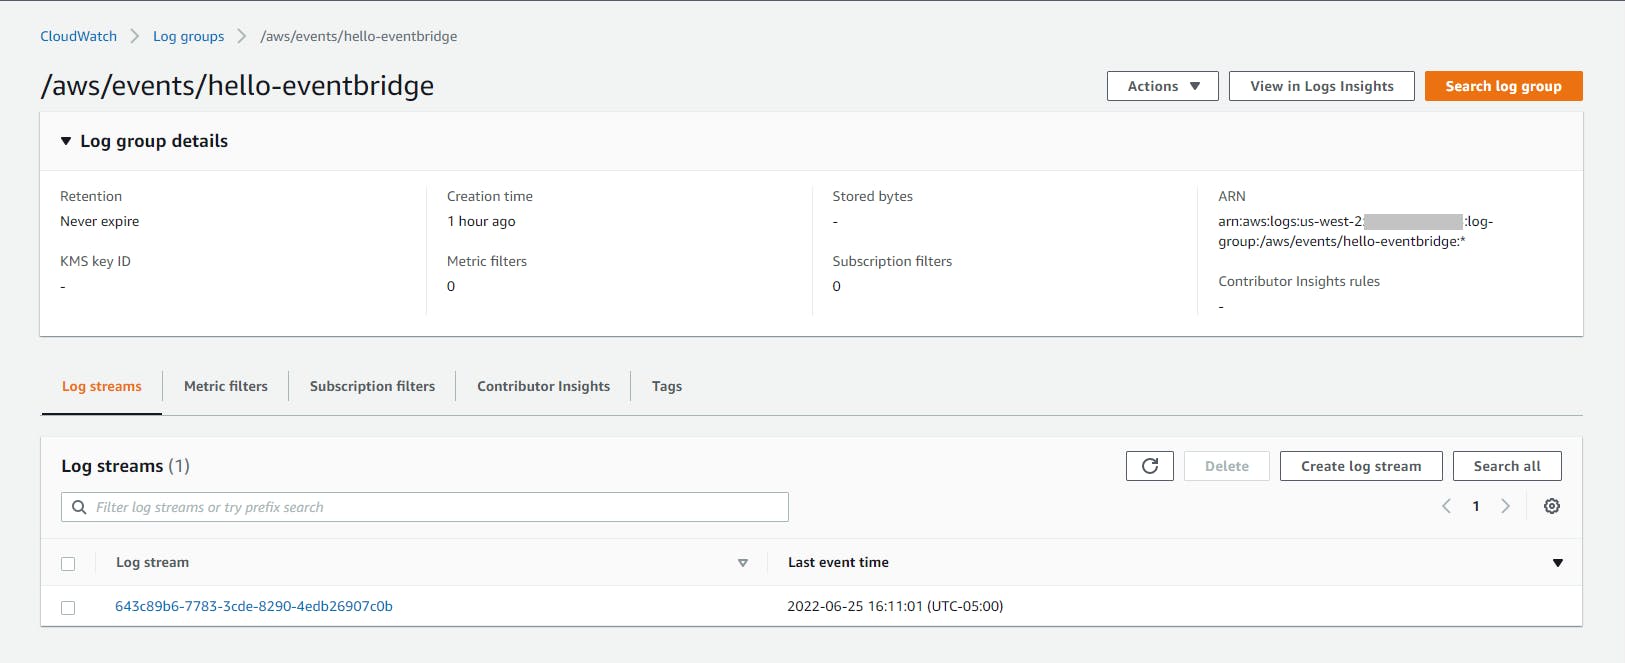
D. Click the log stream to view the log.

Expand the log entry to see the JSON of the message. Under the
detailproperty, you see the test event object sent by the producer program.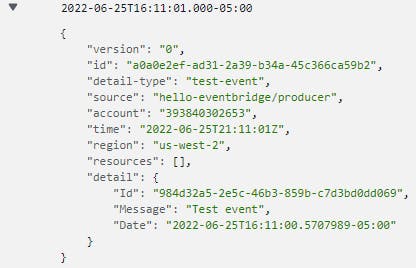
Congratulations! You've published an event to EventBridge from .NET code, and confirmed receipt by a consumer, CloudWatch logs.
Step 4: Create a Consumer Lambda
In this step, you'll create a .NET AWS Lambda function to be another consumer of events.
In a command/terminal window, CD to a development folder.
Enter the
dotnet newcommand below to create a Lambda function namedhello-eventbridge-consumer.dotnet new lambda.EmptyFunction -n hello-eventbridge-consumer
Launch Visual Studio and open the
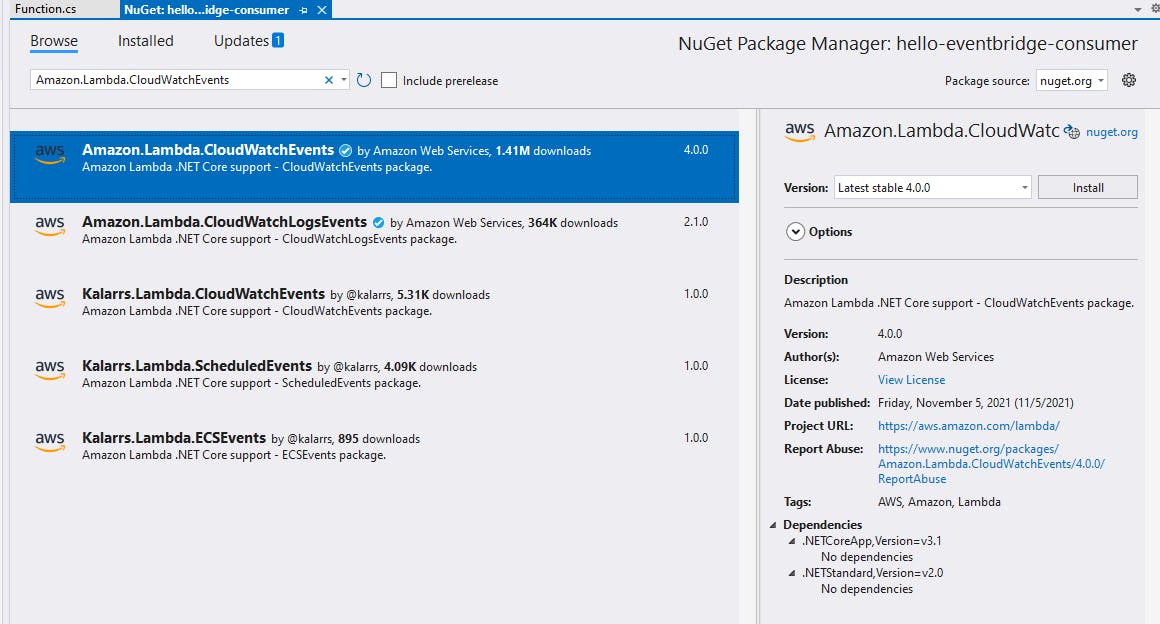
hello-eventbridge-consumerproject.Add the Amazon.Lambda.CloudWatchEvents package to the project. Note: Cloud Watch Events was the original name of EventBridge. This package is needed to understand the incoming EventBridge message structure.
In Solution Explorer, add a class named
TestEventto the project. OpenTestEvent.csin the code editor and replace it with the code at the end of this step. This is the same event structure used by the producer.Open Function.cs in the code editor and replace it with the code at the end of this step. The Lambda function logs the details of the EventBridge message it receives.
Save your changes and build the program.
TestEvents.cs
namespace hello_eventbridge_consumer
{
    public class TestEvent
    {
        public string Id { get; set; } = null!;
        public string Message { get; set; } = null!;
        public DateTime Date { get; set; }
    }
}
Function.cs
using Amazon.Lambda.Core;
using Amazon.Lambda.CloudWatchEvents;

// Assembly attribute to enable the Lambda function's JSON input to be converted into a .NET class.
[assembly: LambdaSerializer(typeof(Amazon.Lambda.Serialization.SystemTextJson.DefaultLambdaJsonSerializer))]

namespace hello_eventbridge_consumer;

public class Function
{
    /// <summary>
    /// A simple function that takes a string and does a ToUpper
    /// </summary>
    /// <param name="input">Test event</param>
    /// <param name="context">logging context</param>
    /// <returns></returns>
    public void FunctionHandler(CloudWatchEvent<TestEvent> input, ILambdaContext context)
    {
        context.Logger.LogLine($"Lambda consumer received test event Id: {input.Detail.Id}, Message: {input.Detail.Message}, Date: {input.Detail.Date}");
    }
}
Step 5: Publish Lambda Function to AWS and Test
In this step, you'll publish your consumer Lambda function to AWS, configure it to receive test events, and test that it works.
Publish the Lambda function to AWS:
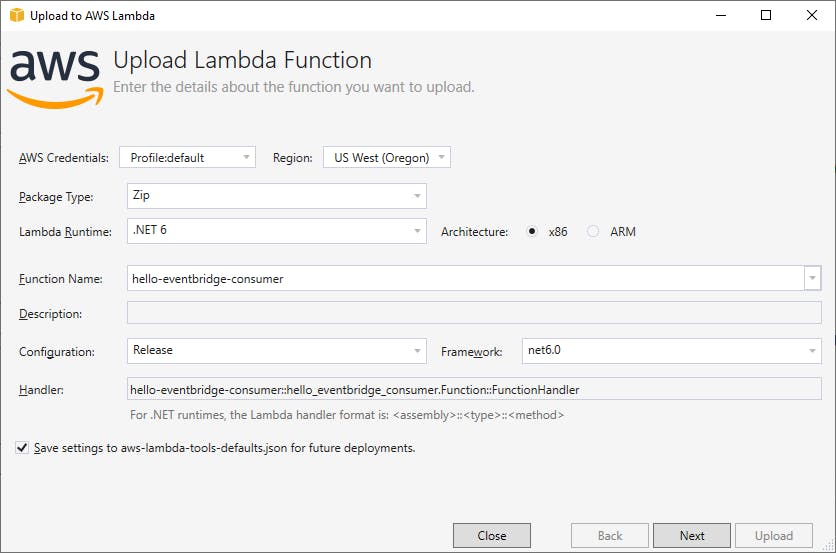
A. In Solution explorer, right-click the
hello-eventbridge-consumerproject and select Publish to AWS Lambda.B. On the wizard, confirm the region is set correctly.
C. For Function Name, enter hello-eventbridge-consumer.
D. For Handler, enter hello-eventbridge-consumer::hello_eventbridge_consumer.Function::FunctionHandler.
E. Click Next.
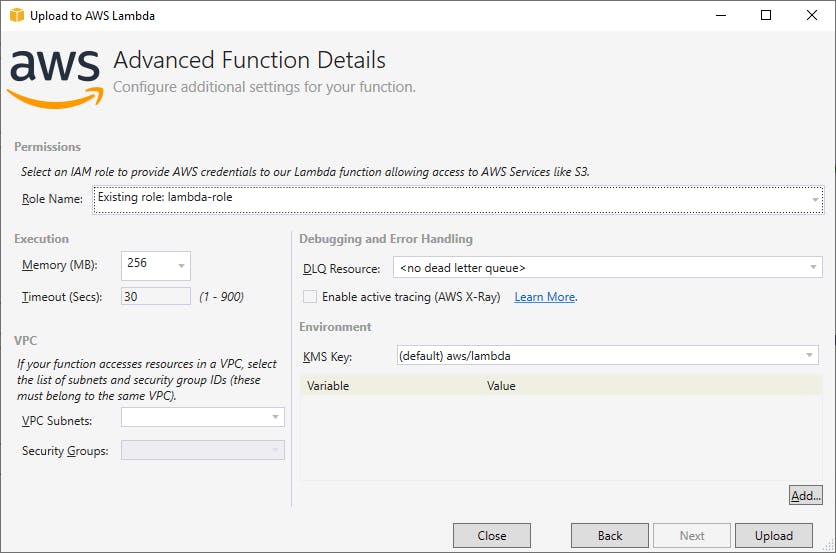
F. On the Advanced Function Detail page, select a Role Name for Lambda execution. If you don't have one, create a role in the AWS console with basic Lambda execution permissions and return to this step.
G. Click Upload.
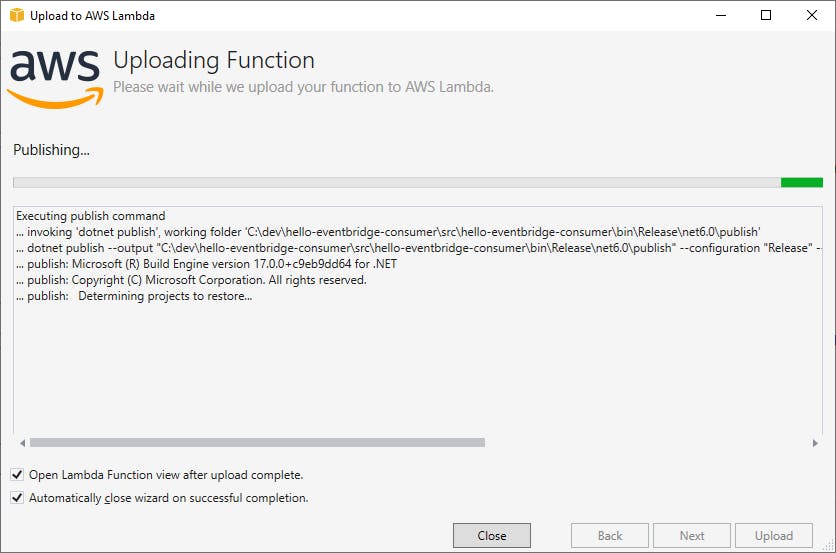
H. Wait for publishing to complete, after which you should see
Last Update Status: Successfulat the top center of the screen.Add the Lambda function as a target to the
all-eventsEventBridge rule you created earlier:A. In the AWS console, navigate to Amazon EventBridge.
B. On the left panel, select Rules and click on the all-events rule.
C. Add a second target, with Target type AWS service, Target Lambda function, function name hello-eventbridge-consumer.
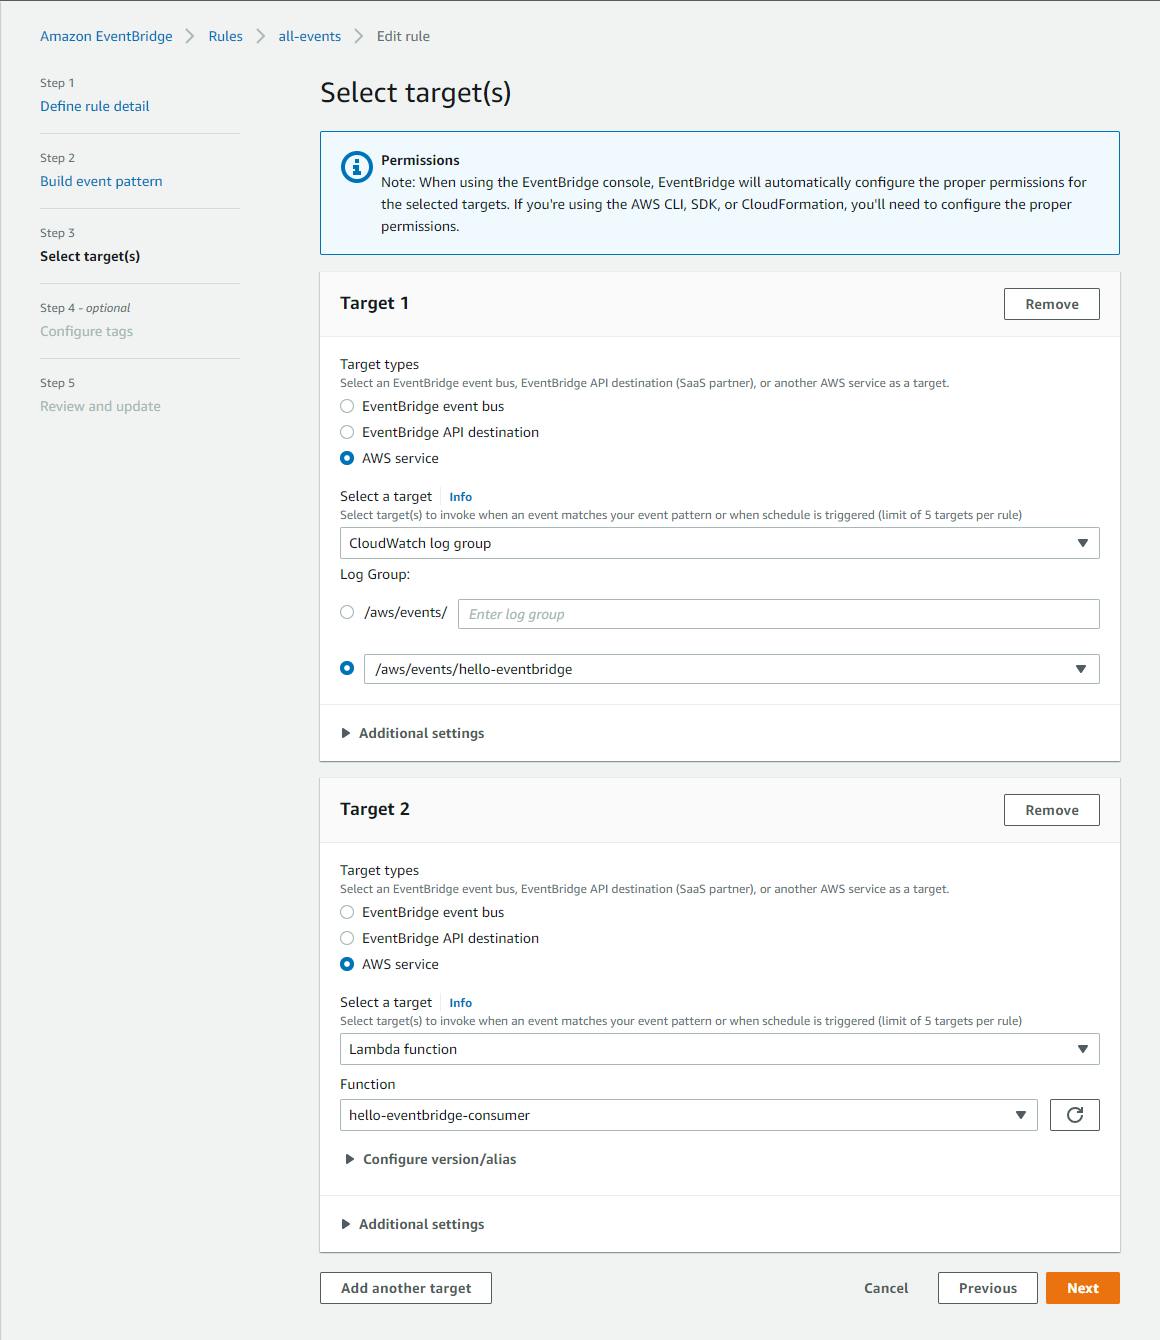
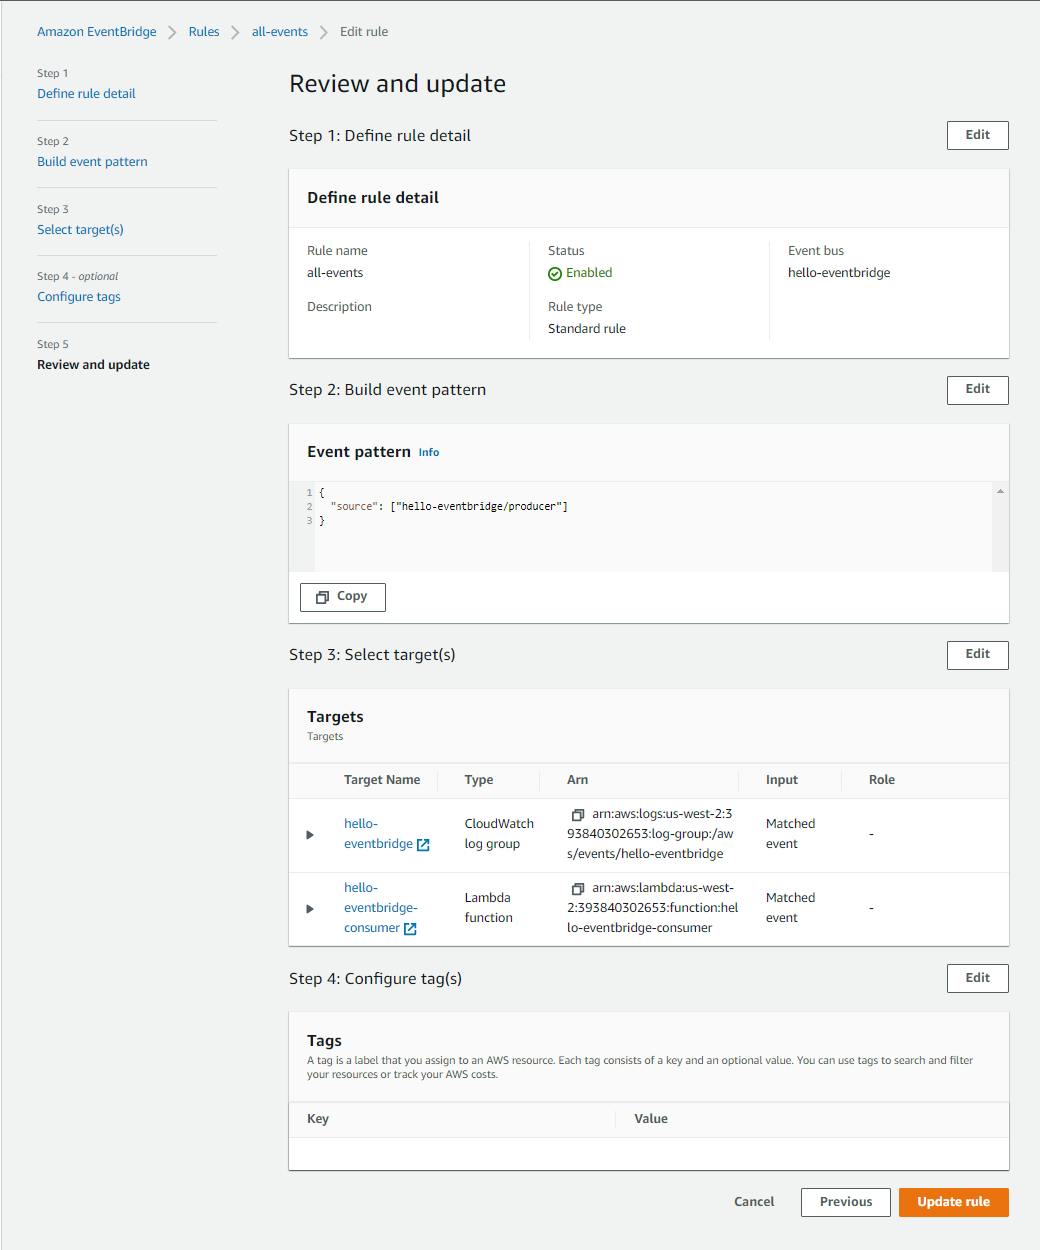
D. Click Next, Next, and Update Rule. Your rule now has two targets: CloudWatch Logs and the consumer Lambda function.
Step 5: Test the Consumer Lambda Function
In this step, you'll again run the producer to send an event, and verify the event was received and processed by the consumer Lambda function.
In a command/terminal window, CD to the
hello-eventbridge-producerproject folder and run the program withdotnet run. The program runs, and an event is sent to your event bus.
View your Lambda function and logs in the AWS console:
A. In the AWS console, navigate to AWS Lambda.
B. Select Functions from the left pane and click on the
hello-eventbridge-consumerfunction.C. The metric dashboards should show that the Lambda function was invoked once.
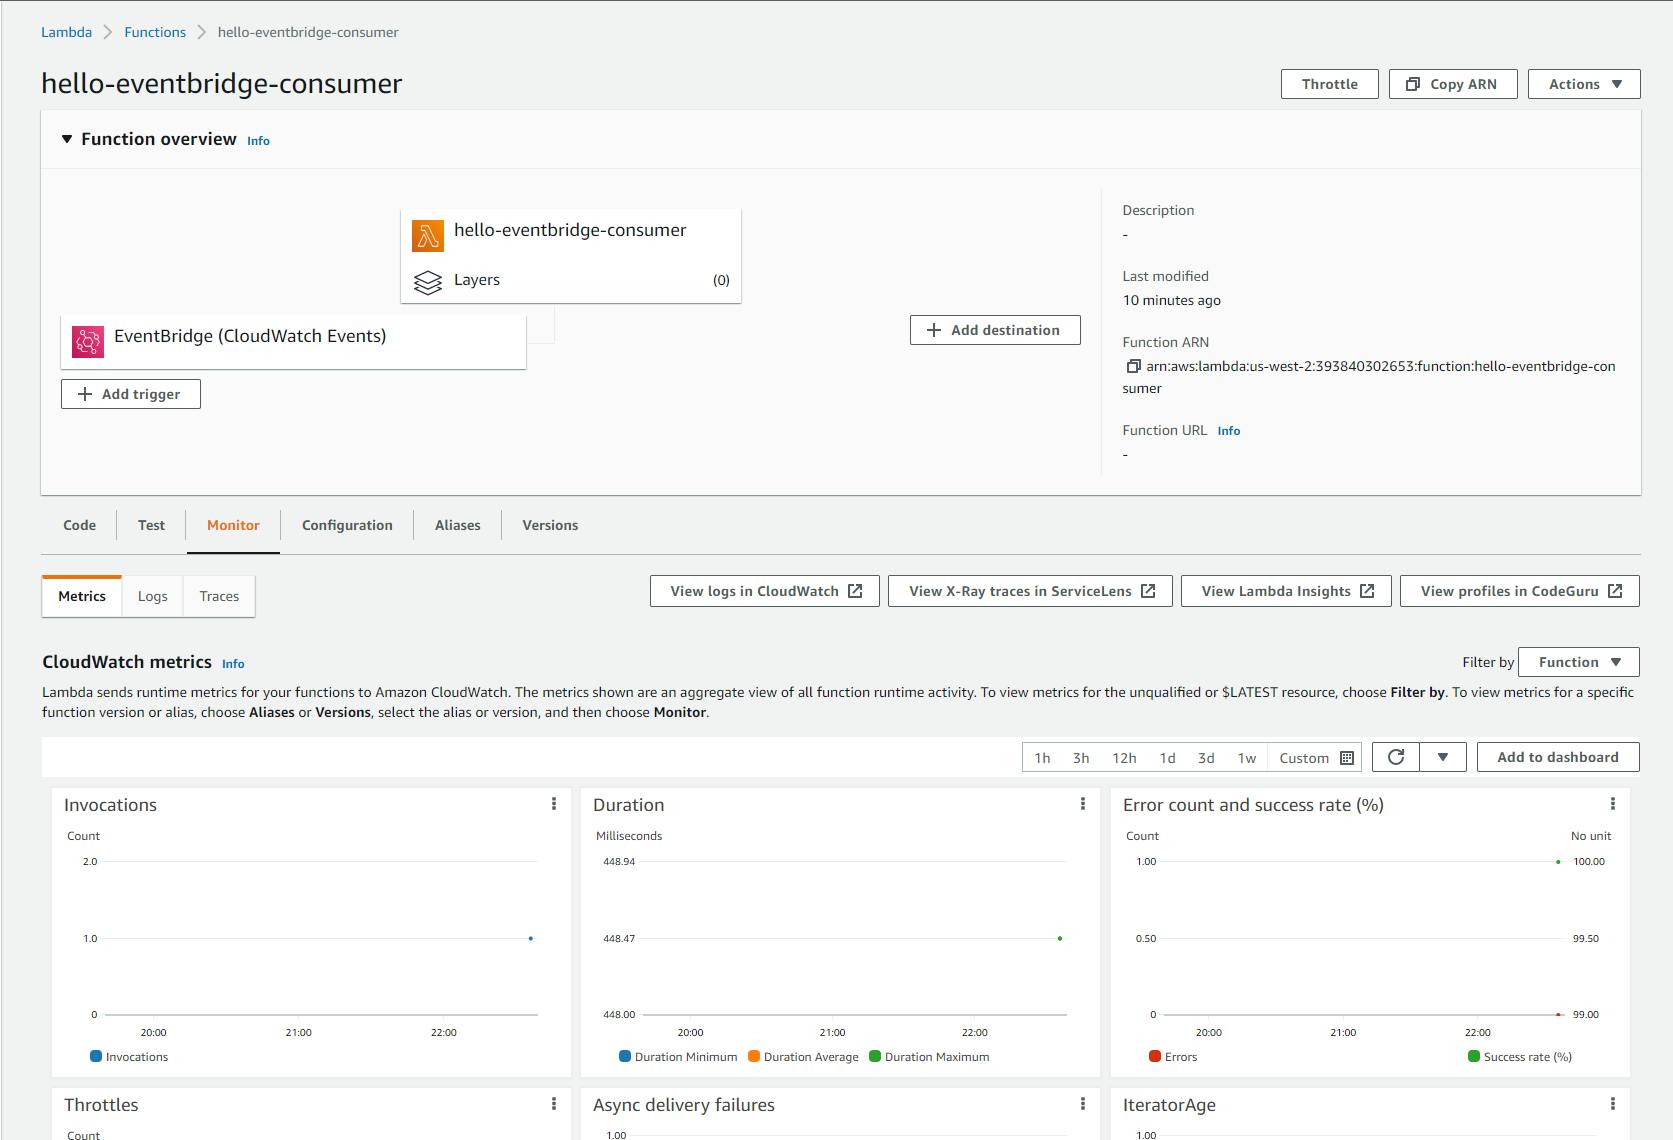
D. Click the View logs in CloudWatch button, and go to the new browser tab that opens. You see a log stream listed.
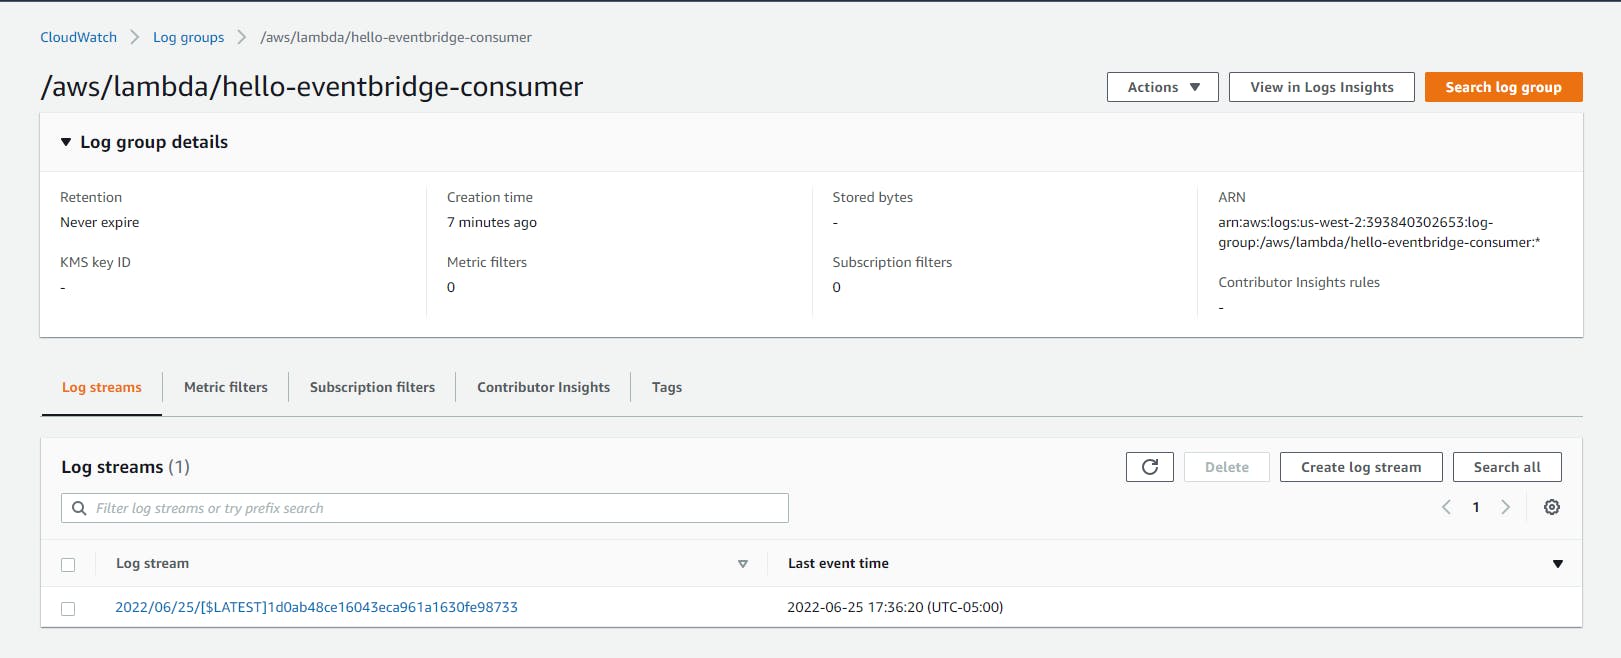
E. Click the log stream to view the log detail. You see a log entry from your consumer Lambda function echoing the detail of the test event it received.

To confirm there are now two consumers subscribed to these events, view the other consumer,
CloudWatch Logs /aws/events/hello-eventbridge:A. Navigate to CloudWatch > Log Groups > /aws/events/hello-eventbridge.
B. Click the newest log stream. You see your test event.
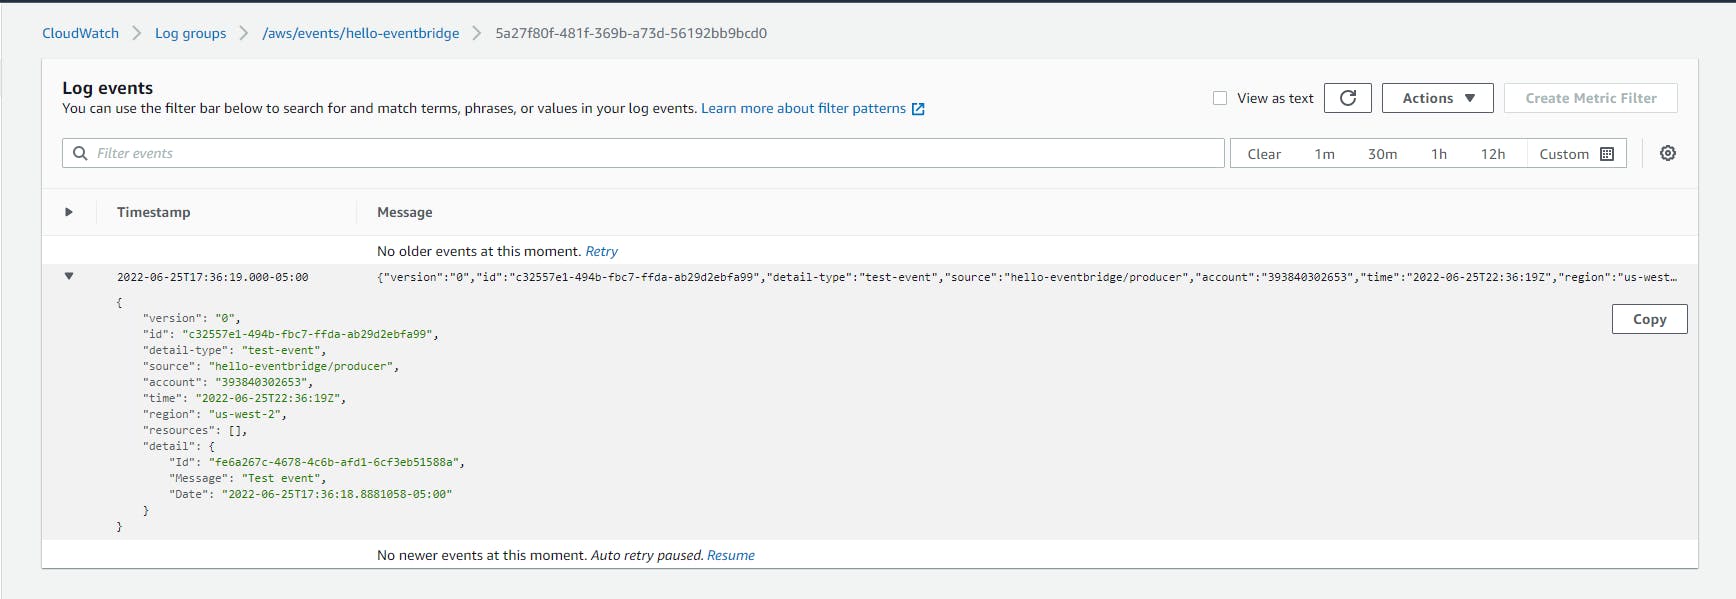
Congratulations! Your C# Lambda function was triggered in response to an EventBridge event, and was able to access the event details.
Optional: if you'd like to take the project further, here are some things you could try:
A. Create additional publishers and consumers.
B. Create a second type of event message.
C. Have a consumer also publish a message. Be care to avoid infinite loops in your message processing!
Step 6: Shut it Down
When you're finished with this hello-eventbridge tutorial, shut it down. You don't want to accrue charges for something you're not using.
In the AWS management console, navigate to AWS Lambda and delete the
hello-eventbridge-consumerfunction.Navigate to Amazon EventBridge and delete the
all-eventsrule.Delete the
hello-eventbridgeevent bus.
Where to Go From Here
Event-driven architectures and decoupled microservices are popular today for some solid reasons. You do away with point-to-point connections between software, which allows you to easily add or remove components without having to touch other components. Decoupled microservices can be independently scaled. Auditing become easy, you just add another consumer to your messaging.
In this tutorial, you write a .NET producer that sends messages to an EventBridge event bus, and a .NET consumer that processes messages received from the event bus. You set up a rule that matched event patterns and routed messages to two targets.
This tutorial did not cover built-in integrations to SaaS products, or many features. To go further with EventBridge, get familiar with these features and evaluate whether they make sense for your use case: archive and replay events, schema registry, built-in integrations to other AWS services, scheduled events, and global endpoints.
There are other AWS messaging services, including Amazon Simple Notification Service, Amazon Simple Queue Service, and Amazon Kinesis Streams. You'll want to choose the messaging service that best fits your use case and requirements.
Further Reading
AWS Documentation
Amazon EventBridge AWS CLI Reference
AWS SDK for .NET Documentation
Videos
Amazon EventBridge Introduction by James Beswick
How to use a Serverless Event Bus in .NET Applications with Amazon EventBridge by Carlos Santos
Blogs
