Table of contents
- This episode: AWS Copilot command line container deployment. In this Hello, Cloud blog series, we're covering the basics of AWS cloud services for newcomers who are .NET developers. If you love C# but are new to AWS, or to this particular service, this should give you a jumpstart.
- AWS Copilot : What is it, and why use It?
- Our Hello, Copilot Project
- Where to Go From Here
- Further Reading
This episode: AWS Copilot command line container deployment. In this Hello, Cloud blog series, we're covering the basics of AWS cloud services for newcomers who are .NET developers. If you love C# but are new to AWS, or to this particular service, this should give you a jumpstart.
In this post we'll introduce AWS Copilot and use it to deploy and manage a "Hello, Cloud" .NET API container from the command line. We'll do this step-by-step, making no assumptions other than familiarity with C# and Visual Studio. We're using Visual Studio 2022 and .NET 6.
AWS Copilot : What is it, and why use It?
“Every pilot needs a co-pilot, and let me tell you, it is awful nice to have someone sitting there beside you, especially when you hit some bumpy air.” ―Eric Wald
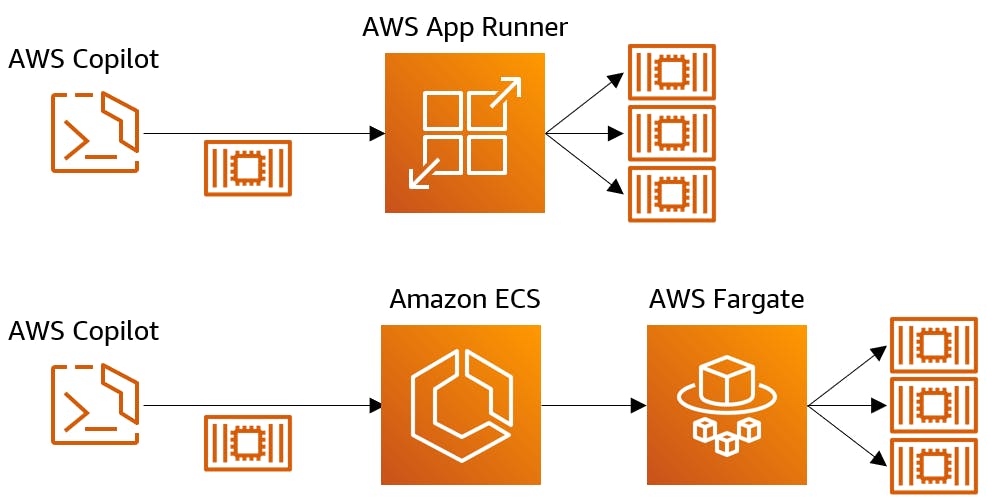
Containers are a standard way to package and deploy applications, and have become very popular in recent years. AWS provides many compute services for containers, including AWS App Runner, Amazon Elastic Container Service (ECS), and AWS Fargate.
AWS Copilot (hereafter "Copilot", not to be confused with GitHub Copilot) is a command line interface that simplifies container deployment and management on AWS. AWS describes Copilot as "a command line interface (CLI) that enables customers to quickly launch and easily manage containerized applications on AWS". AWS Copilot can deploy containers to AWS Fargate on Amazon ECS, or to AWS App Runner. AWS Copilot CLI is also an open source project.
When you deploy a container with Copilot, a single command provisions all of the necessary infrastructure. Copilot takes care of the setup details for you, while showing you exactly what it is doing. If you'd like to focus on your application more than infrastructure details, Copilot will save you time. If you're just learning about containers on AWS, Copilot provides an educational guided experience.
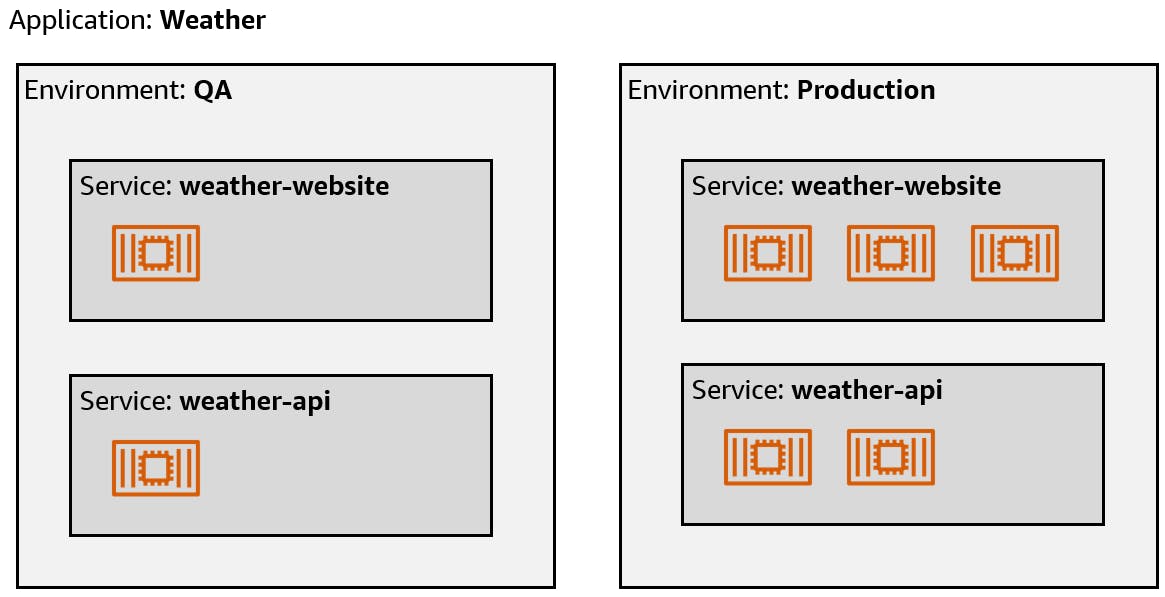
There are 3 primary concepts to understand when working with Copilot: applications, environments, and services.
An application is a collection of services and environments grouped under a name. For example, the "Weather" application might consists of two services, "weather-website" and "weather-api", which can be deployed to two environments, "QA" and "Production".
An environment is a named deployment environment, such as "QA" or "Production".
A service is your code and the infrastructure that goes with it for running on AWS. A service could be a web site's front end or its back-end API.
Let's review some of the Copilot commands. See command documentation for all commands, their parameters, and examples.
| Command | Description |
| copilot init | Your starting point to deploy a container app on ECS or App Runner. |
| copilot app ls | Lists all the Copilot applications in your account |
| copilot app show | Shows configuration, environments, and services for an application |
| copilot deploy | Deploys updated services |
| copilot app delete | Deletes all resources associated with an application |
Our Hello, Copilot Project
In this tutorial you will create a .NET web API that converts between units of measurement. We'll use Copilot to deploy it as a container to AWS App Runner. Then we'll update the service and see how to use Copilot to deploy the update.

One-time Setup
For any of the tutorials in the Hello, Cloud series you need the following:
- An AWS account, and an understanding of what is included in the AWS Free Tier.
- Microsoft Visual Studio 2022. If you're using an older version of Visual Studio you won't be able to use .NET 6. If you use a different IDE, you may have to find alternatives to some tutorial steps.
AWS Toolkit for Visual Studio. You'll need to configure the toolkit to access your AWS account and create an IAM user. Your default AWS profile will be linked to this user when running programs from the command line.
Also install the following for this tutorial, it not already present:
Install Docker Desktop.
Install the AWS Command Line Interface.
Step 1: Create a .NET 6 Web API project
In this step, you'll create a .NET 6 Web API project and write the code for a length conversion API.
Open a command/terminal window and CD to a development folder.
Run the dotnet new command below to create a new .NET 6 Web API project:
dotnet new webapi -n hello-copilot

Launch Visual Studio and open the hello-copilot project.
In Solution Explorer, delete WeatherForecast.cs.
In Solution Explorer, rename WeatherForecastController.cs to ConvertController.cs.
Open ConvertController.cs in the code editor, and replace its code with the code at the end of this step. This controller contains methods that convert between units of length of movement. For example, path
/convert/feet/meters/13will convert 13 feet to meters.Save your changes and build the program.
ConvertController.cs
using Microsoft.AspNetCore.Mvc;

namespace hello_copilot.Controllers;

[ApiController]
[Route("[controller]")]
public class ConvertController : ControllerBase
{
    private readonly ILogger<ConvertController> _logger;

    public ConvertController(ILogger<ConvertController> logger)
    {
        _logger = logger;
    }

    [HttpGet("heartbeat")]
    public string Heartbeat() { return "ConvertController"; }

    #region Feet to Meters

    [HttpGet("feet/meters/{value:double}")]
    public double FeetMeters(double value) { return value / 3.281; }

    [HttpGet("feet/decimeters/{value:double}")]
    public double FeetDecimeters(double value) { return value * 3.048; }

    [HttpGet("feet/centimeters/{value:double}")]
    public double FeetCentimeters(double value) { return value / 30.48; }

    [HttpGet("feet/millimeters/{value:double}")]
    public double FeetMillimeters(double value) { return value * 304.8; }

    [HttpGet("feet/kilometers/{value:double}")]
    public double FeetKilometers(double value) { return value / 3280.84; }

    #endregion

    #region Meters to Feet

    [HttpGet("meters/feet/{value:double}")]
    public double MetersFeet(double value) { return value * 3.281; }

    [HttpGet("decimeters/feet/{value:double}")]
    public double DecimetersFeet(double value) { return value / 3.048; }

    [HttpGet("centimeters/feet/{value:double}")]
    public double CentimetersFeet(double value) { return value / 30.48; }

    [HttpGet("millimeters/feet/{value:double}")]
    public double MillimetersFeet(double value) { return value / 304.8; }

    [HttpGet("kilometers/feet/{value:double}")]
    public double KilometersFeet(double value) { return value * 3280.84; }

    #endregion

    #region Miles to Meters

    [HttpGet("miles/meters/{value:double}")]
    public double MilesMeters(double value) { return value * 1609.34; }

    [HttpGet("miles/decimeters/{value:double}")]
    public double MilesDecimeters(double value) { return value * 16093.4; }

    [HttpGet("miles/centimeters/{value:double}")]
    public double MilesCentimeters(double value) { return value * 160934; }

    [HttpGet("miles/millimeters/{value:double}")]
    public double MilesMillimeters(double value) { return value * 1.609e6; }

    [HttpGet("miles/kilometers/{value:double}")]
    public double MilesKilometers(double value) { return value * 1.609; }

    #endregion

    #region Meters to Miles

    [HttpGet("meters/miles/{value:double}")]
    public double MetersMiles(double value) { return value / 1609.34; }

    [HttpGet("decimeters/miles/{value:double}")]
    public double DecimetersMiles(double value) { return value / 16093; }

    [HttpGet("centimeters/miles/{value:double}")]
    public double CentimetersMiles(double value) { return value / 160934; }

    [HttpGet("millimeters/miles/{value:double}")]
    public double MillimetersMiles(double value) { return value / 1.609e6; }

    [HttpGet("kilometers/miles/{value:double}")]
    public double KilometersMiles(double value) { return value * 1.609; }

    #endregion
}
Step 2: Test and Containerize the Solution
In this step you'll test the application locally to see how it works, then containerize it with Docker.
In Visual Studio, press F5 to launch the program. You should see a Swagger page.
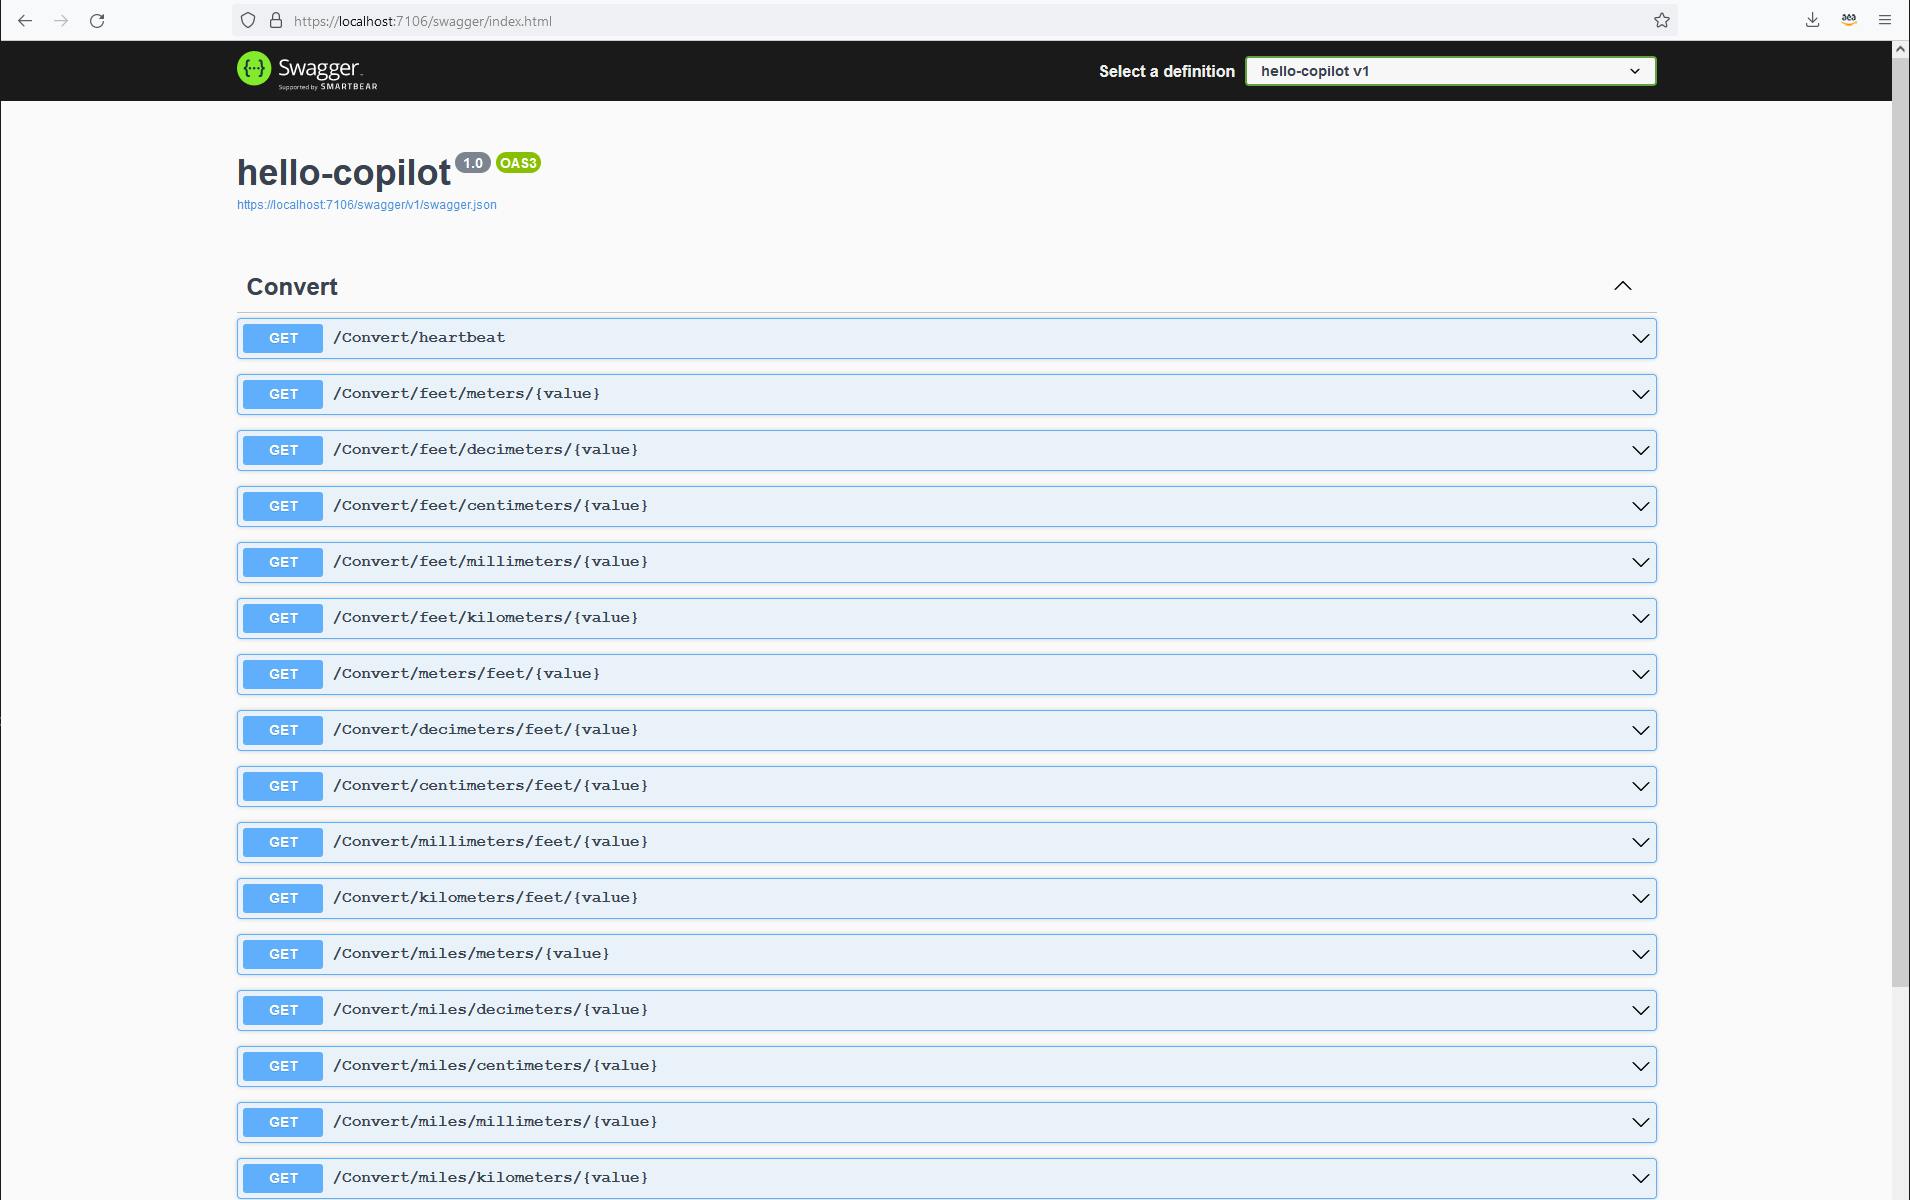
Try amending the path in the browser to variations like those below, at whatever local port your browser is using:
 https://localhost:{port}/convert/feet/meters/1
 https://localhost:{port}/convert/centimeters/feet/93
 https://localhost:{port}/convert/miles/kilometers/0.25
 https://localhost:{port}/convert/millimeters/miles/11.3
 https://localhost:{port}/convert/millimeters/miles/1056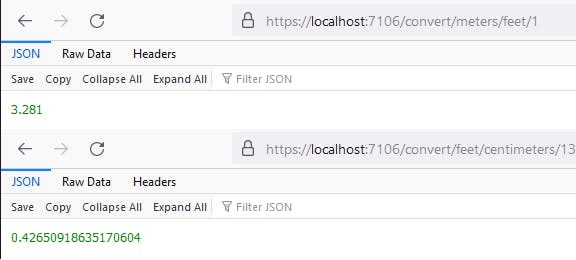
Stop the debugger. We now have a .NET application to containerize and deploy.
Create a text file named Dockerfile (with no file type) in the project directory, with the contents below.
 FROM mcr.microsoft.com/dotnet/sdk:6.0 AS build
 WORKDIR /src
 COPY ["hello-copilot.csproj", "./"]
 RUN dotnet restore "hello-copilot.csproj"
 COPY . .
 WORKDIR "/src/."
 RUN dotnet build "hello-copilot.csproj" -c Release -o /app/build

 FROM build AS publish
 RUN dotnet publish "hello-copilot.csproj" -c Release -o /app/publish

 FROM mcr.microsoft.com/dotnet/aspnet:6.0 AS base
 WORKDIR /app
 EXPOSE 5023
 ENV ASPNETCORE_URLS=http://+:5023

 WORKDIR /app
 COPY --from=publish /app/publish .
 ENTRYPOINT ["dotnet", "hello-copilot.dll"]
Open a command/terminal window and CD to the project folder.
Run the
docker buildcommand below to build a Docker image:docker build . -t hello-copilot:latest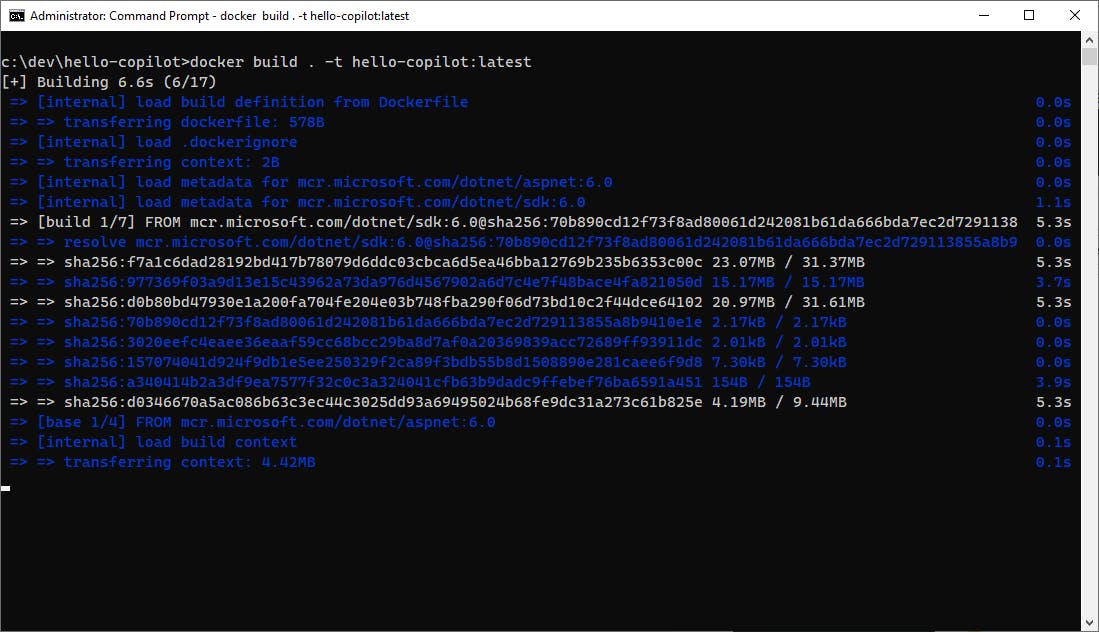
Wait for the command to complete. A Docker build may take a few minutes the first time it is run.
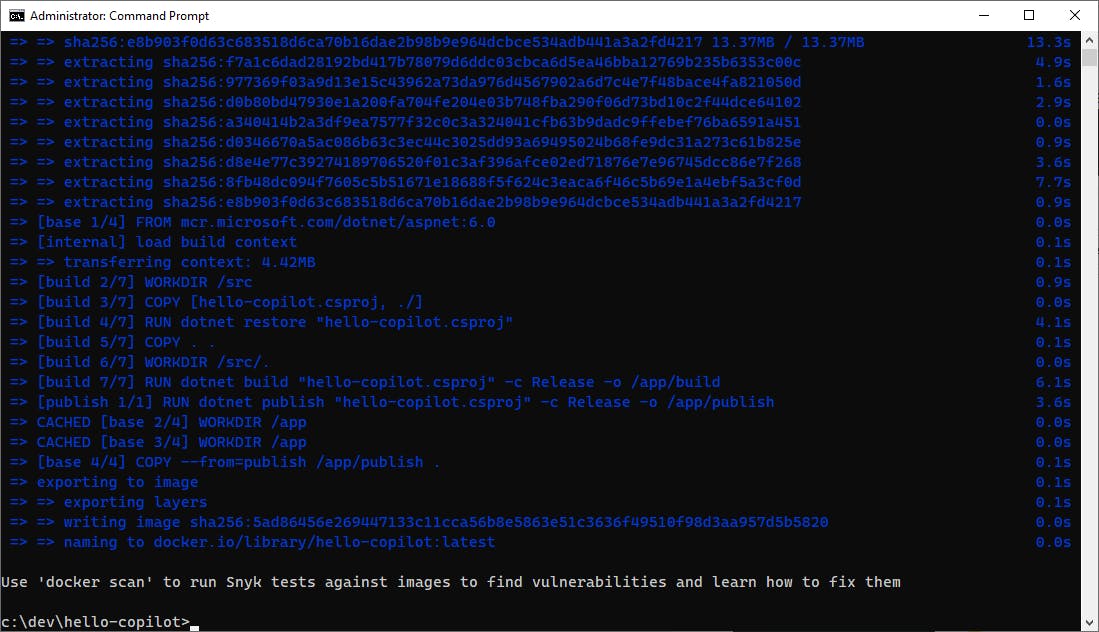
Next, run the
docker runcommand below to run the Docker image.docker run -p 5023:5023 hello-copilot:latest
Your application is now running in a container, on port 5023.
Visit the application from a browser by visiting the same URLs you used at the beginning of this step, but this time on port 5023. This confirms your application is running in the container, alive and well.
http://localhost:5023/convert/kilometers/miles/1
Halt the command window with Ctrl+D or Ctrl+C. If that doesn't work on your machine, you can find the docker container ID and use the
docker stopcommand in another command/terminal window, as shown below.
We have now successfully containerized our .NET Web API and tested it locally. The next step is deployment to AWS.
Step 3: Deploy with Copilot to AWS App Runner
In this step, you'll use Copilot to deploy your container to AWS App Runner. This step assumes you have followed the One-Time Setup steps at the top of this tutorial, which associates a default AWS profile with your command/terminal windows.
Open a command/terminal window.
Run the
aws configurecommand to set a region near you. Be sure to select a region that supports AWS App Runner.
Follow the Copilot installation instructions to install Copilot on your machine. On Windows, you can install by running this PowerShell command as an Administrator.
Invoke-WebRequest -OutFile 'C:\Program Files\copilot.exe' https://github.com/aws/copilot-cli/releases/latest/download/copilot-windows.exe
In a command/terminal window, run the
copilotcommand without parameters to test that it is found. If the command isn't found on a Windows machine, you may have to edit your environment variables and add the installation folder (c:\Program Files) to your path.CD to the project folder and run the
copilot initcommand. Respond to its questions as follows:A. Use existing application or new application: No
B. Application name: hello-copilot
C. Workload type: Request-Driven Web Service (App Runner)
D. Service name: hello-copilot
E. Dockerfile: Dockerfile
F. Would you like to deploy a test environment? Y
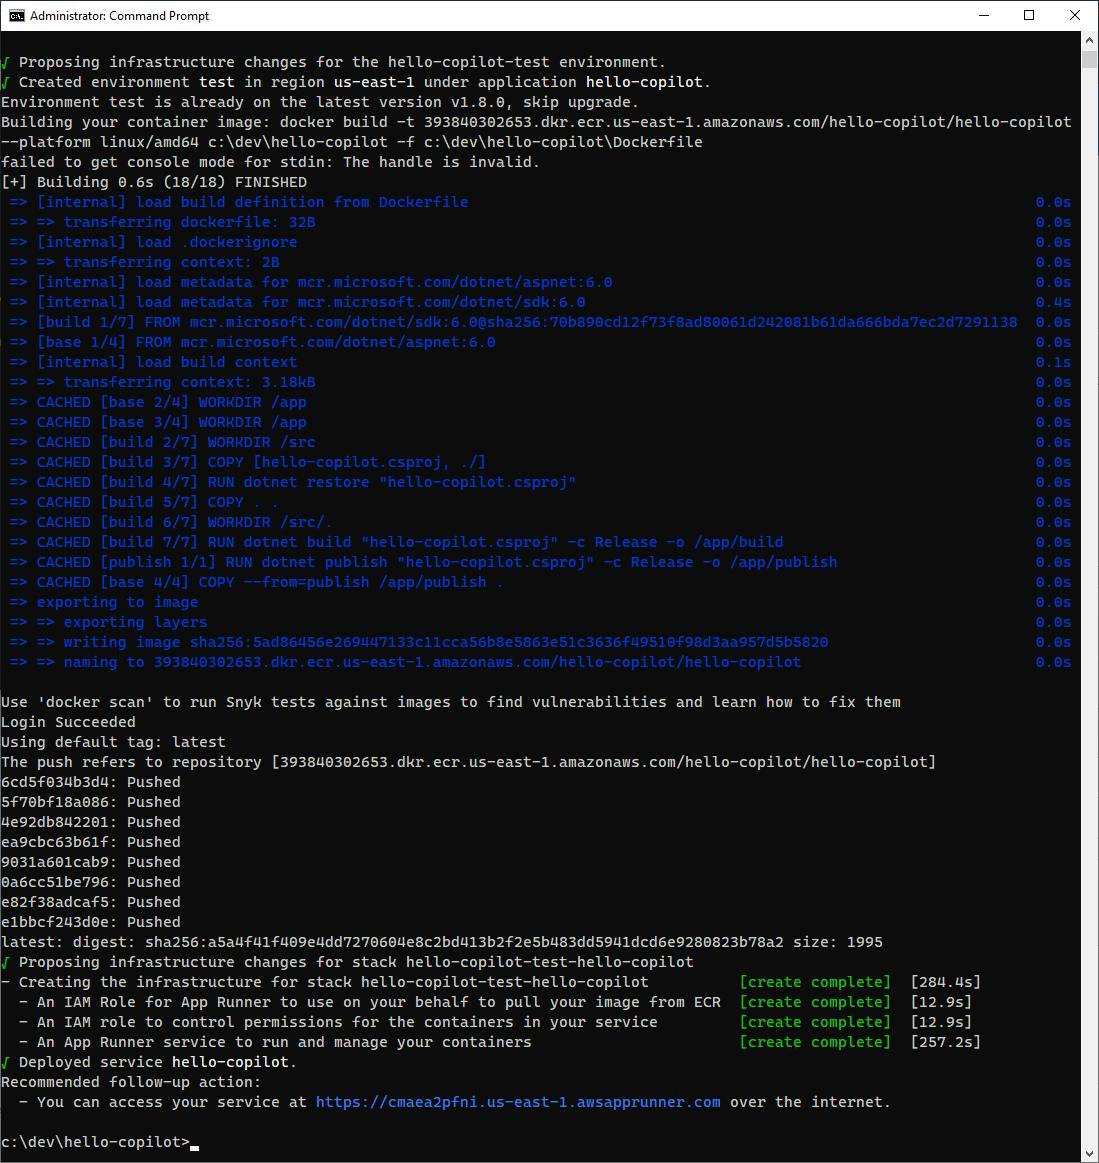
Sit back and watch Copilot set things up. As the display explains, Copilot creates infrastructure, configuration, an ECS cluster, IAM roles, a security group, an Internet Gateway, private subnets, and a VPC. It builds your Docker container and uploads it to Amazon Elastic Container Registry (ECR).
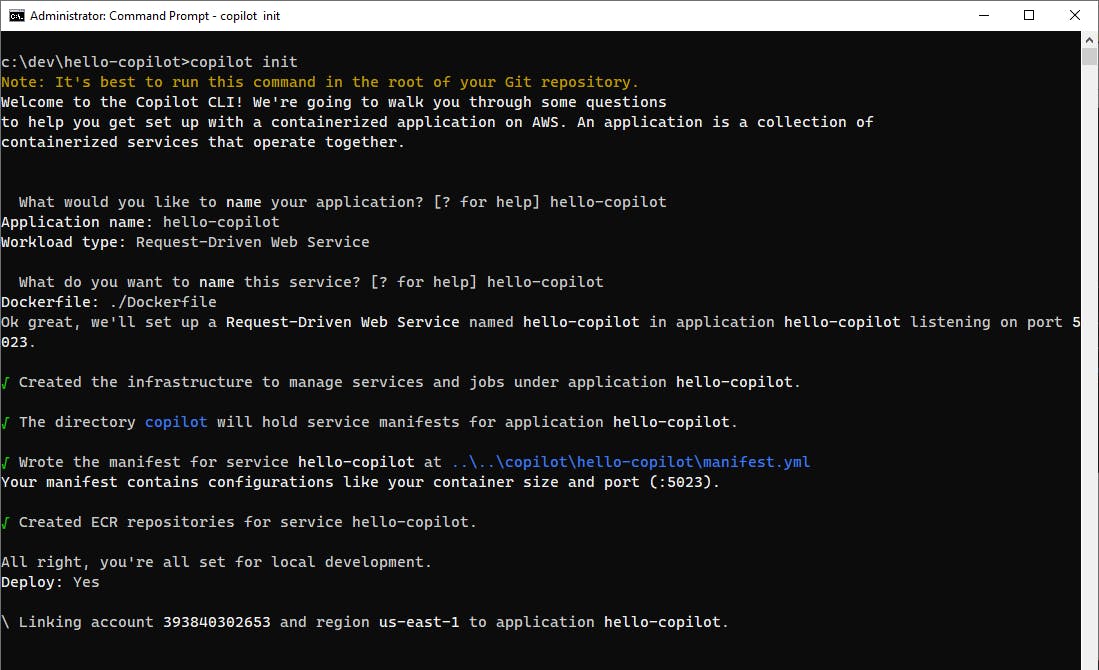
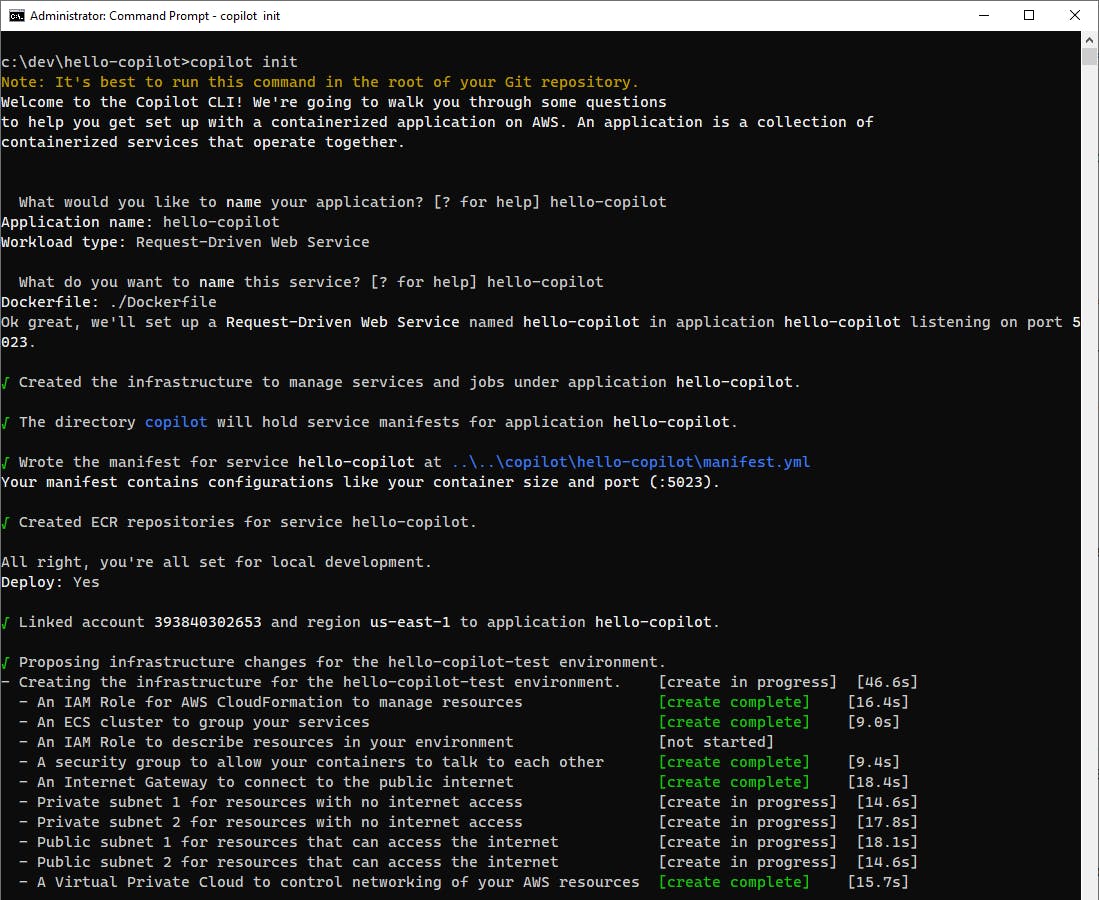
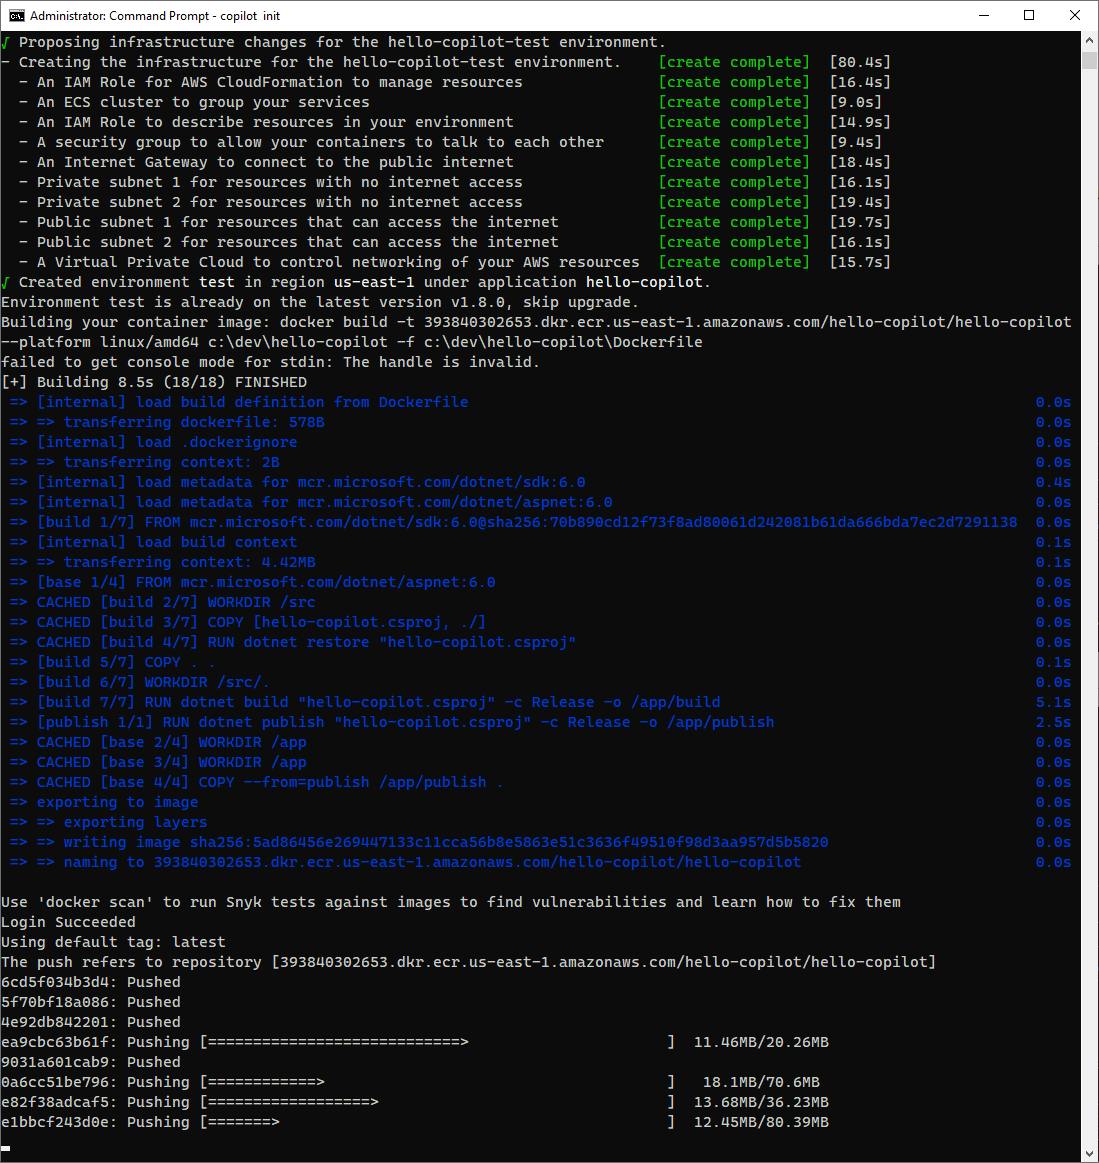
Your first use of Copilot may fail with an access denied error about missing iam:PassRole permissions:
AccessDenied: User: arn:aws:sts::account:assumed-role/hello-copilot-test-EnvManagerRole/id is not authorized to perform: iam:PassRole on resource: arn:aws:iam::account:role/hello-copilot-test-CFNExecutionRole because no identity-based policy allows the iam:PassRole actionIf that happens, do the following:
A. In a command/terminal window, run copilot svc delete --name hello-copilot to clear out the prior partial provisioning.
copilot svc delete --name hello-copilot
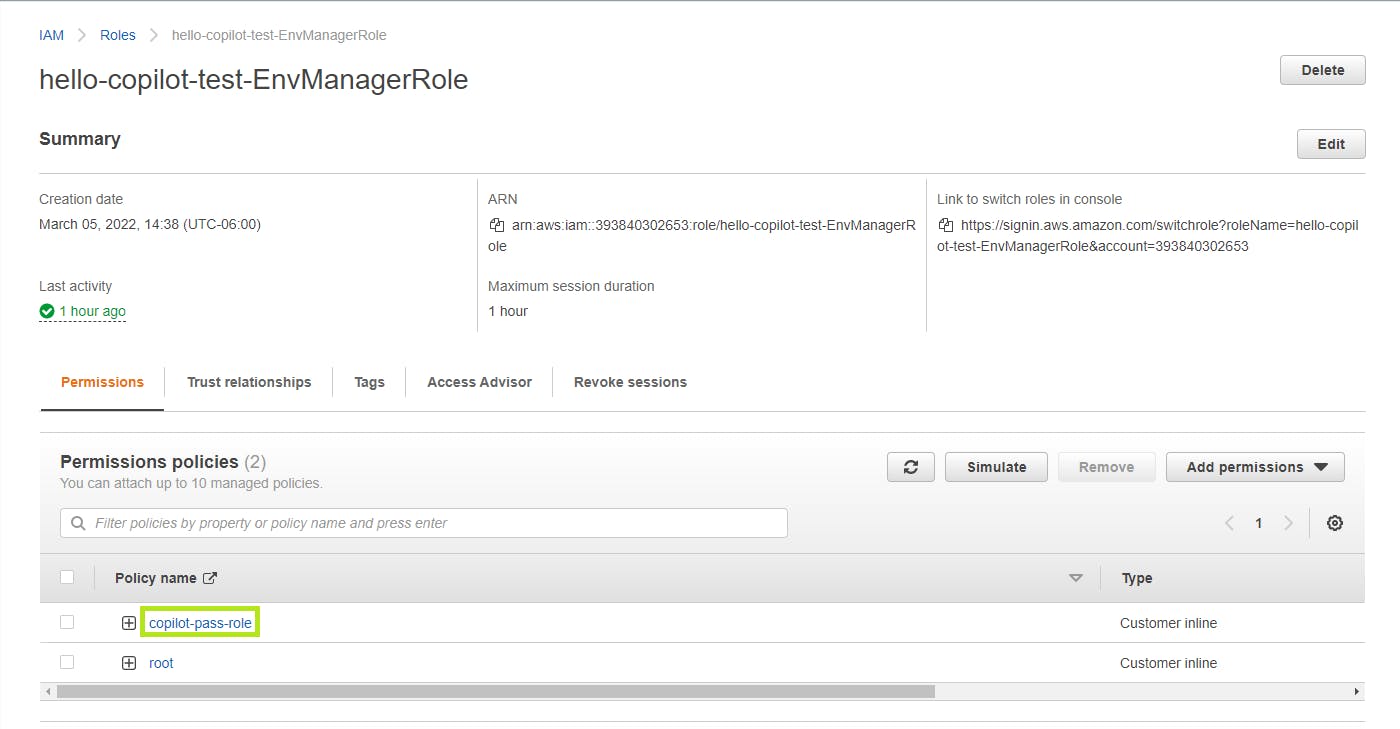
B. In the AWS console, navigate to IAM.
C. Click Roles in the left panel and select the hello-copilot-test-EnvManagerRole.
D. Add an inline policy for the role with the JSON below, replacing "account" with your AWS account number. Name the policy copilot-pass-role.
E. Return to #5 above to retry the deployment.
{
 "Version": "2012-10-17",
 "Statement": [{
     "Effect": "Allow",
     "Action": [
         "iam:GetRole",
         "iam:PassRole"
     ],
     "Resource": "arn:aws:iam::account:role/hello-copilot-*"
 }]
}
If Copilot deployment succeeds, you'll see a final message telling you the URL you can access your service at. Note the URL. Ours was
https://cmaea2pfni.us-east-1.awsapprunner.com.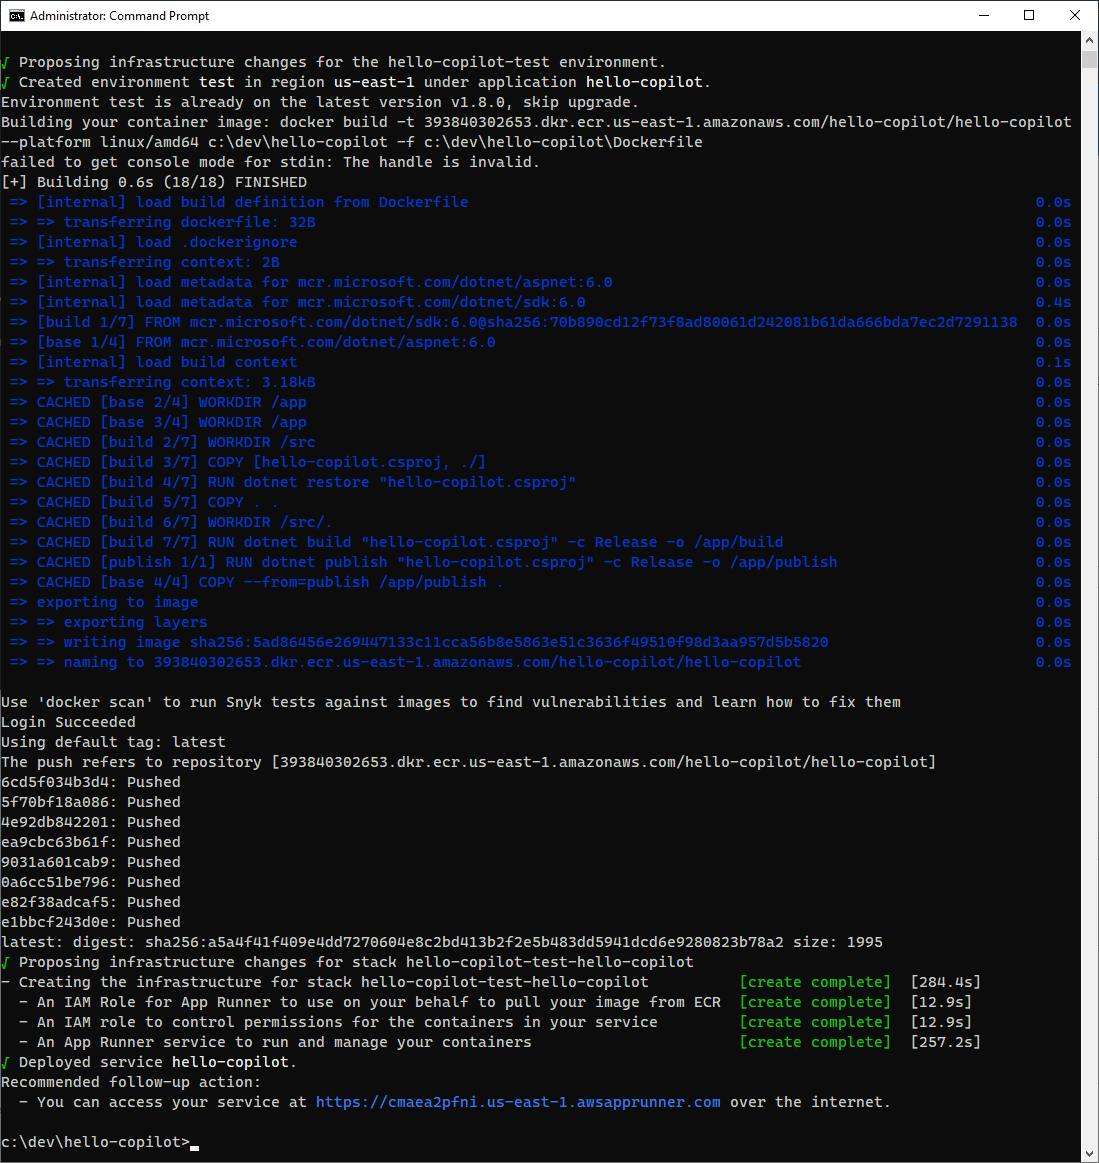
In a web browser, visit the URL with a valid application path, such as
/convert/meters/feet/50. You should get an expected response with a conversion value. Try some other conversions.
In the AWS console, set the same region that you deployed to, and navigate to AWS App Runner.
Click on Services in the left panel. You should see a service named hello-copilot-test-hello-copilot, telling you the application-environment-service (we used the same name
hello-copilotfor both application name and service name). You can see that the service is in a running state.
Click on the service to see its detail, and review what is there. Notice that everything has been set up for you, including SSL and a certificate.
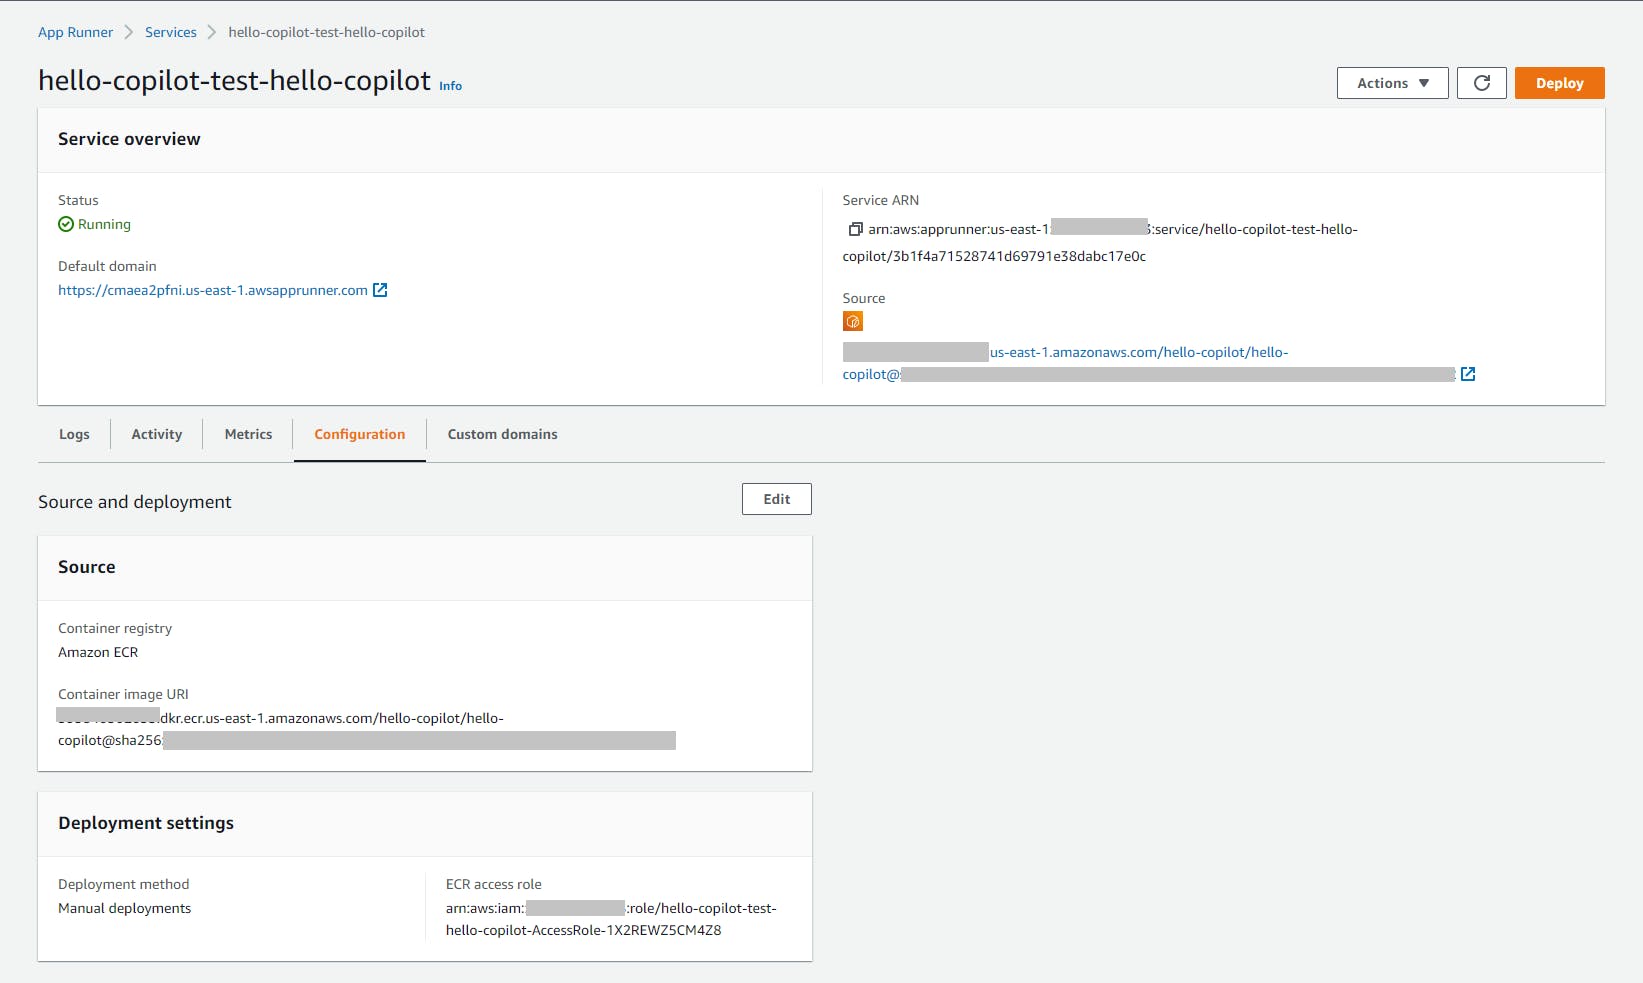
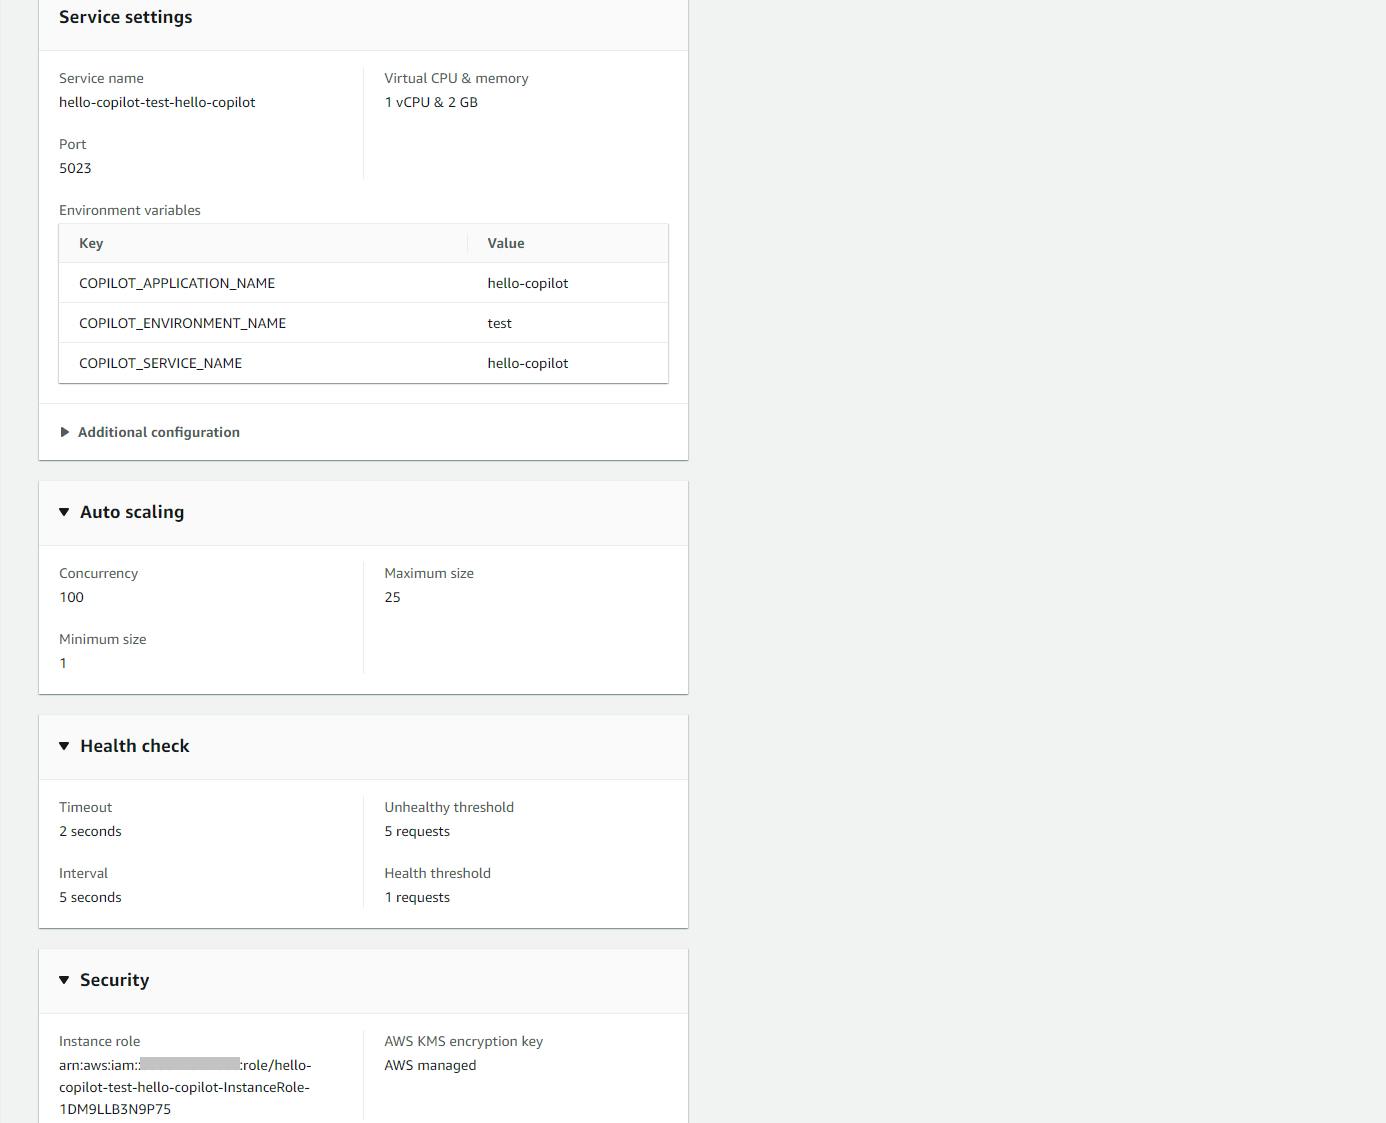
Congratulations! You have successfully containerized a .NET Web API application and deployed it to AWS App Runner from the command line using AWS Copilot.
Step 4: Update the Service
Now that we have an application with a service deployed to an environment, we can use Copilot commands to manage the application. In this step, you'll update the Web API project with additional functionality, then deploy updates with copilot.
From a command/terminal window, CD to the project folder.
Run the command copilot app ls to list applications.
hello-copilotis listed.Run the command copilot app show to show application details. You see the application, service, and environment displayed.
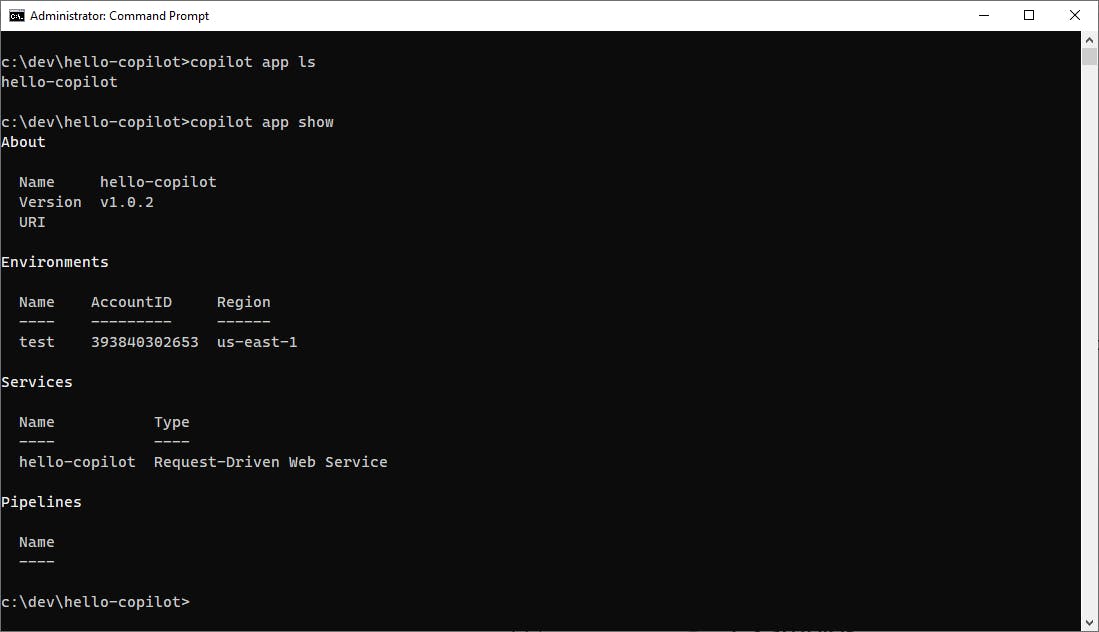
In Visual Studio, open ConvertController.cs in the code editor and add the new code at the end of this step. This will add additional actions to the controller for converting between feet and miles, with new paths
/feet/miles/{value}and/miles/feet/{value}.Issue the command copilot deploy to deploy your update. This will rebuild your docker container (which is much faster the second time around) and re-deploy your service to AWS App Runner in our Test environment.
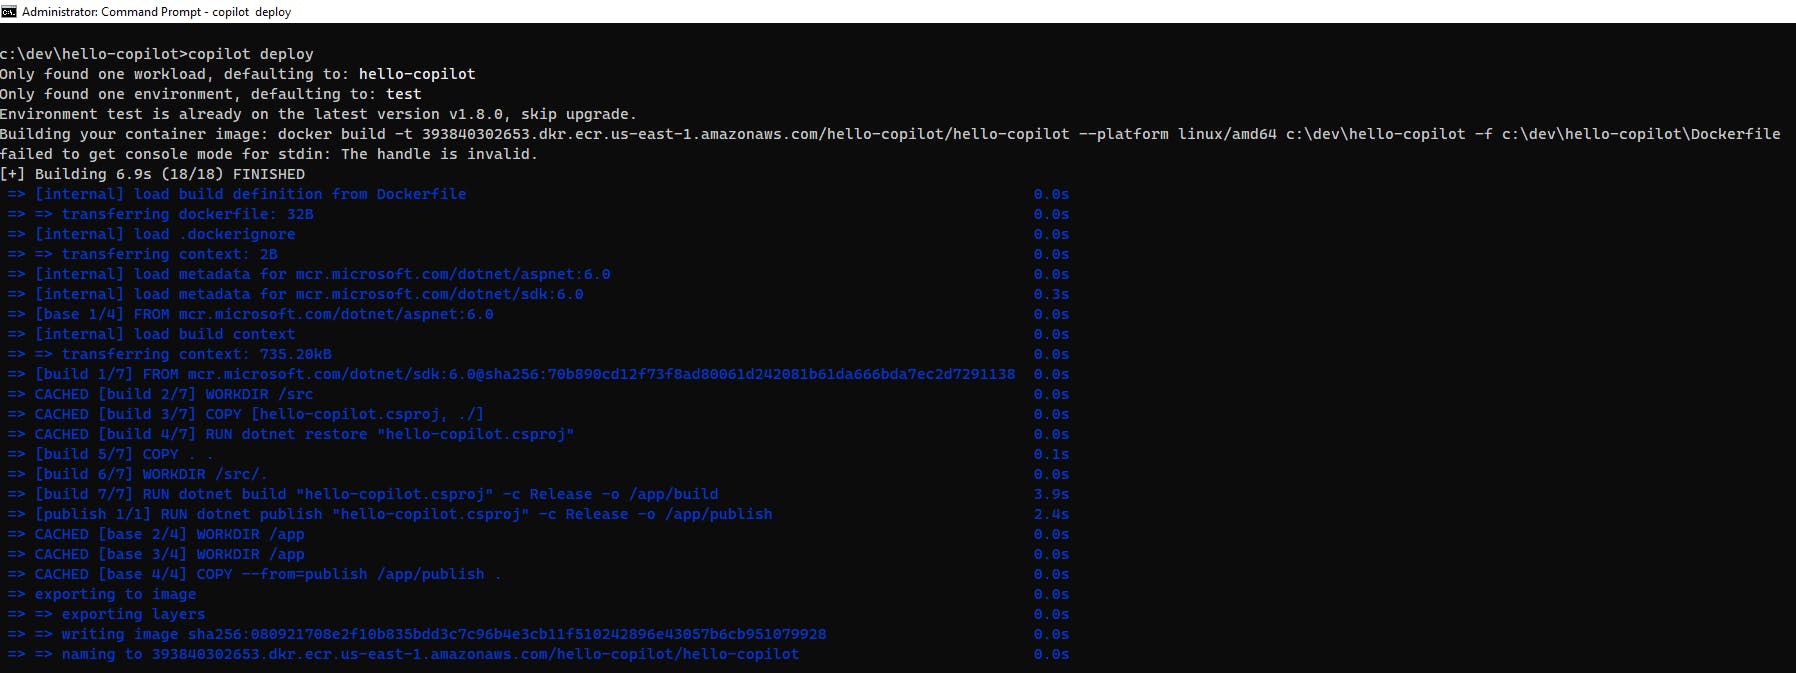
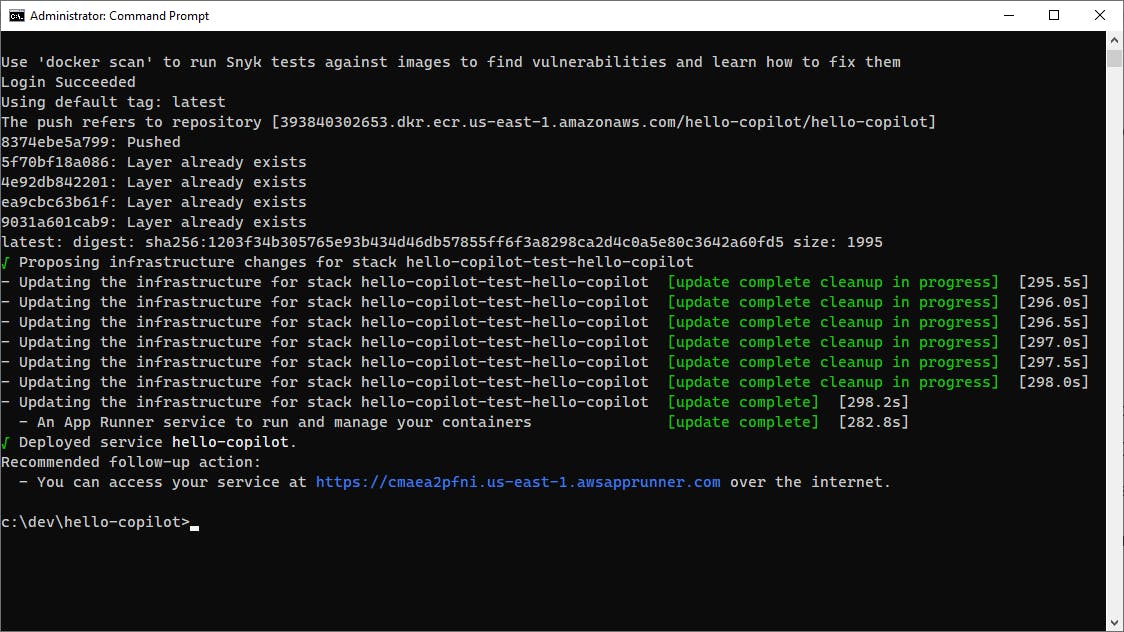
Wait for the deployment to complete. Your updated container will be deployed to Amazon ECR and the AWS App Runner service will now use that. You should see a confirming message that your updated service can be accessed at the same URL as in Step 3.
Browse to your URL with a new path such as
/miles/feet/1and confirm the new functionality is active. You've now both deployed and updated a service using AWS Copilot.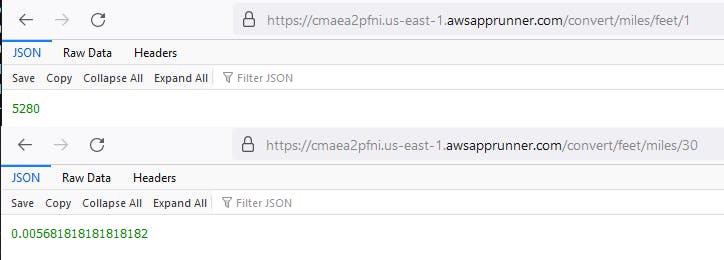
ConvertController.cs
...
    #region Feet to Miles and Miles to Feet

    [HttpGet("feet/miles/{value:double}")]
    public double FeetMiles(double value) { return value / 5280.0; }

    [HttpGet("miles/feet/{value:double}")]
    public double MilesFeet(double value) { return value * 5280.0; }

    #endregion
}
Step 5: Shut it Down
When you are done working with this tutorial, remove the hello-copilot application to avoid ongoing AWS charges. Just as Copilot made deployment easy, deleting is simply a matter of running a command.
Open a command/terminal window and CD to the project folder.
Run the copilot app delete command to delete the application. Affirm the confirmation prompt and wait for removal.

Wait for the application delete to complete.

In the AWS console, navigate to AWS App Runner and confirm you no longer see the hello-copilot service deployed.
Where to Go From Here
AWS Copilot gives you a commanding lead in simplified deployment: it makes it easy to deploy and manage your .NET containers on AWS compute services, with simple commands and a guided experience. In this tutorial, you learned how to deploy a containerized .NET application to AWS App Runner using the AWS Copilot CLI. With different responses, you could just as easily have deployed to AWS Fargate on Amazon ECS. You then updated your Web API service and deployed an update with Copilot.
We did not cover all aspects of Copilot. We only worked with a single service, and only used a handful of Copilot's many commands. We deployed to AWS App Runner but not to AWS Fargate on Amazon ECS. Two Copilot concepts you will want to learn more about are jobs and pipelines. To gain proficiency with Copilot, read the documentation and experiment with more complex applications.
Further Reading
AWS Documentation
Getting started with Amazon ECS using AWS Copilot
Videos
How to deploy a .NET Application to Amazon Elastic Container Service (Amazon ECS) with AWS Copilot
Blogs
AWS Copilot CLI Guides and Resources by Ignacio Fuentes
Deploy .NET 6 API to AWS App Runner using AWS Copilot by Sivamuthu Kumar
