


Table of contents
- This episode: Amazon Comprehend. In this Hello, Cloud blog series, we're covering the basics of AWS cloud services for newcomers who are .NET developers. If you love C# but are new to AWS, or to this particular service, this should give you a jumpstart.
- Amazon Comprehend: What is it, and why use It?
- Our Hello, Comprehend Project
- One-time Setup
- Where to Go From Here
- Further Reading
This episode: Amazon Comprehend. In this Hello, Cloud blog series, we're covering the basics of AWS cloud services for newcomers who are .NET developers. If you love C# but are new to AWS, or to this particular service, this should give you a jumpstart.
In this post we'll introduce Amazon Comprehend and use it in a "Hello, Cloud" .NET program to perform Natural Language Processing. We'll do this step-by-step, making no assumptions other than familiarity with C# and Visual Studio. We're using Visual Studio 2022 and .NET 6.
Amazon Comprehend: What is it, and why use It?
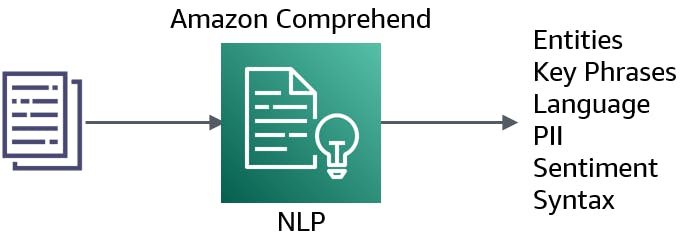
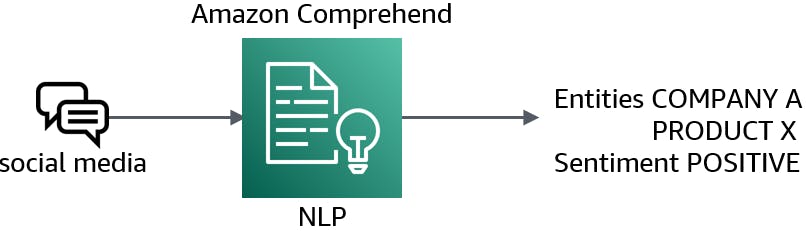
Amazon Comprehend (hereafter "Comprehend") is a service that analyzes text for Natural Language Processing (NLP). As AWS puts it, "Derive and understand valuable insights from text within documents." With Comprehend, you can gain insights from such inputs as customer support issues, product reviews, social media posts, and news articles.
Comprehend can identify entities, key phrases, language, Personally Identifiable Information (PII), sentiment, and syntax from text. The service supports English, French, German, Italian, Portuguese, and Spanish text.
Comprehend is a machine learning service. You can leverage existing, pre-trained models. For example, Comprehend can understand complex medical information. You can also choose to train Comprehend with your document data, which builds customized NLP models through automated machine learning.
Amazon Comprehend combines well with other AWS services. For example, you can use Amazon Textract to extract text from PDF documents and images, then feed the text to Comprehend.
Our Hello, Comprehend Project
After getting familiar with Amazon Comprehend in the AWS Console, you'll write a .NET 6 program that invokes Comprehend to analyze text to 1) analyze sentiment, 2) detect entities, and 3) detect PII and redact the personal information from the text.
We'll then go on to a second program that retrieves tweets on a topic from Twitter, performs sentiment analysis, and generates a web sentiment analysis report.
One-time Setup
To experiment with Amazon Comprehend and .NET, you will need:
- An AWS account, and an understanding of what is included in the AWS Free Tier.
- Microsoft Visual Studio 2022. If you're using an older version of Visual Studio you won't be able to use .NET 6.
- AWS Toolkit for Visual Studio. Configure the toolkit to access your AWS account and create an IAM user.
Step 1: Set Permissions for the AWS Toolkit User
In order to perform this tutorial, your AWS Toolkit User / default AWS profile needs the necessary permissions for Amazon Comprehend operations. In this step, you'll update permissions for your AWS Toolkit for Visual Studio user.
Important: You should always follow the principle of least privilege when it comes to security. This blog series assumes you are working in your own developer account for learning purposes and not working with anything production-related. If you're using an organization-owned AWS account, you should coordinate with your security principal on IAM settings.
- Sign in to the AWS console. Select the region at top right you want to be working in. We're using US-West-2 (Oregon).
Not all regions support Amazon Comprehend, so check availability here.
Navigate to the Identity and Access Management (IAM) area of the AWS Console. You can enter iam in the search box to find it.
Click Users on the left panel and select the username you use with the AWS Toolkit for Visual Studio (you created this user when you installed and configured the toolkit).
If not already assigned, add the built-in PowerUserAccess permission. The PowerUserAccess permission provides developers full access to AWS services and resources, but does not allow management of users and groups.
Your AWS Toolkit for Visual Studio user now has the permissions it needs to perform Comprehend operations.
Step 2: Use Amazon Comprehend in the AWS Console
In this step, you'll get some experience working with Comprehend interactively.
Go to the AWS Console and select a region nearest you that supports Amazon Comprehend. We're using Oregon.
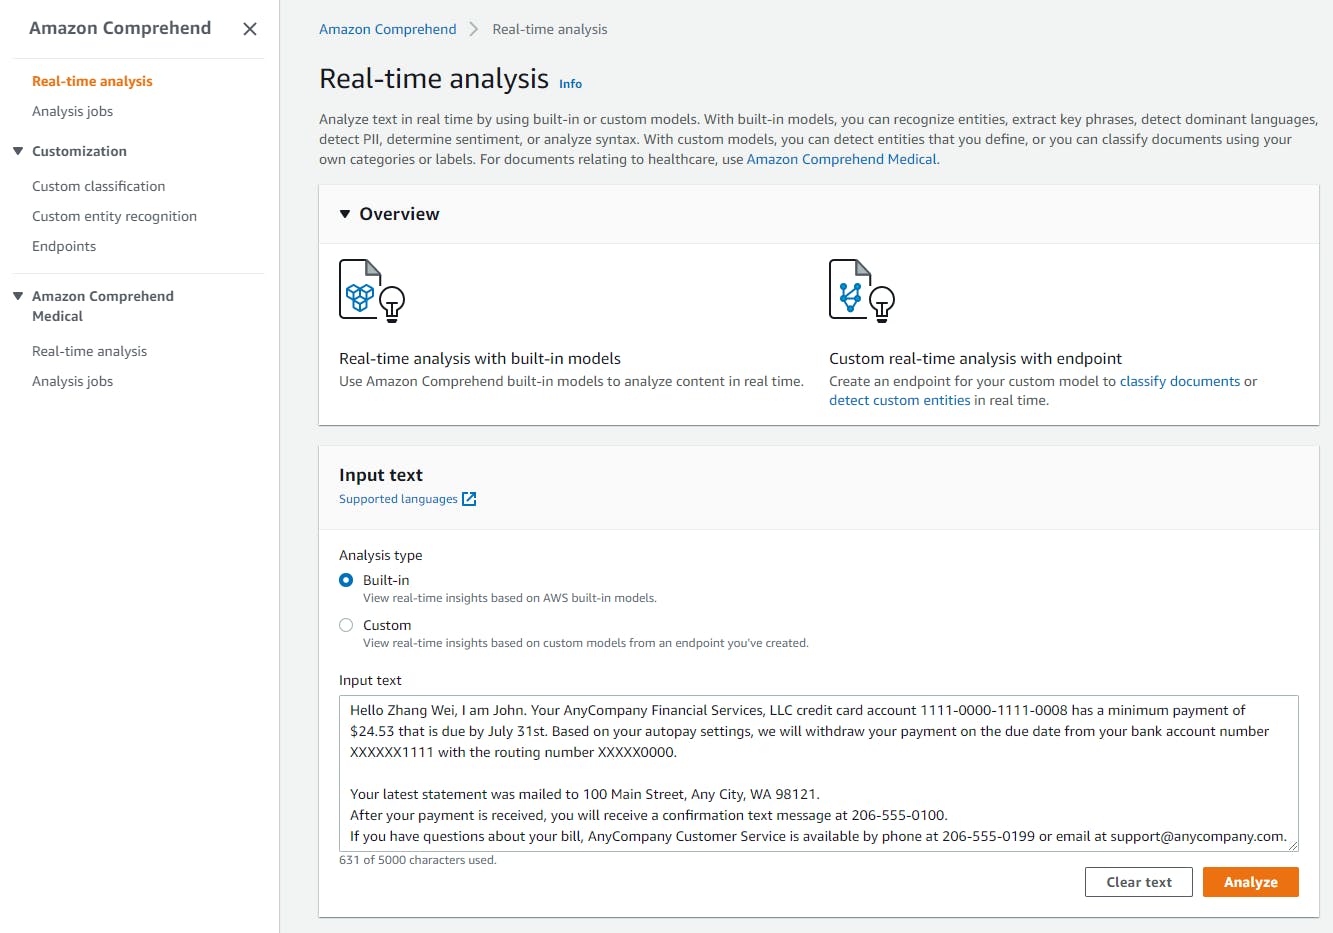
In the left panel, click Real-time analysis. A form appears with sample text and insights. Take a moment to review the input text and insights.
In the Input text panel, replace the text with some text you want to analyze, such as a product review, customer incident, or social media post. Then click Analyze.
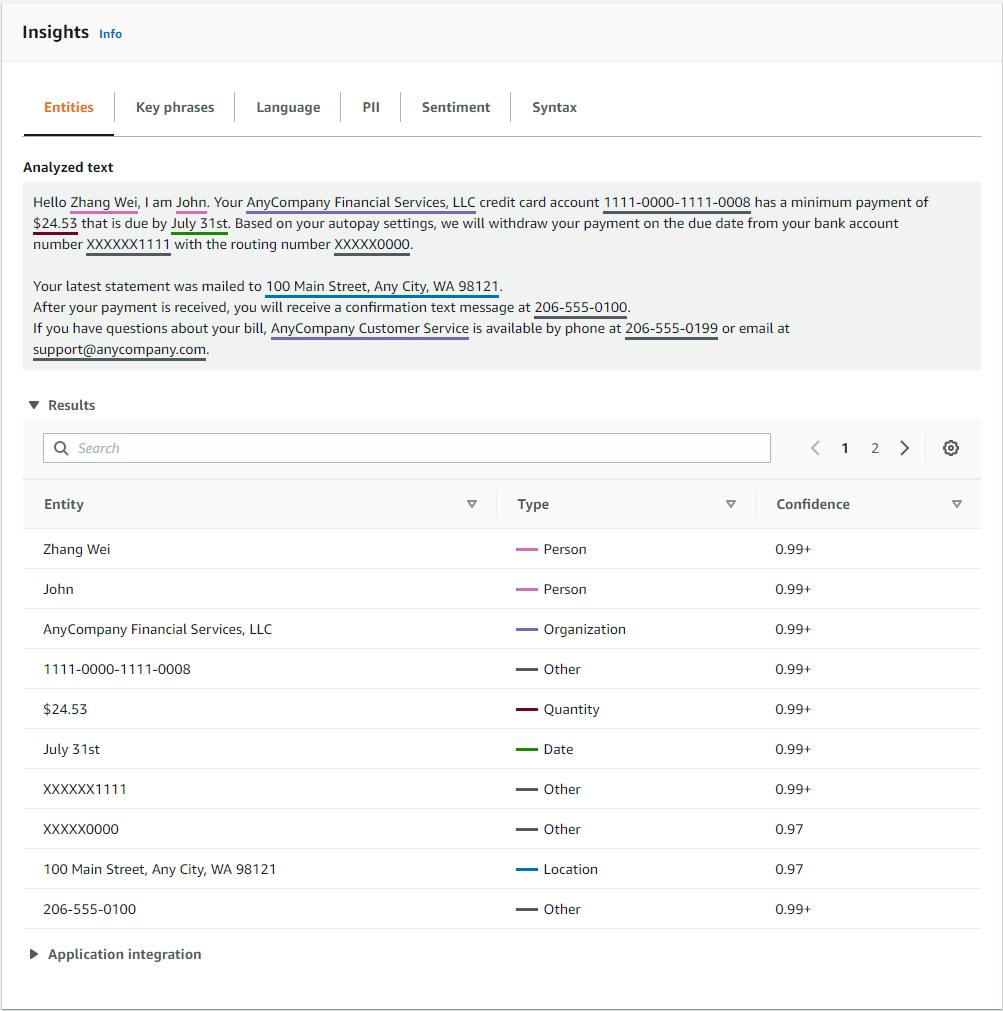
On the Insights panel, note what Comprehend determined:
a. The Entities tab lists the entities that Comprehend found in the text.
b. The Key phrases tab highlights the key phrases in the text.
c. The Language tab identifies the language, with a confidence rating.
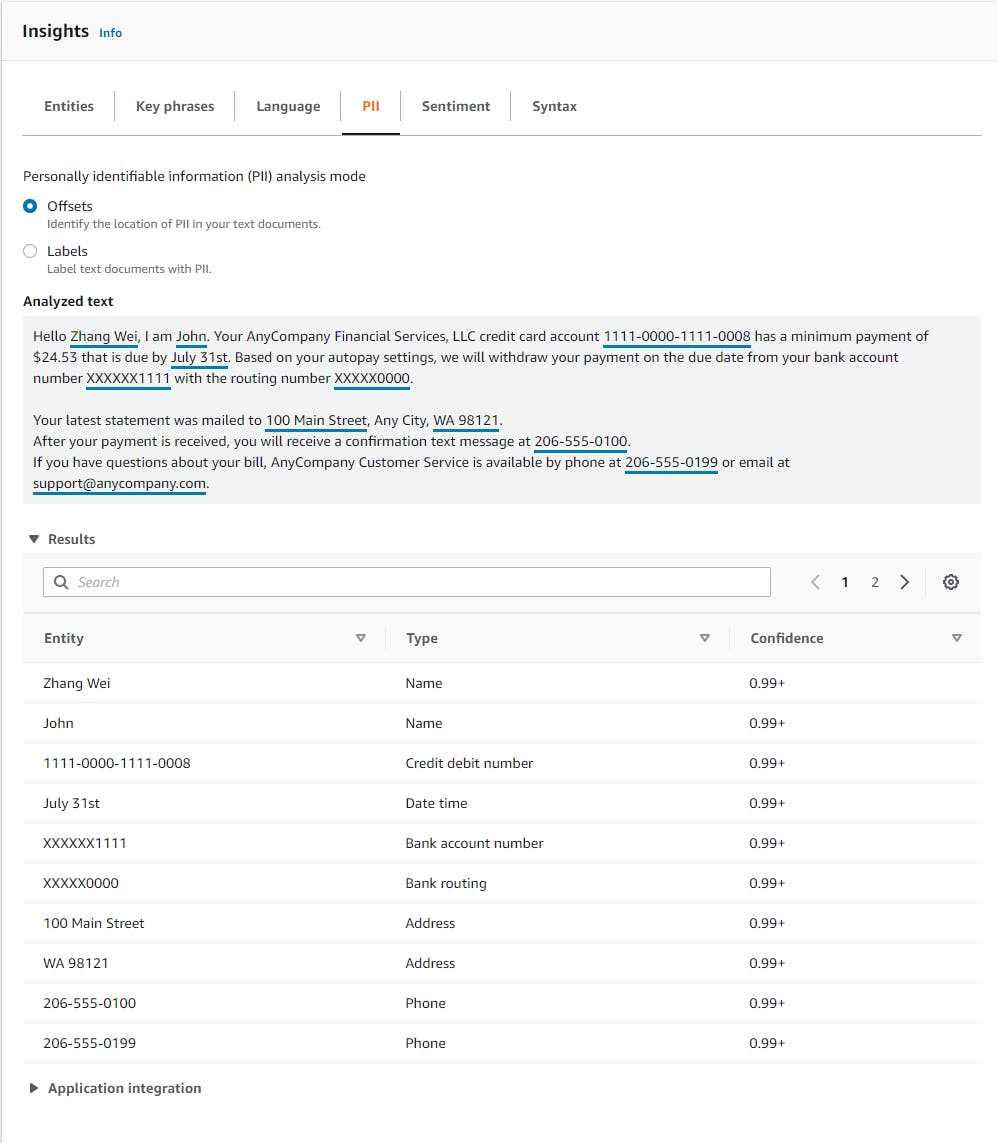
d. The PII tab highlights personally identifiable information in the text.
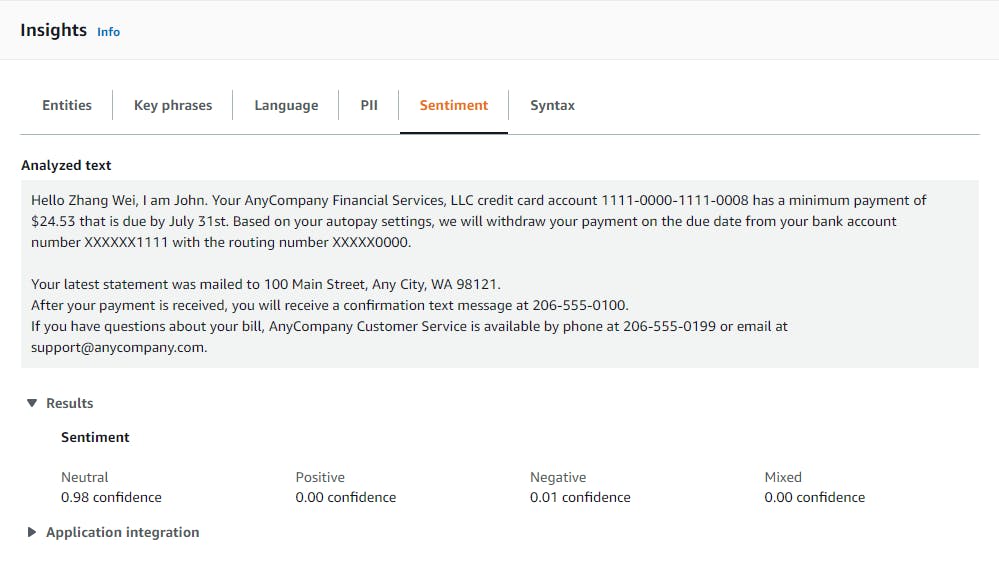
e. The Sentiment tab rates the positive and/or negative sentiment in the text.
f. The Syntax tab identifies the parts of speech for words and phrases.
Try entering and analyzing different text inputs to get a sense for what Comprehend can tell you.
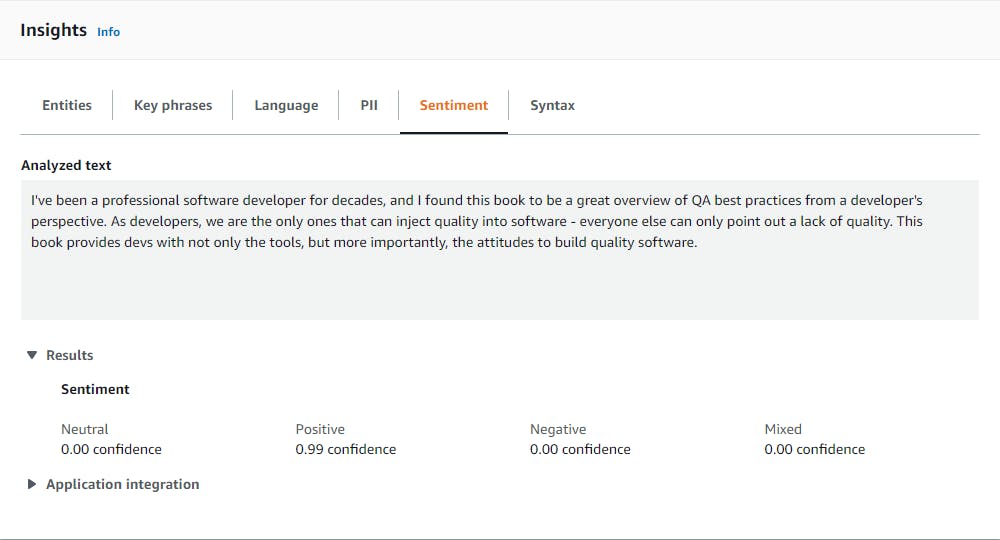
Here's an example of an overwhelmingly positive book review:
"I've been a professional software developer for decades, and I found this book to be a great overview of QA best practices from a developer's perspective. As developers, we are the only ones that can inject quality into software - everyone else can only point out a lack of quality. This book provides devs with not only the tools, but more importantly, the attitudes to build quality software. "
Comprehend rated this text Positive with 99% confidence.
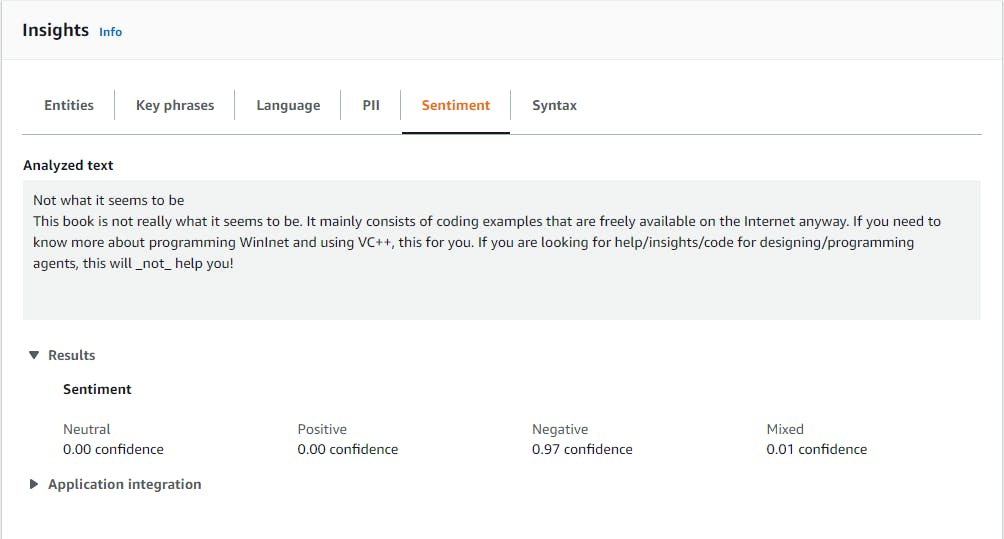
Next, let's try a negative book review:
"Not what it seems to be This book is not really what it seems to be. It mainly consists of coding examples that are freely available on the Internet anyway. If you need to know more about programming WinInet and using VC++, this for you. If you are looking for help/insights/code for designing/programming agents, this will not help you!"
Comprehend rated this second review Negative with 97% confidence.
Of course, some text might include positive and negative comments, and Comprehend can find both. Sentiment can be evaluated as positive, negative, mixed, or neutral.
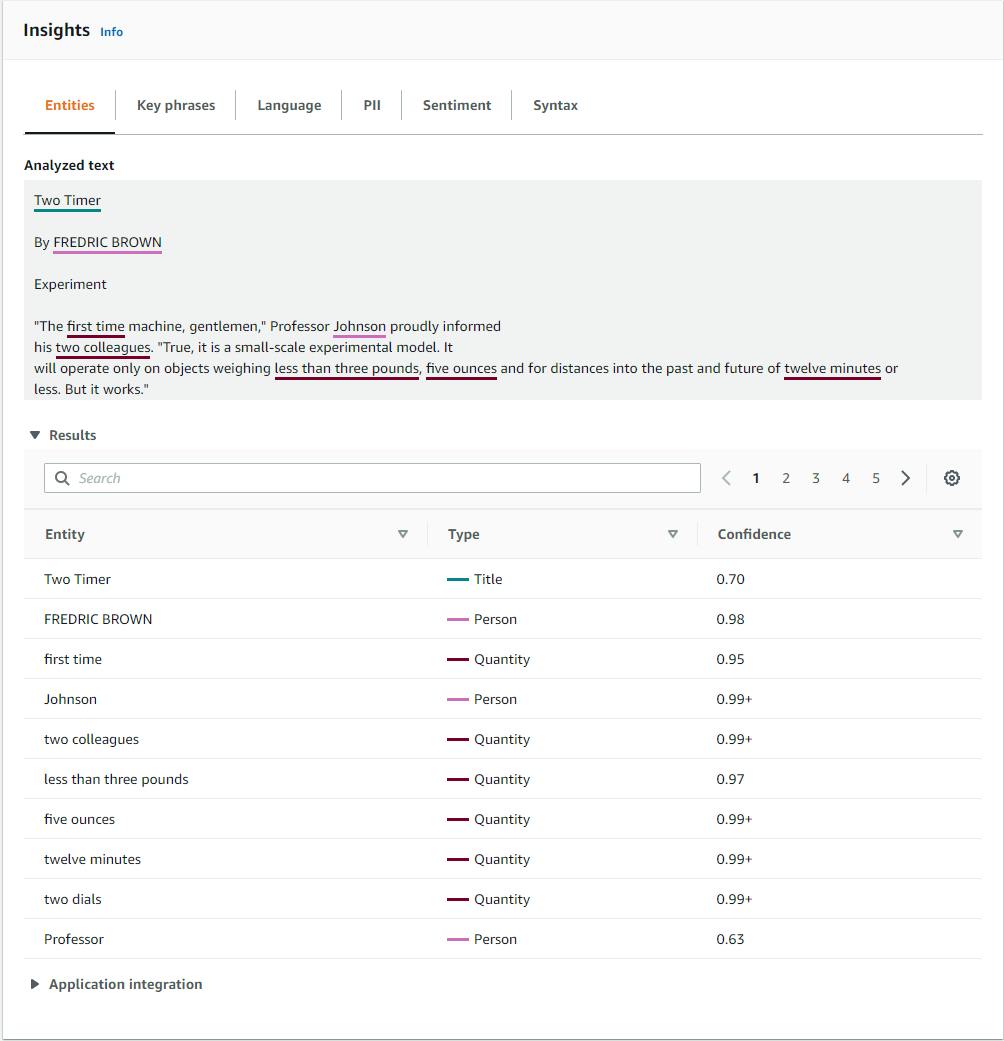
Let's feed Comprehend something larger: a public-domain short story by Fredric Brown from Project Gutenberg. The entities in the story are readily identified.
Now that we understand what Amazon Comprehend can do, let's use it programmatically.
Step 3: Create a .NET Program that Uses Comprehend
In this step, we'll create a .NET console program and use it to invoke Comprehend on various text files.
Open a command/terminal window and CD to a development folder.
Enter the dotnet new command below to create a .NET 6 console program.
dotnet new console -n hello-comprehend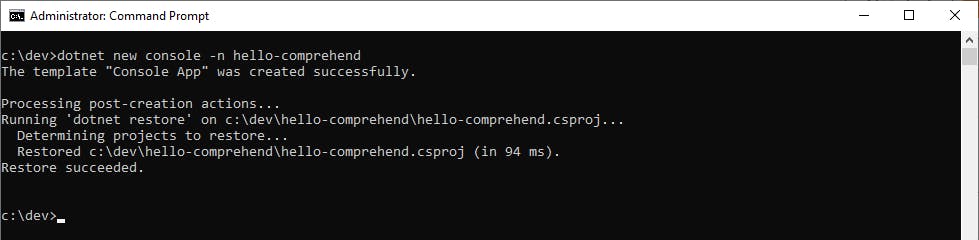
Launch Visual Studio and open the hello-comprehend project.
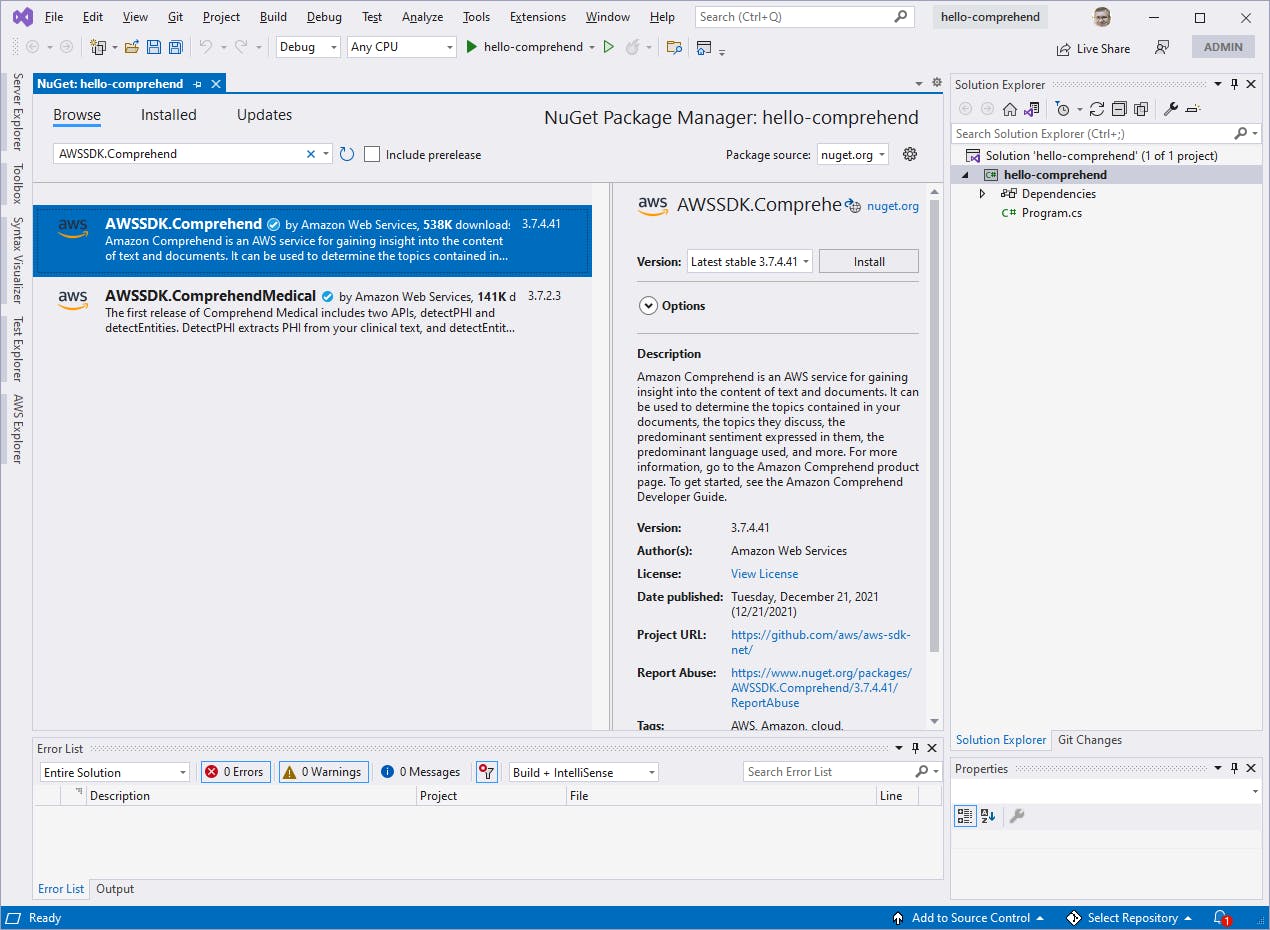
In Solution Explorer, right-click the hello-comprehend project and select Manage Nuget Packages.... Find and install the AWSSDK.Comprehend package.
Replace Program.cs with the code at the end of this step. Set region to the Amazon region code for your region. For example, for the region of Oregon we specify RegionEndpoint.USWest2.
Save your changes and build the program.
Program.cs
using Amazon;
using Amazon.Comprehend;
using Amazon.Comprehend.Model;
using System.Text;

var region = RegionEndpoint.USWest2;

if (args.Length == 1)
{
    var filename = args[0];
    var analysisType = (args.Length > 1) ? args[1] : "text";

    var client = new AmazonComprehendClient(region);

    Console.WriteLine($"Processing file {filename} with Amazon Comprehend");

    var text = File.ReadAllText(filename);

    var request = new DetectSentimentRequest()
    {
        Text = text,
        LanguageCode = LanguageCode.En
    };

    Console.WriteLine("--- input text:");
    Console.WriteLine(text);
    Console.WriteLine();

    // sentiment analysis

    var response = await client.DetectSentimentAsync(request);

    Console.WriteLine($"Sentiment: {response.Sentiment} (Positive: {response.SentimentScore.Positive:N}% | Negative: {response.SentimentScore.Negative:N}% | Neutral: {response.SentimentScore.Neutral:N}% | Mixed: {response.SentimentScore.Mixed:N}%)");

    var requestEntities = new DetectEntitiesRequest()
    {
        Text = File.ReadAllText(filename),
        LanguageCode = LanguageCode.En
    };

    // detect entities

    var responseEntities = await client.DetectEntitiesAsync(requestEntities);

    foreach(var entity in responseEntities.Entities)
    {
        Console.WriteLine($"entity Type: {entity.Type.Value} | Text: {entity.Text}");
    }

    // detect personally identifiable information (PII)

    var requestPII = new DetectPiiEntitiesRequest()
    {
        Text = File.ReadAllText(filename),
        LanguageCode = LanguageCode.En
    };

    var responsePII = await client.DetectPiiEntitiesAsync(requestPII);

    if (responsePII.Entities.Count > 0)
    {
        var redactedText = new StringBuilder(requestPII.Text);

        foreach (var entity in responsePII.Entities)
        {
            Console.WriteLine($"PII entity Type: {entity.Type.Value} | Text: {entity.BeginOffset}-{entity.EndOffset}");
            for (var pos = entity.BeginOffset; pos < entity.EndOffset; pos++)
            {
                redactedText[pos] = 'X';
            }
        }
        Console.WriteLine();
        Console.WriteLine($"--- redacted text:");
        Console.WriteLine(redactedText);
    }

    Environment.Exit(0);
}

Console.WriteLine("?Invalid parameter - command line format: dotnet run -- <file>");
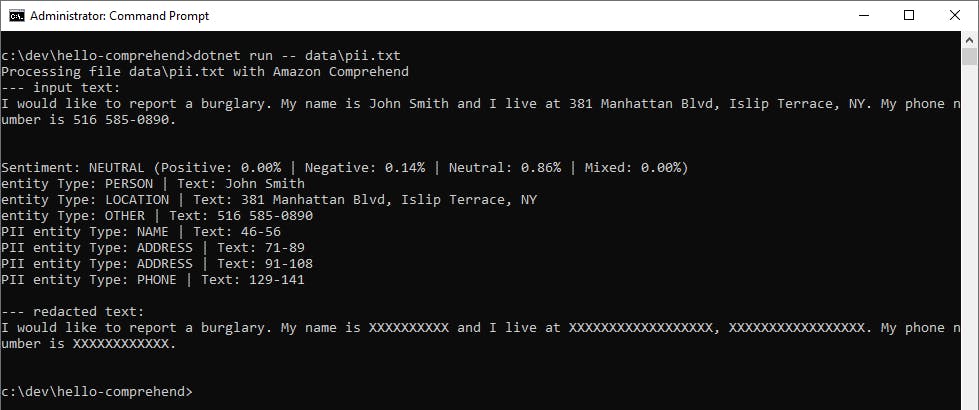
The code is simple to understand. We use an AmazonComprehend client to communicate with Amazon Comprehend. There are asynchronous calls in the SDK for various kinds of analysis. We used DetectSentimentAsync for sentiment analysis, DetectEntitiesAsync to detect entities, and DetectPiiEntitiesAsync to detect personally identifiable information (PII). In each case we displayed the results to the console with a foreach loop. When PII is detected, we redact those fields from the text and display it.
Step 4: Run the Program
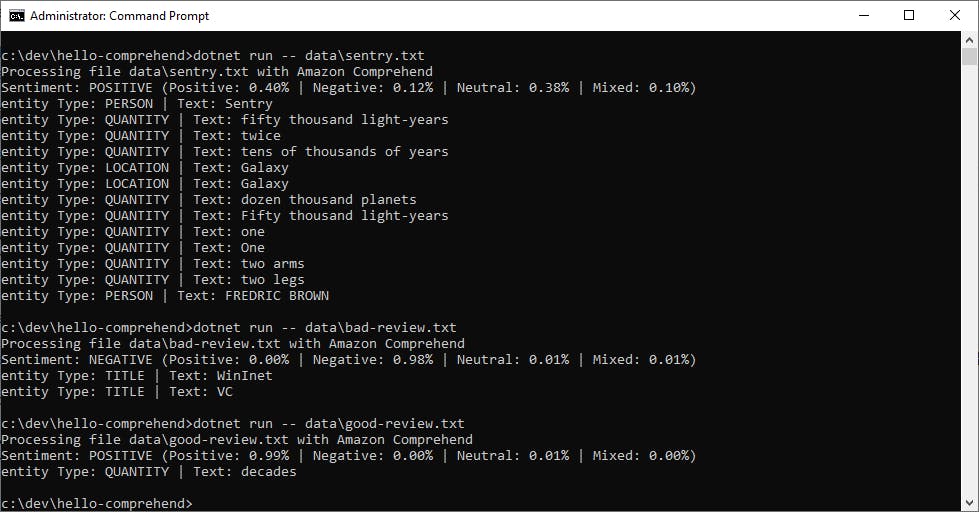
In this step, we'll run our program. Our program expects a filename on the command line. A sentiment analysis and entity detection are performed, with results displayed on the console.
Run the command with a text file and note the results.
Run the command again and try different text files.
Now, run the program against a text file that contains some Personally Identifiable Information. The PII entities should be displayed, along with a version of the text with those entities redacted. The code uses the beginning and ending positions of the discovered PII entities to replace them with "X" characters in the text string.
Congratulations, you've performed Natural Language Processing of text using Amazon Comprehend!
Step 5: Write a Twitter Sentiment Analysis Program
If you'd like to go further with an actual application for Amazon Comprehend, follow Steps 5 and 6. In this step, you'll create a second program that queries Twitter on a topic and creates a sentiment analysis web report. With this sample, or any code you write for the Twitter API, you'll want to be sure to follow the Twitter developer agreement and policy.
You'll need Twitter API credentials.
a. If you don't already have one, sign up for a Twitter developer account.
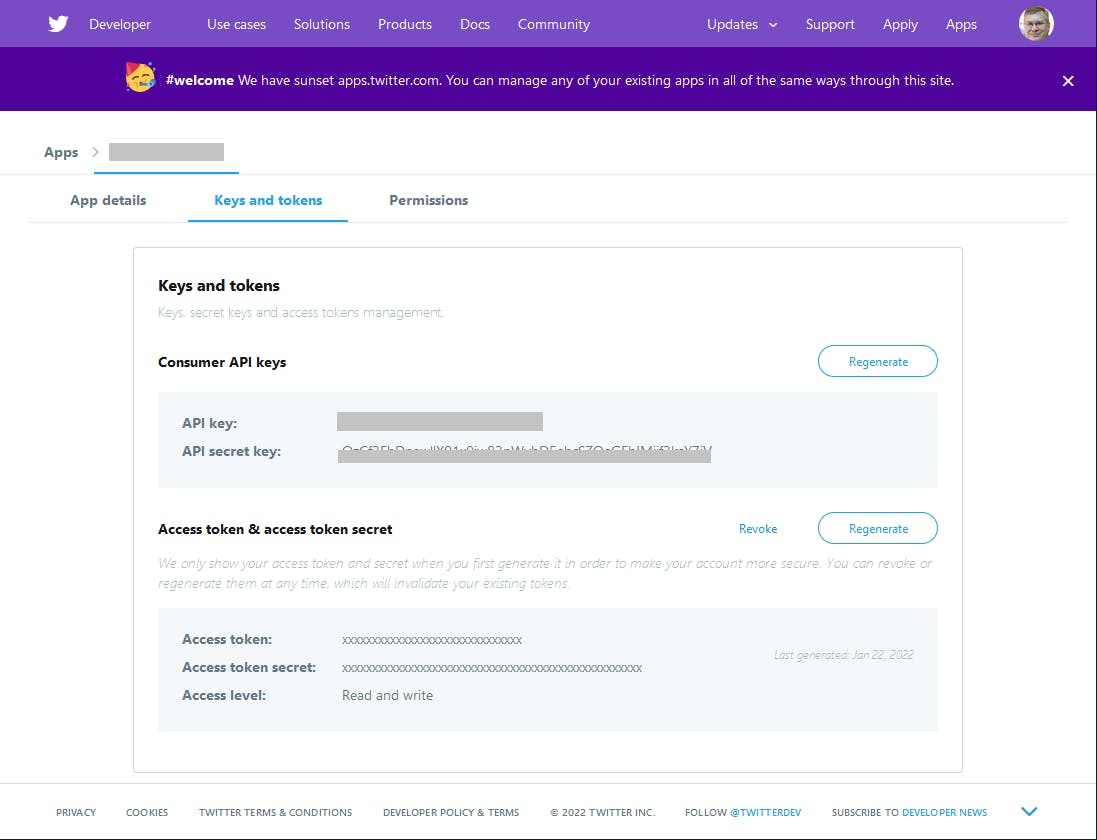
b. Create a project and record your Twitter API credentials, an API Key and an API Secret Key.
c. Generate a token on the Twitter API portal and record your Token and Token secret.
In a command/terminal window, CD to a development folder and enter a dotnet new command to create a new C# console application named comprehend-twitter-sentiment.
dotnet new console -n comprehend-twitter-sentiment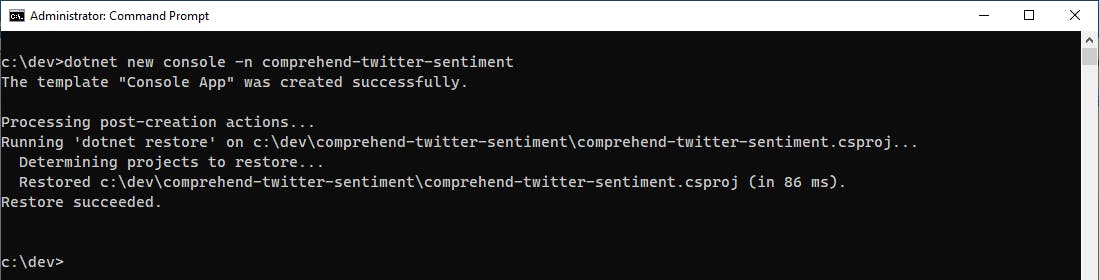
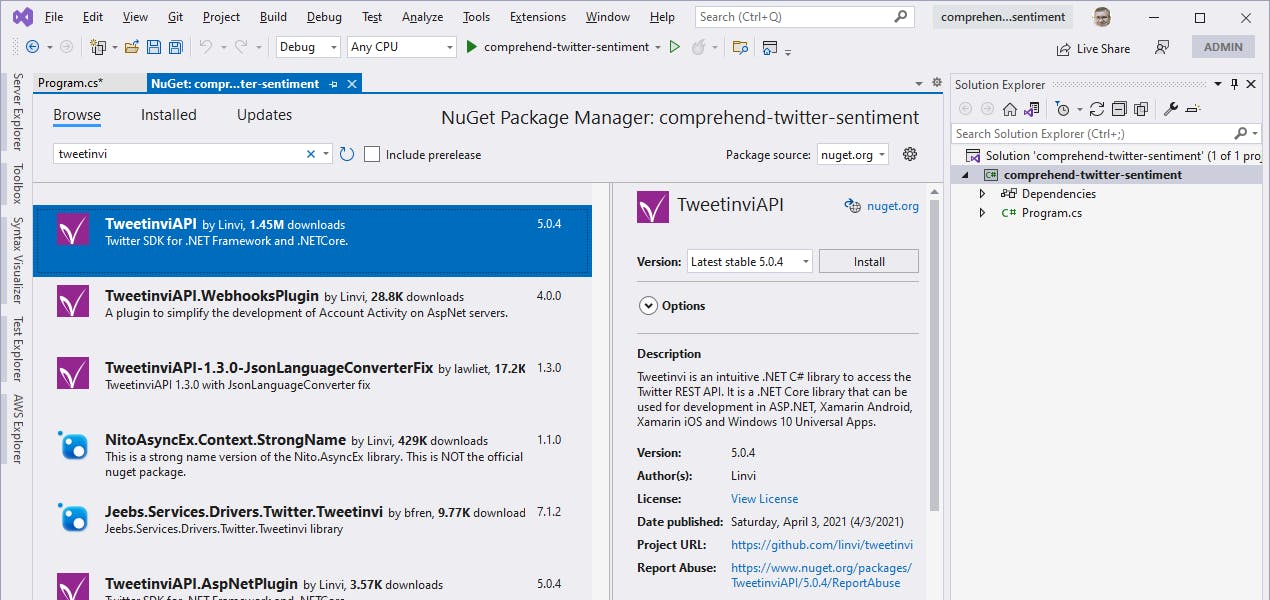
Open the comprehend-twitter-sentiment project in Visual Studio.
In Solution Explorer, right-click the comprehend-twitter-sentiment project and select Manage NuGet Packages. Find and add the TweetinviAPI package and the AWSSDK.Comprehend package.
Open Program.cs in the code editor and replace it with the code below at the end of this step. Then make these replacements:
a. Replace [twitter-api-key] and [twitter-api-secret] with your Twitter API key and secret key.
b. Replace [twitter-access-token] and [twitter-access-token-secret] with your Twitter project token and token secret.
c. Set AWSRegion to the Amazon region code for your region. For example, for the region of Oregon we specify RegionEndpoint.USWest2.
Save your changes and build the program.
Program.cs
using Amazon;
using Amazon.Comprehend;
using Amazon.Comprehend.Model;
using Tweetinvi;
using Tweetinvi.Models;
using System.Diagnostics;
namespace comprehend_twitter_sentiment;
class Program
{
const string API_KEY = "[twitter-api-key]";
const string API_SECRET = "[twitter-api-secret]";
const string ACCESS_TOKEN = "[twitter-access-token]";
const string ACCESS_TOKEN_SECRET = "[twitter-access-token-secret]";
const int MAX_TWEETS_TO_DISPLAY = 15;
static RegionEndpoint AWSRegion = RegionEndpoint.USWest2;
public static async Task Main(string[] args)
{
if (args.Length < 1)
{
Console.WriteLine("Usage: dotnet run -- <topic>");
Environment.Exit(1);
}
// Retrieve tweets
var topic = args[0];
Console.WriteLine($"Searching Twitter for tweets on {topic}");
var twitterClient = new TwitterClient(API_KEY, API_SECRET, ACCESS_TOKEN, ACCESS_TOKEN_SECRET);
ITweet[] tweets = await twitterClient.Search.SearchTweetsAsync(topic);
// Analyze tweet sentiment
Console.WriteLine($"Analzying sentiment with Amazon Comprehend");
var client = new AmazonComprehendClient(AWSRegion);
var sentiment = new Dictionary<long, string>();
int positive = 0, negative = 0, mixed = 0, neutral = 0;
foreach (var tweet in tweets)
{
if (tweet.RetweetedTweet == null)
{
var request = new DetectSentimentRequest()
{
Text = tweet.FullText,
LanguageCode = LanguageCode.En
};
var response = await client.DetectSentimentAsync(request);
sentiment.Add(tweet.Id, response.Sentiment);
switch(response.Sentiment)
{
case "POSITIVE":
positive++;
break;
case "NEGATIVE":
negative++;
break;
case "MIXED":
mixed++;
break;
case "NEUTRAL":
neutral++;
break;
}
}
}
// generate sentiment report web page
var filename = "tweets.html";
Console.WriteLine($"Generating sentiment report {filename}");
using (TextWriter tw = File.CreateText(filename))
{
tw.WriteLine($@"<html>
<head>
<title>Twitter Sentiment Analysis: #{topic}</title>
<style>body {{ font-family: Helvetica, Arial; }}
td {{ padding: 10px; vertical-align: top; }}
.POSITIVE {{ background-color: limegreen; color: white; }}
.NEGATIVE {{ background-color: tomato; color: white; }}
.NEUTRAL {{ background-color: gray; color: white; }}
.MIXED {{ background-color: tan; color: white; }}
</style>
</head>
<body>
<h1>topic {topic} | positive: {positive} | negative {negative} | mixed {mixed} | neutral {neutral}</h1>
<p> </p>
<table>");
int count = 0;
int columns = 0;
foreach (var tweet in tweets)
{
if (tweet.RetweetedTweet==null && sentiment[tweet.Id] != "NEUTRAL")
{
var embedTweet = await tweet.GenerateOEmbedTweetAsync();
if (columns==0)
{
tw.WriteLine(" <tr>");
}
tw.WriteLine($@" <td class=""{sentiment[tweet.Id]}"">{sentiment[tweet.Id]}<br/>{embedTweet.HTML}</td>");
Console.Write(".");
columns++;
if (columns >=4)
{
tw.WriteLine(" </tr>");
columns = 0;
}
count++;
if (count >= MAX_TWEETS_TO_DISPLAY) break;
}
}
Console.WriteLine();
if (columns > 0)
{
tw.WriteLine(" </tr>");
columns = 0;
}
tw.WriteLine(
@" </table>
</body>
</html>");
}
var path = Path.GetFullPath(filename);
Console.WriteLine($"Opening {path} in browser");
var p = new Process();
p.StartInfo = new ProcessStartInfo(path)
{
UseShellExecute = true
};
p.Start();
}
}
Step 6: Run the Twitter Sentiment Analysis Program
In this step, you'll run the Twitter sentiment analysis program. Let's first review how the program works:
- The user will specify a topic on the command line, such as #airfryer. The program will retrieve tweets on that topic using a search of the Twitter API, via the TweetinviAPI package.
- Next, the program will feed each tweet's text to Amazon Comprehend for sentiment analysis. We track the sentiment in a dictionary.
- Lastly, the program will generate a web page report showing the positive, negative, or mixed tweets.
In order to display the tweets in accordance with Twitter developer display requirements, we fetch a Twitter-supplied HTML snippet for each tweet. The code has a limit on how many of these to perform, so as not to exhaust the Twitter API rate limit. We don't display the neutral tweets, but they are accounted for in the counts at the top of the report.
We'll start with a popular topic, air fryers, then move onto some more controversial topics.
In a command/terminal window, CD to the project location and run the command dotnet run -- #airfryer. If your Twitter developer account has been set up and the API keys and access tokens are correct, the program should retrieve tweets, analyze sentiment, and generate a web report.
The web report should open in a browser. At top, you see the number of positive/negative/mixed/neutral sentiment. In our example, 52 of the 81 tweets were neutral and 27 positive, with only 1 mixed and none negative.
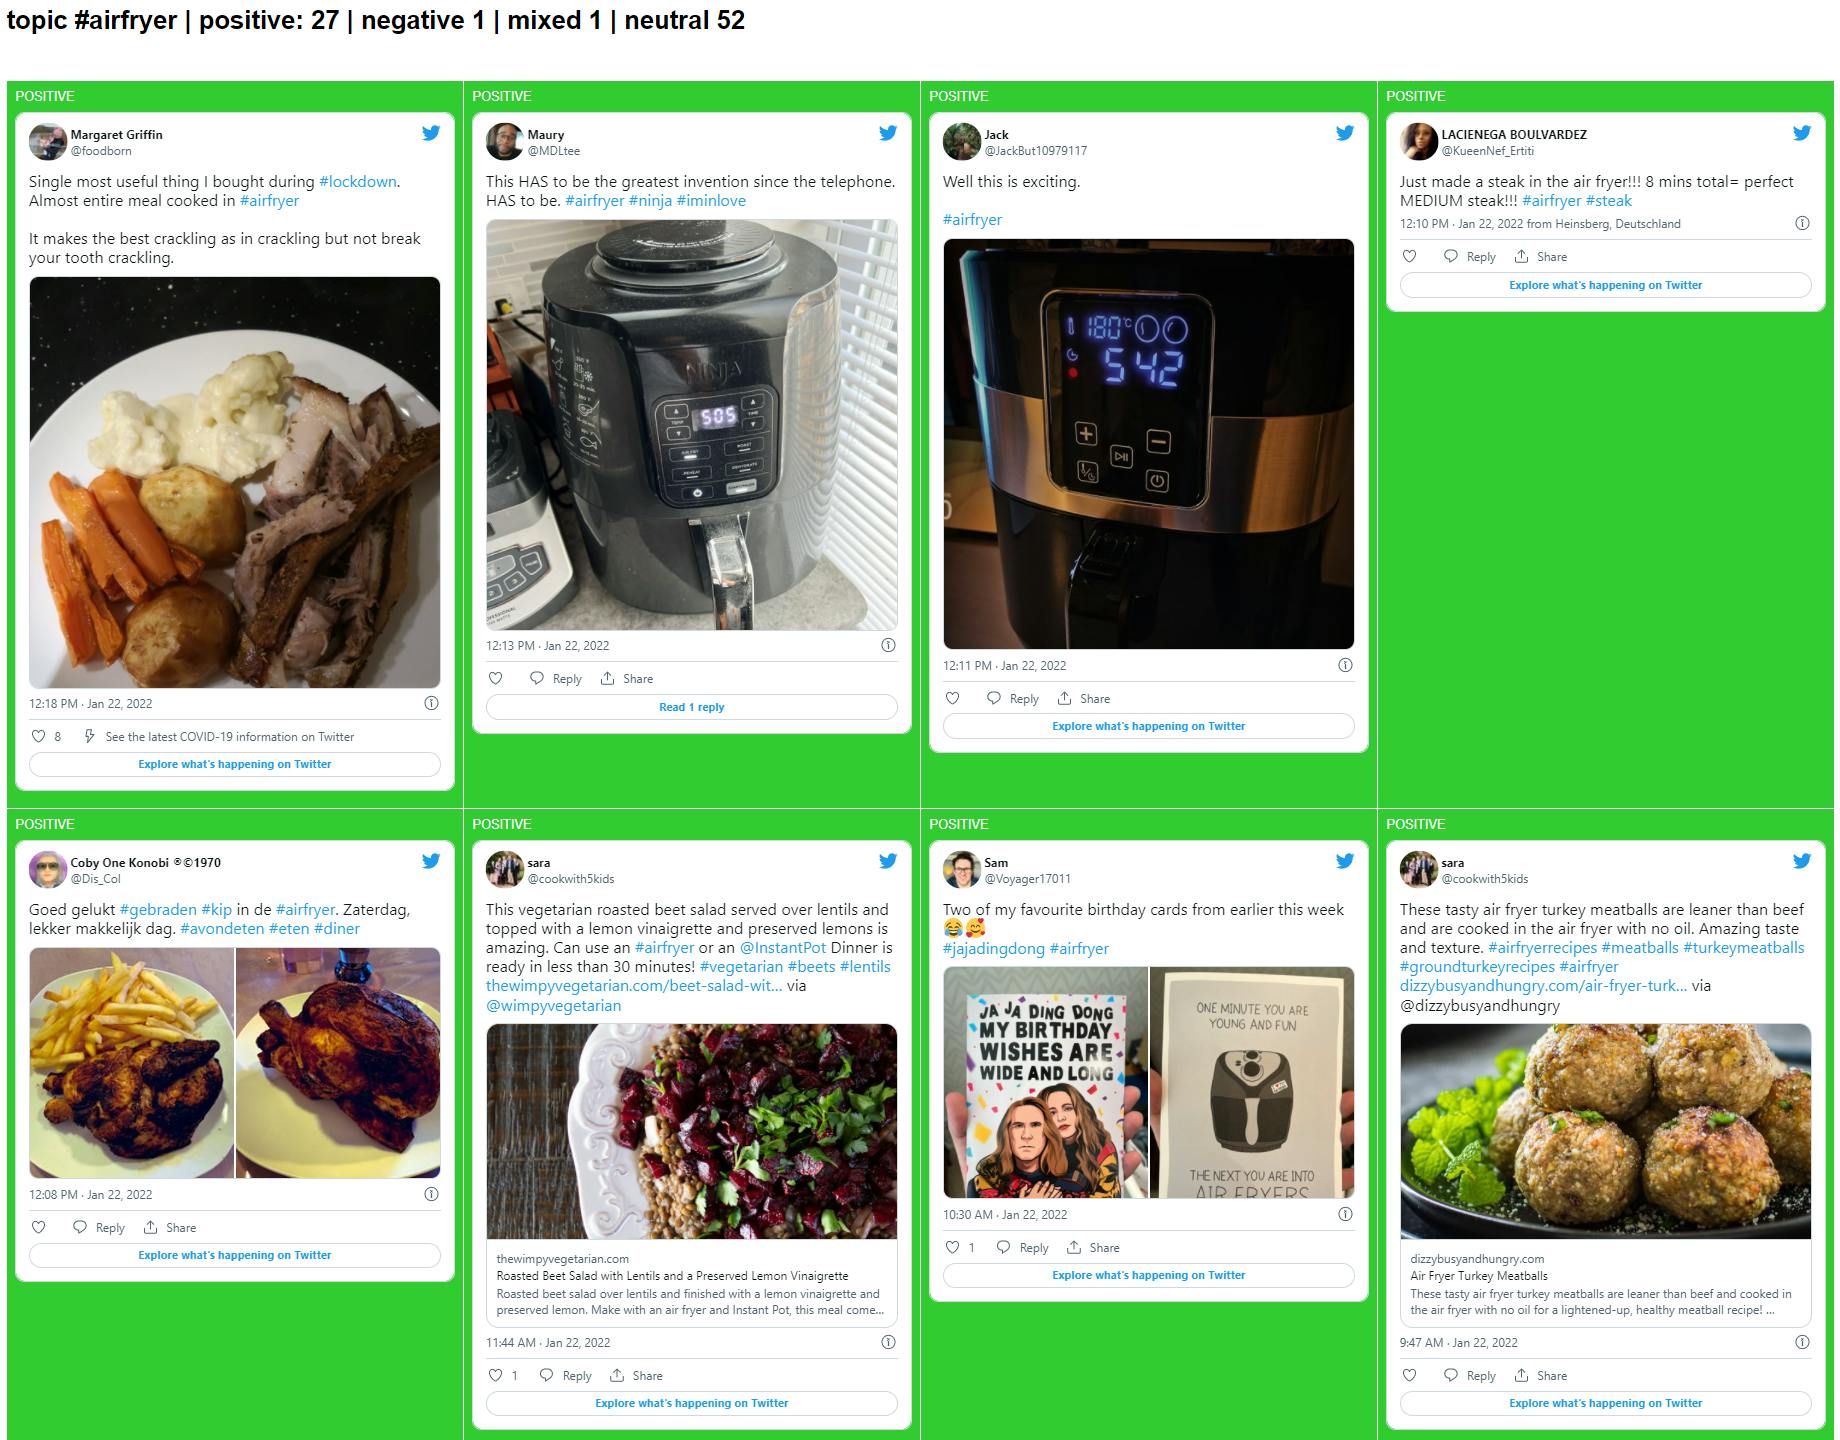
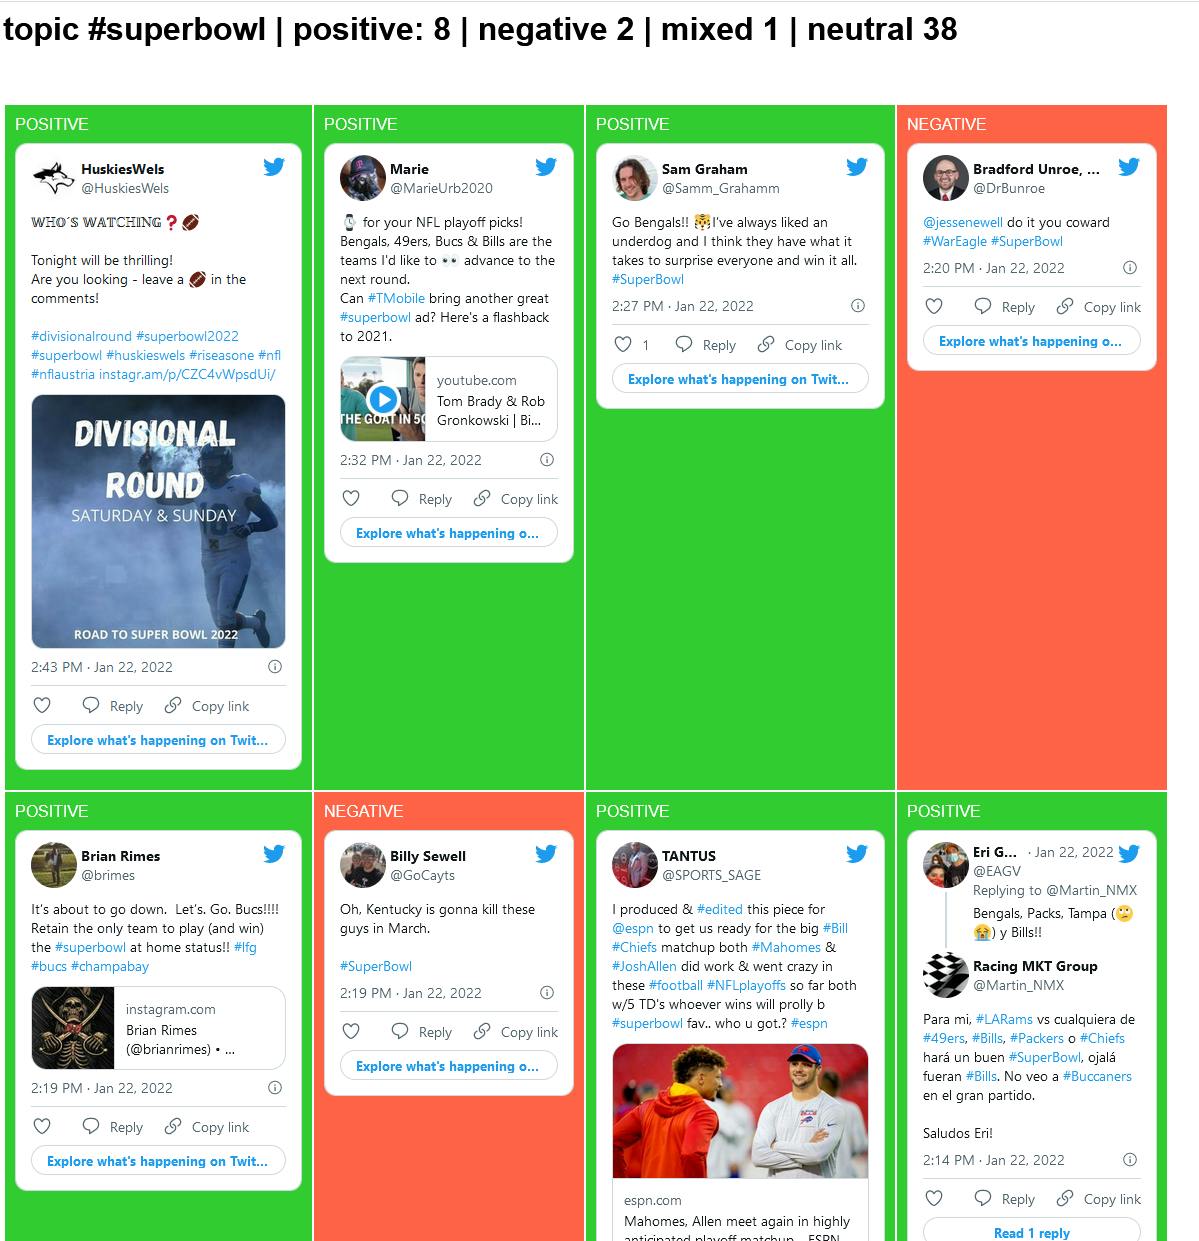
There is a tile for each tweet. The tweets are embedded tweets with HTML rendered by Twitter.
Each tweet is enclosed in a colored sentiment indicator: POSITIVE-green, NEGATIVE-red, MIXED-tan showing the Amazon Comprehend sentiment analysis of the tweet text. Neutral tweets are not shown so as to prioritize the other sentiments for display.
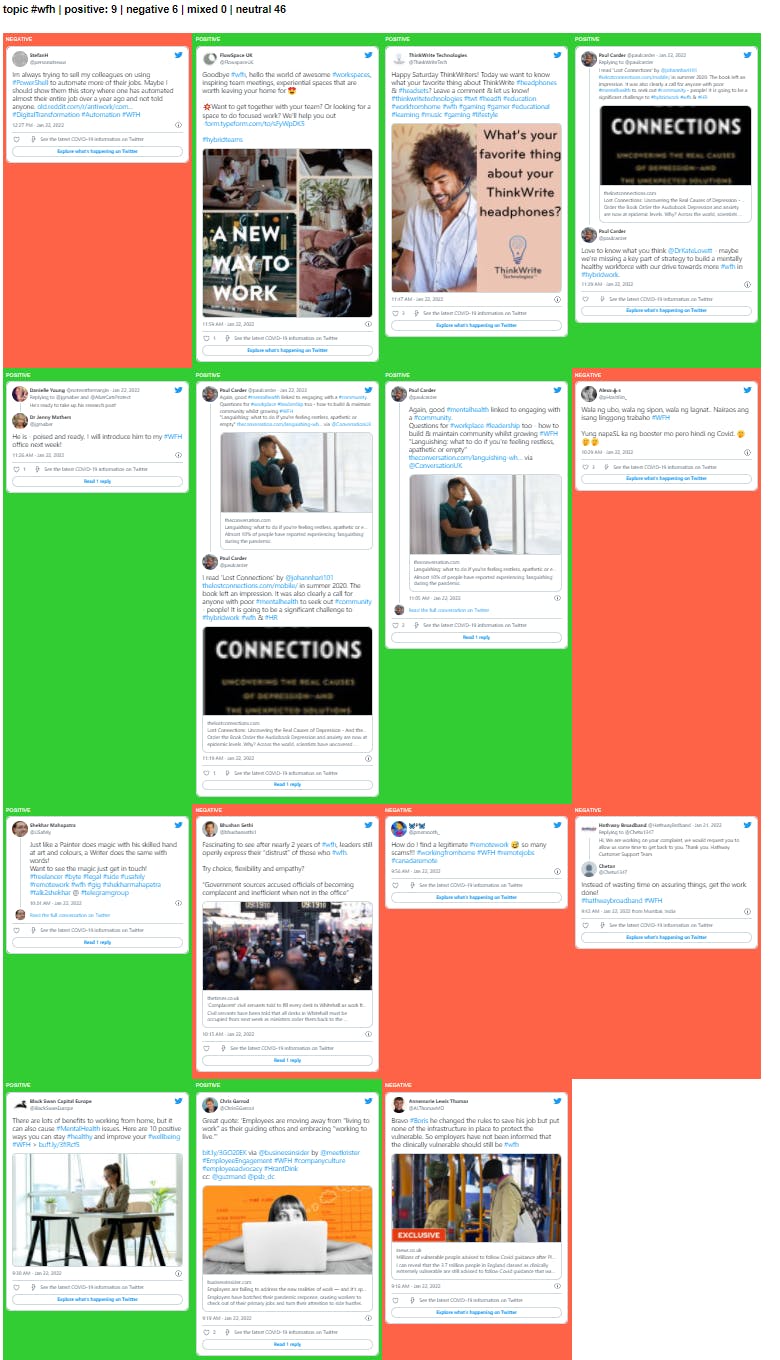
Now try another topic, such as #wfh (work-from-home) or #superbowl.
dotnet run -- #wfhThis time, our results are mixed. Our run yielded 61 tweets with 9 positive sentiment, 6 negative, and 46 neutral.
Try running the program with different topics.
Congratulations! You've now not learned the basics of Amazon Comprehend and put it to use in an application.
Where to Go From Here
Thucydides said, "Knowledge without understanding is useless." We live in a time where the amount of data we need to deal with is exploding, and some of that data is in the form of documents, customer conversations, reviews, social media, surveys, and other text. Amazon Comprehend can help you process that mountain of text and surface items worthy of attention, such as topics of interest and positive/negative reviews.
In this tutorial, you used Amazon Comprehend to perform Natural Language Processing on text to discover entities and sentiment and PII, and to redact the PII fields from the text. You did this from the AWS console and in .NET code. Then, you went on in a second program to retrieve Tweets from Twitter and generate a sentiment analysis report.
We used the AWS SDK for .NET for on-demand processing of single documents, but did not show how to upload a document to S3 and submit a job in the tutorial. You can get a sense for that from the Hello, Textract tutorial, which includes document upload to S3 and job submission. Use the same pattern with Amazon Comprehend to submit jobs.
To experiment further with Amazon Comprehend, think about how it fits in with your overall document processing needs, and build a pipeline for document retrieval, text processing, and reporting. You may find it useful to combine Amazon Comprehend with other AWS services, such as Amazon S3 for document storage, Amazon Textract to extract text from PDF/image files, or Amazon Redshift to build a data warehouse.
Further Reading
AWS Documentation
Amazon Comprehend Text Analysis APIs
Amazon Comprehend Document Processing Modes
Amazon Comprehend Developer Guide
Amazon Comprehend Custom Classification
Amazon Comprehend Guidelines and Quotas
Amazon Comprehend announces model management and evaluation enhancements
Tutorial: Find insights in text using Amazon Comprehend
Videos
Building AI APIs with .NET 6 and Amazon Comprehend by Noah Gift
Using Amazon Comprehend with .NET by Thorr Giddings
Blogs