Table of contents
- This episode: Amazon CloudFront and content delivery networks. In this Hello, Cloud blog series, we're covering the basics of AWS cloud services for newcomers who are .NET developers. If you love C# but are new to AWS, or to this particular service, this should give you a jumpstart.
- Amazon CloudFront: What is it, and why use It?
- Our Hello, CloudFront Project
- Where to Go From Here
- Further Reading
This episode: Amazon CloudFront and content delivery networks. In this Hello, Cloud blog series, we're covering the basics of AWS cloud services for newcomers who are .NET developers. If you love C# but are new to AWS, or to this particular service, this should give you a jumpstart.
In this post we'll introduce Amazon CloudFront and use it in a "Hello, Cloud" .NET website to globally distribute content. We'll do this step-by-step, making no assumptions other than familiarity with C# and Visual Studio. We're using Visual Studio 2022 and .NET 6.
Amazon CloudFront: What is it, and why use It?
"Clouds on clouds, in volumes driven, curtain round the vault of heaven." —Thomas Love Peacock
Many web applications run from one physical location, but users are distributed across locales. Content, such as images, video, and text, needs to travel worldwide to where the user is. A content delivery network (CDN) delivers that content more quickly to geographic locations. CDNs are networks that with points-of-presence (POPs) all over the world that cache content.
Amazon CloudFront (hereafter "CloudFront") is a CDN service that securely delivers content with low latency and high transfer speeds. AWS describes it as "a content delivery network (CDN) service built for high performance, security, and developer convenience".
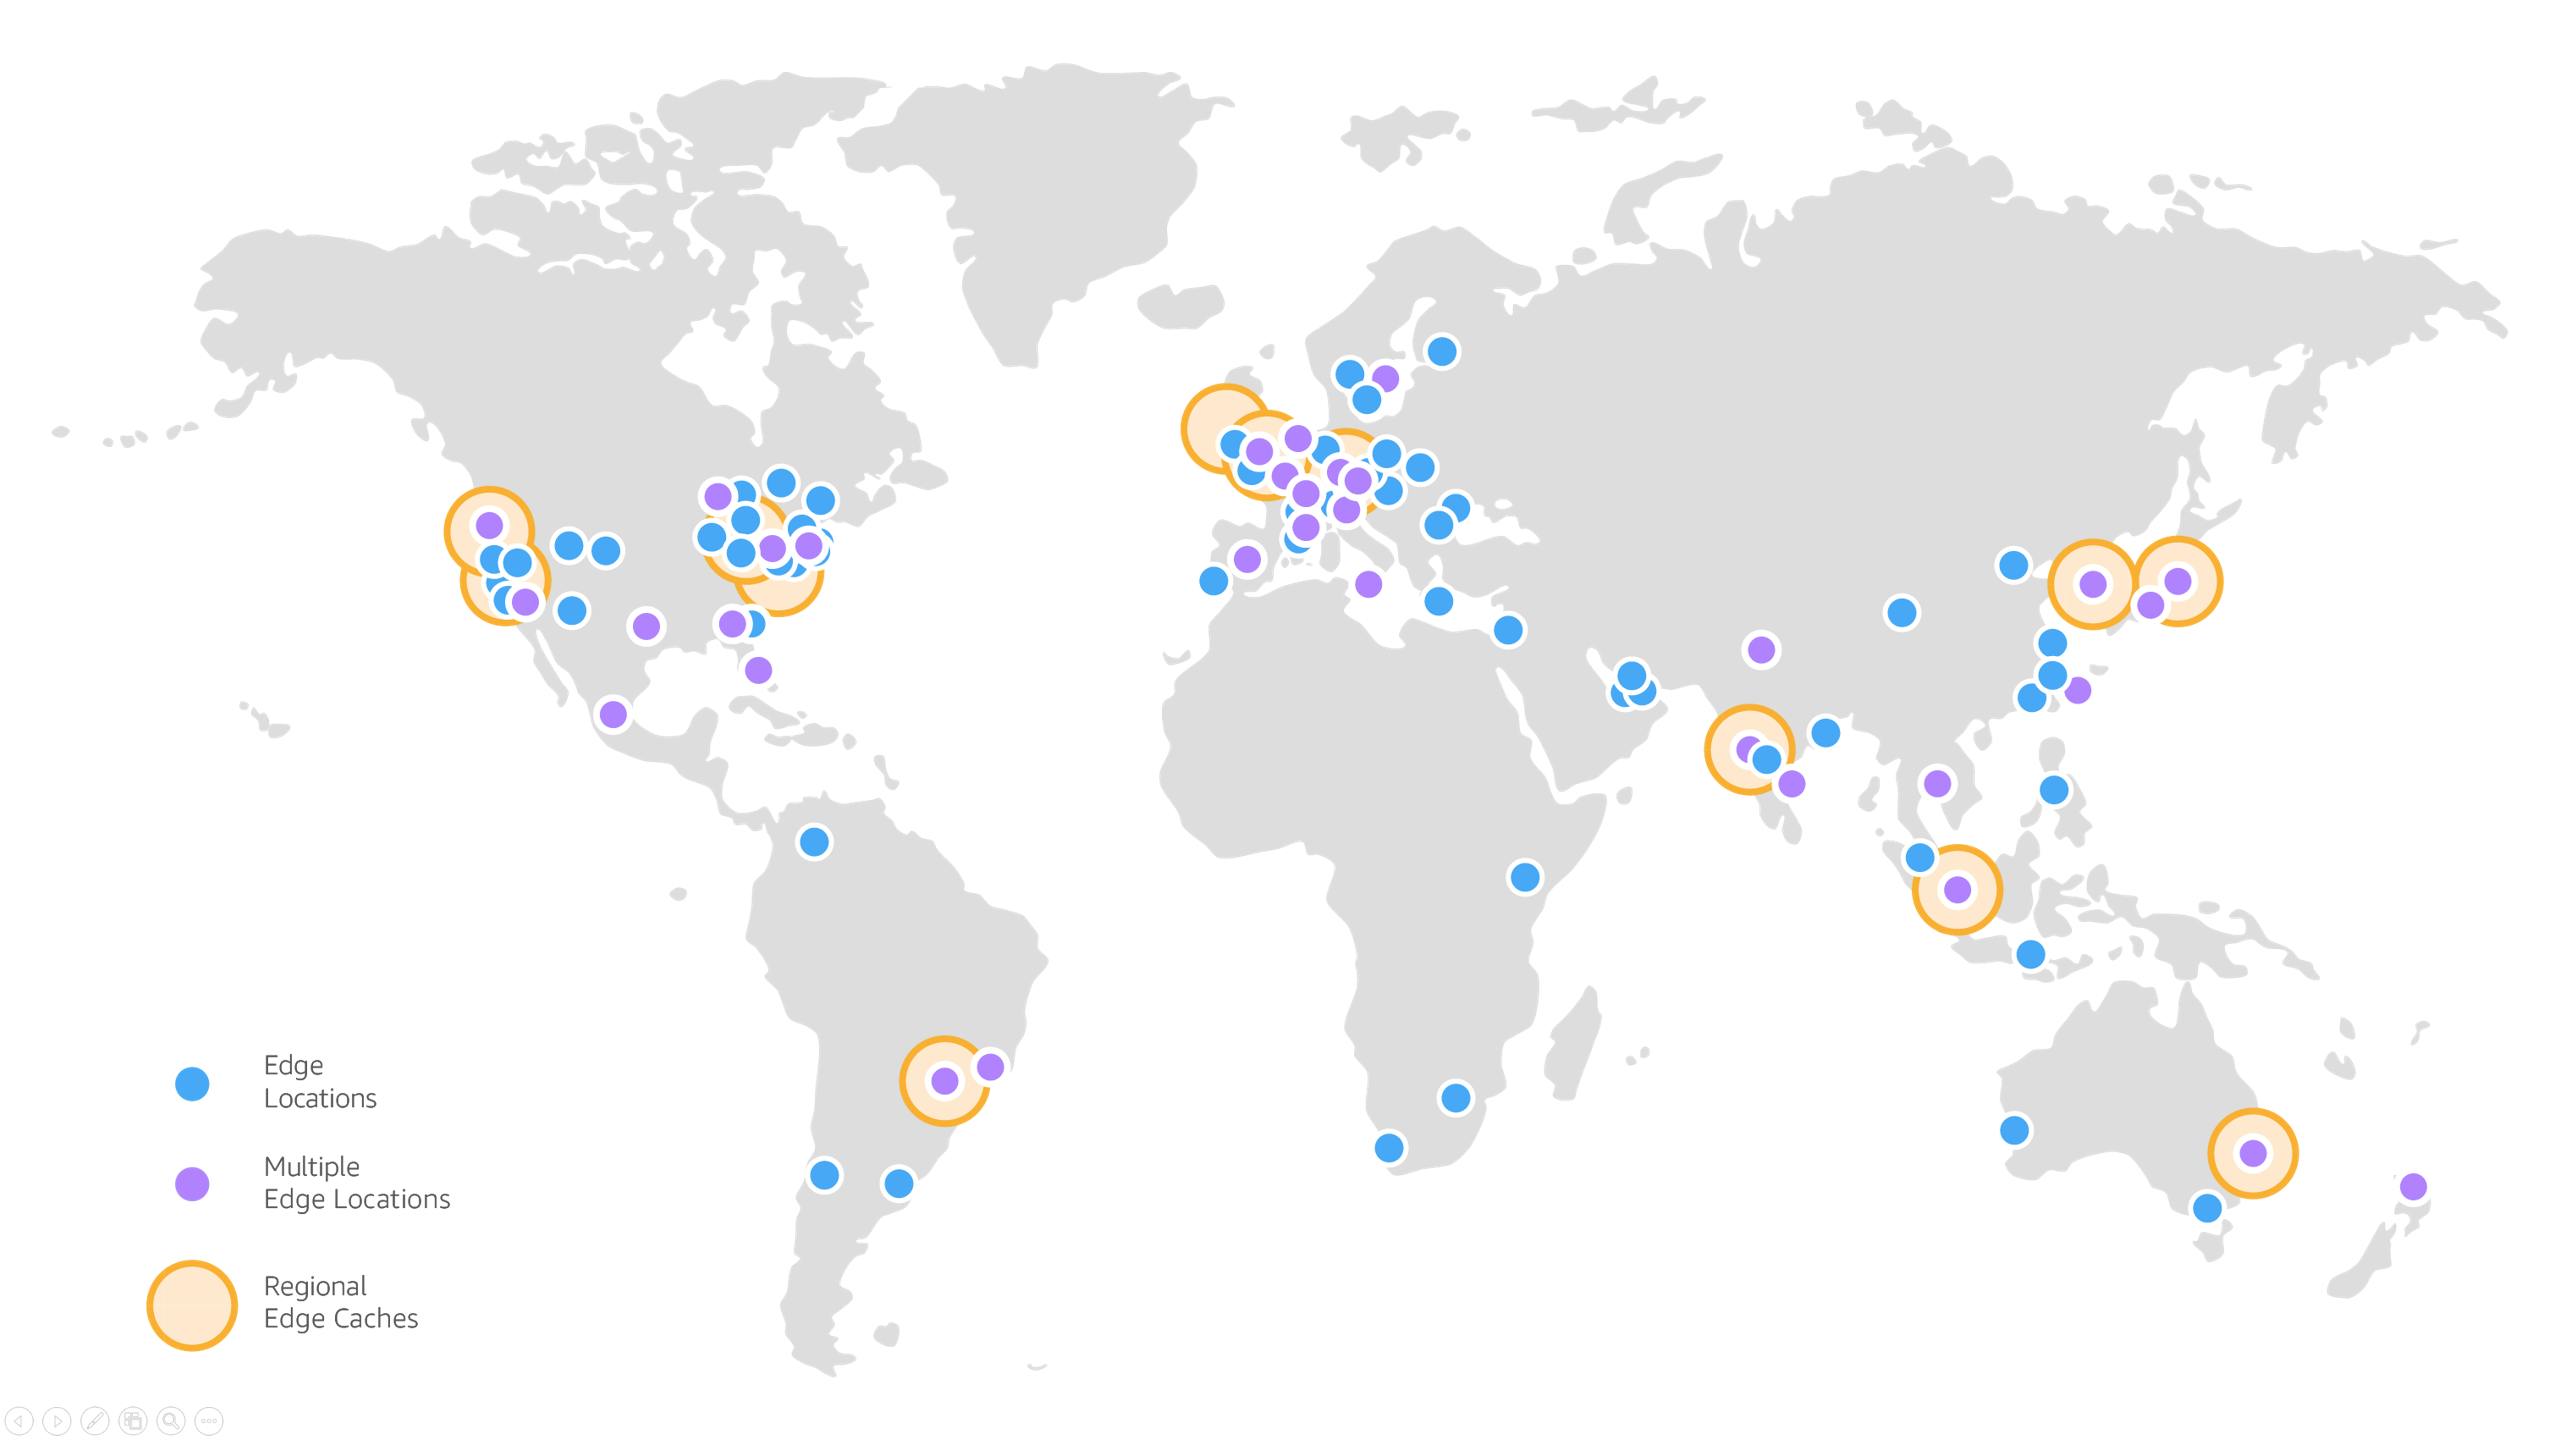
CloudFront reduces latency by delivering content via intelligent routing over 410+ points-of-presence worldwide, known as edge locations. CloudFront routes requests through the AWS backbone network to the edge location that will provide fastest delivery to the user. This reduces the number of networks that requests must pass through, reducing latency with higher data transfer rates. Your site's reliability and availability are increased by having copies of your content held in multiple geographic locations. CloudFront also improves security by encrypting traffic and includes DDoS defenses.
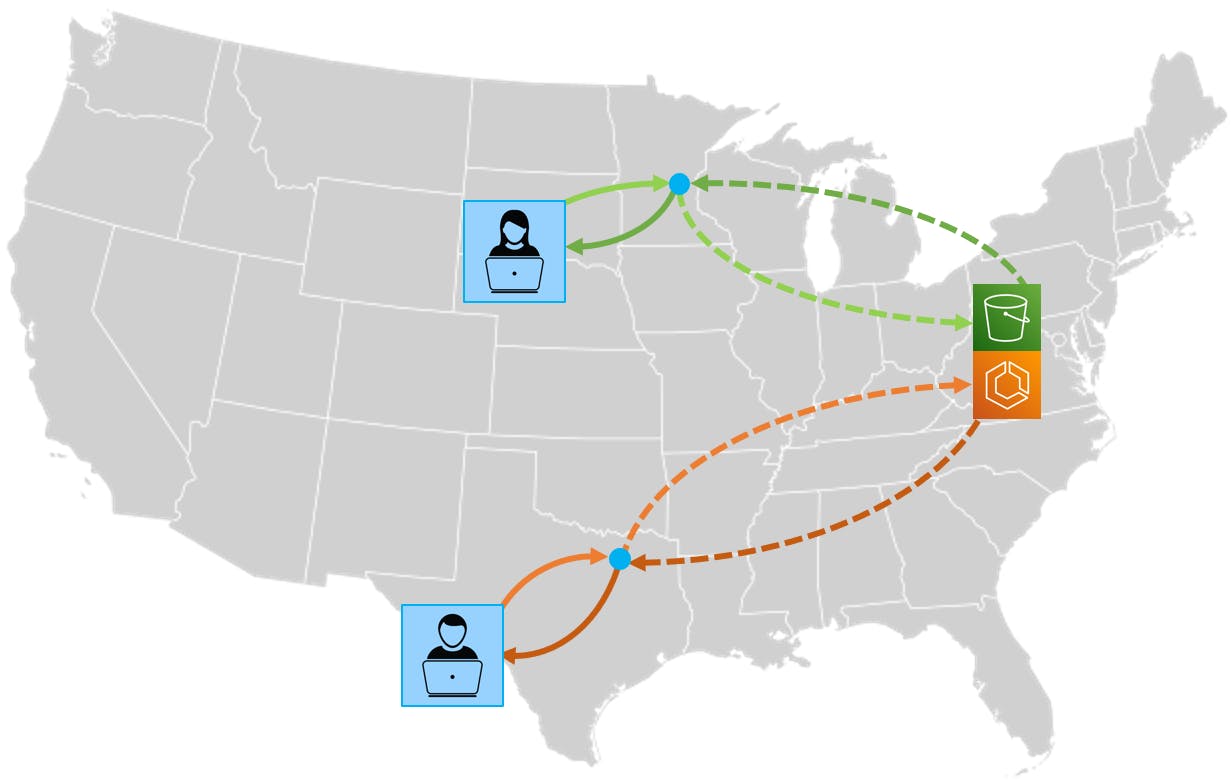
A CloudFront configuration with a DNS endpoint is known as a distribution. You define one or more content sources for your distribution, called origins. Your CloudFront distribution can front both static content, such as S3 images, and dynamic content, such as web application responses. You configure cache behaviors for each class of content. For example, for a dynamically changing website you would not cache web responses at all but might cache images for 24 hours.
When a user accesses your application through a CloudFront distribution URL, their requests are routed to a nearby edge location. If the edge location already has the requested resource, it returns it immediately. Otherwise, CloudFront retrieves the content from its origin, which might be your HTTP load balancer or an S3 bucket. Configured behaviors determine whether retrieved resources are cached in edge locations, and for how long. If another request comes in for the content before its Time To Live (TTL) expires, the edge location can respond without having to reach back to the content source.
The AWS Free Tier includes 1TB of data transfer out and 10M of HTTP/HTTPS requests every month for free. You can save as much as 30 percent for a one-year usage commitment with the CloudFront Savings Bundle, and you can negotiate custom pricing in exchange for a higher usage commitment. Always check the pricing page to confirm current pricing and offer details.
Our Hello, CloudFront Project
We will deploy a simple website with an image and set up a CloudFront distribution for it. The website will always return a unique response, and the images will rarely change. We will set up cache behaviors that cache images for an hour at a time but never cache the website pages. We'll confirm CloudFront's cache behaviors by changing images in S3 and noting how much time elapses before the updated editions are served to a site visitor.
One-time Setup
For any of the tutorials in the Hello, Cloud series you need the following:
- An AWS account, and an understanding of what is included in the AWS Free Tier.
- Microsoft Visual Studio 2022. If you're using an older version of Visual Studio you won't be able to use .NET 6. If you use a different IDE, you may have to find alternatives to some tutorial steps.
- AWS Toolkit for Visual Studio. You'll need to configure the toolkit to access your AWS account and create an IAM user. Your default AWS profile will be linked to this user when running programs from the command line.
Step 1: Upload image to S3
In this step, you'll choose two images to use for this tutorial and upload one of them to S3.
Find two JPEG images to use. You can use the two public-domain images linked below, or any two images you have the rights to use. Image attribution for these images is in the links and in the source code README file.


The web application we will build will display a single image, which we will later switch. Make a copy of Image 1 named image.jpg.
Sign in to the AWS management portal and select a region you want to work in. We're using us-west-2 (Oregon).
Navigate to Amazon S3.
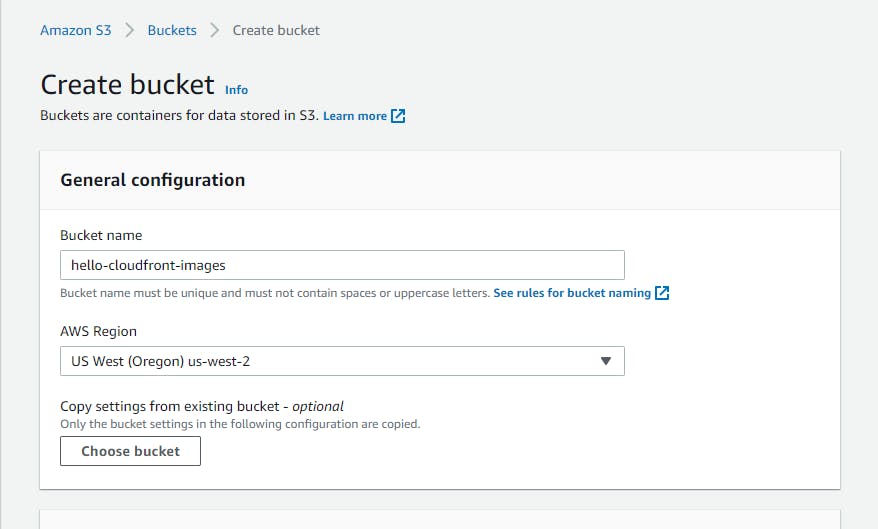
Create a new bucket and give it a name similar to hello-cloudfront-images. If the name you want to use is taken, find a variation that is not in use. Record your bucket name, which you can find on the Properties tab when viewing the bucket.
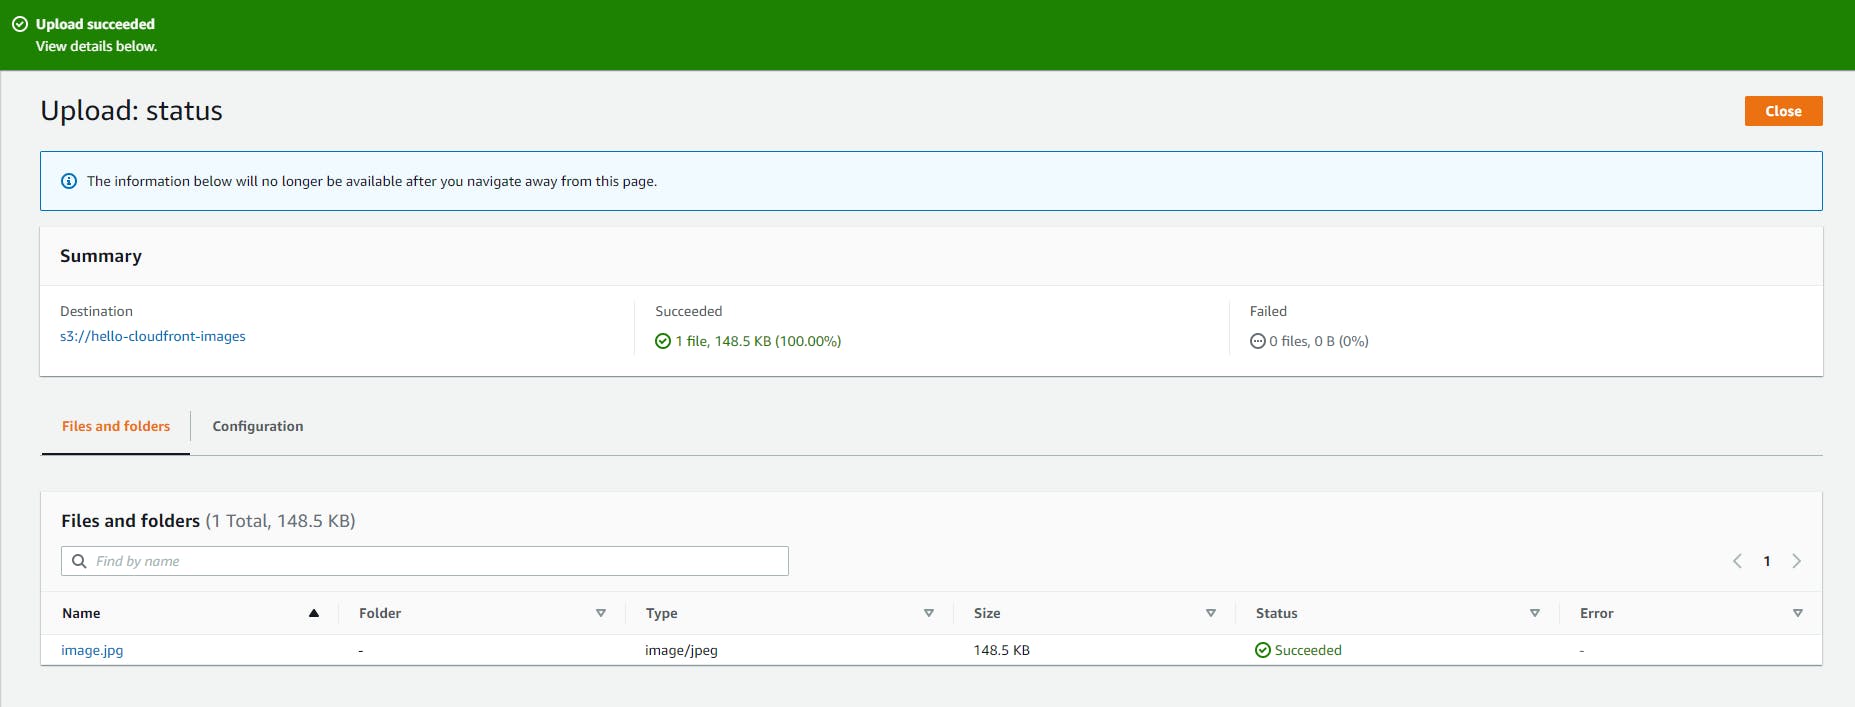
Upload image.jpg to the bucket.
Step 2: Create a CloudFront distribution
In this step, you'll create a CloudFront distribution and add your S3 bucket as an origin.
In the AWS management console, navigate to Amazon CloudFront.
On the left pane, select Distributions and click Create distribution.
In the Origin input box, type your S3 bucket name and you should see it listed, in a format similar to
hello-cloudfront-images.s3.us-west-2.amazonaws.com. Select it.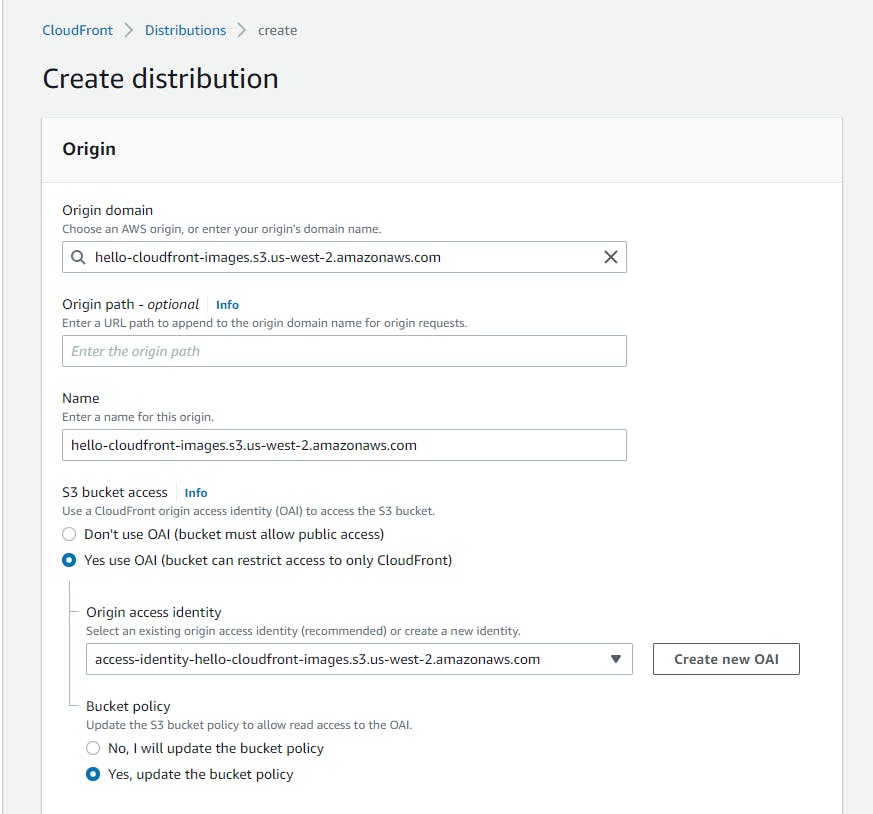
Do the following to configure an Origin Access Identity for CloudFront. This allows the objects in the bucket to be accessed by CloudFront, even if the bucket is private.
A. S3 Bucket Access: select Yes use OAI.
B. Click Create new OAI and click Create.
C. Bucket policy: select Yes, update the bucket policy.
Set a one-hour cache policy:
A. Scroll down the page to Cache key and origin requests. Select cache policy and origin request policy.
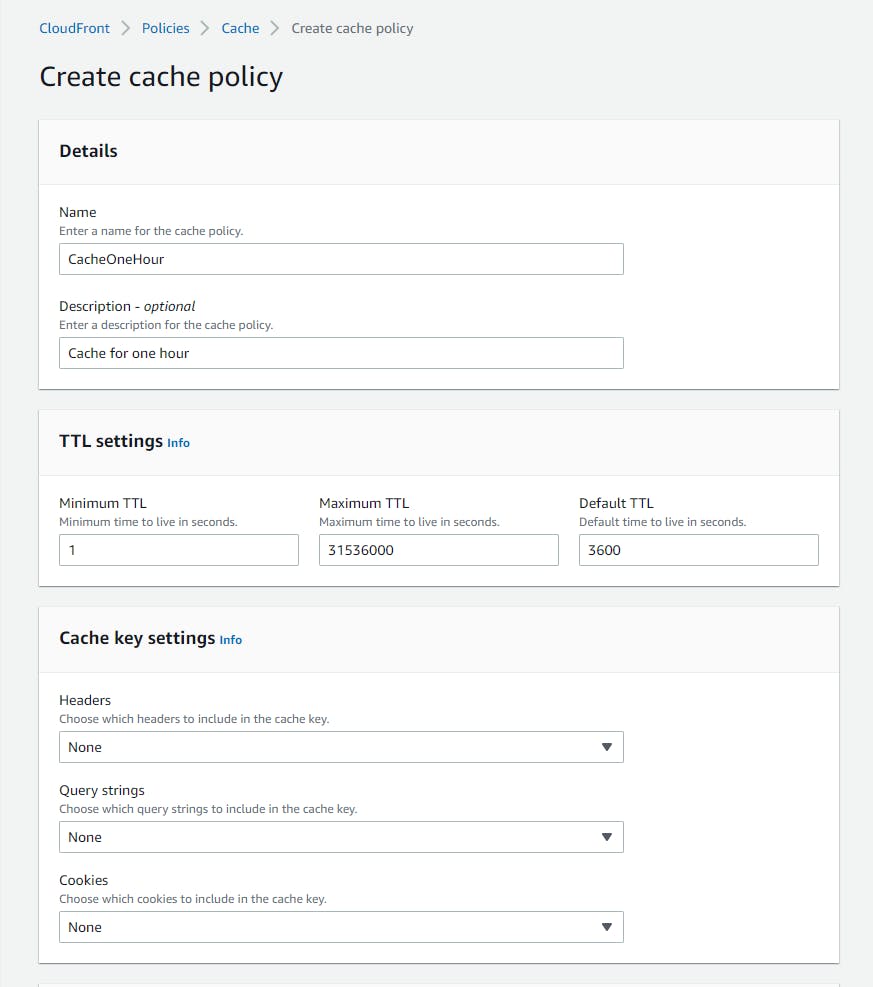
B. Below Cache Policy, click Create policy and enter the following on the Create cache policy page:
C. Name: CacheOneHour.
D. Description: Cache for one hour.
E. Default TTL: 3600.
F. Click Create.
Back on the original browser tab where you are creating the CloudFront distribution, under Cache key and origin requests, refresh the Cache policy list and select CacheOneHour.
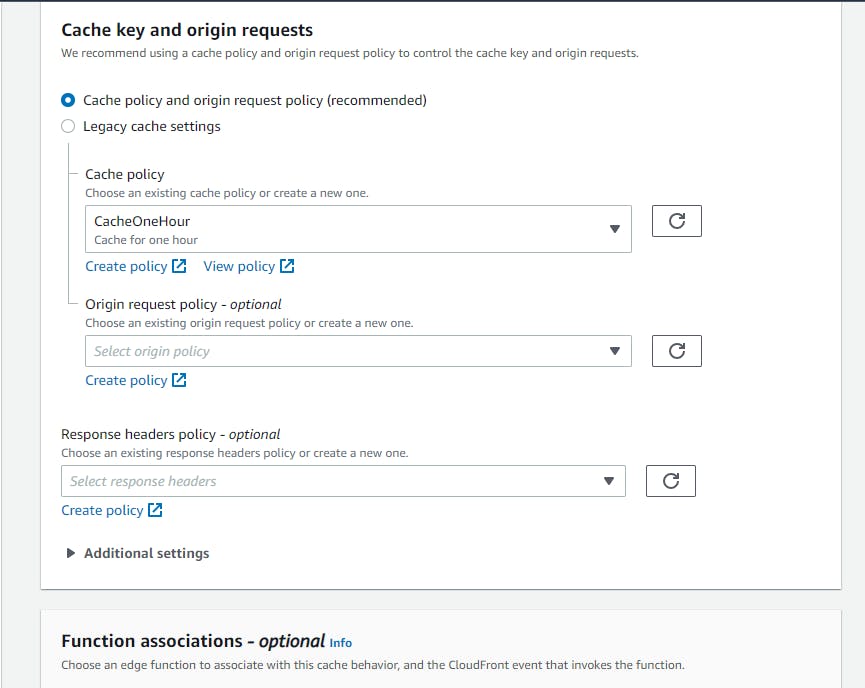
At the bottom of the page, click Create distribution.
You see confirmation that your distribution was created. Copy and record the distribution domain name, which will be of the form
https://xxxxxxxxxx.cloudfront.net.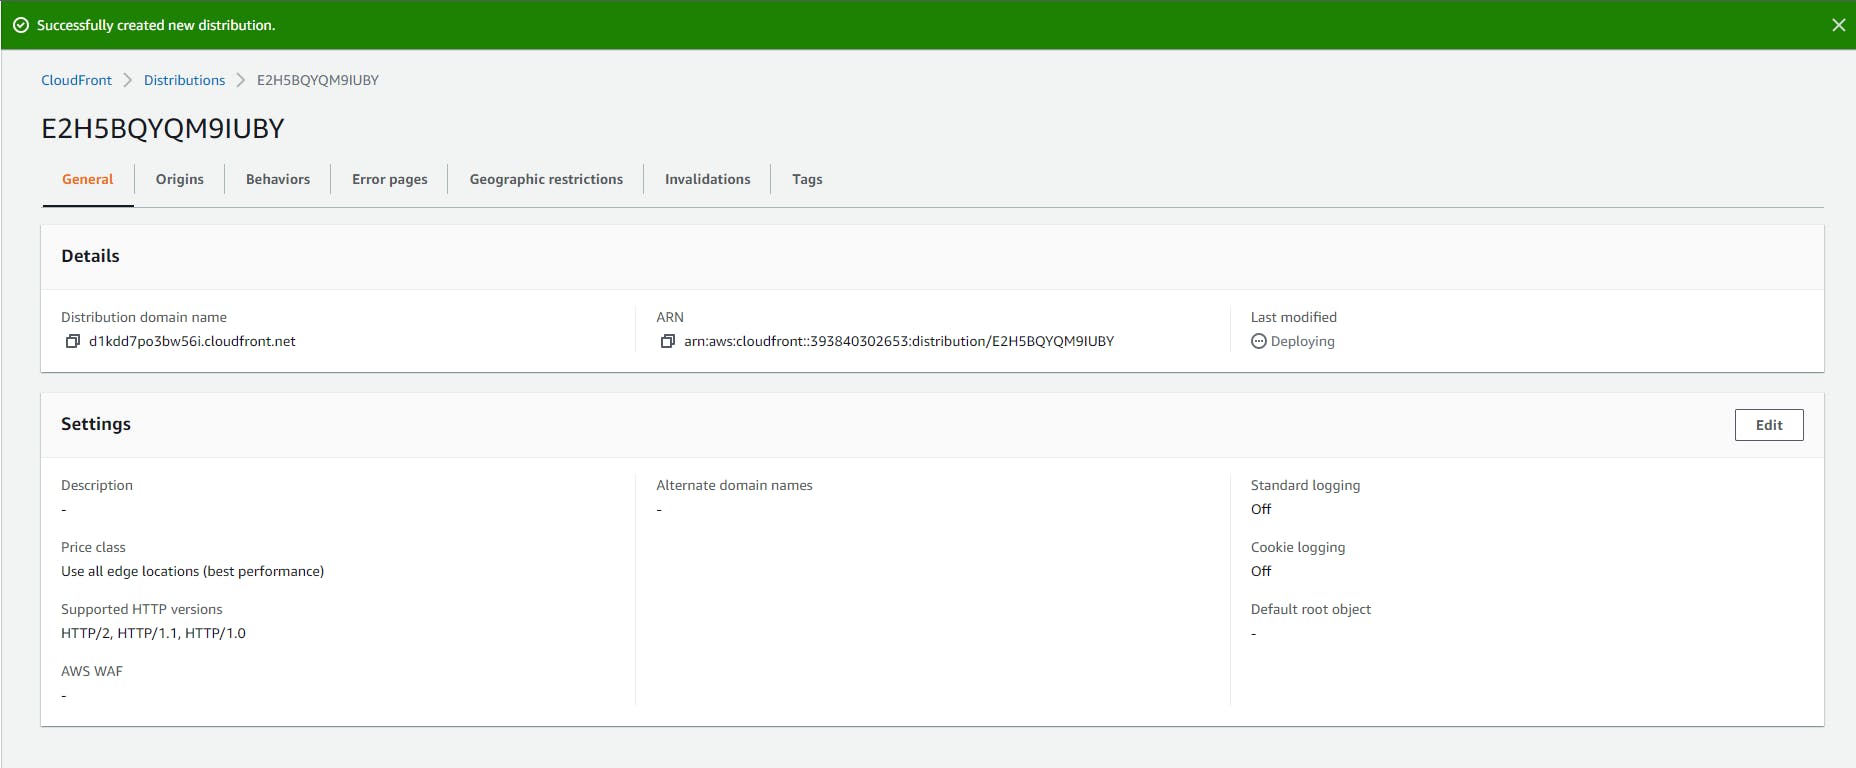
In a new browser tab, browse to your distribution domain path with "/image.jpg" at the end. Your Image 1 should appear.
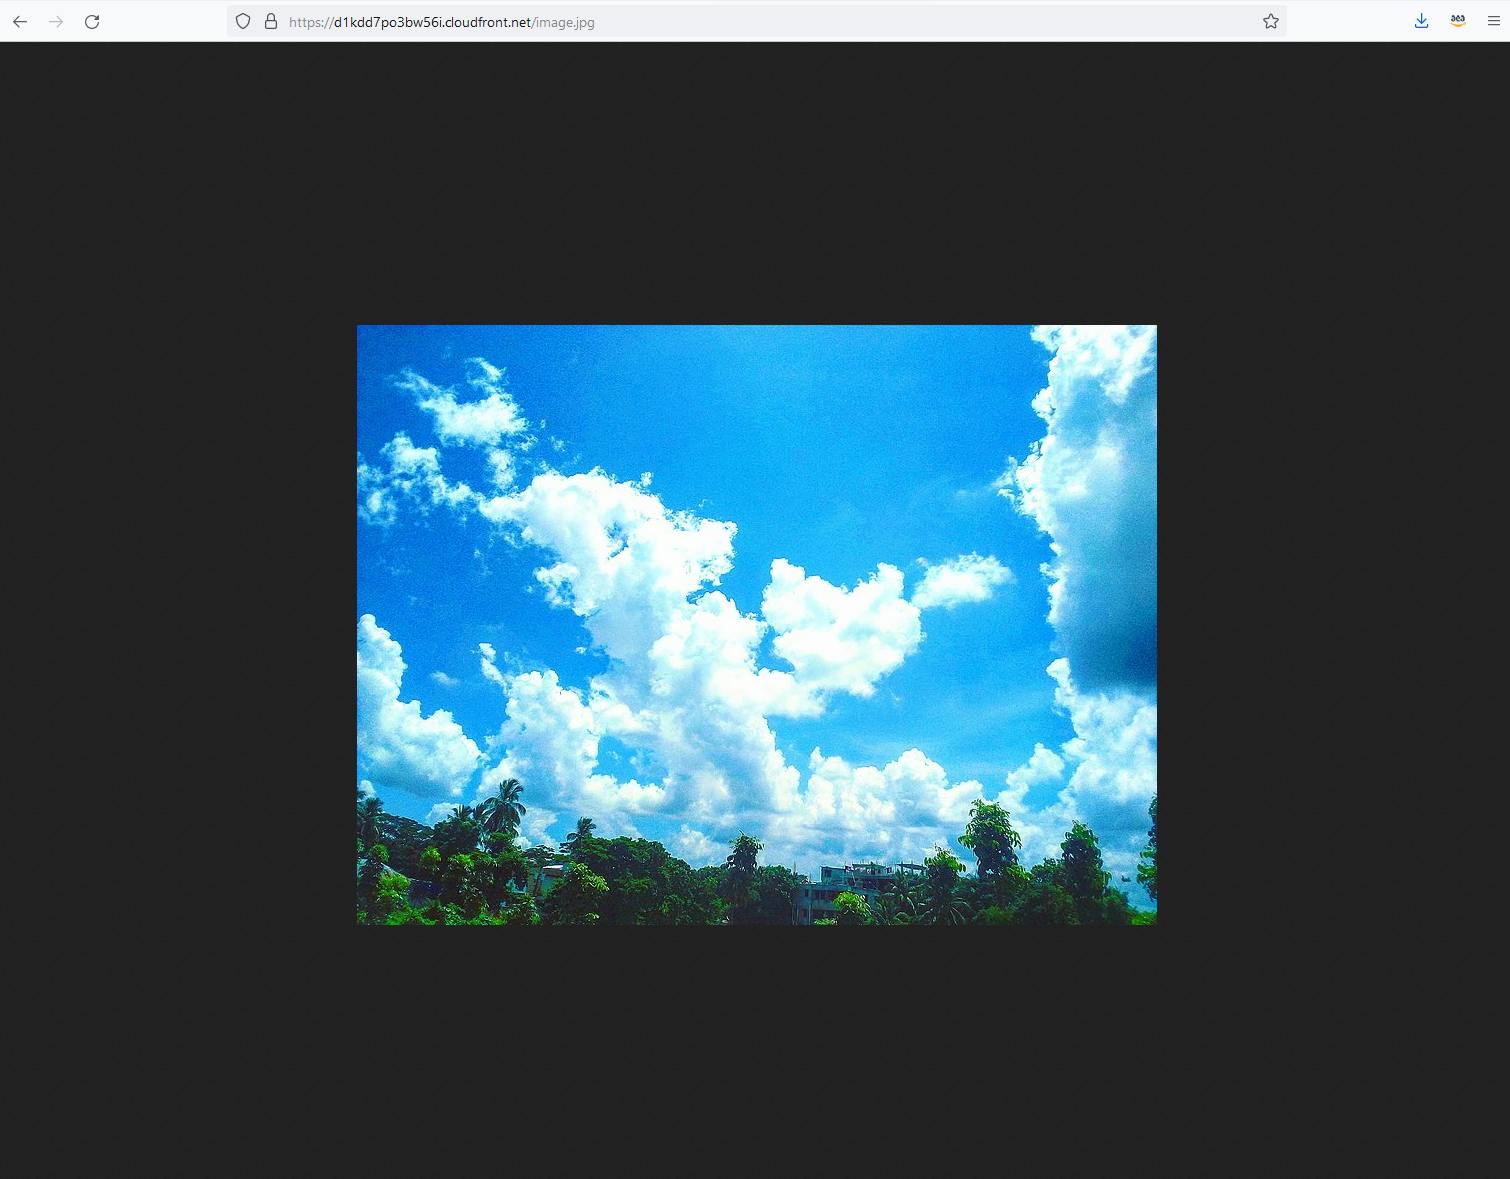
Congratulations, you've set up a CloudFront distribution for an S3 bucket.
Step 3. Create a .NET web application
In this step, you'll create a simple web application that displays the image.
Open a command/terminal window and CD to a development folder.
Enter the dotnet new command below to create a console program named hello-cloudfront.
dotnet new webapp -n hello-cloudfrontOpen the
hello-cloudfrontproject in Visual Studio.Open the C# code-behind file Pages/Index.cshtml.cs in the code editor and replace with the code at the end of this step. The code behind exposes a property named Message with the current date and time. We'll use this to have our website home page be different every time.
Open the cshtml file Pages/Index.cshtml in the code editor and replace with the code below. Replace [YOUR-CLOUDFRONT-URL] with the (HTTP) distribution image URL you recorded and verified in the previous step.
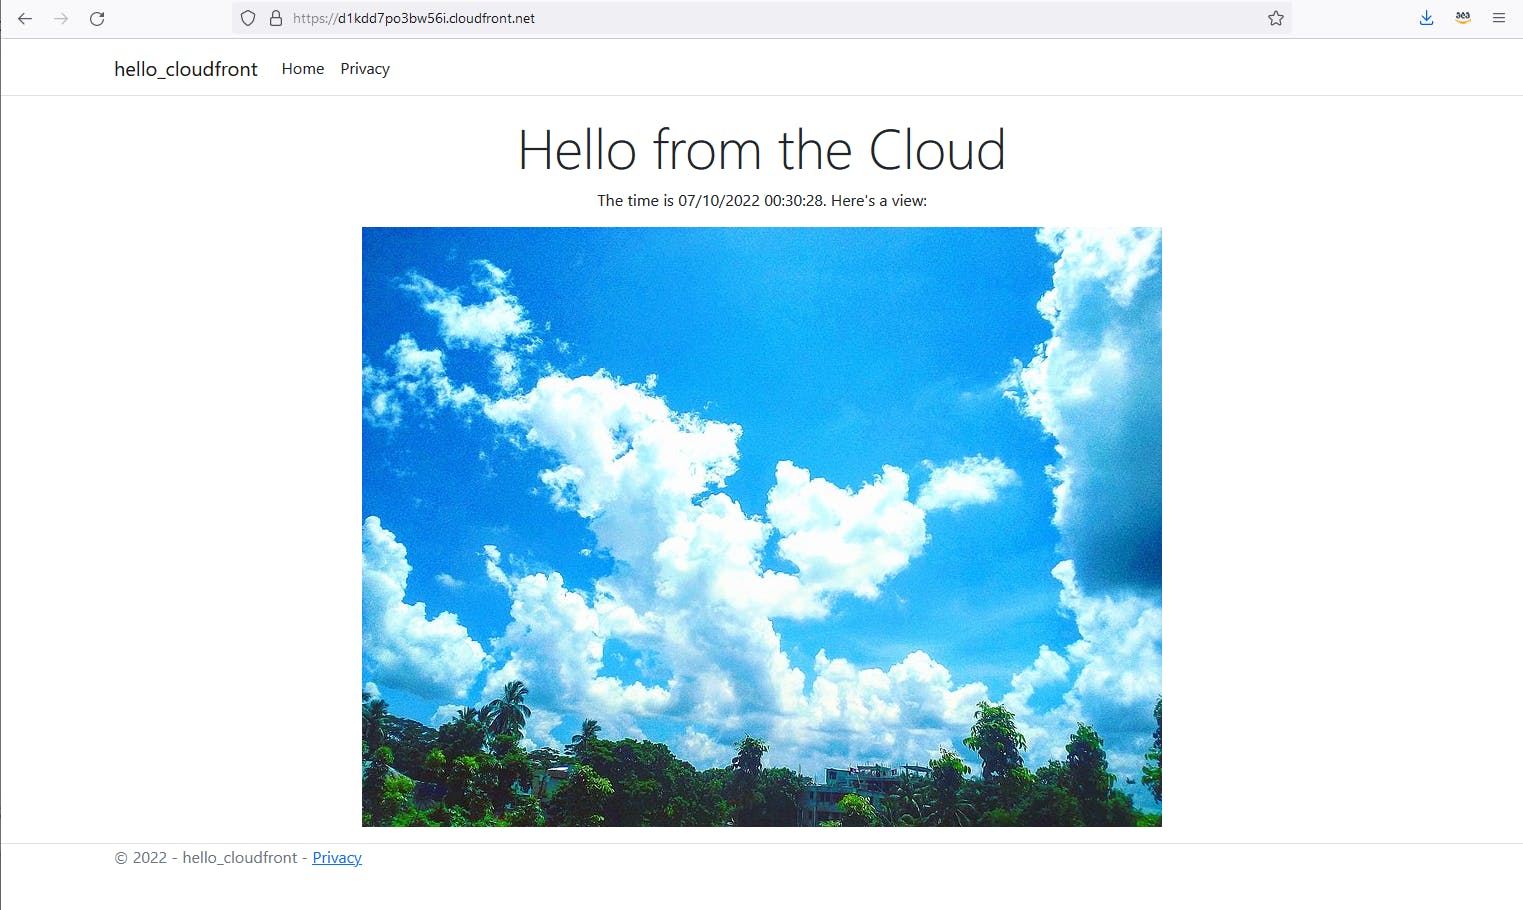
Save your changes. Press F5 or Debug > Run to run the app. A browser tab should open, and you should see the local time and your image in the browser.
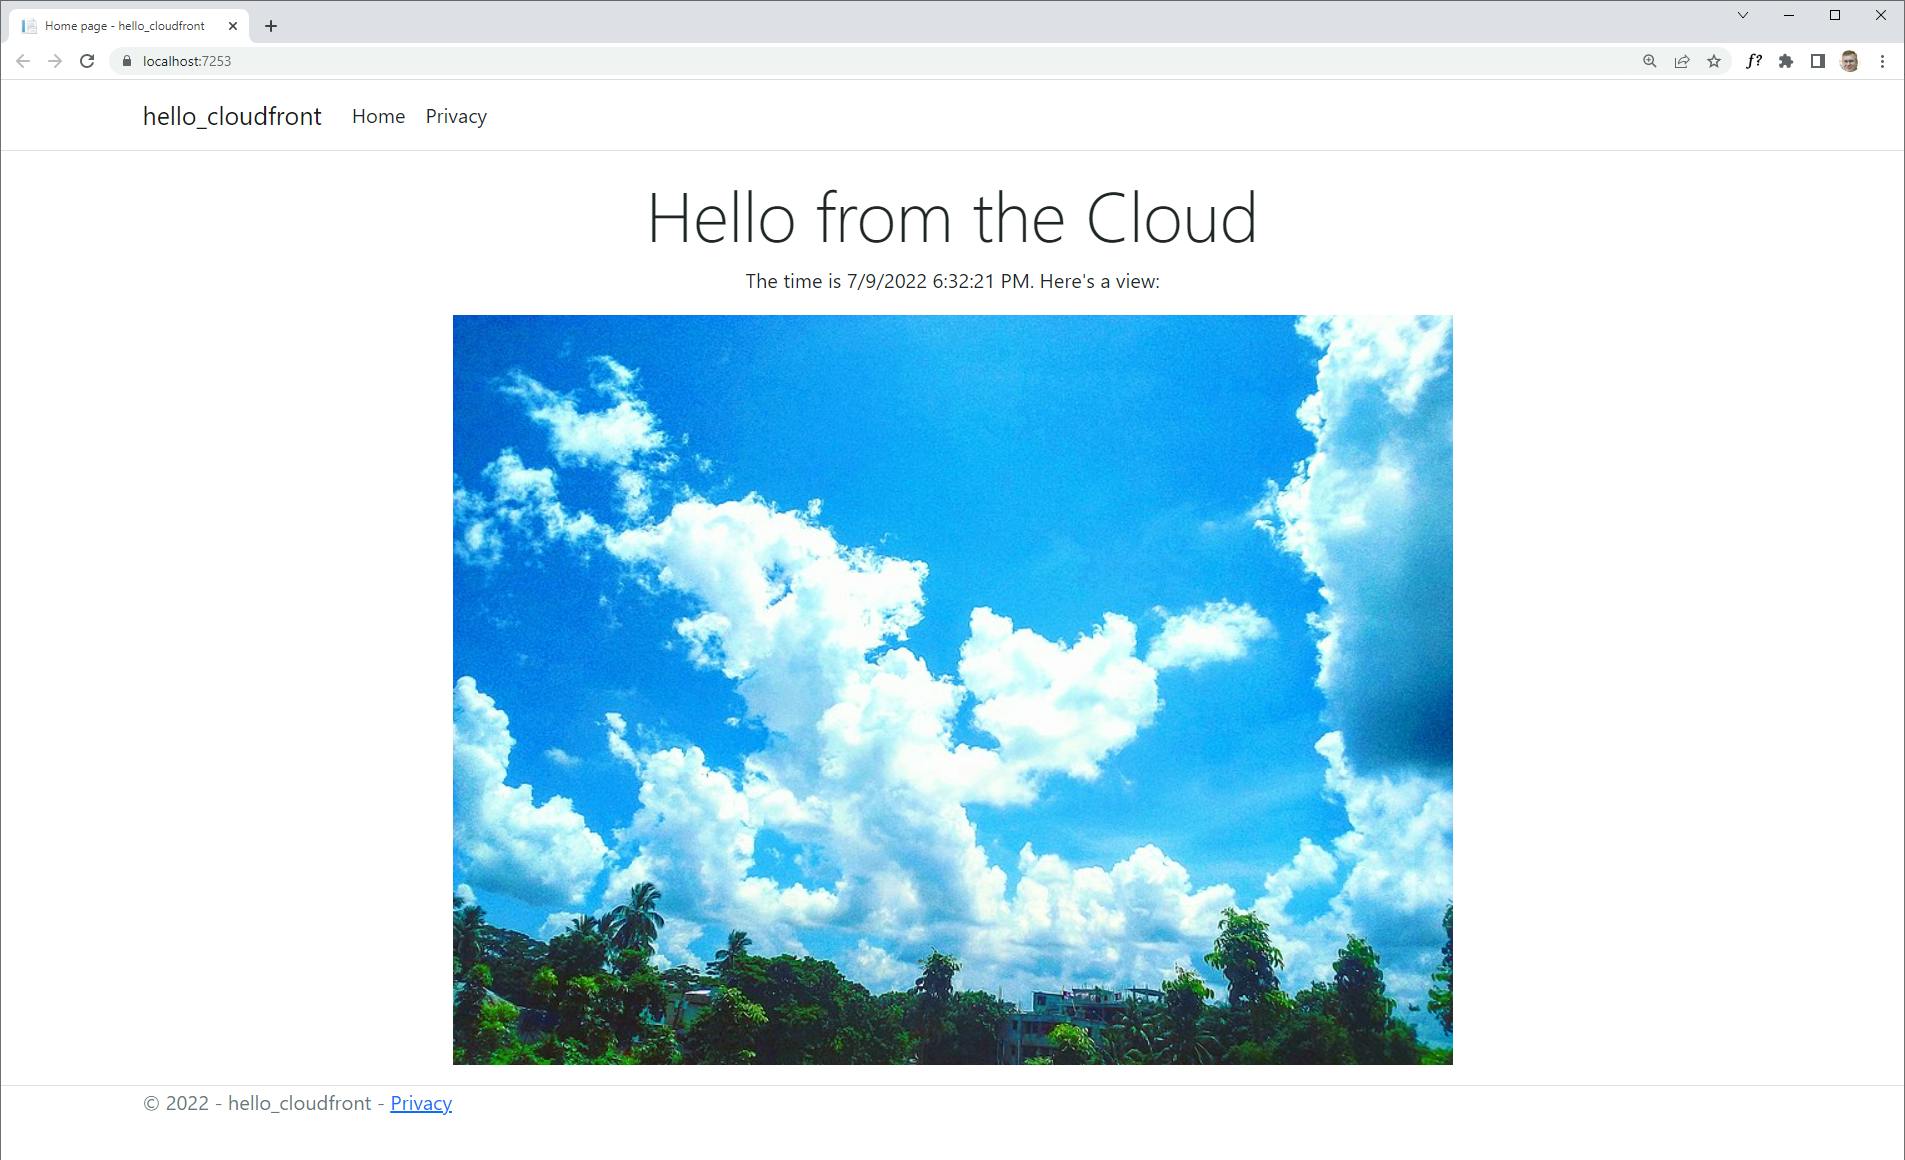
Stop the app.
Index.cshtml
@page
@model IndexModel
@{
    ViewData["Title"] = "Home page";
}

<div class="text-center">
    <h1 class="display-4">Hello from the Cloud</h1>
    <p>The time is @Model.Message. Here's a view:</p>
    <img src="http://[YOUR-CLOUDFRONT-URL]" />
</div>
Index.cshtml.cs
using Microsoft.AspNetCore.Mvc;
using Microsoft.AspNetCore.Mvc.RazorPages;

namespace hello_cloudfront.Pages;

public class IndexModel : PageModel
{
    private readonly ILogger<IndexModel> _logger;

    public string Message
    {
        get => DateTime.Now.ToString();
    }

    public IndexModel(ILogger<IndexModel> logger)
    {
        _logger = logger;
    }

    public void OnGet()
    {

    }
}
Step 4: Deploy to App Runner
In this step, you'll deploy your web application to AWS App Runner.
Open a command/terminal window and run
aws configureto set the same default region you used for your S3 image. Note: we're using a different region in our example, us-east-1 (N. Virginia), just to make things interesting.aws configure
Run the
dotnet aws deploycommand below to deploy. If the command is not recognized, you need to install the AWS Deployment Tool for .NET CLI.dotnet aws deployWhen prompted for a deployment target, select the choice for AWS App Runner.

Accept all defaults and proceed with deployment. This is a good time for a bio break.
When deployment completes, note the AWS App Runner endpoint URL.
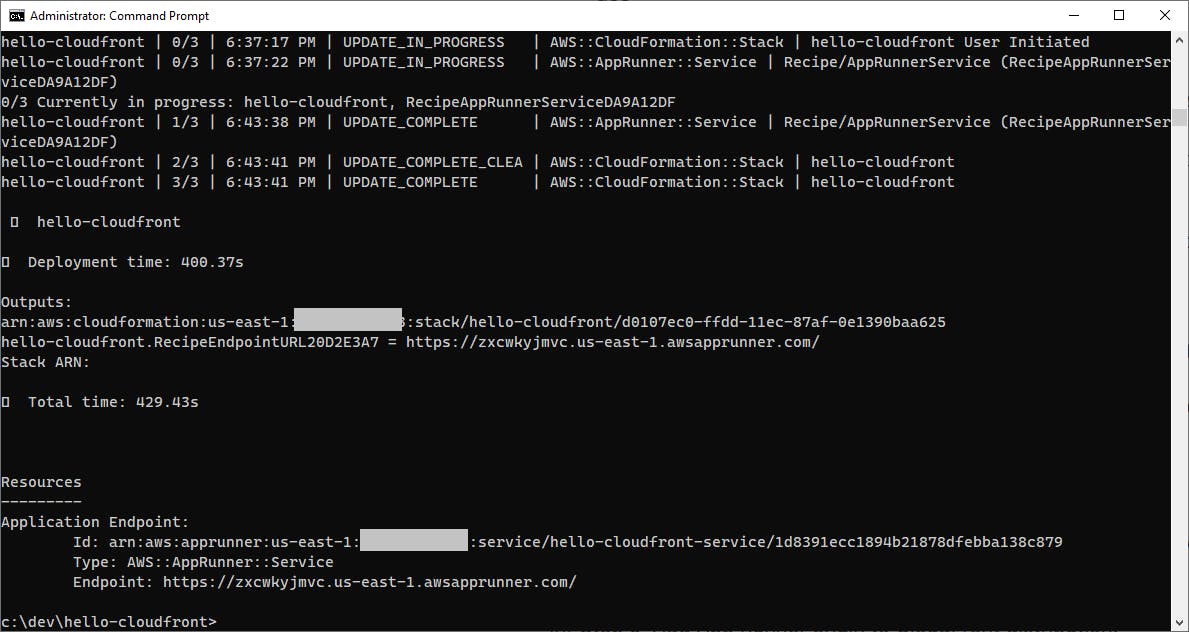
In a browser tab, visit the endpoint URL and confirm the web page loads.
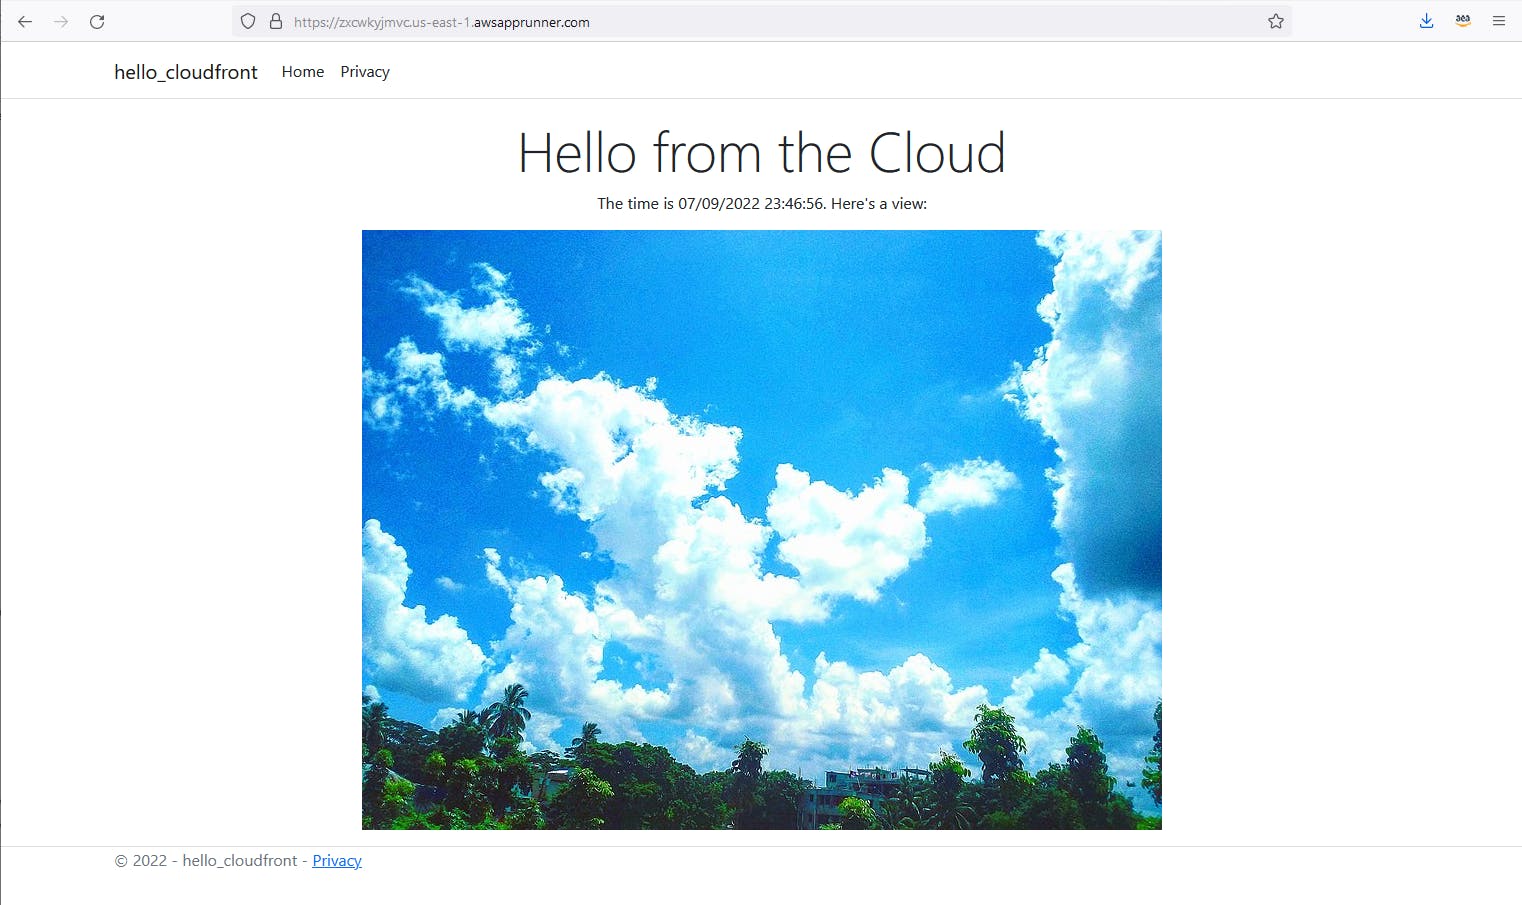
We now have our app deployed to app runner, displaying an image via a CloudFront distribution domain endpoint. However, we also want the website itself to be accessible through CloudFront. We'll set that up next.
Step 5: Add App Runner origin to CloudFront distribution.
In this step, you'll add your App Runner endpoint as a second origin to the CloudFront distribution. Then you'll define new behaviors.
In the AWS management console, navigate to Amazon CloudFront. Click on your CloudFront distribution to views its details and select the Origins tab. You see one origin listed, the one you created earlier for S3.

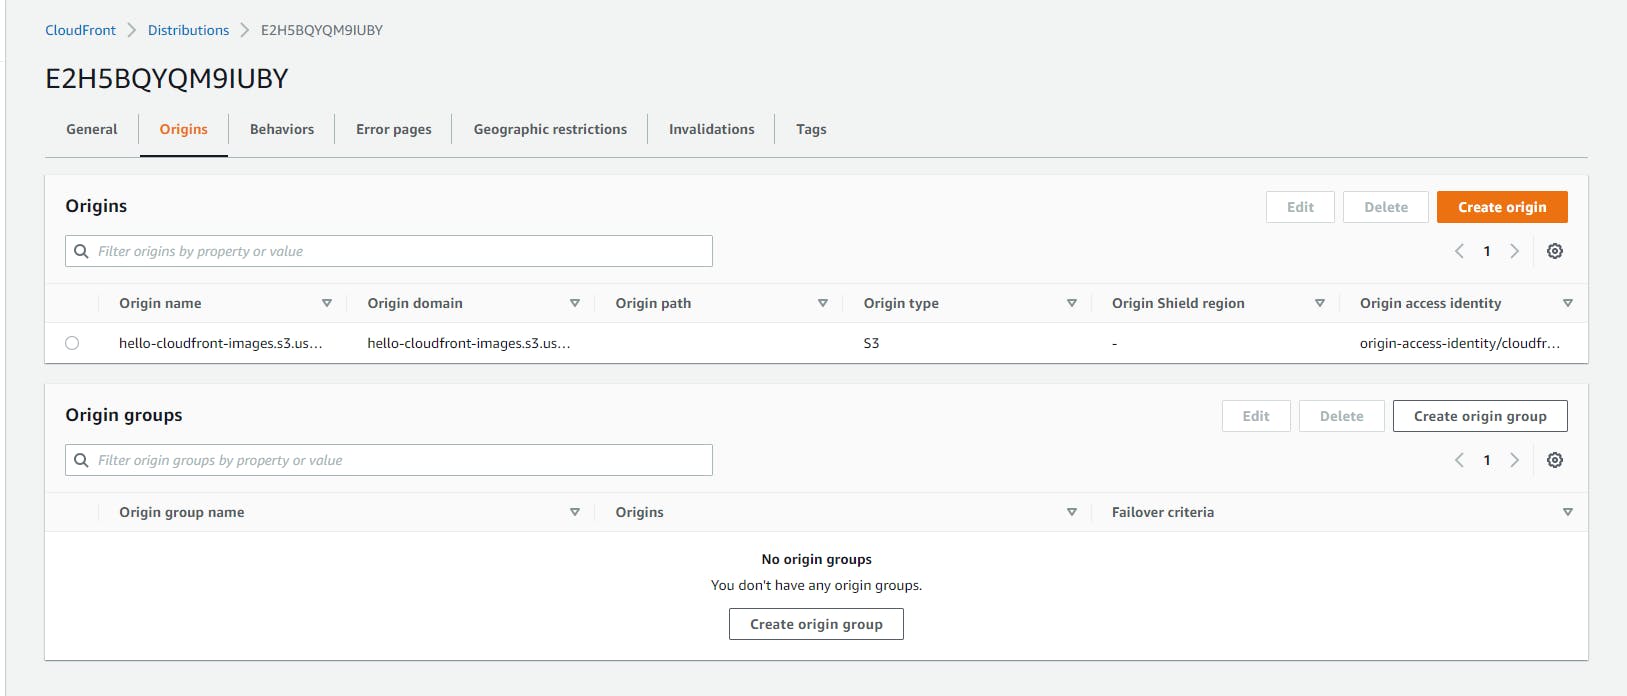
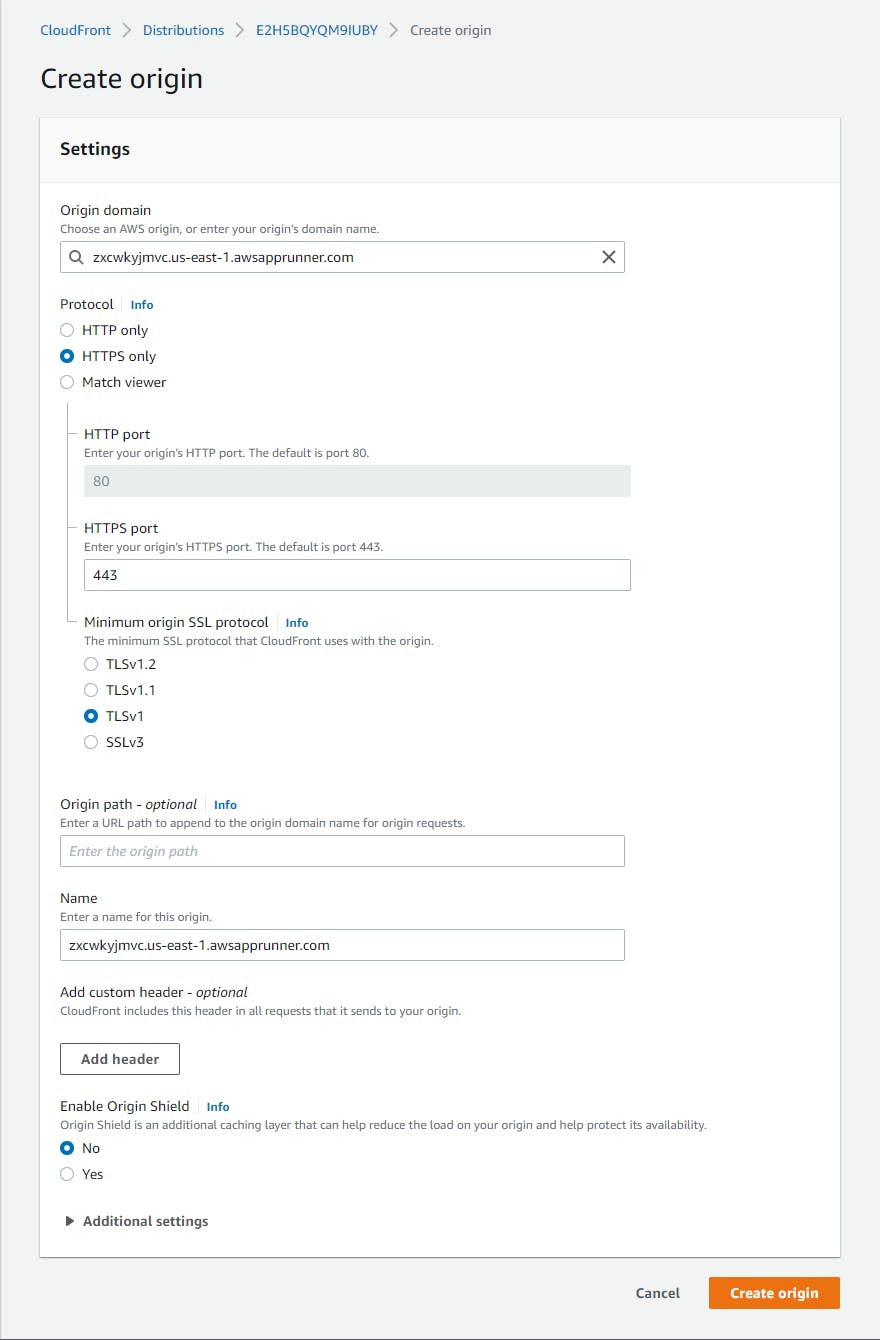
Click Create origin and fill out the page as follows:
A. Origin domain: enter the App Runner endpoint URL you recorded in the previous step.
B. Click Create origin at the bottom of the page.
C. Back on the Distributions page, record the Origin name for the Custom Origin you just added. Ours is
zxcwkyjmvc.us-east-1.awsapprunner.com. This is the CloudFront URL for accessing your website through CloudFront.Select the Behaviors tab and click Create behavior to add a behavior for the new origin. On the Create behavior page,
A. Path pattern: set to *.
A. Origin and origin groups: select the origin you just added for the App Runner site.
B. Cache policy: select CachingDisabled. We do not want to cache the App Runner site, because it is dynamic and we want users to get fresh content.
C. Origin request policy: select UserAgentRefererHeaders. This will pass on request user agent and referer headers to the origin.
D. Click Create behavior at the bottom of the page.
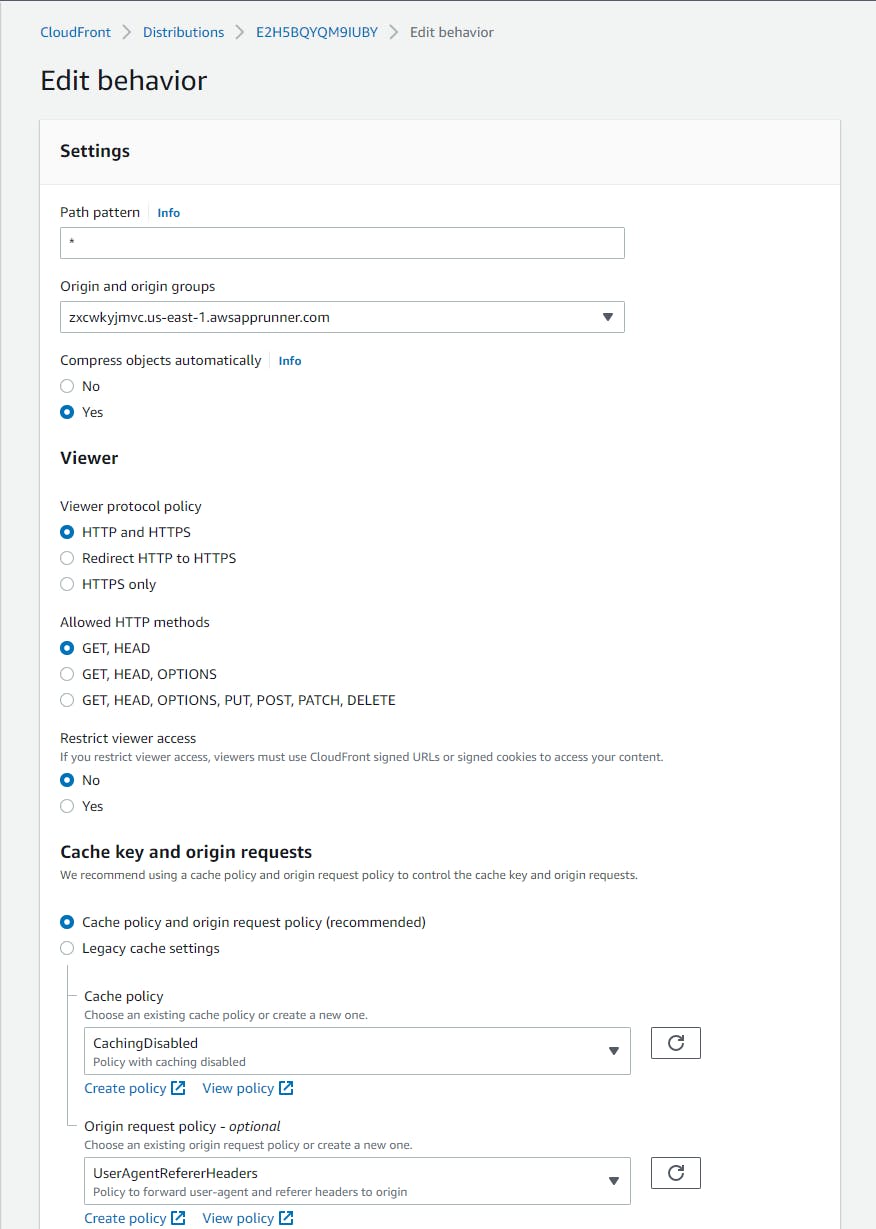
In a browser, visit the CloudFront website URL. Your web site should come up, but the image will not appear. Why? That's because the first behavior is now the App Runner site, which is trying to process * (everything). Although our initial behavior for the S3 origin can serve up the image, it doesn't get a chance to. We can fix that by adding another behavior specifically for images and making it the first-in-line behavior:
A. Click Create behavior.
B. Path pattern: set to *.jpg.
C. Origin and origin groups: select your
hello-cloudfront-images.s3...amazon.combucket from the dropdown, the same value you used in Step 2.D. Cache key and origin requests: select Cache policy and origin request policy.
E. Cache policy: select CacheOneHour.
F. Click Save change.

Review your behaviors and ensure they match this order: 1) *.jpg for the S3 origin, 2) * for the App Runner endpoint, and 3) Default (*) for the S3 origin. To reorder, select a behavior and use the Move Up or Move Down buttons. You must also click Save after reordering. Note that you can't move or delete the original behavior for first origin, which is why we added another.

Now, again visit the CloudFront website URL. This time the website should show the image correctly. Note: it may take a few seconds for the changes you just made to propagate. If you don't see the image at first, try waiting and refreshing the page.
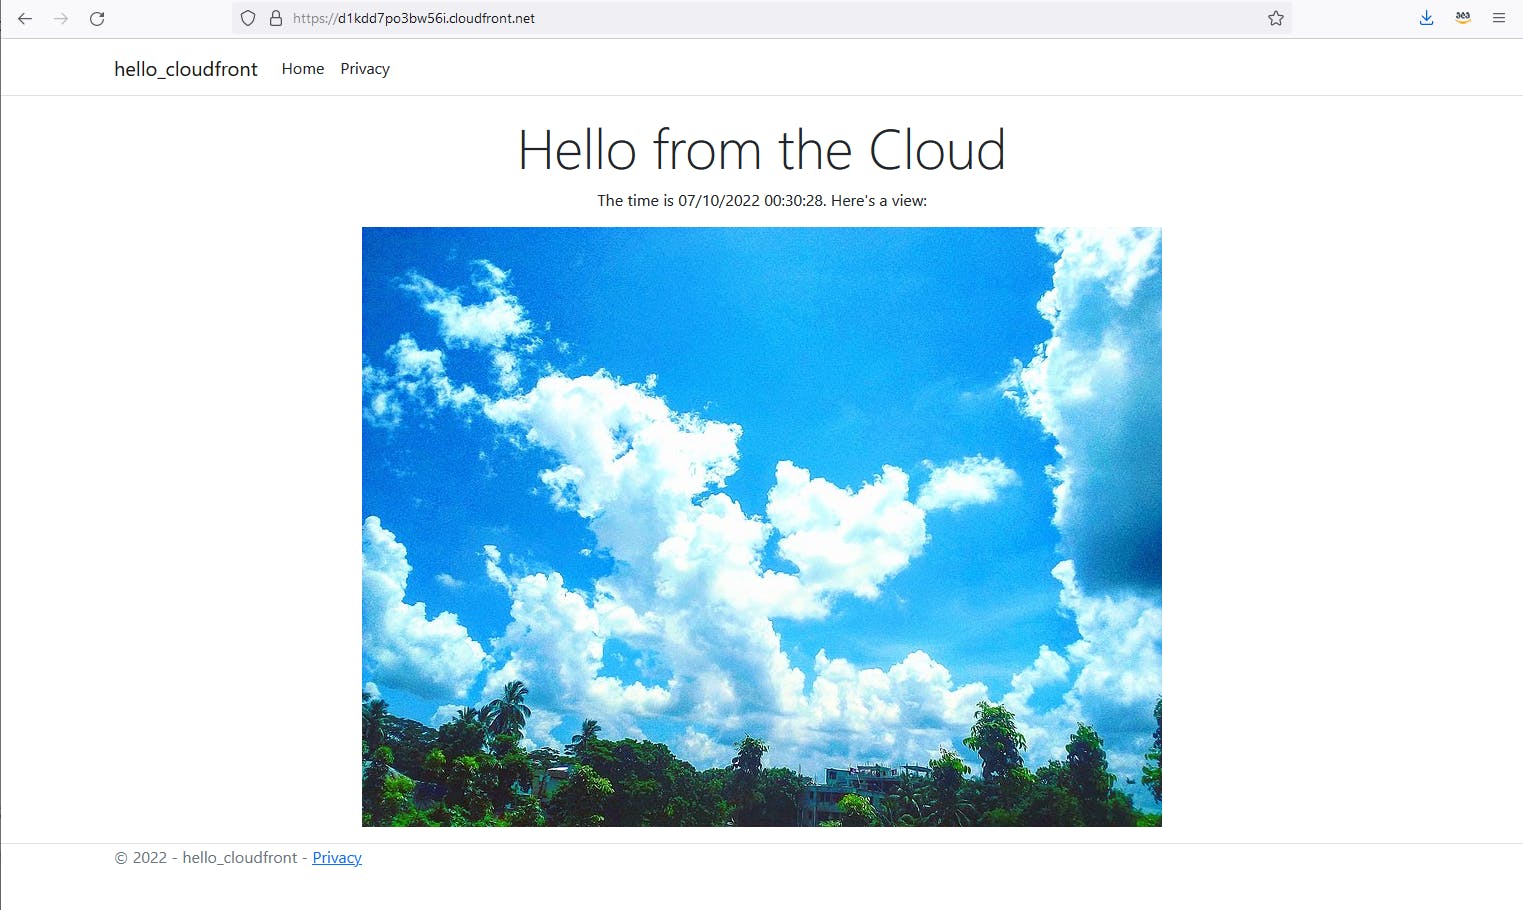
Congratulations, you are now accessing both the App Runner website and the S3 image through your CloudFront distribution!
Step 6: Change the S3 Image
In this step, you'll change the image in S3, then see the website eventually show the new image after the cache one-hour Time To Live (TTL) expires.
Make a copy of Image 2 from Step 1 named image.jpg.
In the AWS management console, navigate to Amazon S3 and click on your bucket to view its objects.
Upload image.jpg, replacing the earlier version of the image (Image 1) with Image 2.
In a browser, visit your App Runner endpoint. You still see Image 1, because it is still cached in the CloudFront POP. However, the time updates each time you refresh the page, because the web pages are not cached. How much time remains before the TTL on the cached image expires? We don't know, but it can't be more than one hour.
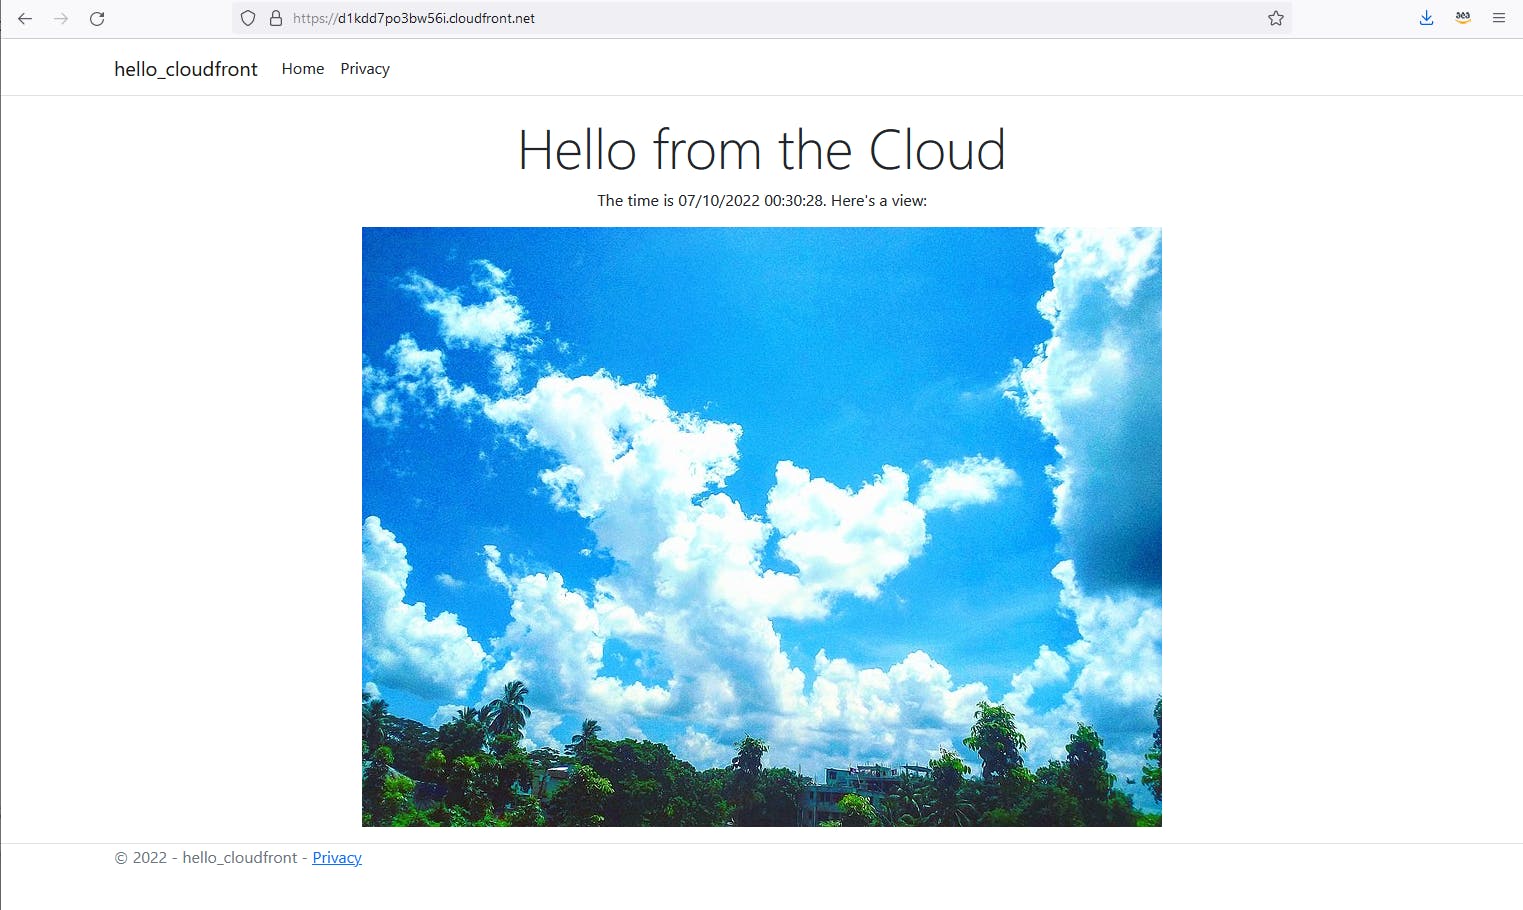
Come back and periodically refresh the page. In no more than one hour's time, you Image 2 should appear. Image 1 will have expired, and CloudFront will again fetch image.jpg from S3, which is now Image 2.
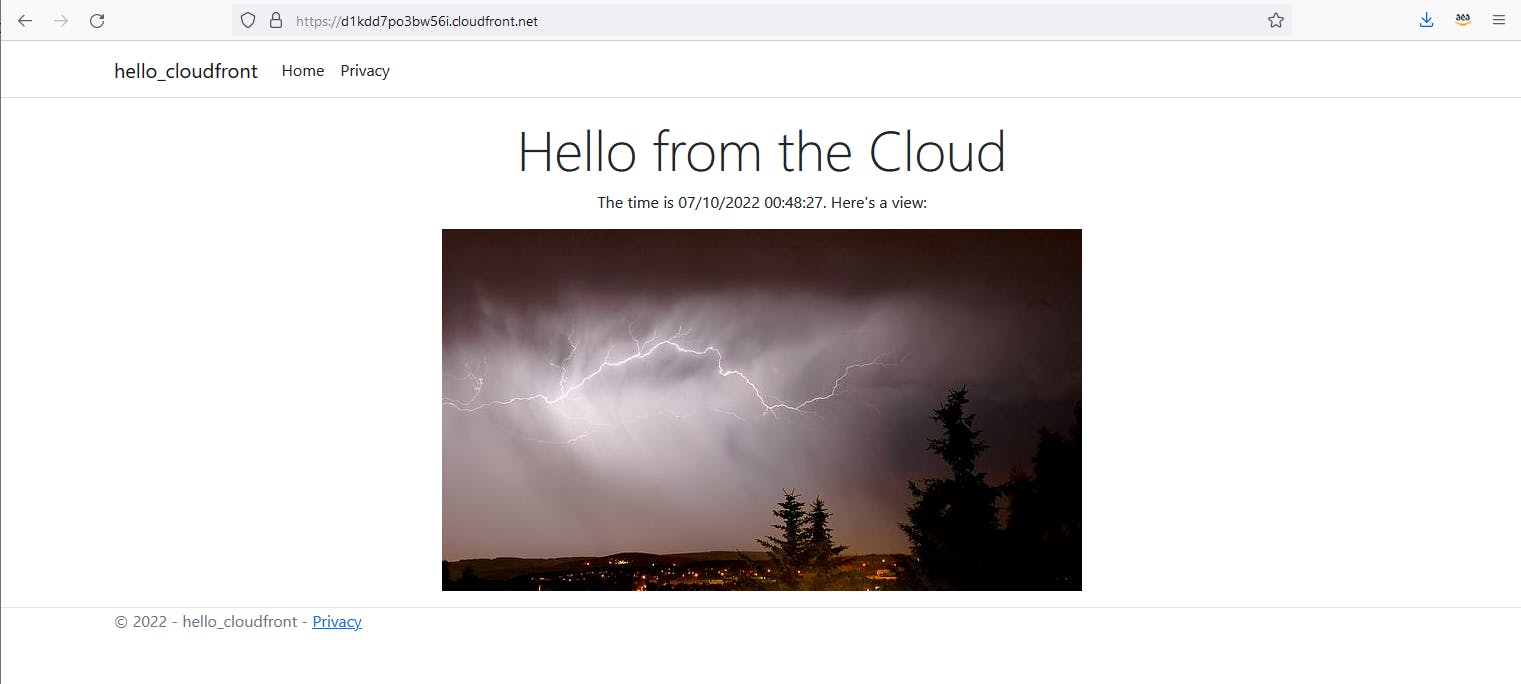
Feel free to replace image.jpg in the S3 bucket and test accessing the site to confirm the cache behavior.
Step 7: Shut it Down
When you're done with the Hello, CloudFront project, follow the steps below to remove the S3 bucket, the App Runner deployment, and the CloudFront distribution. You don't want to accrue charges for something you're not using.
Disable and delete your CloudFront distribution:
A. In the AWS console, navigate to Amazon CloudFront. Note the Status of the distribution is
Enabled.
B. Check the box to select your CloudFront distribution. Click Disable and confirm. Wait for the status to change to
Disabled.C. Check the box to select your CloudFront distribution. Click Delete and confirm. Wait for the distribution to be deleted. No distributions should be listed.
In a command/terminal window, CD to the
hello-cloudfrontfolder and run the command below to delete the deployment and remove the App Runner service. Confirm the action.dotnet aws delete-deployment hello-cloudfront
After the operation completes, navigate to AWS App Runner in the AWS console. The service should no longer be listed.
Navigate to Amazon S3. Delete the
image.jpgobject in the bucket, and then the bucket itself.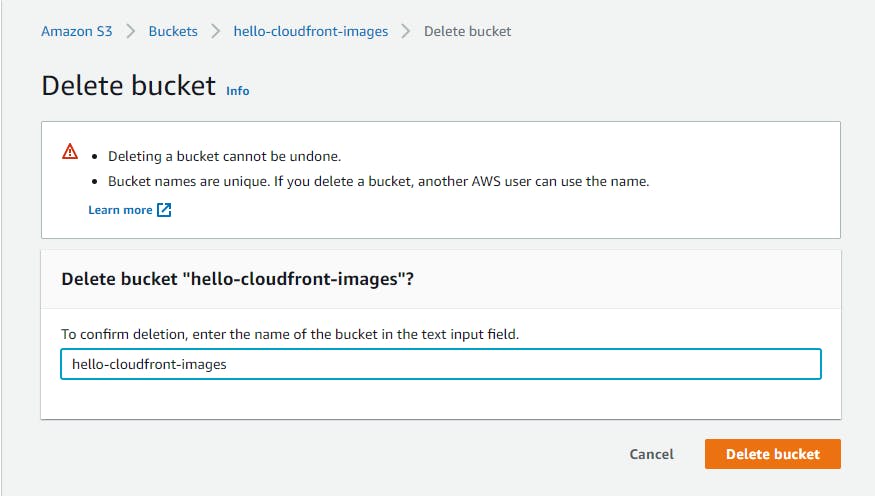
Where to Go From Here
A website with geographically dispersed users should partner with a CDN in order to provide the best performance, a key element of the user experience. Amazon CloudFront is a global CDN that securely transfers content to clients worldwide with low latency and high transfer speed.
In this tutorial, you built a simple web application, hosted it in AWS App Runner, and stored its image in S3. You created a CloudFront distribution, and configured origins and cache behaviors for the website and S3 bucket. You saw how to configure a caching policy for static content and how to disable caching for dynamic content. You learned how to define multiple behaviors for an origin and control the order of behaviors. Lastly, you verified CloudFront edge location caching by replacing the image in the S3 bucket and noting when the new image appeared when refreshing the page in your browser.
This tutorial did not cover all features of CloudFront, such as website cache headers, CORS support, DDoS defenses, or the ability to run code functions in edge locations. To go further, review the documentation and other resources below and gain familiarity by experimenting.
Further Reading
AWS Documentation
Amazon CloudFront Developer Guide
Videos
Setting up CloudFront Distribution for S3 origin by Tino Tran
Blogs
Using Amazon CloudFront with ASP .NET Apps by Steve Roberts
