


Table of contents
- This episode: Amazon Kendra and enterprise search. In this Hello, Cloud blog series, we're covering the basics of AWS cloud services for newcomers who are .NET developers. If you love C# but are new to AWS, or to this particular service, this should give you a jumpstart.
- Amazon Kendra : What is it, and why use It?
- Our Hello, Kendra Project
- Where to Go From Here
- Further Reading
This episode: Amazon Kendra and enterprise search. In this Hello, Cloud blog series, we're covering the basics of AWS cloud services for newcomers who are .NET developers. If you love C# but are new to AWS, or to this particular service, this should give you a jumpstart.
In this post we'll introduce Amazon Kendra and use it in a "Hello, Cloud" .NET program to perform enterprise search with machine learning. We'll do this step-by-step, making no assumptions other than familiarity with C# and Visual Studio. We're using Visual Studio 2022 and .NET 6.
Amazon Kendra : What is it, and why use It?
"He who would search for pearls must dive below."—John Dryden
Amazon Kendra (hereafter "Kendra") is a service that performs enterprise search for websites and applications. AWS describes it as "an intelligent search service powered by machine learning (ML)." With Kendra, you can provide a superior search experience for your employees and customers, even when the content is dispersed across many content repositories and locations. Kendra provides natural language search with high relevancy, easy setup, support for diverse content repositories, and 14 built-in knowledge domains such as HR and finance. Use cases include customer Q & A, research and development, regulation and compliance, and employee productivity.
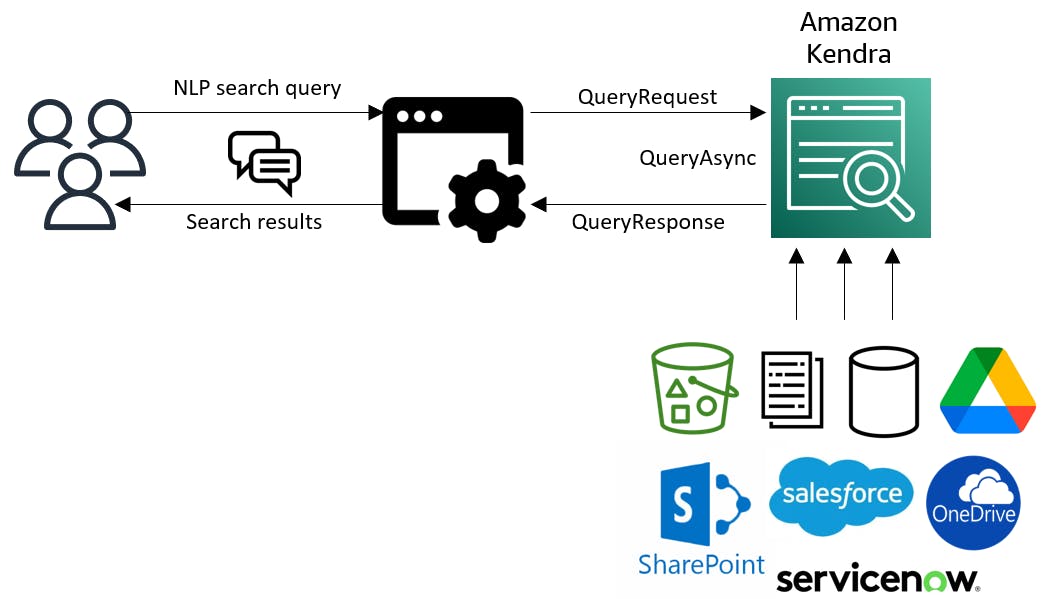
To work with Kendra, you 1) create an index, 2) add data sources using connectors, and 3) test and deploy. There are connectors for Amazon RDS databases, Amazon S3, Confluence, Google Drive, Sales Force, ServiceNow, Slack, Microsoft OneDrive, Microsoft SharePoint, and more.
As you get familiar with Kendra and experiment with it, you can take advantage of its Developer edition which includes free usage of up to 750 hours for the first 30 days. This provides 10,000 documents, supports up to 4,000 queries per day, and runs in 1 availability zone (AZ). Connectors are not free, so read through the Free Tier details carefully.
Our Hello, Kendra Project
We will first create a Kendra index of S3 documents, using public-domain physics papers from Project Gutenberg. After testing search in the AWS console, we'll create a .NET Web API project that processes searches with Kendra using the AWS SDK for .NET.

One-time Setup
For any of the tutorials in the Hello, Cloud series you need the following:
- An AWS account, and an understanding of what is included in the AWS Free Tier.
- Microsoft Visual Studio 2022. If you're using an older version of Visual Studio you won't be able to use .NET 6. If you use a different IDE, you may have to find alternatives to some tutorial steps.
- AWS Toolkit for Visual Studio. You'll need to configure the toolkit to access your AWS account and create an IAM user. Your default AWS profile will be linked to this user when running programs from the command line.
Step 1: Create an Index
In this step, you'll create a Kendra index in the AWS Console.
Sign in to the AWS management console. At top right, select the region you want to work in. You can check supported regions for Amazon Kendra on the AWS regional services list. I'm using us-west-2 (Oregon).
Navigate to Amazon Kendra. You can enter kendra in the search bar.
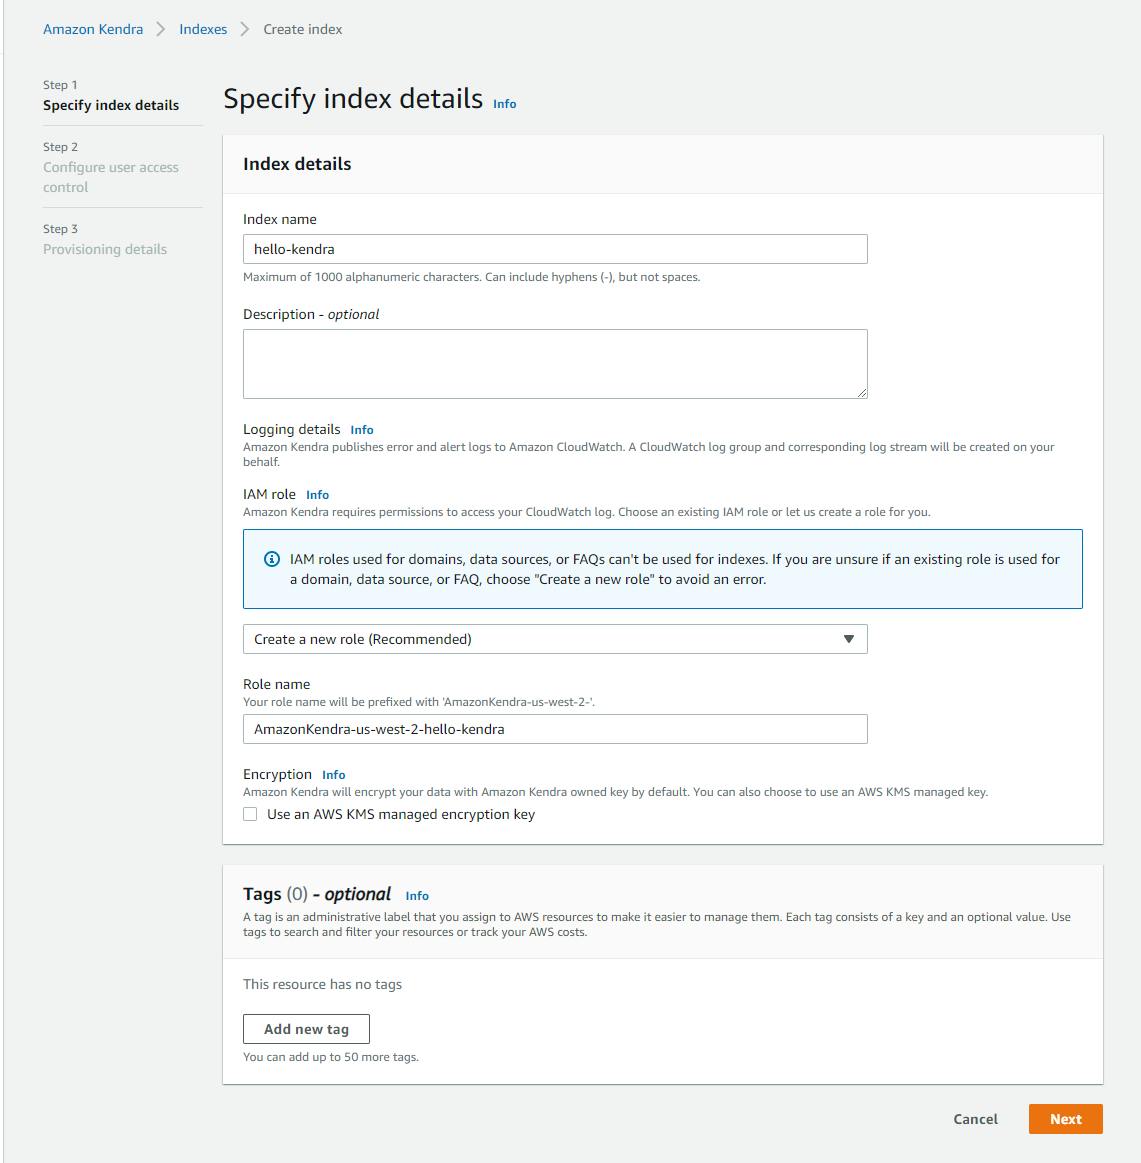
Click Create index and enter/select the following:
A. Index name: hello-kendra.
B. IAM role: Create a new role.
C. Role name: hello-kendra. The console will assign a prefix, your full role name will look something like
AmazonKendra-us-west-2-hello-kendra.D. Click Next.
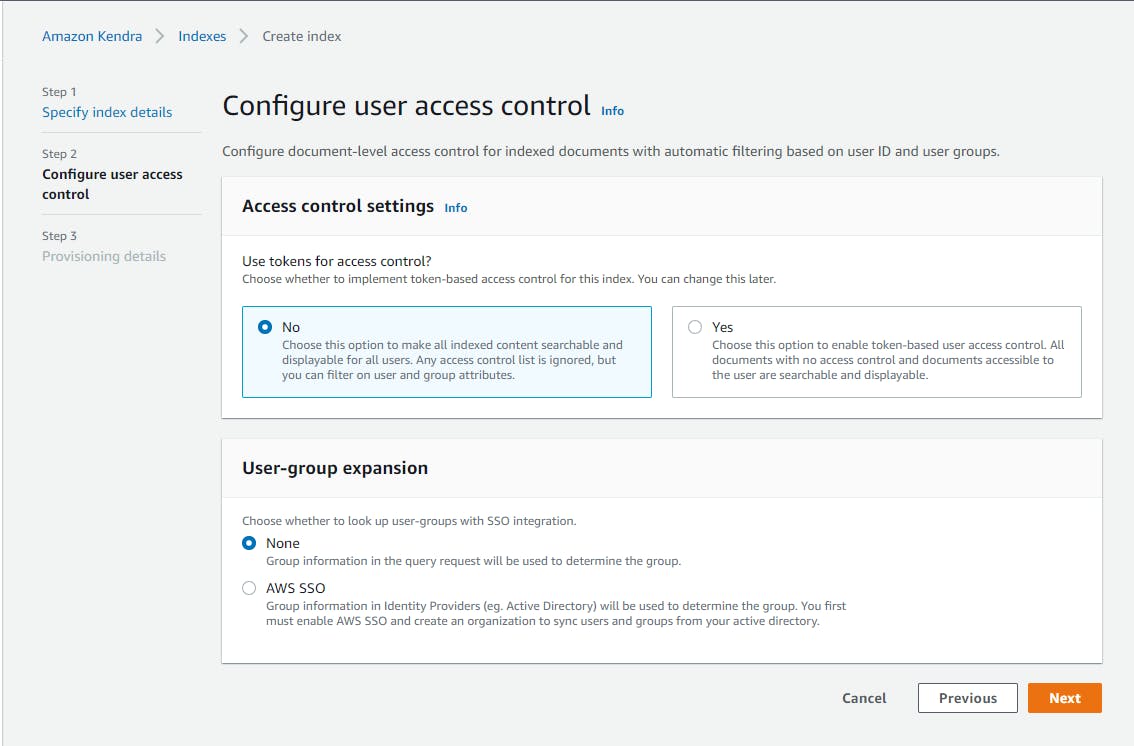
E. On the Configure user access control page, leave the defaults and click Next.
F. On the Provisioning details page, choose Developer edition.
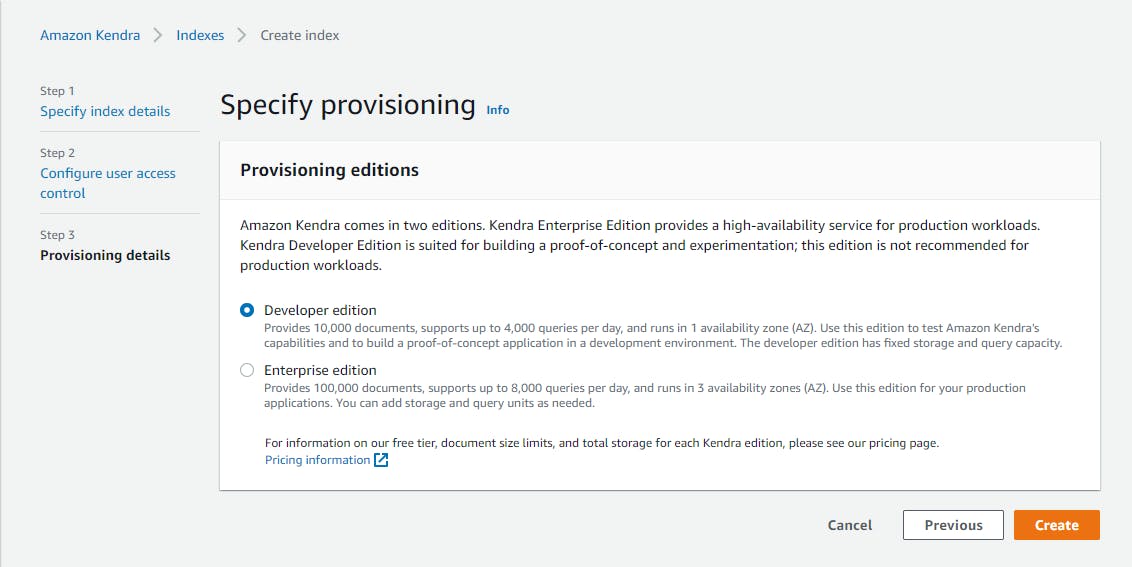
G. Click Create and wait for the index to be created. This may take up to 30 minutes.


Step 2: Add an S3 Data Source
In this step, you'll create an S3 bucket, upload documents, and add an S3 data source to the Kendra index.
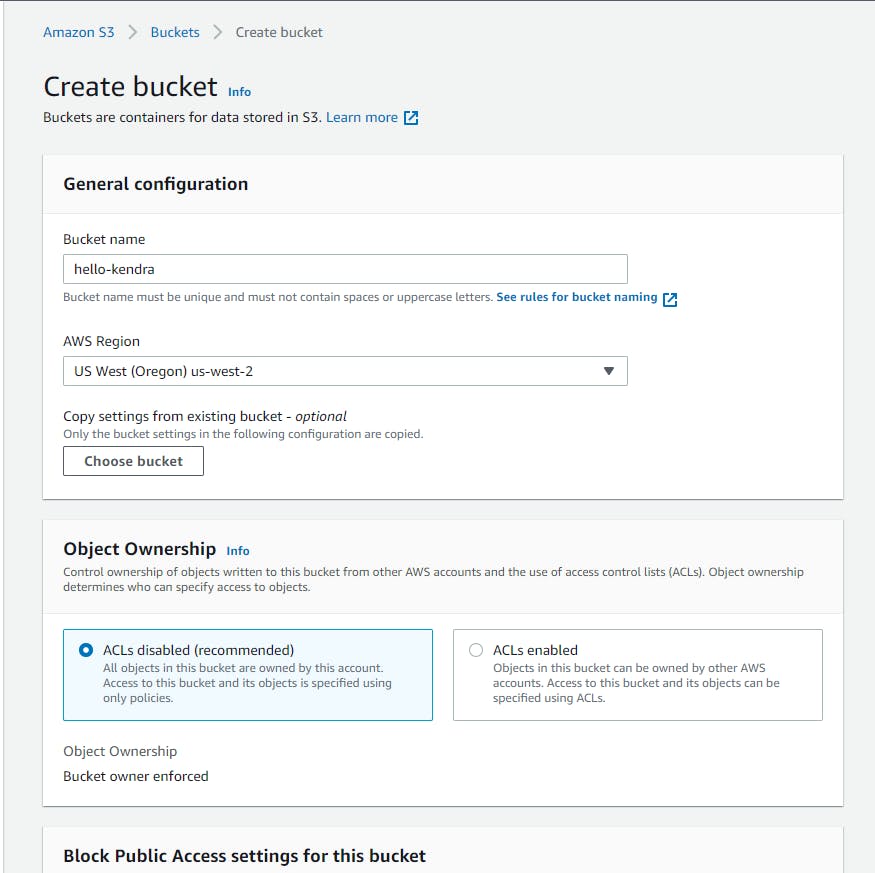
In the AWS console, navigate to Amazon S3 > Buckets and select Create bucket.
Create a bucket, in the same region you used in Step 1, with a name similar to hello-kendra. Since S3 bucket names must be unique, you may need to use a variation of the name if it is in use.
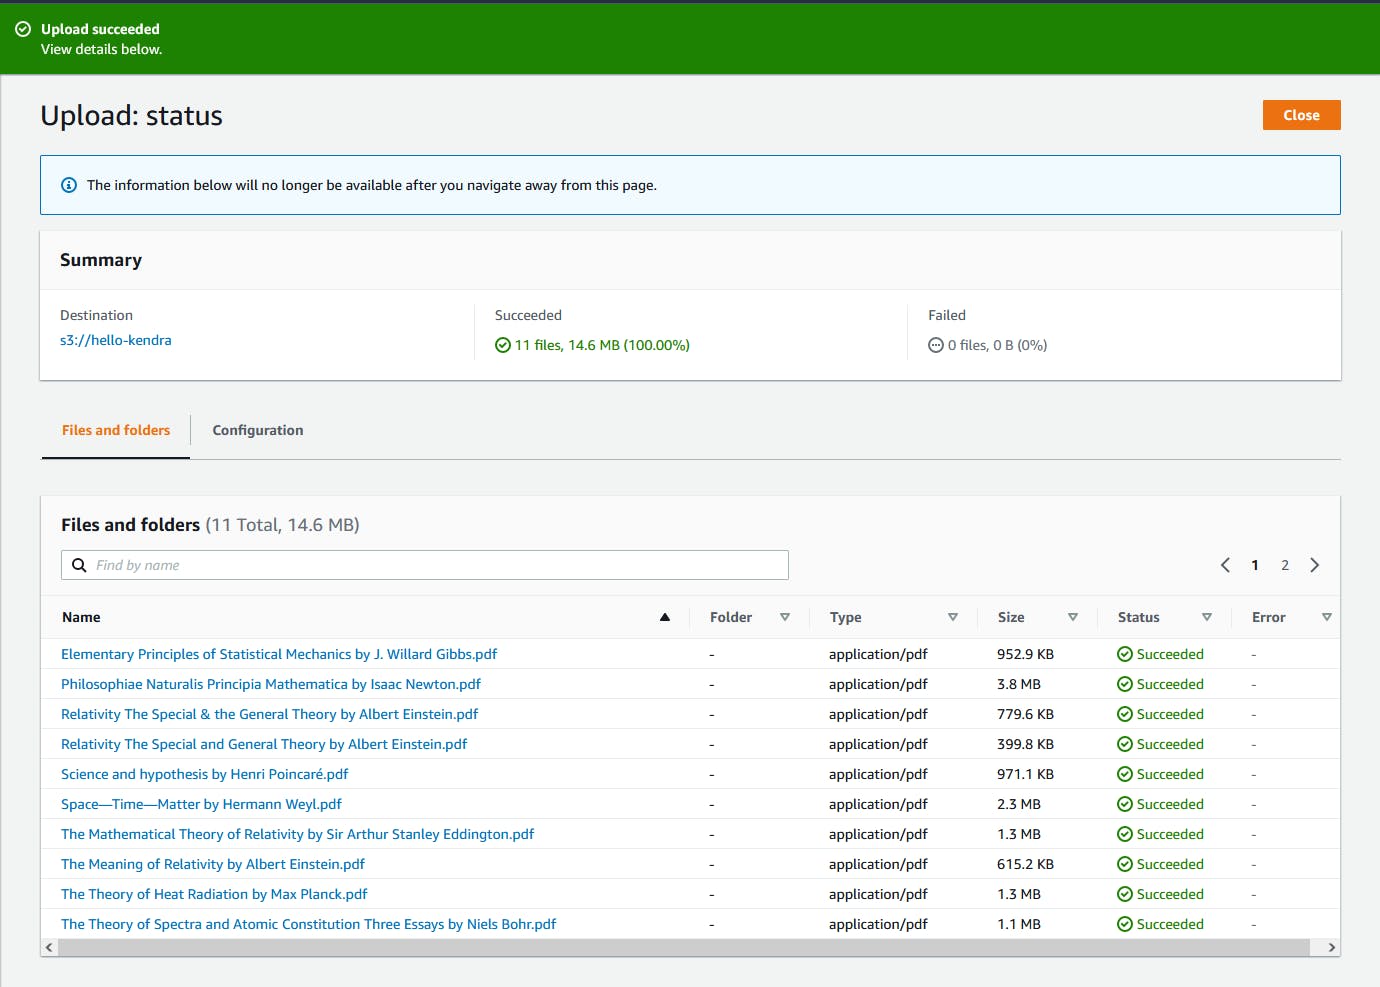
Upload a collection of documents you want to index. If you want to exactly match what we're doing in the tutorial, you can upload a dozen public-domain Physics PDFs from Project Gutenberg. You can find the specific documents used here in the Hello, Kendra source code GitHub repository, in the data folder. If you prefer to upload your own documents, that's fine.
Note the Amazon Resource Name (ARN) of your bucket, which you can find on the bucket detail page, Properties tab. Our hello-kendra bucket's ARN is
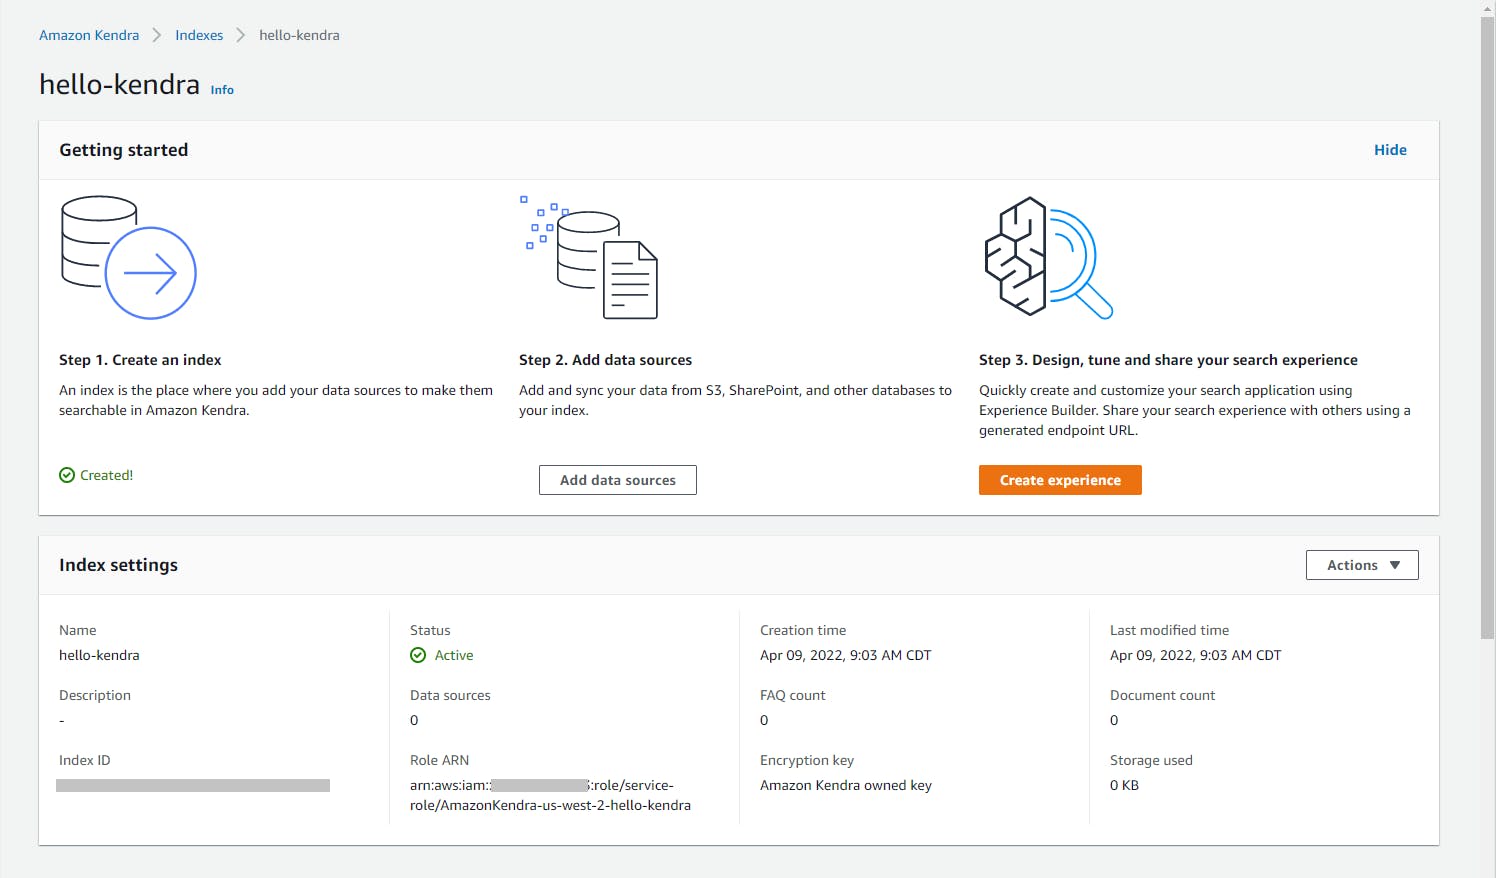
arn:aws:s3:::hello-kendra.Navigate back to Amazon Kendra and select your hello-kendra index. Under Index settings, record the index ID (a GUID) for the index. You'll need to specify that when we get to writing .NET code.
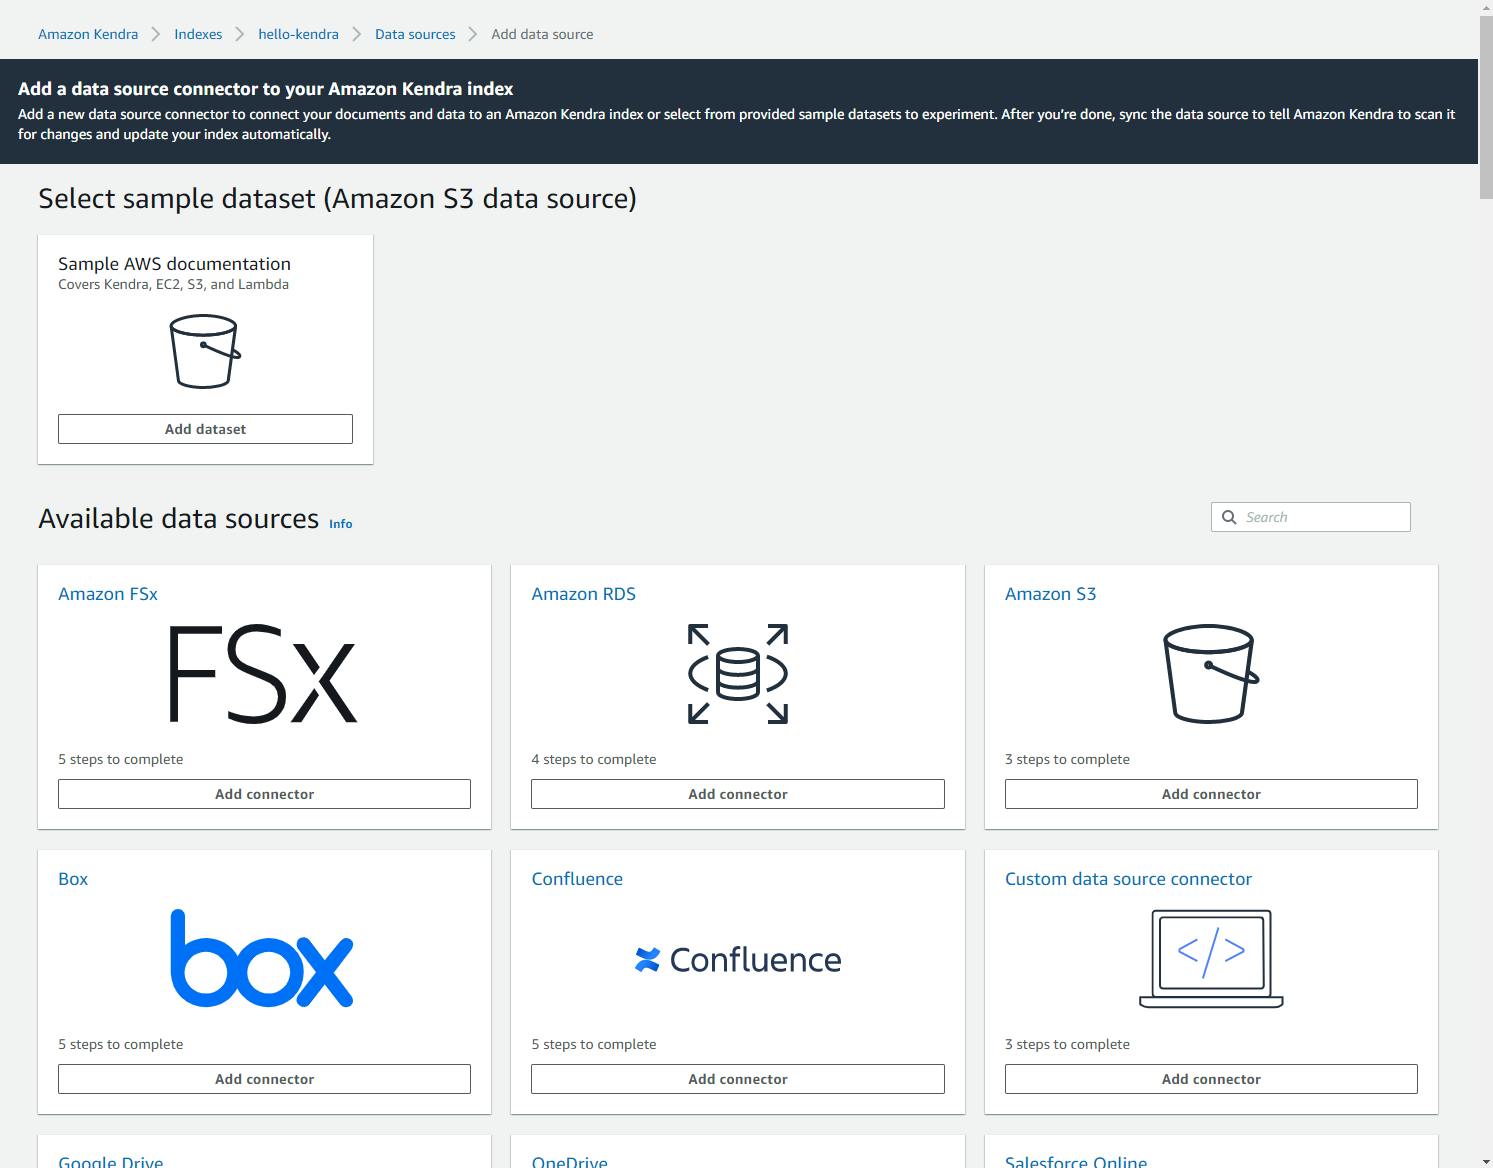
click Add data sources.
From the Available data sources list, find Amazon S3 and click Add connector.
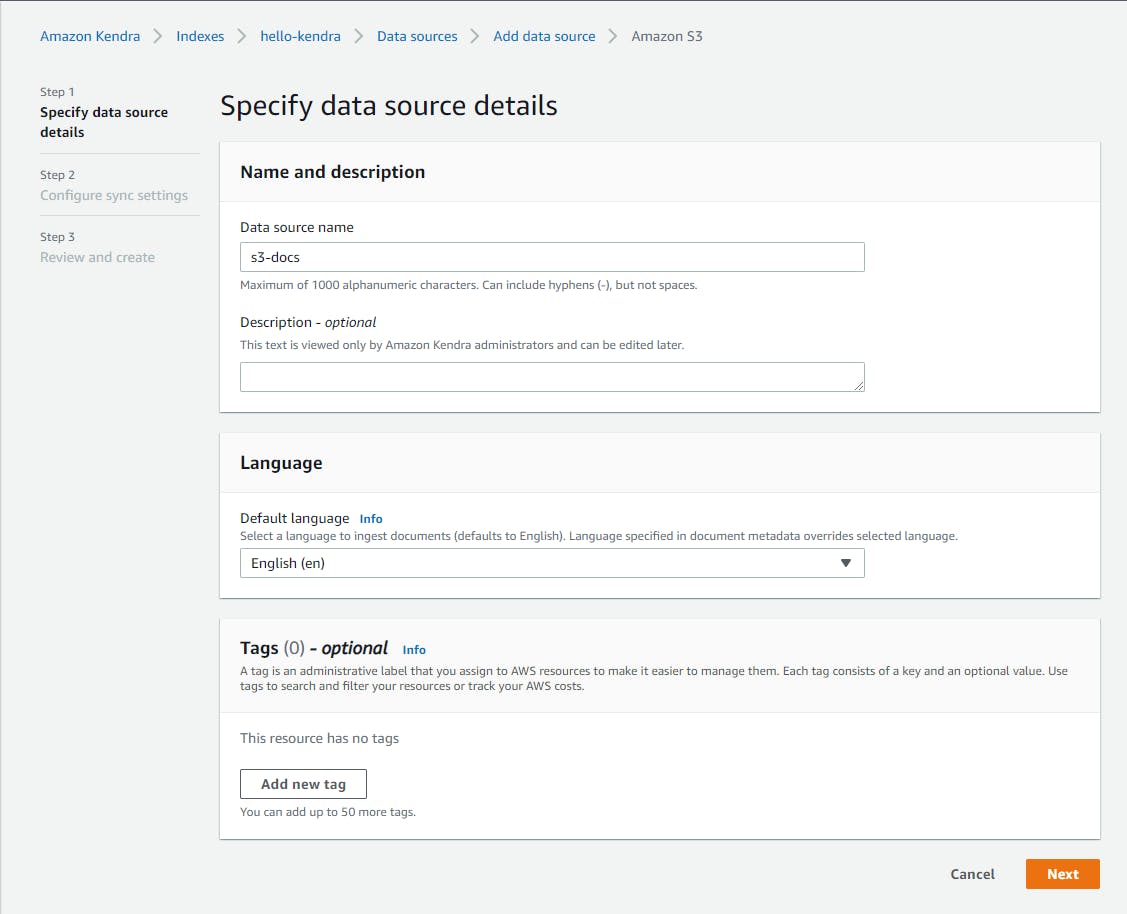
On the Specify source details page, enter/select the following:
A. Data source name: s3-docs.
B. Click Next.
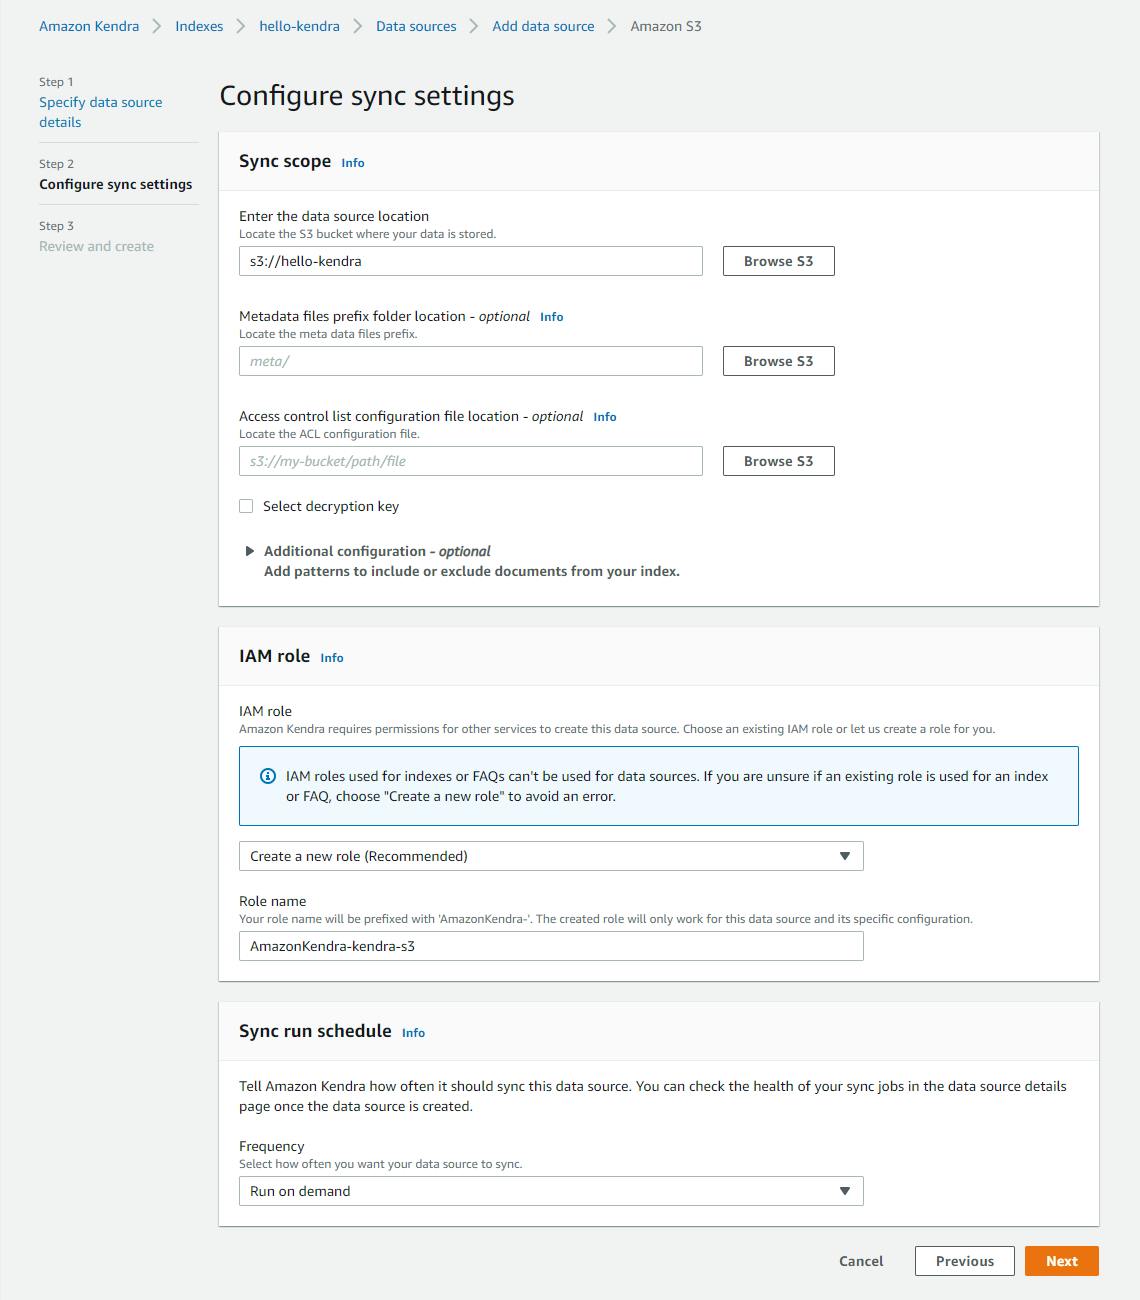
On the Configure sync settings page,
C. for Enter the data source location, browse to and select your S3 bucket. You'll end up with a URI like ``s3://hello-kendra.
D. For IAM role, select Create a new role and type a role name kendra-s3. The console will add a prefix, your full role name will look something like
AmazonKendra-kendra-s3.E. For Sync run schedule - Frequency, select Run on demand.
F. Click Next.
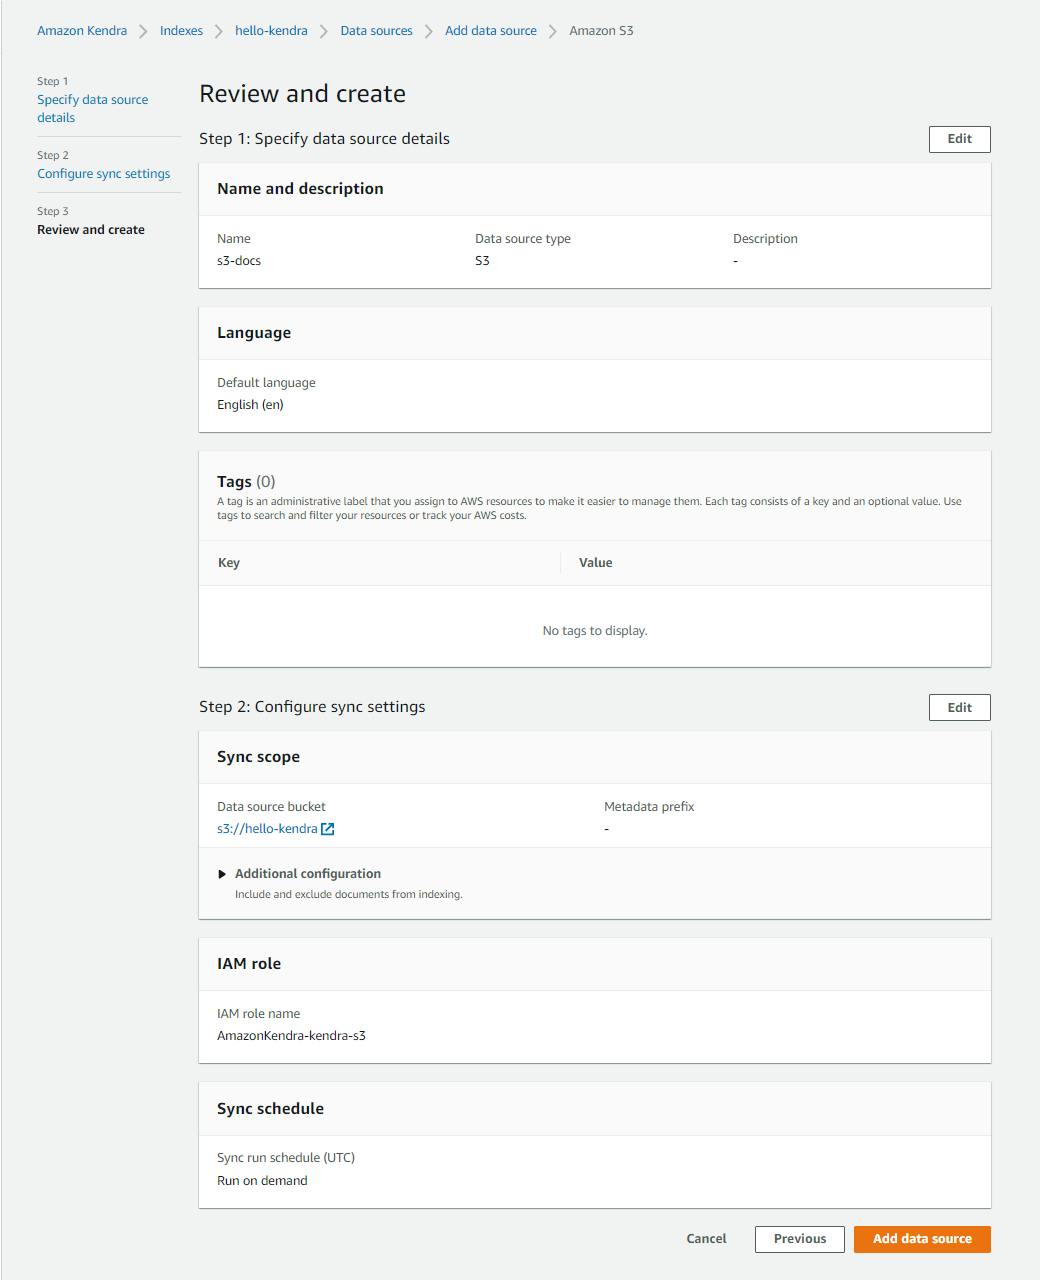
On the Review and create page,
G. under Sync scope, browse to the data source bucket which open up another tab window. If all is well in terms of access, your uploaded S3 documents should be visible.
If there is an access error, you'll need to ensure that Kendra is able to access your S3 bucket for ListBucket and GetObject operations. You can add a bucket policy to your S3 bucket allowing access, such as the one below. If you are using an organization account or are not using test data, you should consult with your security expert and set an appropriately strong policy.
{
 "Version": "2012-10-17",
 "Statement": [
     {
         "Sid": "AddPerm",
         "Effect": "Allow",
         "Principal": "*",
         "Action": [
             "s3:GetObject",
             "s3:ListBucket"
         ],
         "Resource": [
             "arn:aws:s3:::hello-kendra",
             "arn:aws:s3:::hello-kendra/*"
         ]
     }
 ]
}
H. Click Add data source and wait for the data source to be created.
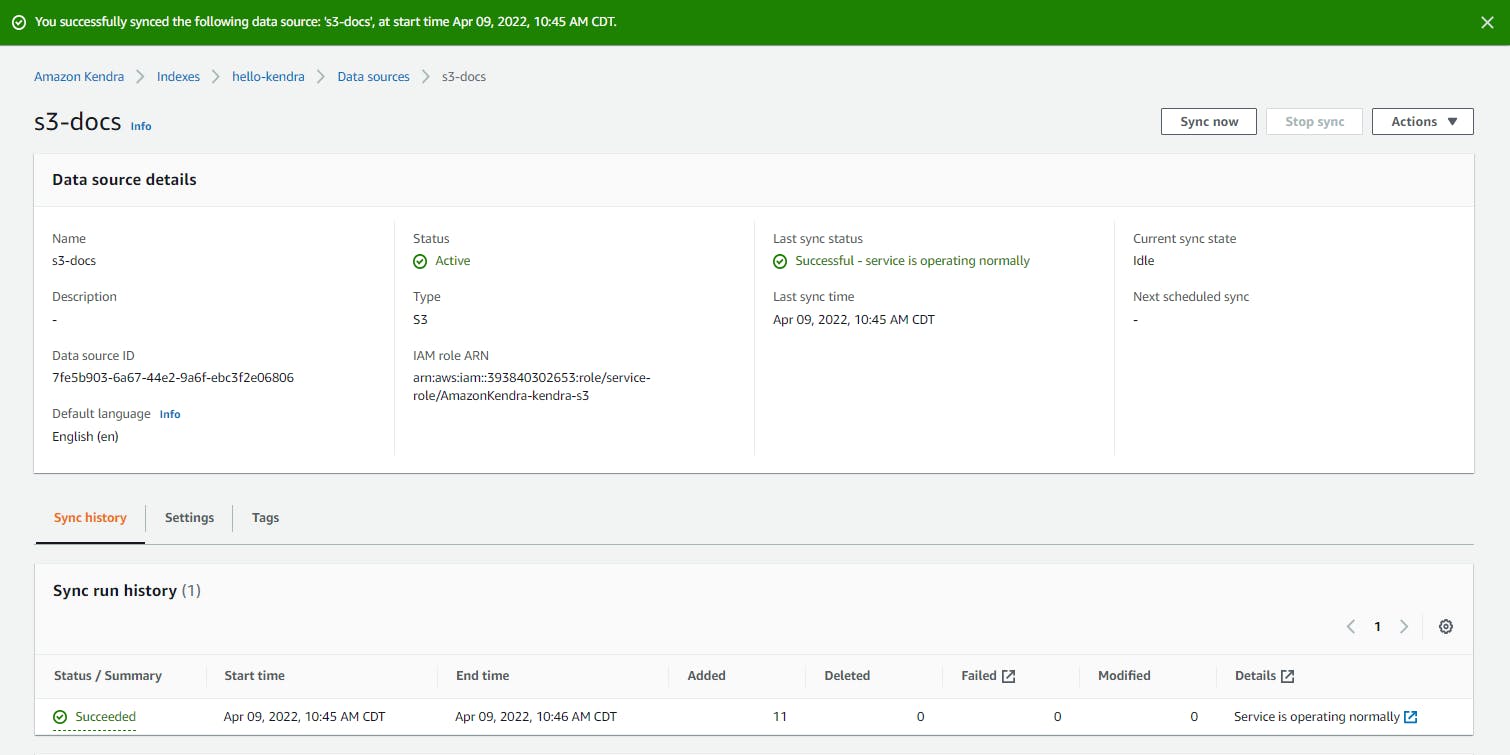
On the S3-docs data connector page, click Sync now to sync the index with your S3 documents. This may take several minutes.
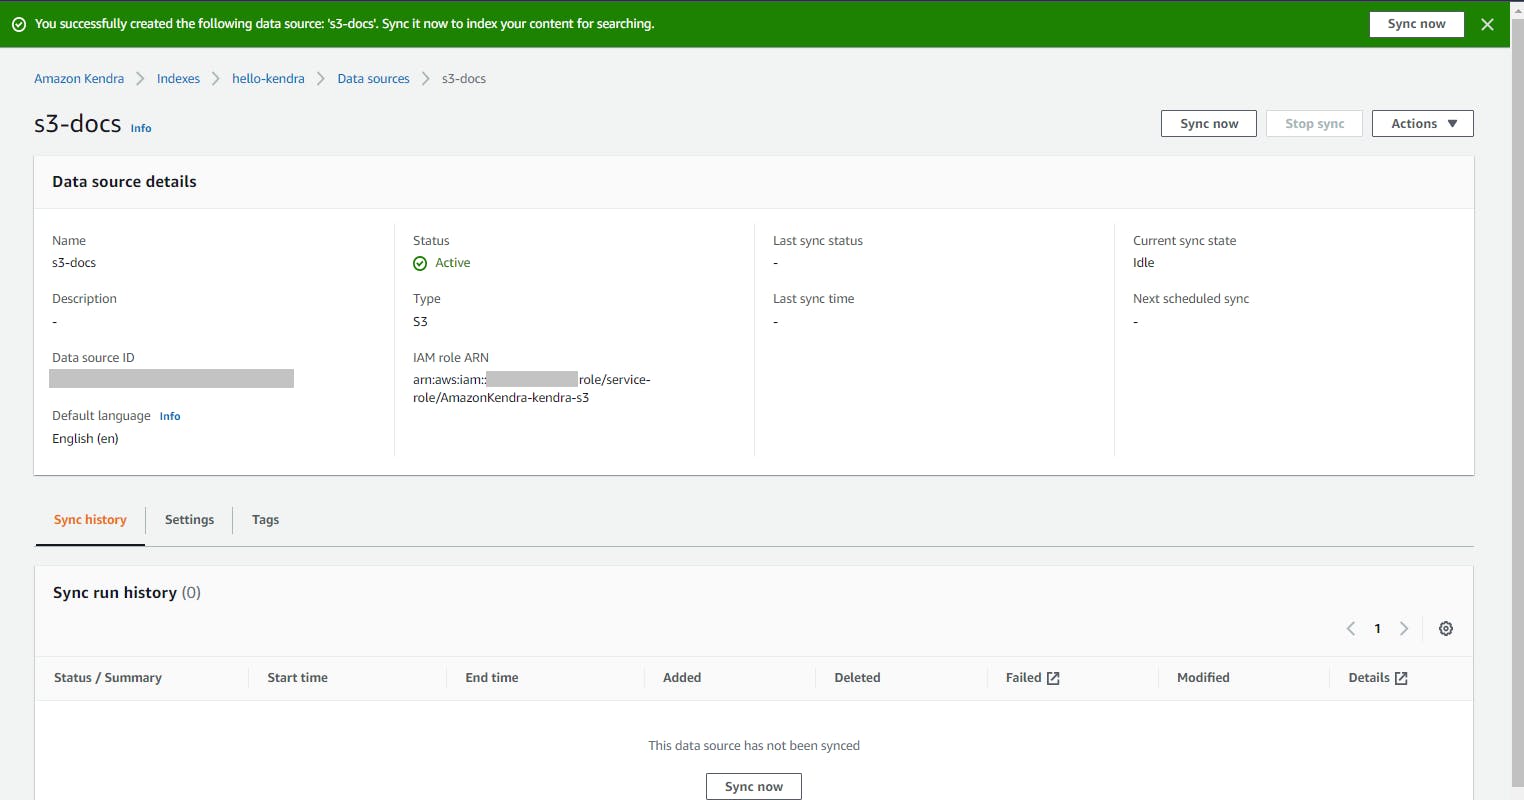
When the sync is completed, you should see a document count confirming your new documents have been indexed.
Step 3: Test Kendra Search in the AWS Console
In this step, you'll test searching your index in the AWS console.
On the left pane, select Search indexed content.
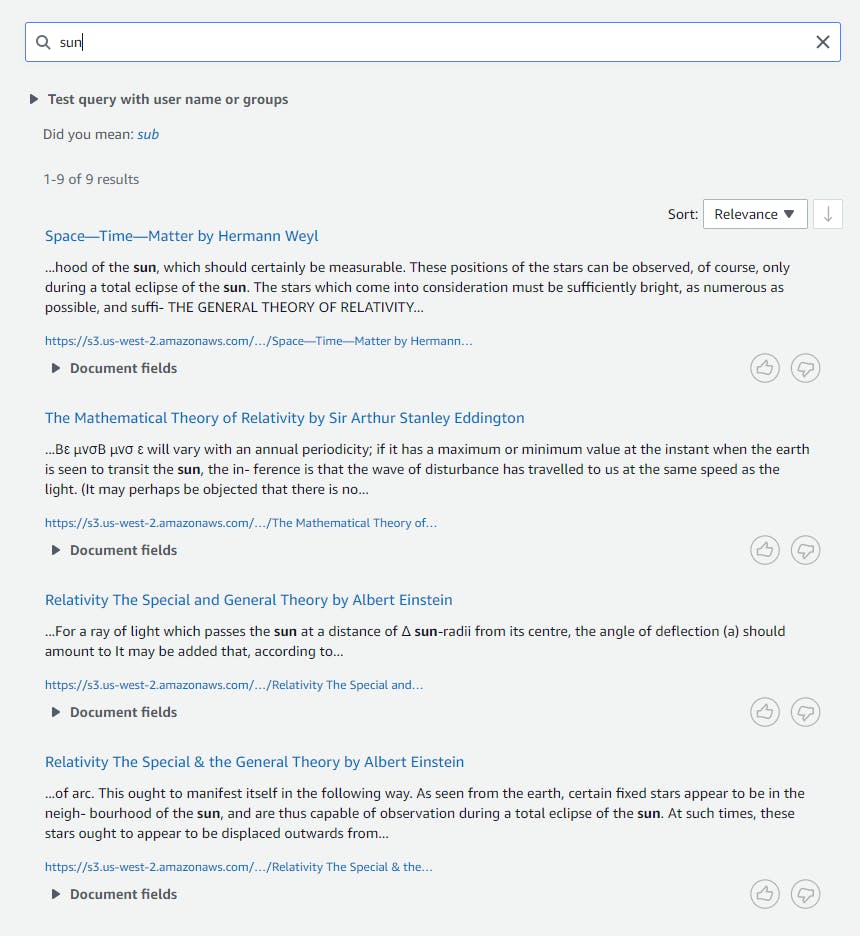
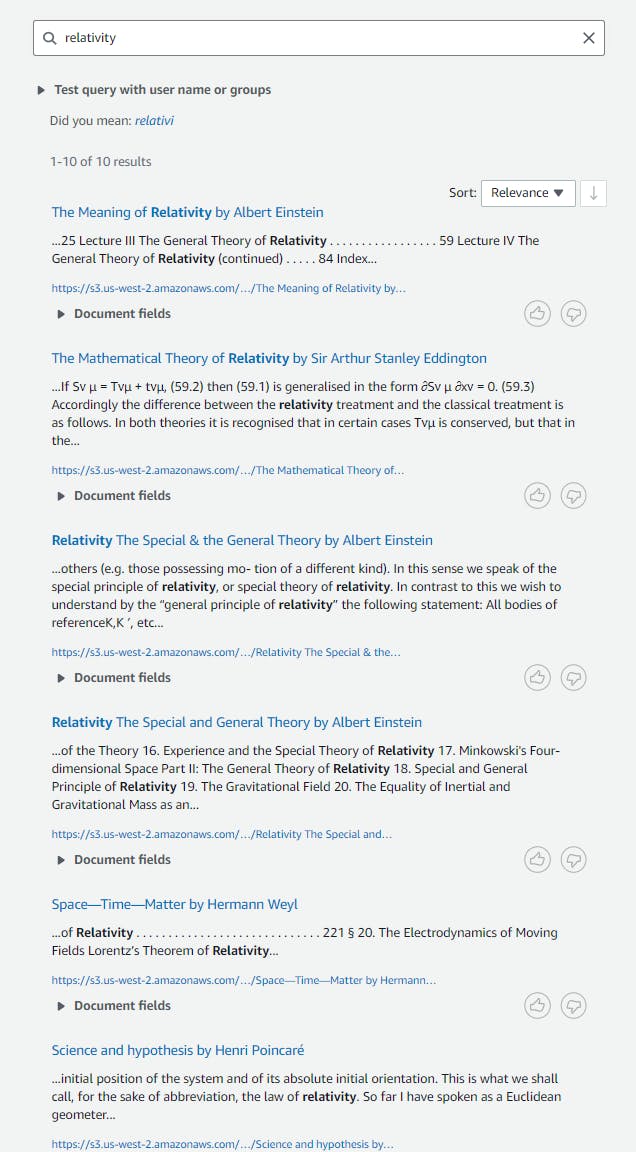
In the search box, enter a term likely to appear in your documents. For our index of sample physics documents, we entered relativity and got these 10 results, including document excerpts.
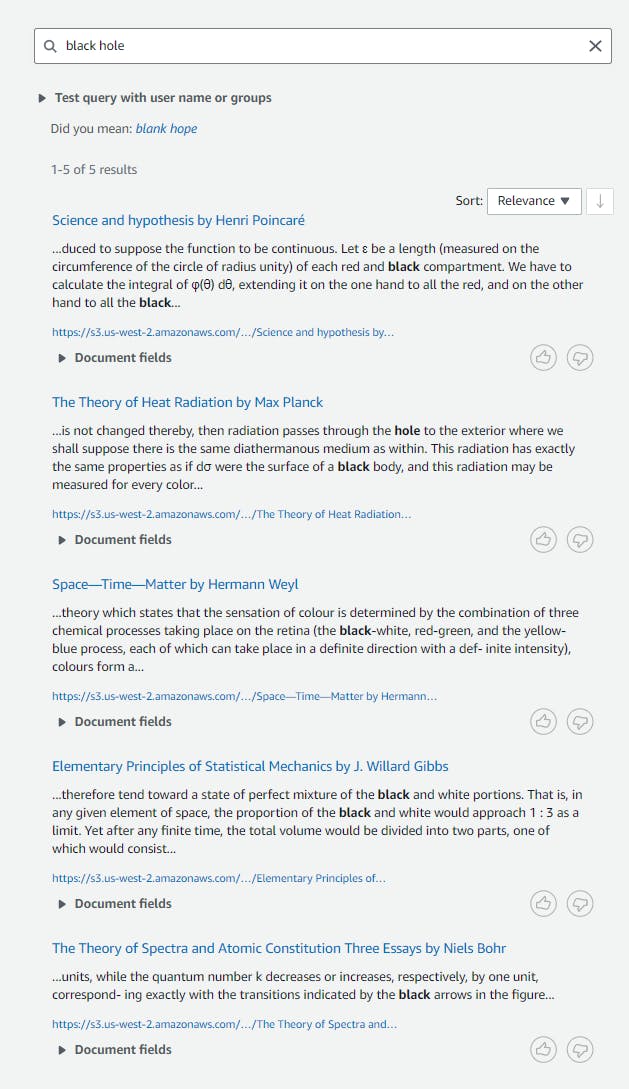
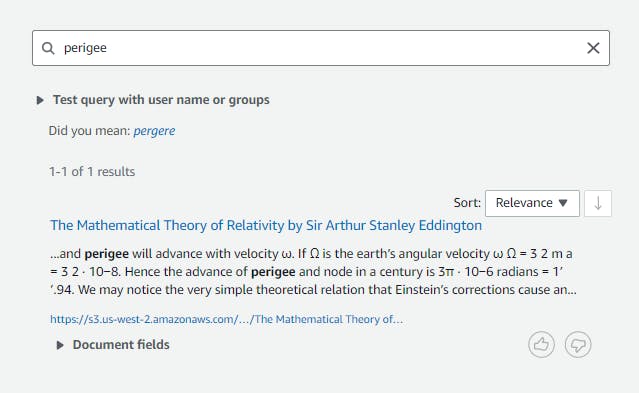
Now try terms less likely to appear in most of your documents. Our search for black hole gave us 5 results. Our search for perigee had just 1 result.
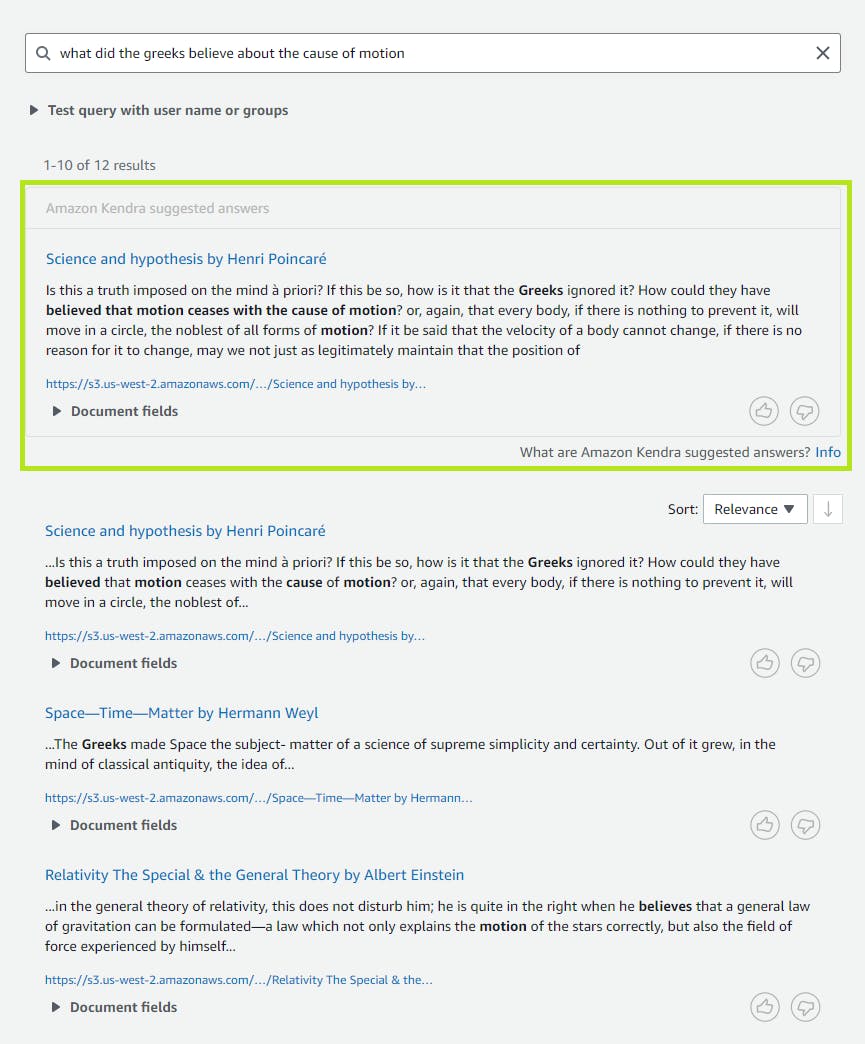
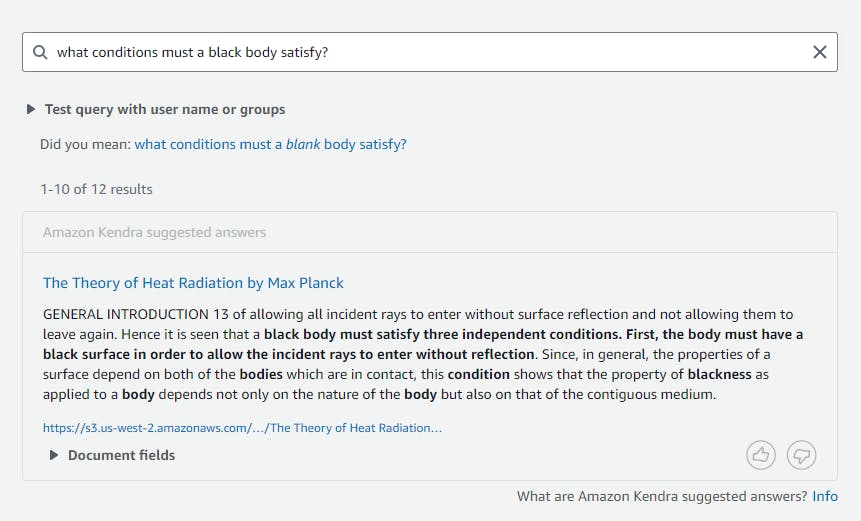
Search for what did the greeks believe about the cause of motion? and note that the top search result is highlighted as an "Amazon Kendra suggested answer". If you click the Info link, you'll see an explanation that this is an excerpt of a document that Kendra determined as the best response to the query. You can also try what conditions must a black body satisfy? and what is euclid's postulate?
Experiment a bit more with searching, including multiple terms and natural language questions, and get a feel for Kendra and the relevancy of results. Try the different options in the sort box. Note the document fields returned for each result, which include a document link and the page number of the excerpt.
Step 4: Add a Thesaurus
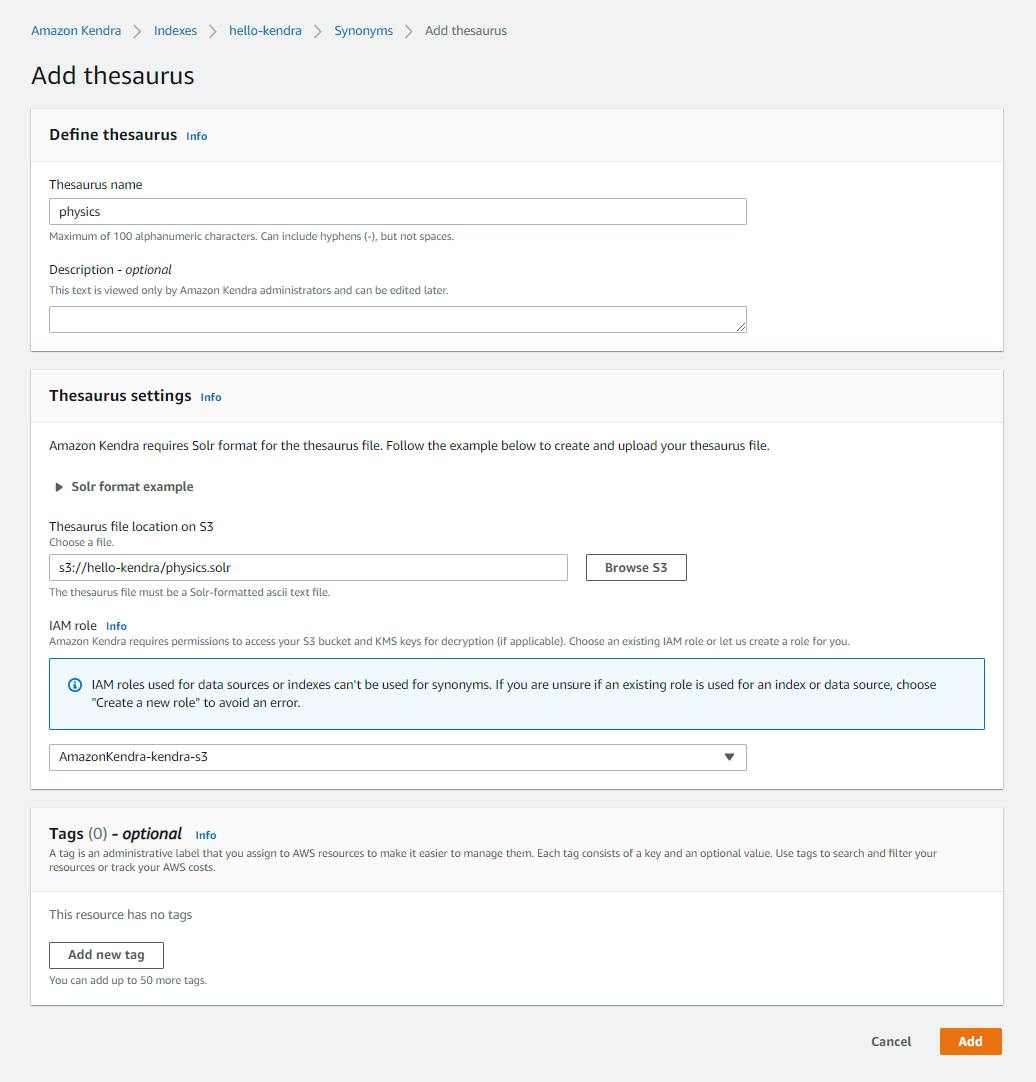
Since our document collection includes a Latin text, Philosophiae Naturalis Principia Mathematica by Isaac Newton, a search for "sun" won't return results from this document. However, we can teach Kendra that the Latin word for sun, "solis", is a synonym for sun. Add a synonym for Latin physics terms to Kendra:
Create a text file named physics.solr with the content below and upload it to your S3 bucket.
globi => globe
mundus => world
planetae => planet
planetarum => planets
solis => sun
stella => star
stellae => stars
On the left pane, select Synonyms and click Add thesaurus and enter/select the following:
A. Thesaurus name: physics.
B. Thesaurus settings - file: browse to and select
.solrin your bucket.C. Role: select the same role you easier in Step 2 #7D.
D. Click Add and wait for the thesaurus to be created.
On the left pane, select Synonyms and click Add thesaurus and enter/select the following:
A. Thesaurus name: physics.
B. Thesaurus settings - browse to and select physics.solr in your bucket.
C.. Click Add.
On the left panel, select Search indexed content and now try a search for sun. This time, Sir Isaac Newton's Latin document is included in the search results. You can see the same for planet.

Step 5: Write a .NET Program for Search
Now that we've seen what Kendra can do, it's time to work with it programmatically. In this step you'll write a .NET 6 Web API project that responds to search queries using Kendra via the AWS SDK for .NET.
Open a command/terminal window and CD to a development folder.
Enter the dotnet new command below to create a console program named hello-kendra.
dotnet new webapi -n kello-kendra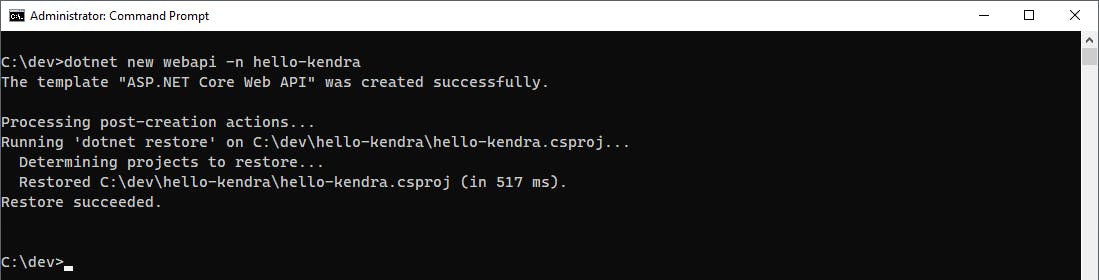
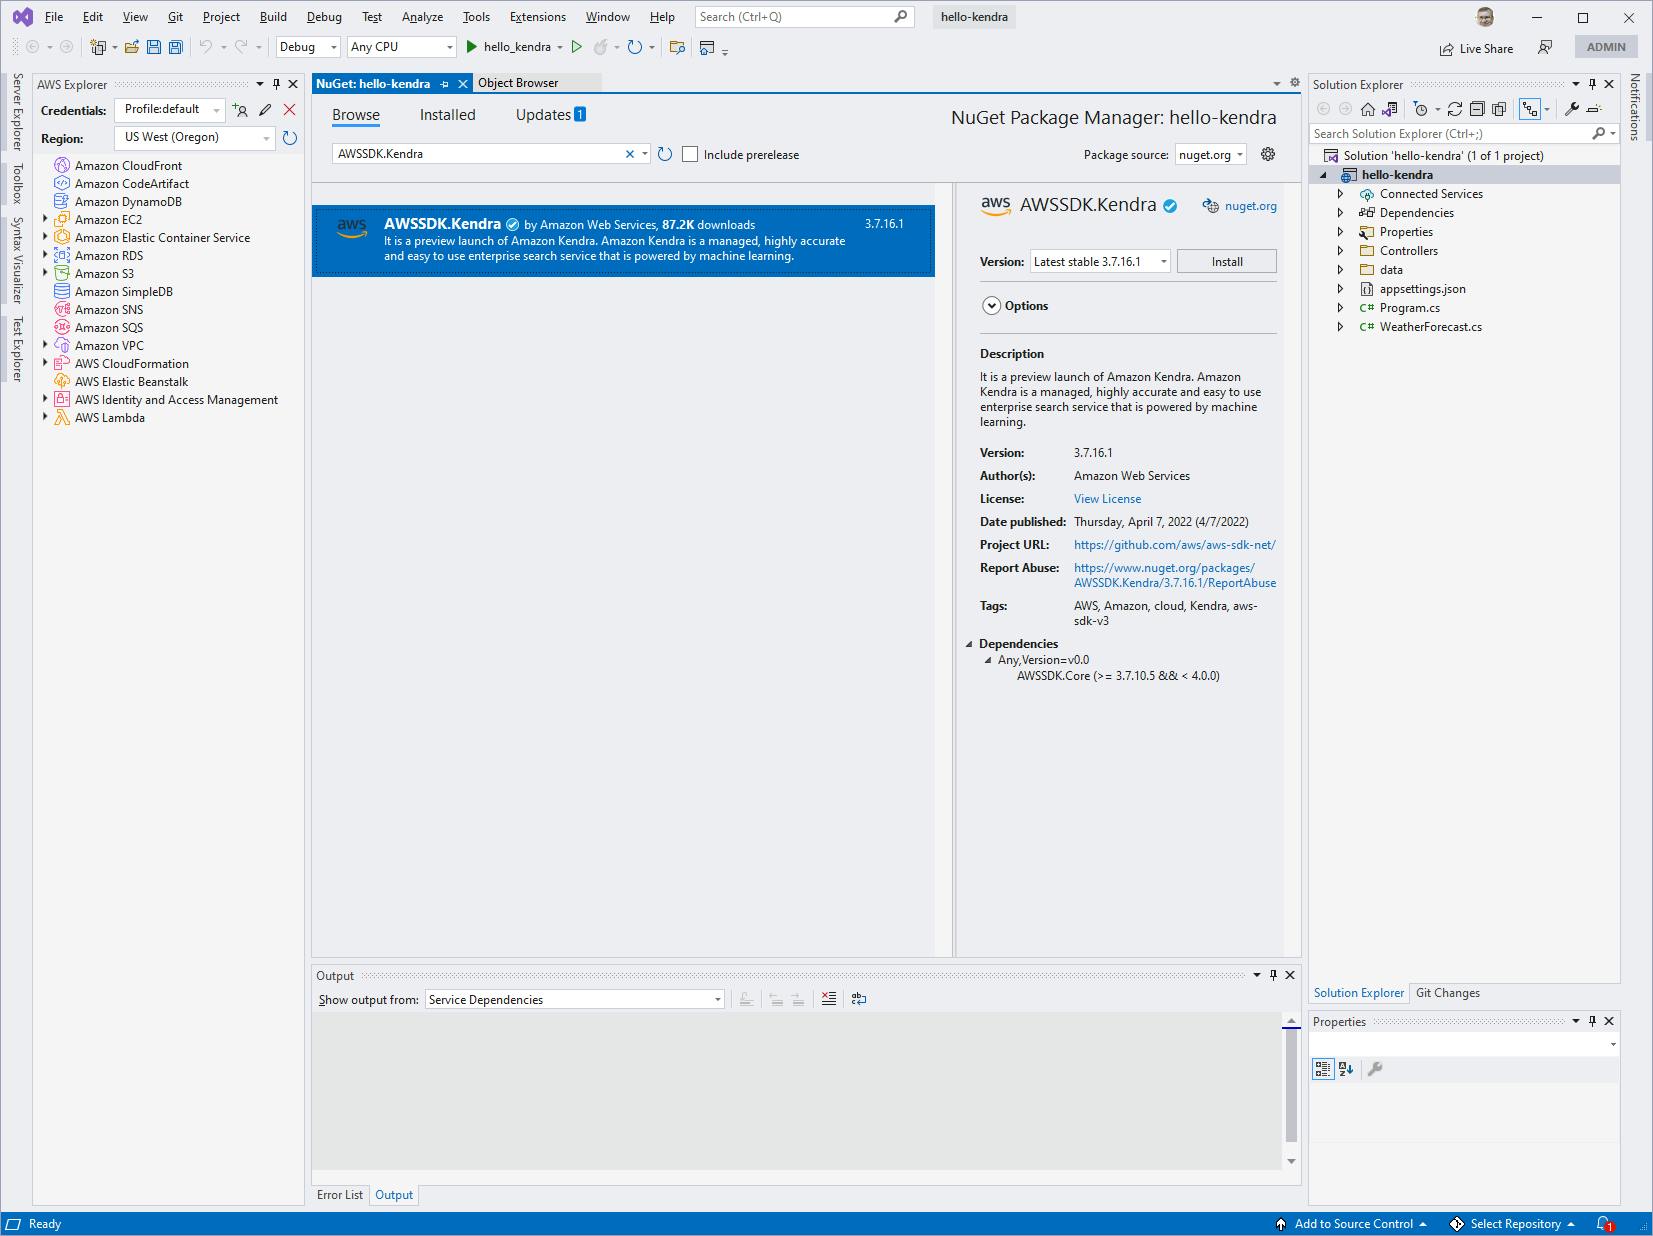
Open the hello-kendra project in Visual Studio.
In Solution Explorer, right-click the hello-kendra project and select Manage NuGet Packages.... Find and install the AWSSDK.Kendra package.
In Solution Explorer, rename WeatherForecast.cs to SearchResult.cs. Our program will return a collection of this class in response to search queries.
Open SearchResult.cs in the code editor, and replace with the code below at the end of this step.
In Solution Explorer, expand the Controllers folder and rename WeatherForecastController.cs to SearchController.cs.
Open SearchController.cs in the editor and replace with the code below.
A. Replace [Index-ID]with the Index ID you record earlier in Step 2 #5.
B. Set RegionEndpoint to the region you are using.
Save your changes and build the program.
SearchResult.cs
namespace hello_kendra;

public class SearchResult
{
    public string Title { get; set; } = null!;
    public string Excerpt { get; set; } = null!;
    public string Document { get; set; } = null!;
}
SearchController.cs
using Microsoft.AspNetCore.Mvc;
using Amazon;
using Amazon.Kendra;
using Amazon.Kendra.Model;

namespace hello_kendra.Controllers;

[ApiController]
[Route("[controller]")]
public class SearchController : ControllerBase
{
    const string INDEX_ID = "[Index-ID]";

    private RegionEndpoint region = RegionEndpoint.USWest2;

    private readonly ILogger<SearchController> _logger;
    private AmazonKendraClient client;

    public SearchController(ILogger<SearchController> logger)
    {
        _logger = logger;
        client = new AmazonKendraClient(region);
    }

    [HttpGet]
    public async Task<IEnumerable<SearchResult>> Get([FromQuery] string term)
    {
        var request = new QueryRequest()
        {
            IndexId = INDEX_ID,
            QueryText = term
        };

        var response = await client.QueryAsync(request);

        return response.ResultItems.Select(result => new SearchResult
        {
            Title = result.DocumentTitle.Text,
            Document = result.DocumentURI,
            Excerpt = result.DocumentExcerpt.Text
        })
        .ToArray();
    }
}
Understand the Code
Here's what this short piece of code does. In SearchController.cs, the constructor instantiates an AmazonKendraClient, passing in the AWS region. The controller implements a /Search HTTP GET operation for searching with a query parameter named term. Kendra is invoked to perform the search by creating a QueryRequest object with the Kendra index ID and query term, and passing that to the client's QueryAsync method. The returned QueryResponse response includes a collection of results named ResultItems. We iterate over that collection to generate our collection of SearchResult objects, populated with document title, document link, and excerpt text from the results.
Step 6: Test the Program
In this step, you'll run your .NET code and see it interact with Kendra to perform searches.
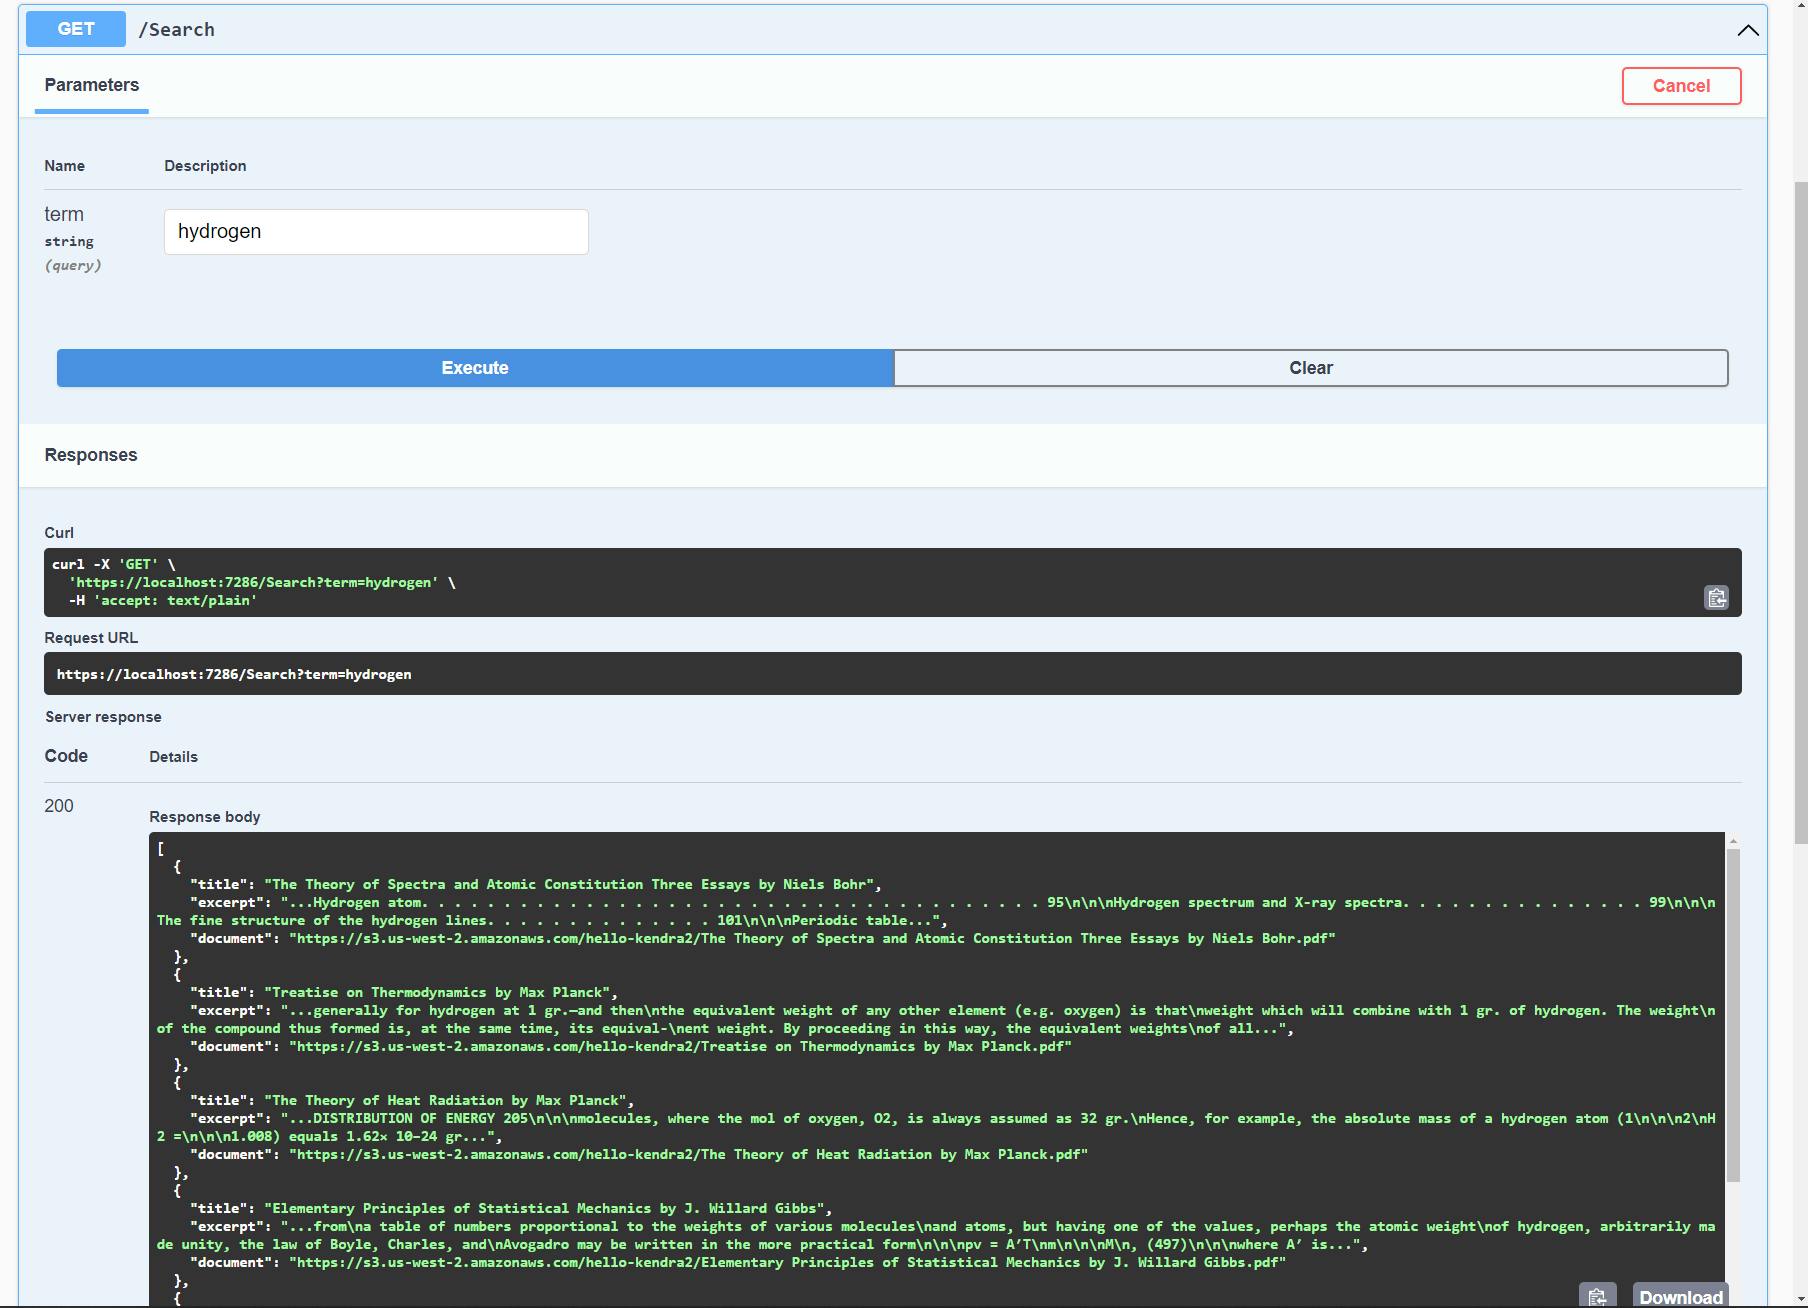
In Visual Studio, press F5 to run the program. A Swagger page will open in your browser showing a single /Search GET operation.
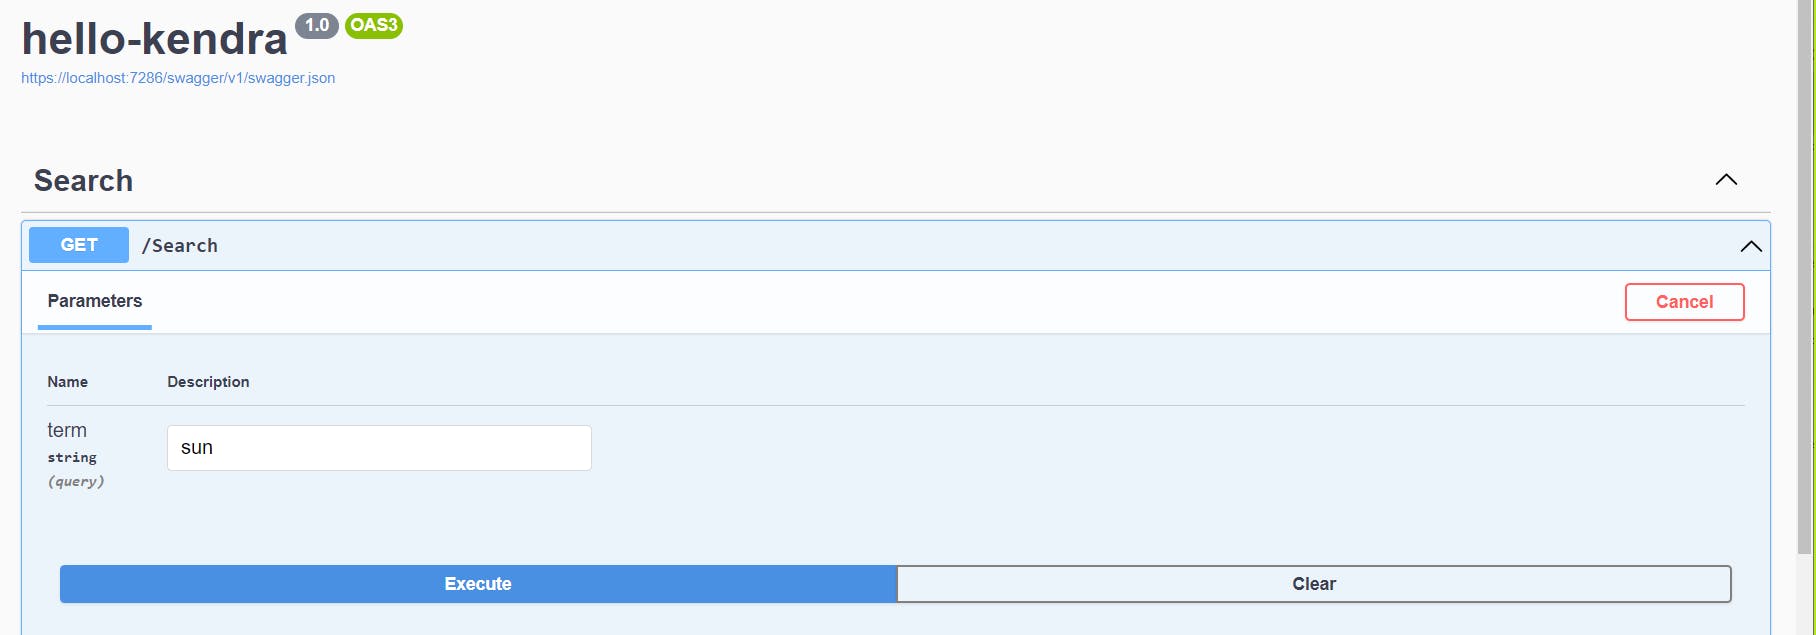
Expand the /Search action and click Try it out.
In the input box for
term, enter sun.Click Execute
Review the search results in the Response body, which should contain document search results matching the query.
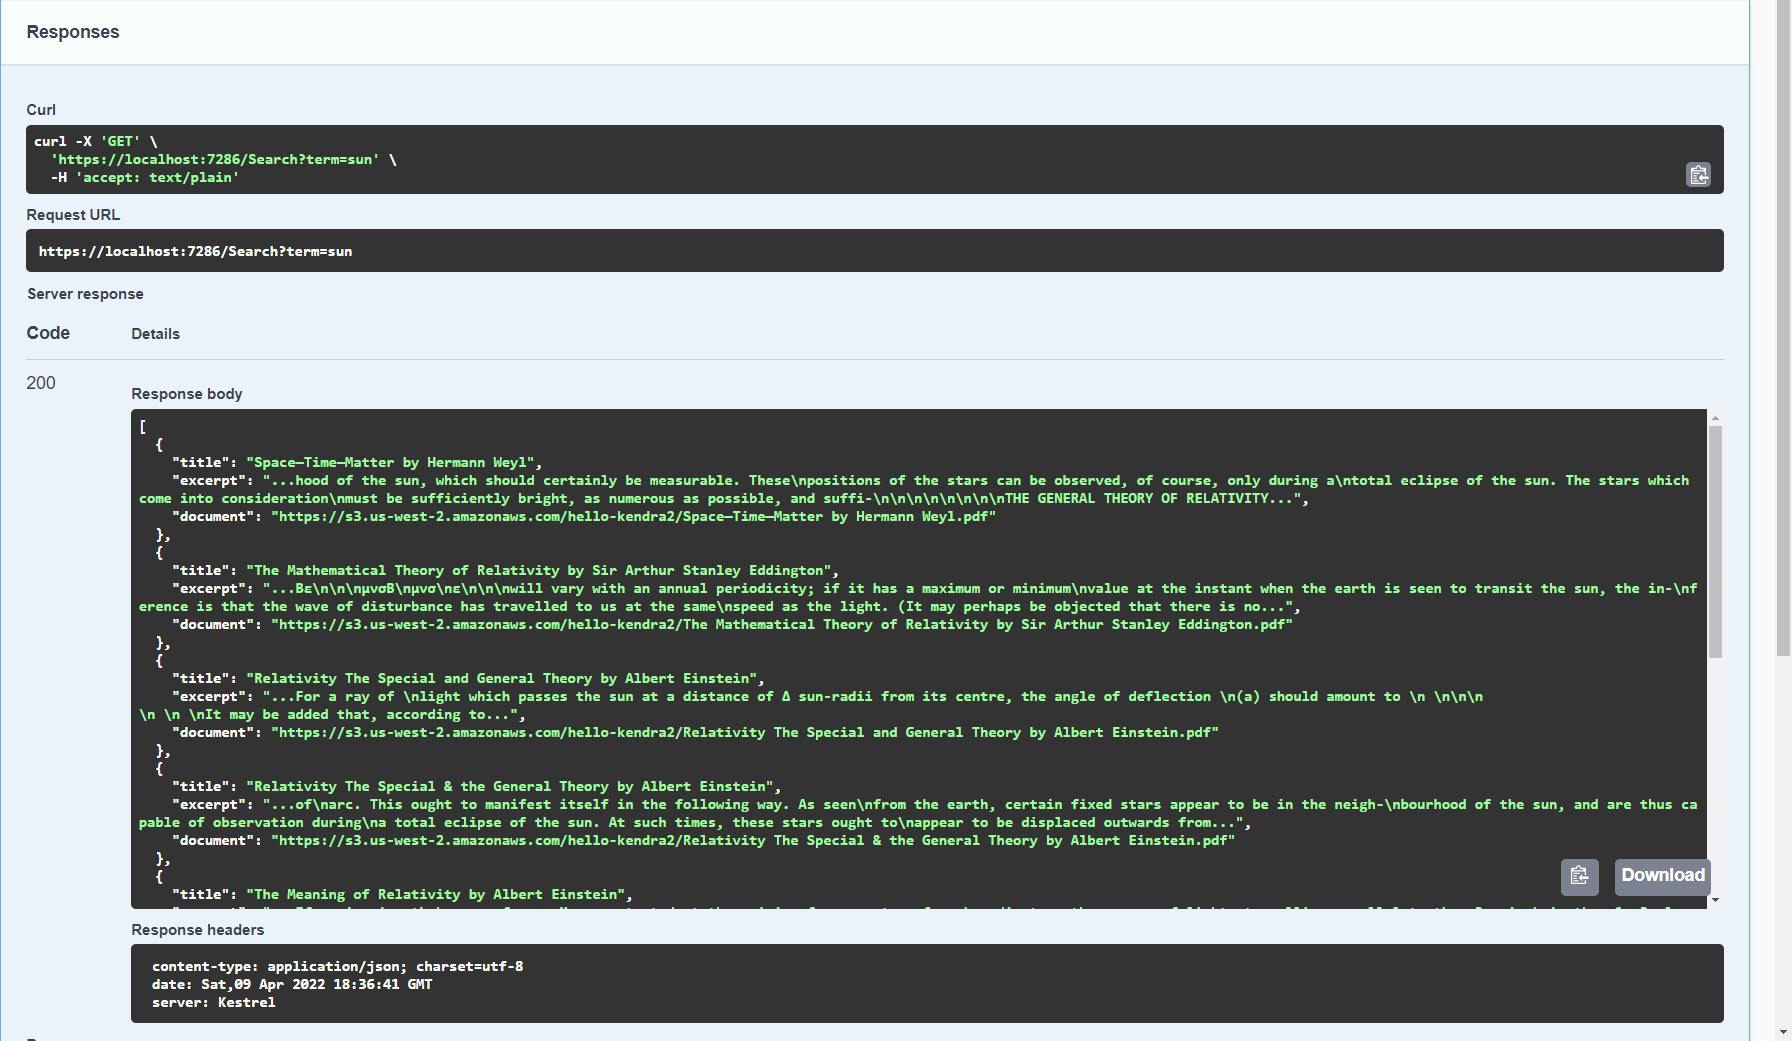
Try other terms. Enjoy your handiwork!

Congratulations! You've used Amazon Kendra in .NET code to perform a search against an index of documents.
Step 7: Shut it Down
When you're done with Hello, Kendra, deallocate your S3 bucket and the Kendra index. You don't want to be charged something you're not using.
In the AWS console, navigate to Amazon Kendra > Indexes. Select hello-kendra and select Delete under the Actions dropdown. Confirm the delete prompt.
Navigate to Amazon S3 > Buckets. Click on your S3 bucket and delete its objects, and then the bucket itself.
Where to Go From Here
More and more, search is expected by customers and employees. Effective search can improve customer discovery and employee productivity. With Amazon Kendra, you can provide high-quality enterprise search against your documents, databases, and other application data through connectors.
In this tutorial, you created an index and synced it with documents in an S3 bucket. You saw search work in the AWS console. You set up a thesaurus, and saw Kendra suggested answers in search results. You created a .NET Web API project, and implemented a search action that queried Kendra on the back end and returned search results.
To go further with Amazon Kendra, learn more about it and practice working with it. Evaluate how well the Kendra connectors cover your content. This tutorial did not cover a number of Kendra features, including curated FAQ matching, machine learning from user feedback, fine-tuning search results, built-in domains, experience builder, search analytics, document enrichment, and query auto-completion.
Further Reading
AWS Documentation
AWS SDK for .NET Documentation
Videos
Blogs
Enhancing Enterprise Search with Amazon Kendra by Leonardo Gomez
Amazon Kendra: Enterprise Search Powered by ML by Sivamuthu Kumar