

AWS & IoT- Philips Hue Lights, Part 2: The API
.NET on AWS and Internet of Things: Philips Hue API


This is Part 2 on getting the Philips Hue Starter Kit set up for .NET on AWS programatic control. In Part 1, we explained Internet of Things (IoT) and covered home connection of Philips Hue Bridge and Lights. Here in Part 2, we'll set up and learn about the API. This post assumes you have your bridge and lights installed and working with the mobile Hue App.
Setting up a Hue Account
In order to work with your Hue Bridge and lights from via an API, you need to create a Hue Account identity. You can set that up in your mobile Hue App by going to Settings > Hue Account. You can provide a username and password, or connect with an existing social account such as your Google account.

Seeing the Bridge Online at MeetHue
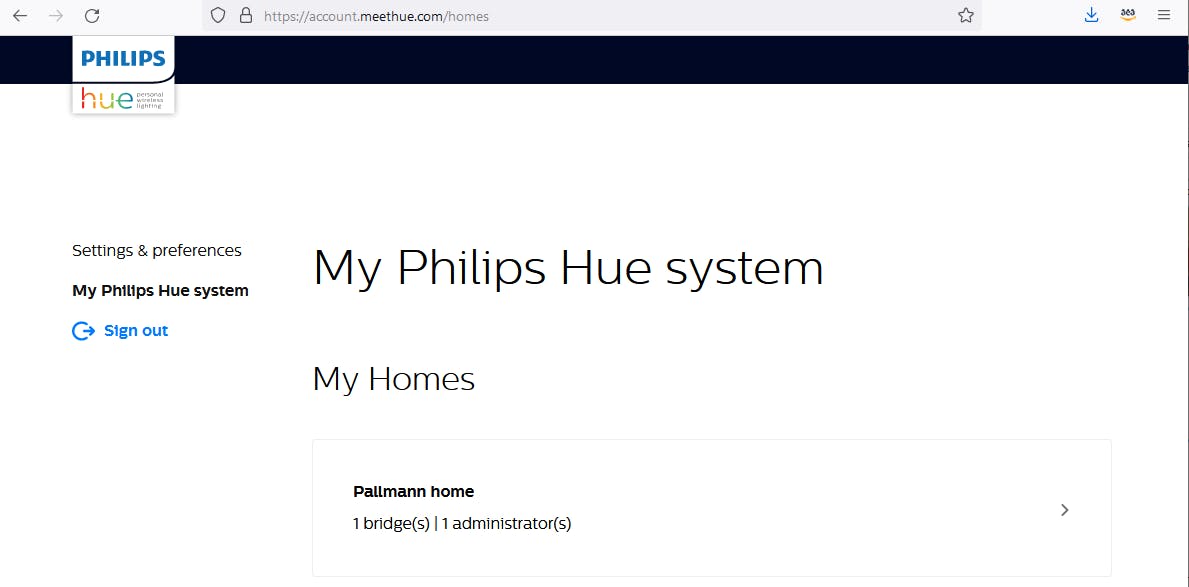
Now that we have our Hue Bridge and lights connected, have a Home defined, and have a Hue account, we're ready to try accessing it online. We can do that with the meethue site. Browsing to https://meethue.com, I sign in with the Hue account I just created on the mobile app. Navigating to My Philips Hue system, I can see my home system displayed.
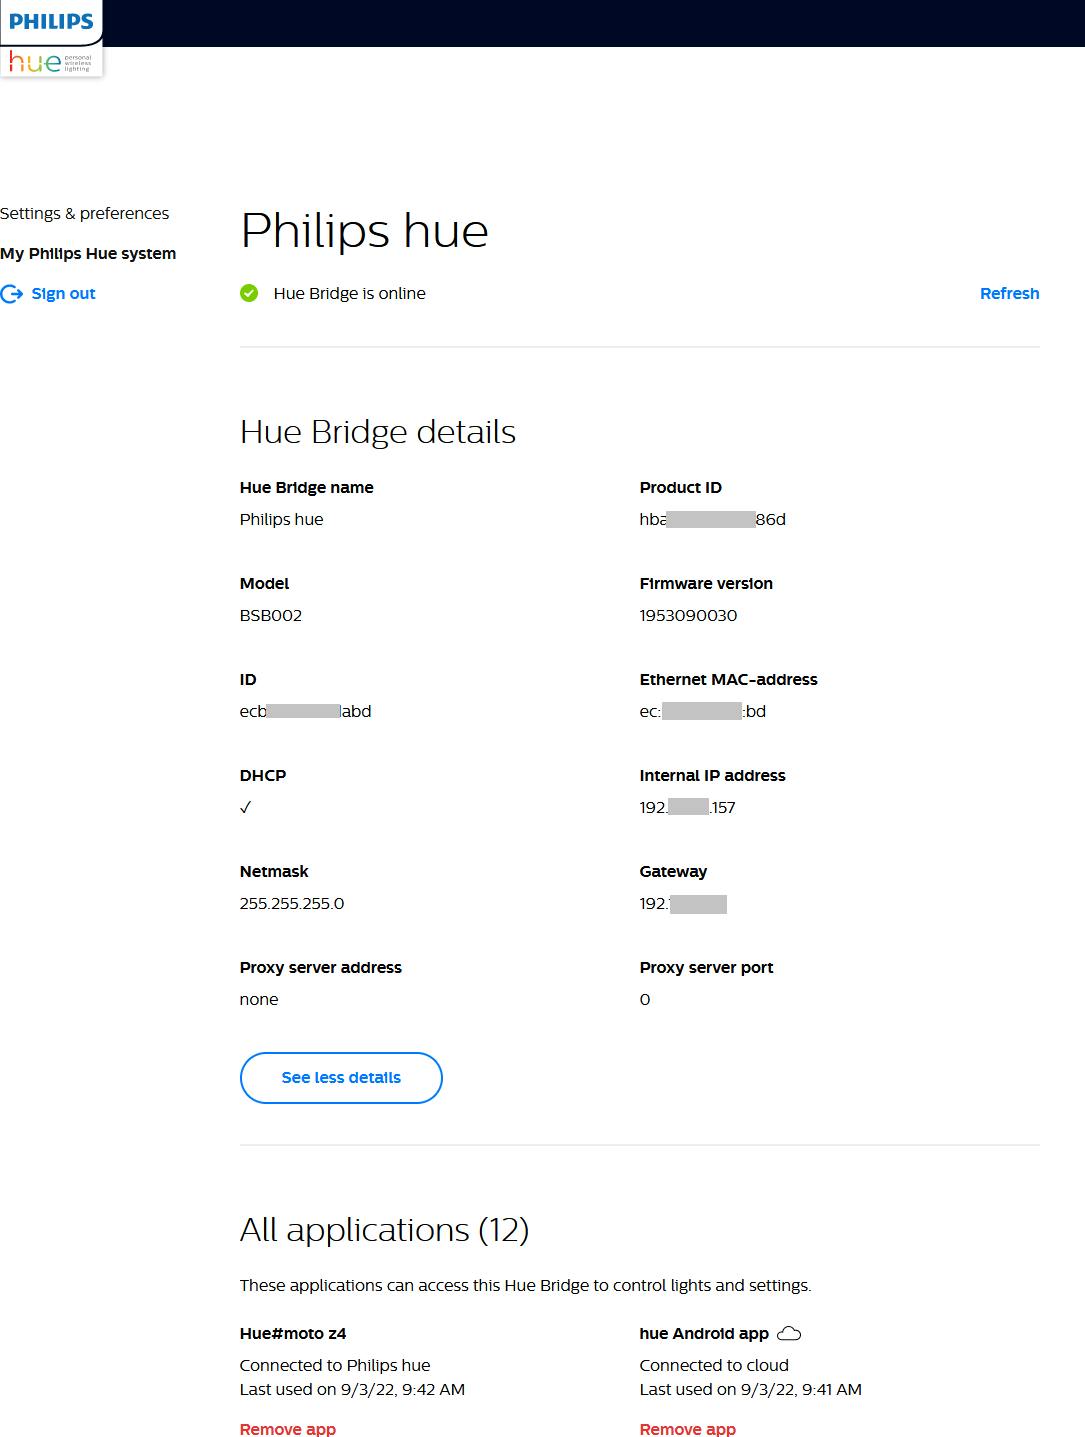
Clicking on my home, and then the bridge, we can see the bridge details, including what it's connected to, my phone and the Hue app. Nice, our home can be seen online, in a secure way.
Philips Developer Site and API
Now it's time to try accessing our lights via an API, and for that we'll need to learn how the API works and also configure a user. In a browser, go to the Philips Hue developer site and sign in. Everything covered in this section can also be found on the excellent tutorial on the Get Started page.
1. Find your Bridge IP Address
The first thing you need is the IP address of your Hue Bridge. In Part 1, we learned we can find the IP address in the Hue mobile app, and we also saw it just now on the MeetHue site. Another way to see the IP is to browse to https://discovery.meethue.com/.
Take note that this IP address is local to your network, so the steps below need to performed on a PC connected to the same network as your Hue Bridge. You could opt to configure your router with a public IP address for the bridge, but we're not going to suggest that as there are other ways to integrate your Hue lights with the outside world.
2. CLIP API Debugger
You can test the Hue Bridge API from your browser using the CLIP API Debugger. To do that, you navigate to your bridge IP address with /debug/clip.html at the end of the path.
https://<bridge ip address>/debug/clip.html
Once there, perform a GET /api/newdeveloper action. Enter that path, then click GET.
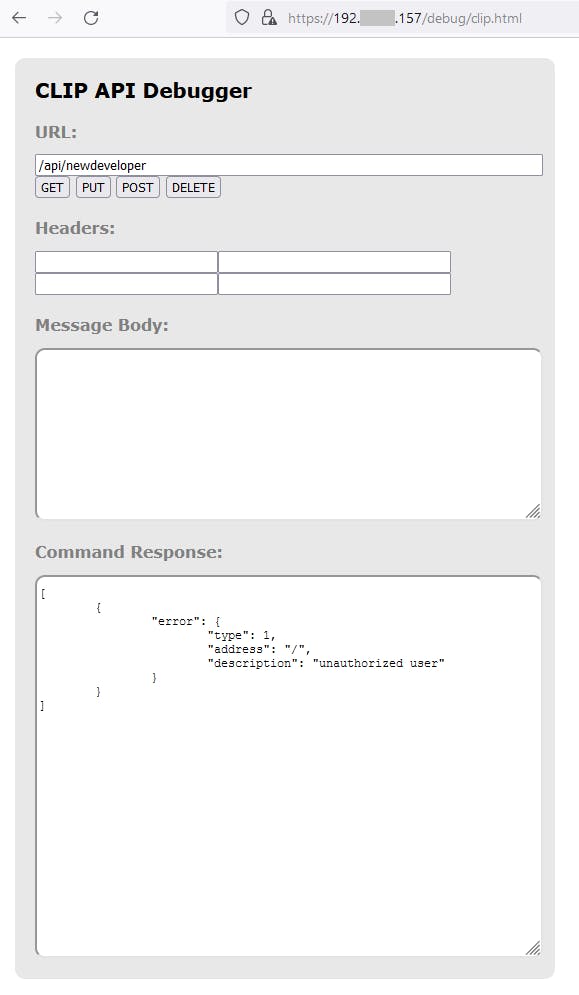
You get an "unauthorized user" error. This is expected because you haven't configured a user yet.
3. Create a User
The next step is to create a username. Send a POST to /api and a request body specifying a devicetype of myhue_app#your-name. Enter the path, enter the request body, and click POST.
POST /api
{"devicetype":"my_hue_app#<your-name>"}
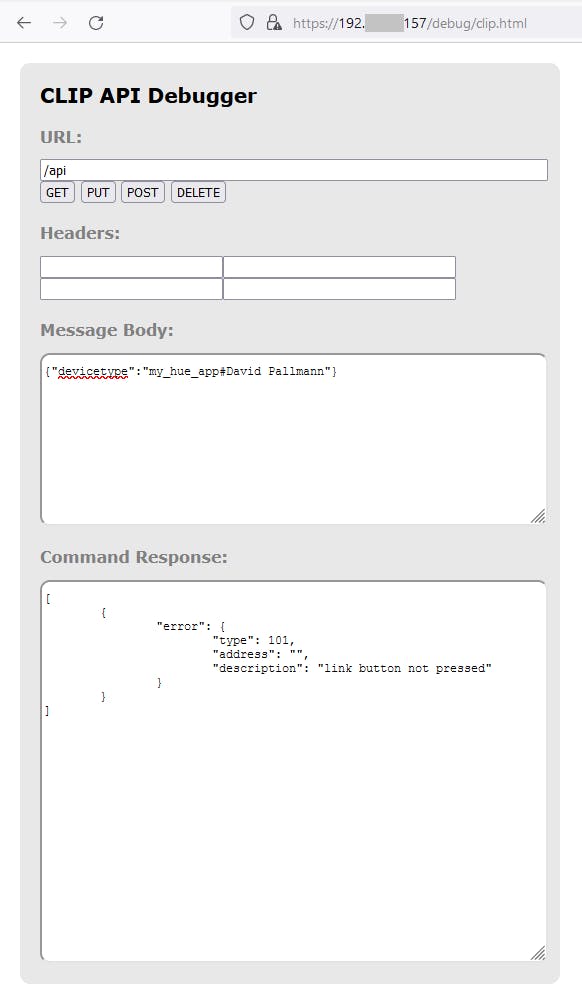
You get an error, which is intentional because the Bridge doesn't know it's you. There's a built-in security mechanism where you need the bridge's Link button pressed for this to work.
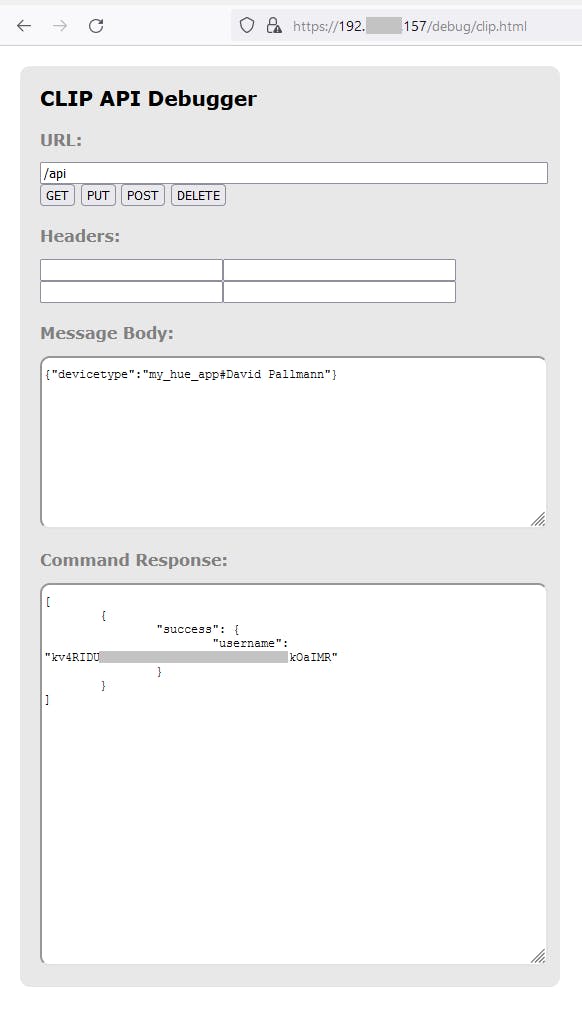
Now, press the big circular Link button on the bridge, then repeat the previous action (click POST again). This time, a user is created. Record the generated username. You'll need that generated username string whenever you access the API.
4. Get Info
Now that we have a username, we can get information about the bridge and lights. From this point forward, the generated username you just recorded will always be part of the path.
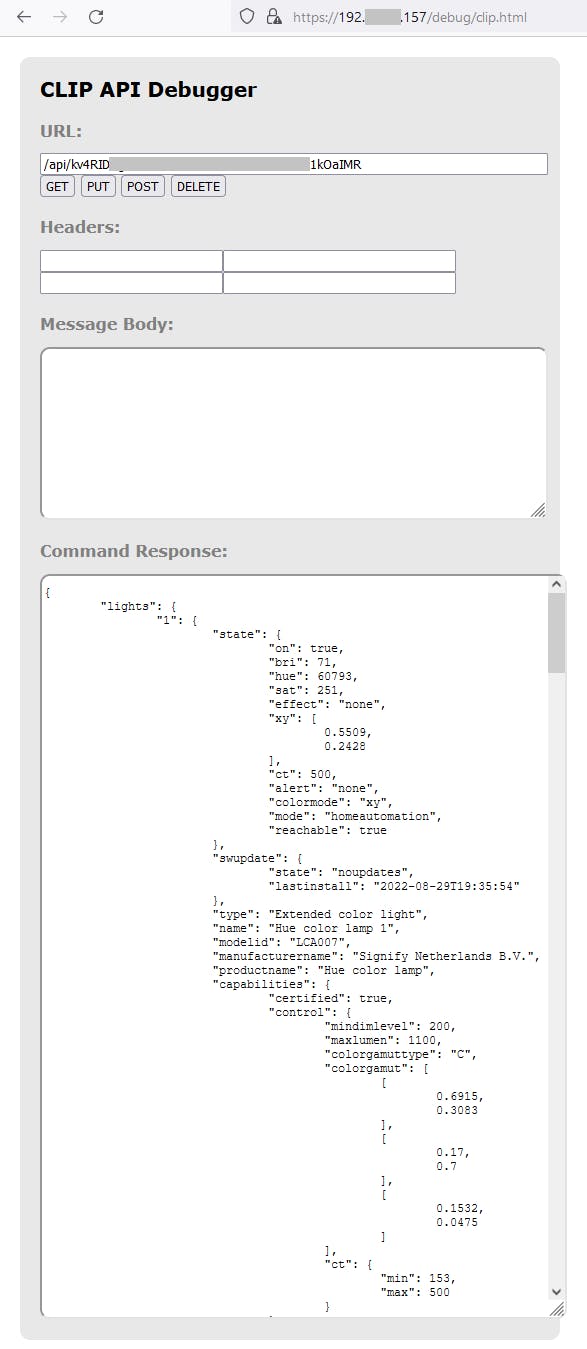
Get information about the bridge by performing a GET on /api/username. We receive lots of information in the response.
GET /api/<username>
Now we can issue a more targeted GET command to tell us about our lights:
GET /api/<username>/lights
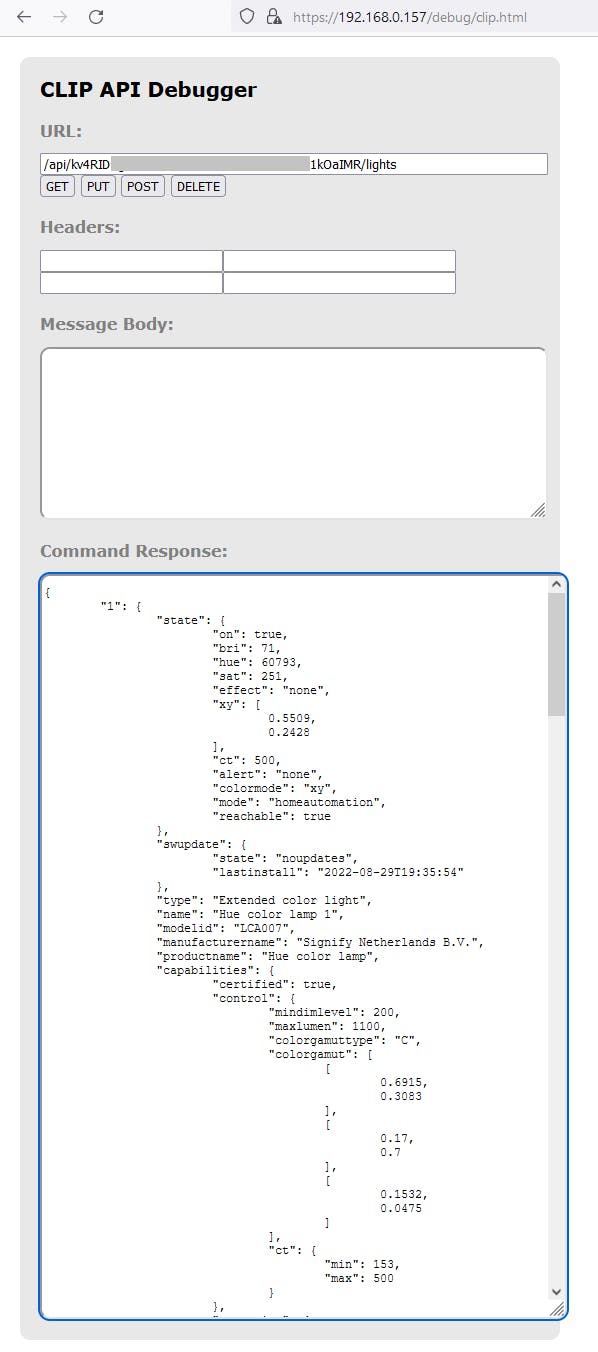
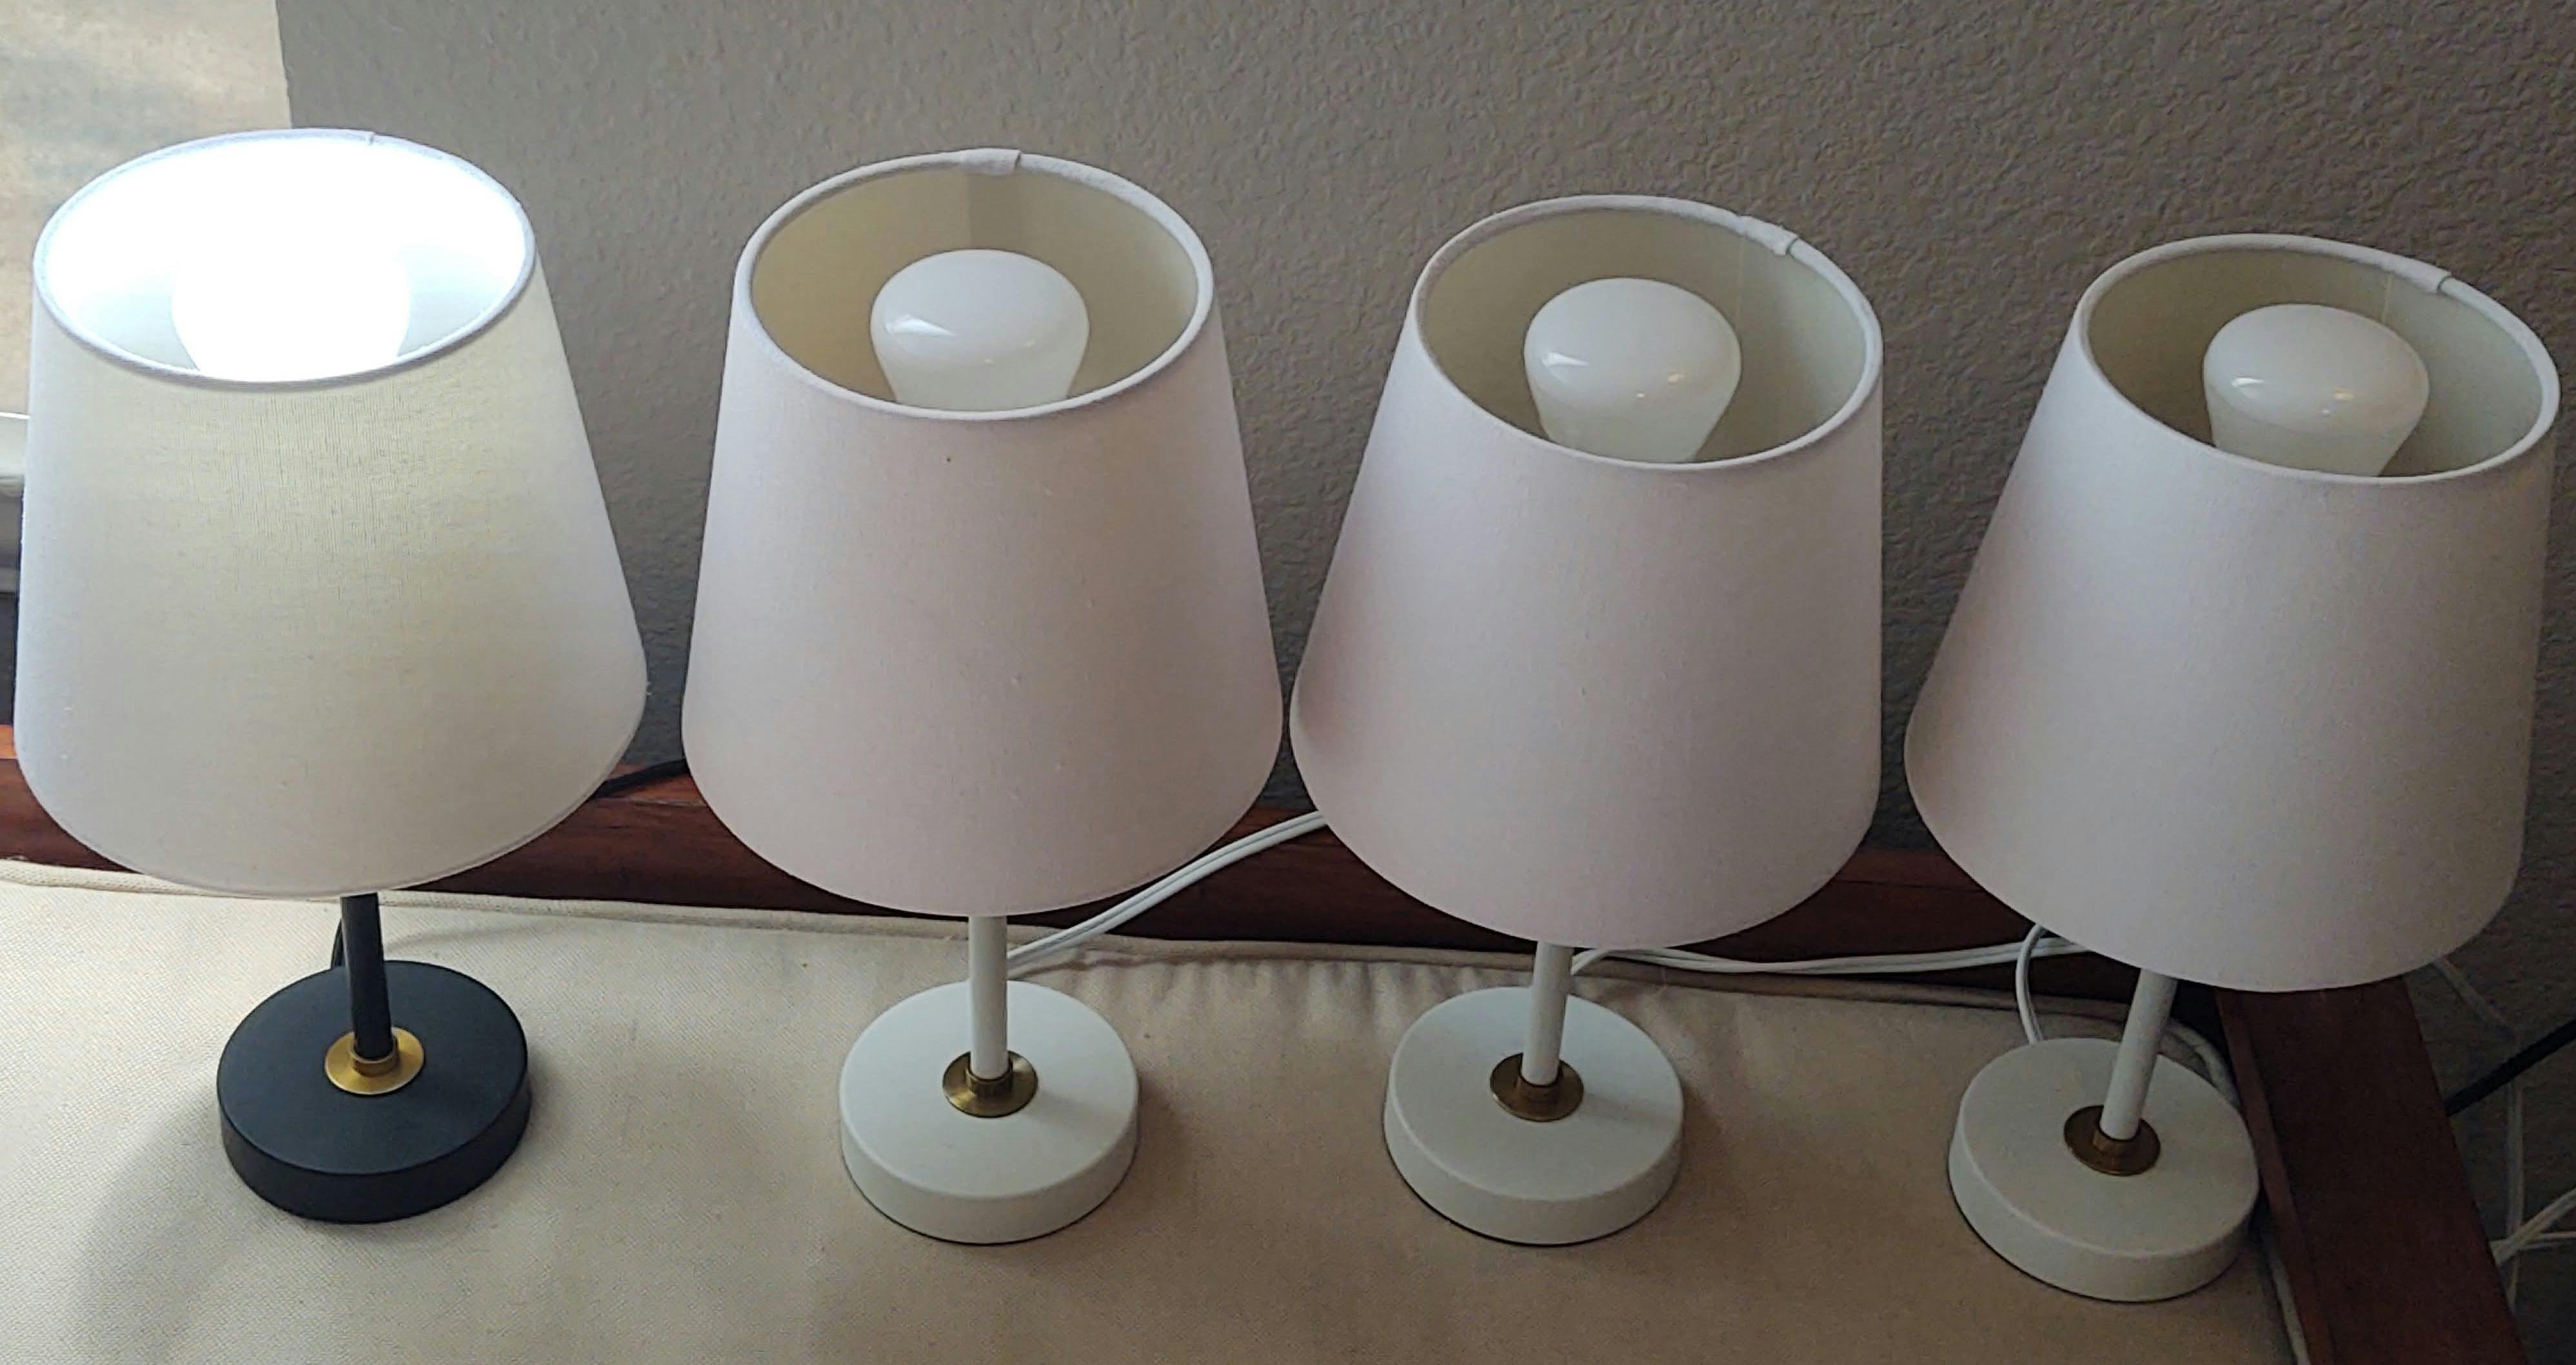
Each of our 4 lights are listed in the response, with IDs 1-4. We see their state (on: true/false), and colors/brightness (bri, hue, and sat properties).
{
    "1": {
        "state": {
            "on": true,
            "bri": 71,
            "hue": 60793,
            "sat": 251,
            "effect": "none",
            "xy": [
                0.5509,
                0.2428
            ],
            "ct": 500,
            "alert": "none",
            "colormode": "xy",
            "mode": "homeautomation",
            "reachable": true
        },
        "swupdate": {
            "state": "noupdates",
            "lastinstall": "2022-08-29T19:35:54"
        },
        "type": "Extended color light",
        "name": "Hue color lamp 1",
        "modelid": "LCA007",
        "manufacturername": "Signify Netherlands B.V.",
        "productname": "Hue color lamp",
        "capabilities": {
            "certified": true,
            "control": {
                "mindimlevel": 200,
                "maxlumen": 1100,
                "colorgamuttype": "C",
                "colorgamut": [
                    [
                        0.6915,
                        0.3083
                    ],
                    [
                        0.17,
                        0.7
                    ],
                    [
                        0.1532,
                        0.0475
                    ]
                ],
                "ct": {
                    "min": 153,
                    "max": 500
                }
            },
            "streaming": {
                "renderer": true,
                "proxy": true
            }
        },
        "config": {
            "archetype": "classicbulb",
            "function": "mixed",
            "direction": "omnidirectional",
            "startup": {
                "mode": "safety",
                "configured": true
            }
        },
        "uniqueid": "00:17:...a:ad-0b",
        "swversion": "1.93.11",
        "swconfigid": "47270DB8",
        "productid": "Philips-LCA007-1-A19HECLv1"
    },
    "2": {
        ...
    }
    "3": {
        ...
    },
    "4": {
        ...
    }
}
Here are some other paths you can experiment with to get or interact with different resources. We won't be covering all of these features or API methods in this post.
| Command | Action |
| /lights | lights |
| /groups | groups |
| /config | rconfiguration items |
| /schedules | schedules |
| /scenes | scenes |
| /sensors | sensors |
| /rules | rules |
5. Get the State of a Light
We can similarly get information about one specific light with the /api/username/lights/light-ID GET action, specifying the light number at the end of the path. For example, /api/kv4RIDU...1kOaIMR/lights/1 for Light 1.
GET /api/<username>/lights/<light-ID>
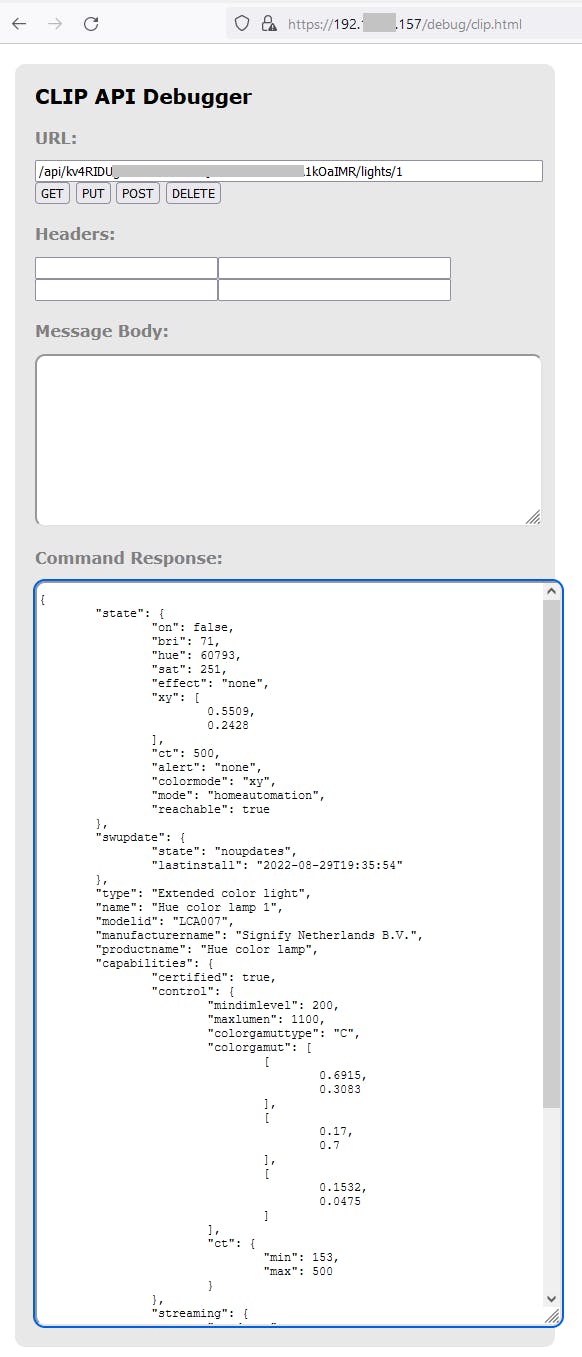
The light is currently off. In the response, under "state", we see "on": false.
{
    "state": {
        "on": false,
        "bri": 71,
        "hue": 60793,
        "sat": 251,
        "effect": "none",
        "xy": [
            0.5509,
            0.2428
        ],
        "ct": 500,
        "alert": "none",
        "colormode": "xy",
        "mode": "homeautomation",
        "reachable": true
    },
    "swupdate": {
        "state": "noupdates",
        "lastinstall": "2022-08-29T19:35:54"
    },
    "type": "Extended color light",
    "name": "Hue color lamp 1",
    "modelid": "LCA007",
    "manufacturername": "Signify Netherlands B.V.",
    "productname": "Hue color lamp",
    "capabilities": {
        "certified": true,
        "control": {
            "mindimlevel": 200,
            "maxlumen": 1100,
            "colorgamuttype": "C",
            "colorgamut": [
                [
                    0.6915,
                    0.3083
                ],
                [
                    0.17,
                    0.7
                ],
                [
                    0.1532,
                    0.0475
                ]
            ],
            "ct": {
                "min": 153,
                "max": 500
            }
        },
        "streaming": {
            "renderer": true,
            "proxy": true
        }
    },
    "config": {
        "archetype": "classicbulb",
        "function": "mixed",
        "direction": "omnidirectional",
        "startup": {
            "mode": "safety",
            "configured": true
        }
    },
    "uniqueid": "00:17:88:01:0c:e3:0a:ad-0b",
    "swversion": "1.93.11",
    "swconfigid": "47270DB8",
    "productid": "Philips-LCA007-1-A19HECLv1"
}
6. Turn a Light On or Off
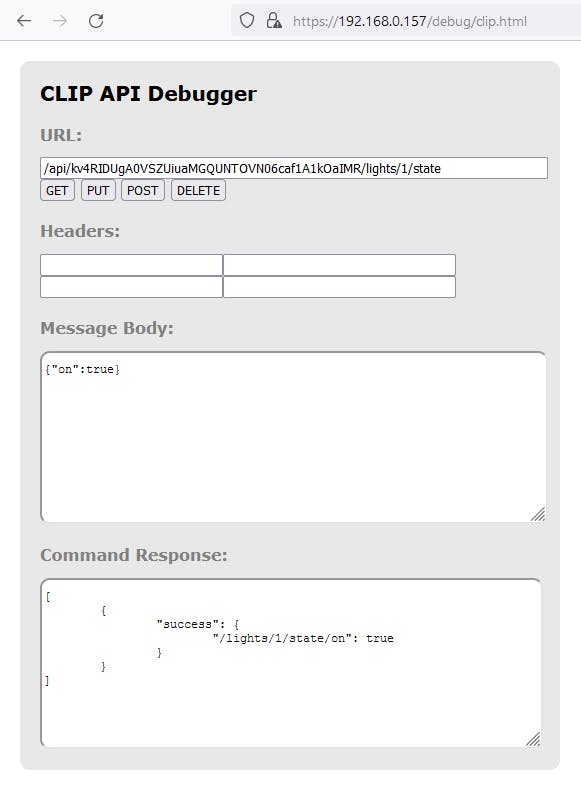
We can change the state of a light, such as whether it's on or off, with a /lights/light-ID/state PUT action. Send the command below with request body { "on": true } and click PUT. The light turns on.
PUT /api/<username>/lights/<light-ID>/state
{ "on": true }

Change the request body to { "on": false }and again click PUT. The light turns off.
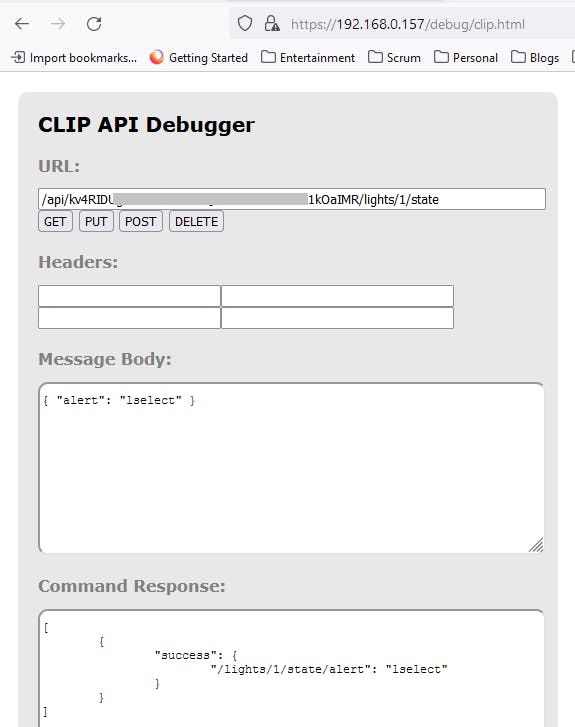
7. Send a Light an Alert
We can send an alert to a light with the /lights/light-ID/state PUT action and the alert property. A value of select sends a momentary light pulse. A value of lselect sends them for 15 seconds. It's not necessary for the light to be on. If the light was previously off, the alert happens, and then it's off again.
PUT /api/<username>/lights/<light-ID>/state
{ "alert": "lselect" }
8. Control a Light's Colors
We want to control a light's colors, and this can be a complicated subject. The Hue lights allow you to set lights using several different systems, covered on the Core Concepts page under Colors Get More Complicated. You have 3 choices for specifying color to the Hue, and if like me you're used to hex colors codes like #FF0000, all of them will feel unfamiliar.
- XY: X, Y coordinates on the CIE Chromacity Diagram ("x", "y")
- CT: Color temperature values on the curved line on the CIE Chromacity Diagram ("ct")
- HS: Hue and Saturation properties ("hue", "sat")
Regardless of which color system you choose to work with, you can control the light's brightness with the "bri" property, which affects the effective color.
In this post, we'll be using Hue, Brightness, and Saturation (HBS) values to set light colors with the "hue", "bri", and "sat" properties in our API request bodies. The best advice I can give for any of these color measurements systems is to understand the theory behind them, understand the range of values the Hue accepts for each property, and simply experiment with them. Saving your favorite value combinations as named colors in your own code will be helpful, and is something we'll do in the Hello Hue .NET project that is up next.
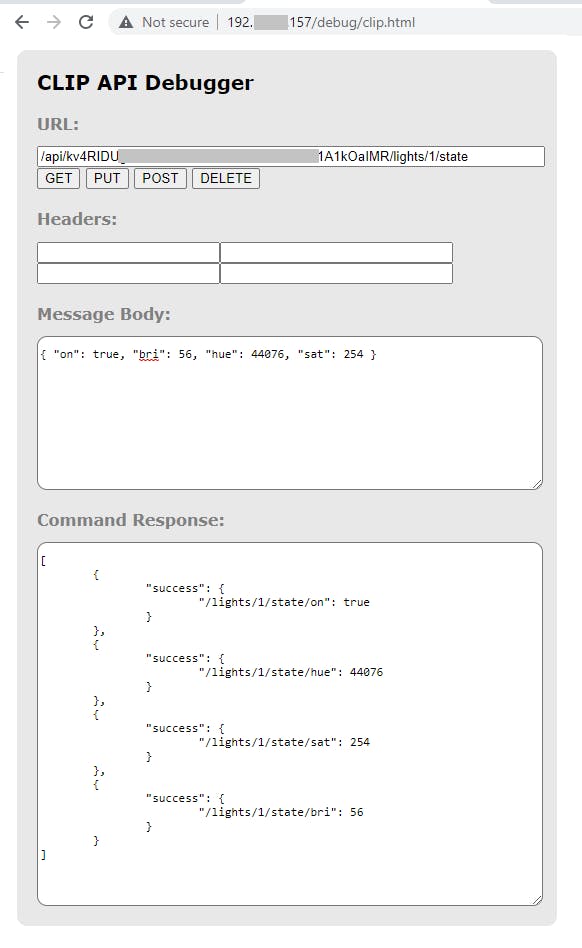
To set a light's colors with HBS properties, perform a PUT to /api/username/lights/1/state and include the hue, bri, and sat properties. You can also include on if you want to turn on the light at the same time. Issue the command below to set Light 1 to blue and turn it on.
/api/<username>/lights/1/state
{ "on": true, "bri": 56, "hue": 44076, "sat": 254 }

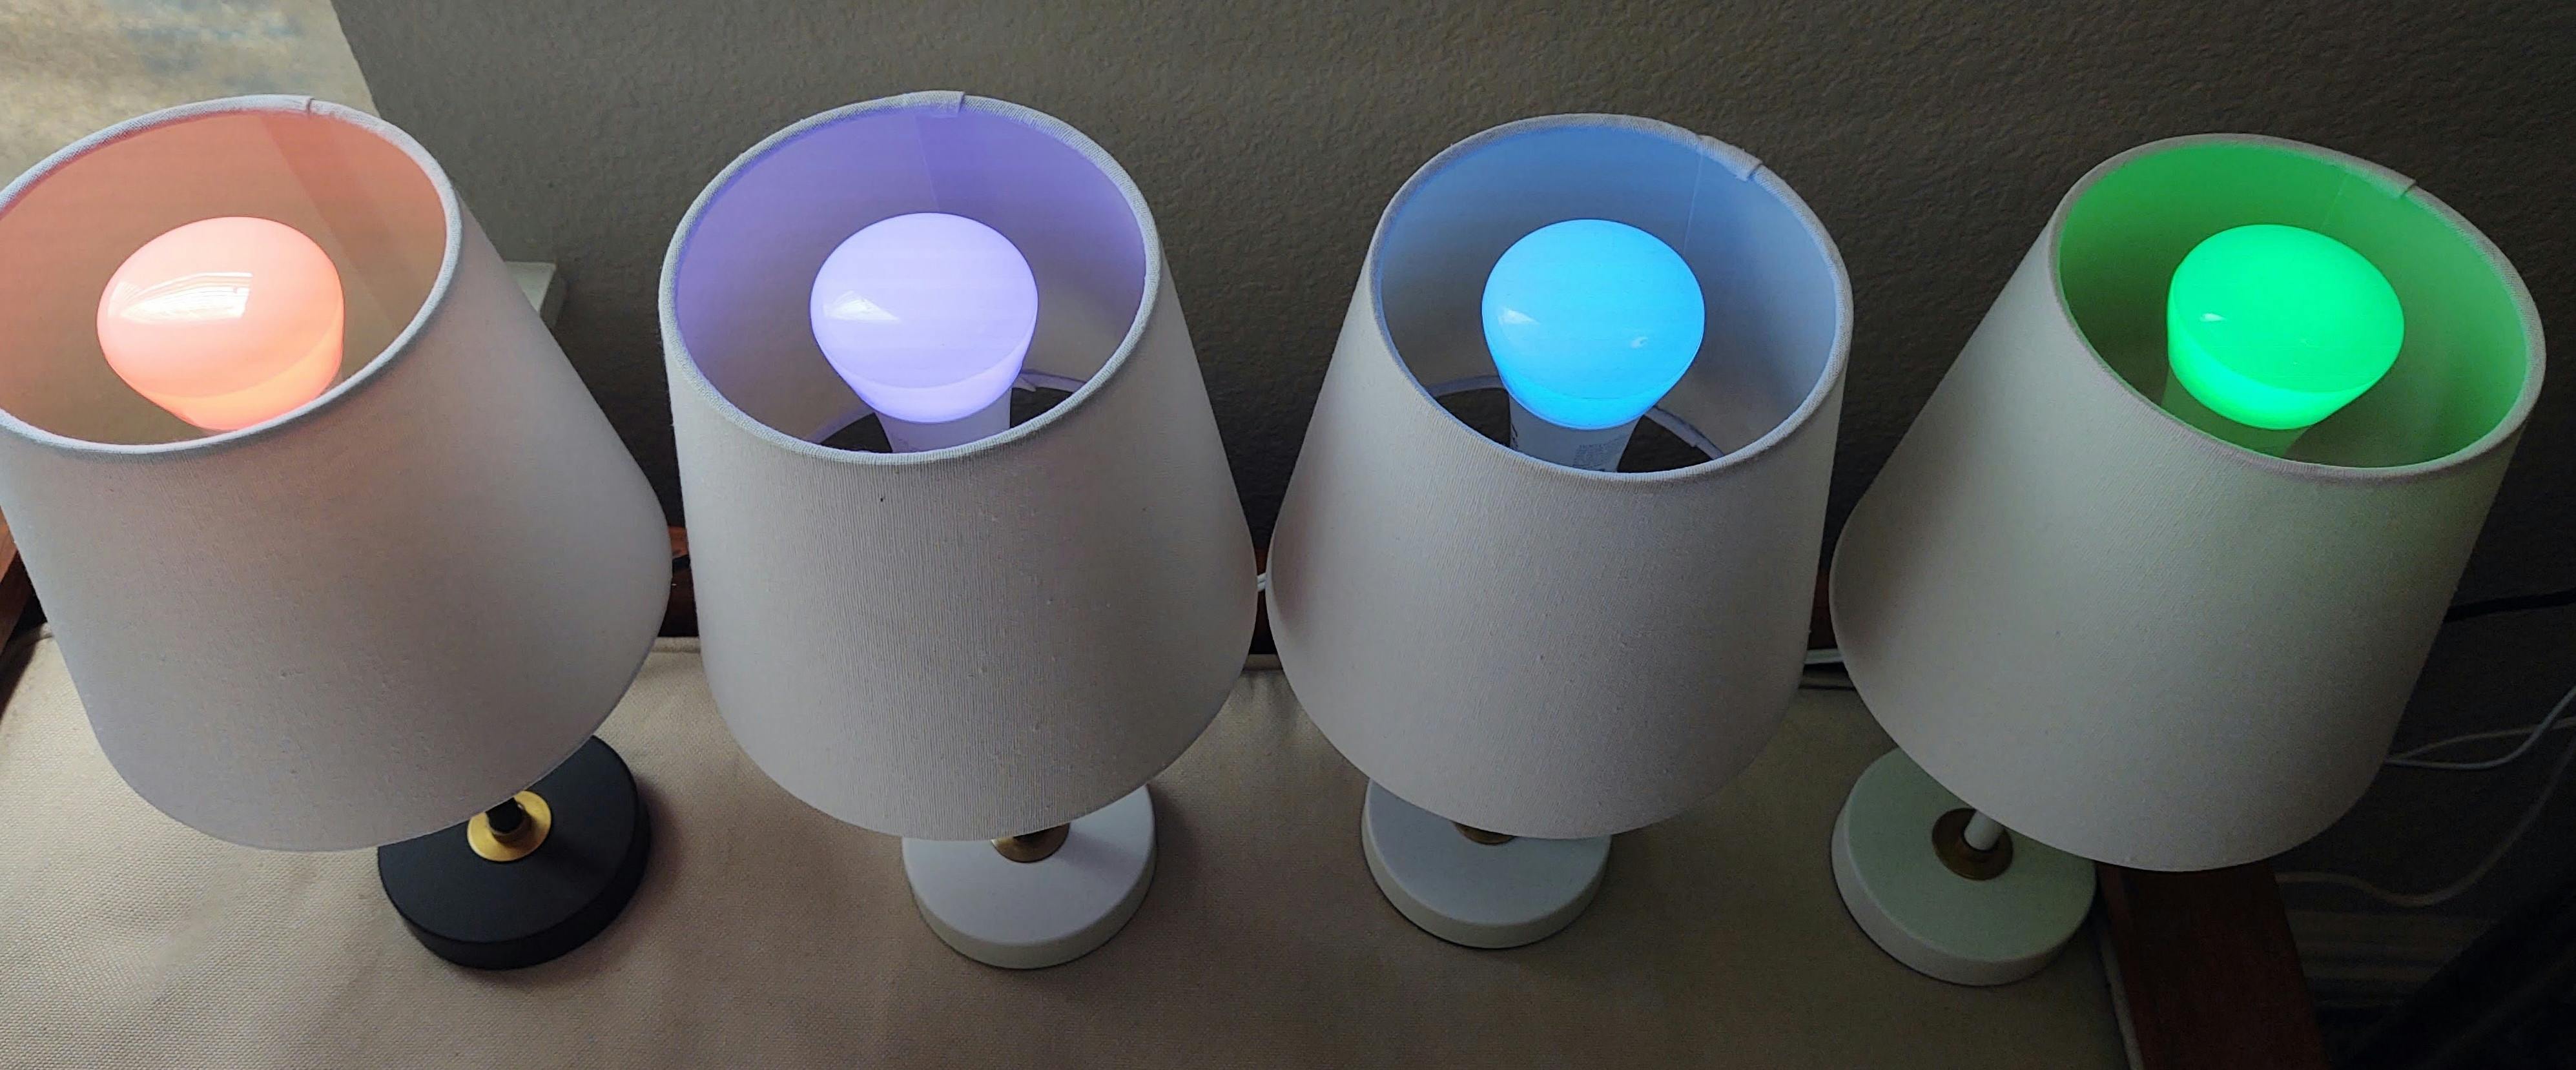
Then experiment with other HBS values, and set each light to a color.
9. Schedule a Light Action
Finally, let's see how to control a light on a schedule. The Philips API lets you schedule an API action in advance, which is tremendously useful for things like reminders or putting your lights on a timer.
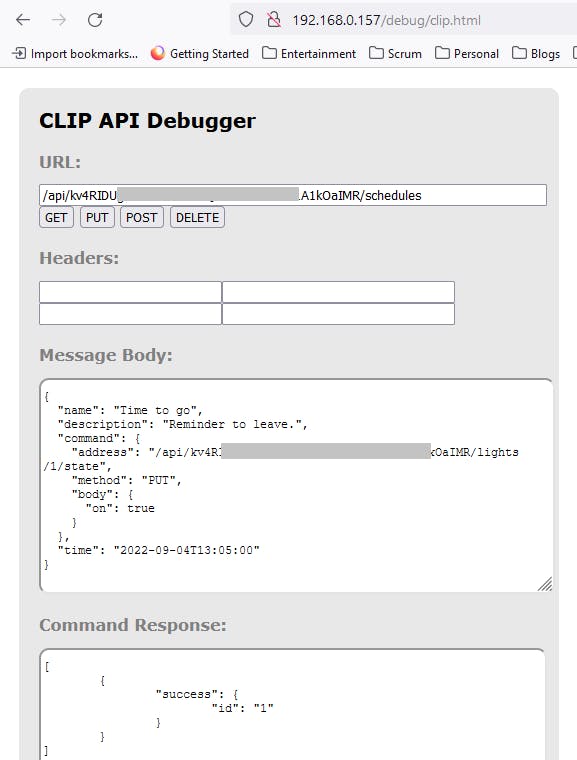
To schedule an API action, we POST to /api/username/schedules. The body specifies a name and description, the command path and method to issue, and the request body to send with it. We want to turn on Light 1, so we specify a PUT to /api/username/lights/1/state. The time is in UTC time, so adjust that to be in the near future.
POST /api/<username>/schedules
{
  "name": "Time to go",
  "description": "Reminder to leave.",
  "command": {
    "address": "/api/<username>/lights/1/state",
    "method": "PUT",
    "body": {
      "on": true
    }
  },
  "time": "2022-09-04T13:05:00"
}
Send the command, and wait for the scheduled time. At the appointed time, Light 1 turns on.
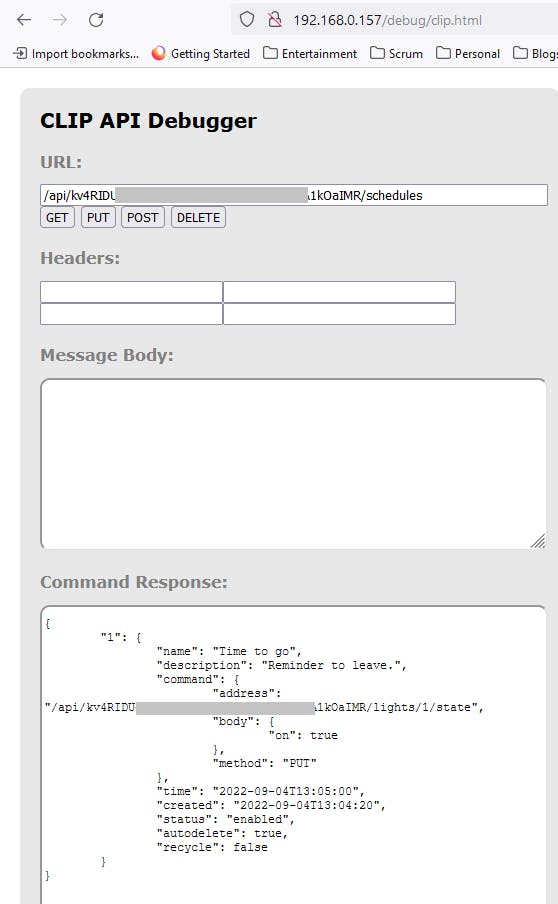
We can also get existing schedules, with a GET to /api/username/schedules. Once the scheduled event happens, it will no longer be listed.
API Limitations
The Philips API has some limitations, spelled out on the Philps Develop for Hue website.
- Transition time: Changing a light's state has a transition time which defaults to 400ms. You can control the transition time with the
transitiontimeproperty. - Commands per second: The lights can't accept more than about 10 commands per second. Groups can only accept one command per second.
- Don't always send ON: If you're sending a command to a light and you already know it's on, you don't have to specify "on": true with each command. That will slow the responsiveness of the bridge.
Our Hello Hue Project
Now that we have a way to interact with the Hue lights programaticaly, let's write some .NET code to call the API. In this project you'll create a .NET console program to control the Hue lights. It will support these commands:
| Command | Action |
| dotnet run -- <light#> state | display the state of a light |
| dotnet run -- <light#> on | turn a light on |
| dotnet run -- <light#> off | turn a light off |
| dotnet run -- <light#> alert | send a light an alert |
| dotnet run -- <light#> color (color) | set a light's color (red, orange, yellow, green, blue, purple, or white), and turn the light on |
| dotnet run -- <light#> hbs <hue#> <brightness#> <saturation#> | set a light's hue, brightness, and saturation, and turn it on |

Later, we'll connect this to an AWS SQS queue so we can send commands to the lights external to the home.
Step 1: Develop .NET Console Program
In this step, you'll create a .NET console program that can turn lights on and off and change their saturation, brightness, and hue.
Open a command/terminal window and CD to a development folder. Run the command below to create a .NET console program named hello-hue.
dotnet new console -n hello-hue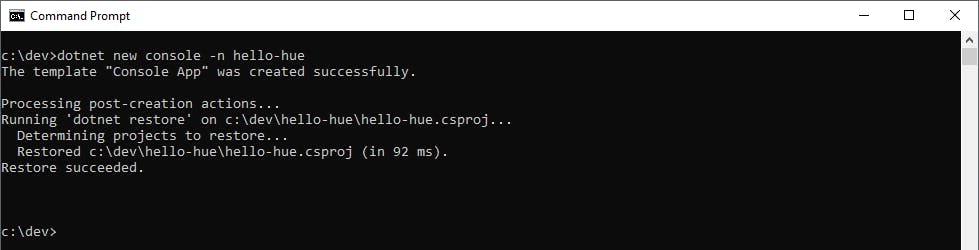
Open the project in Visual Studio.
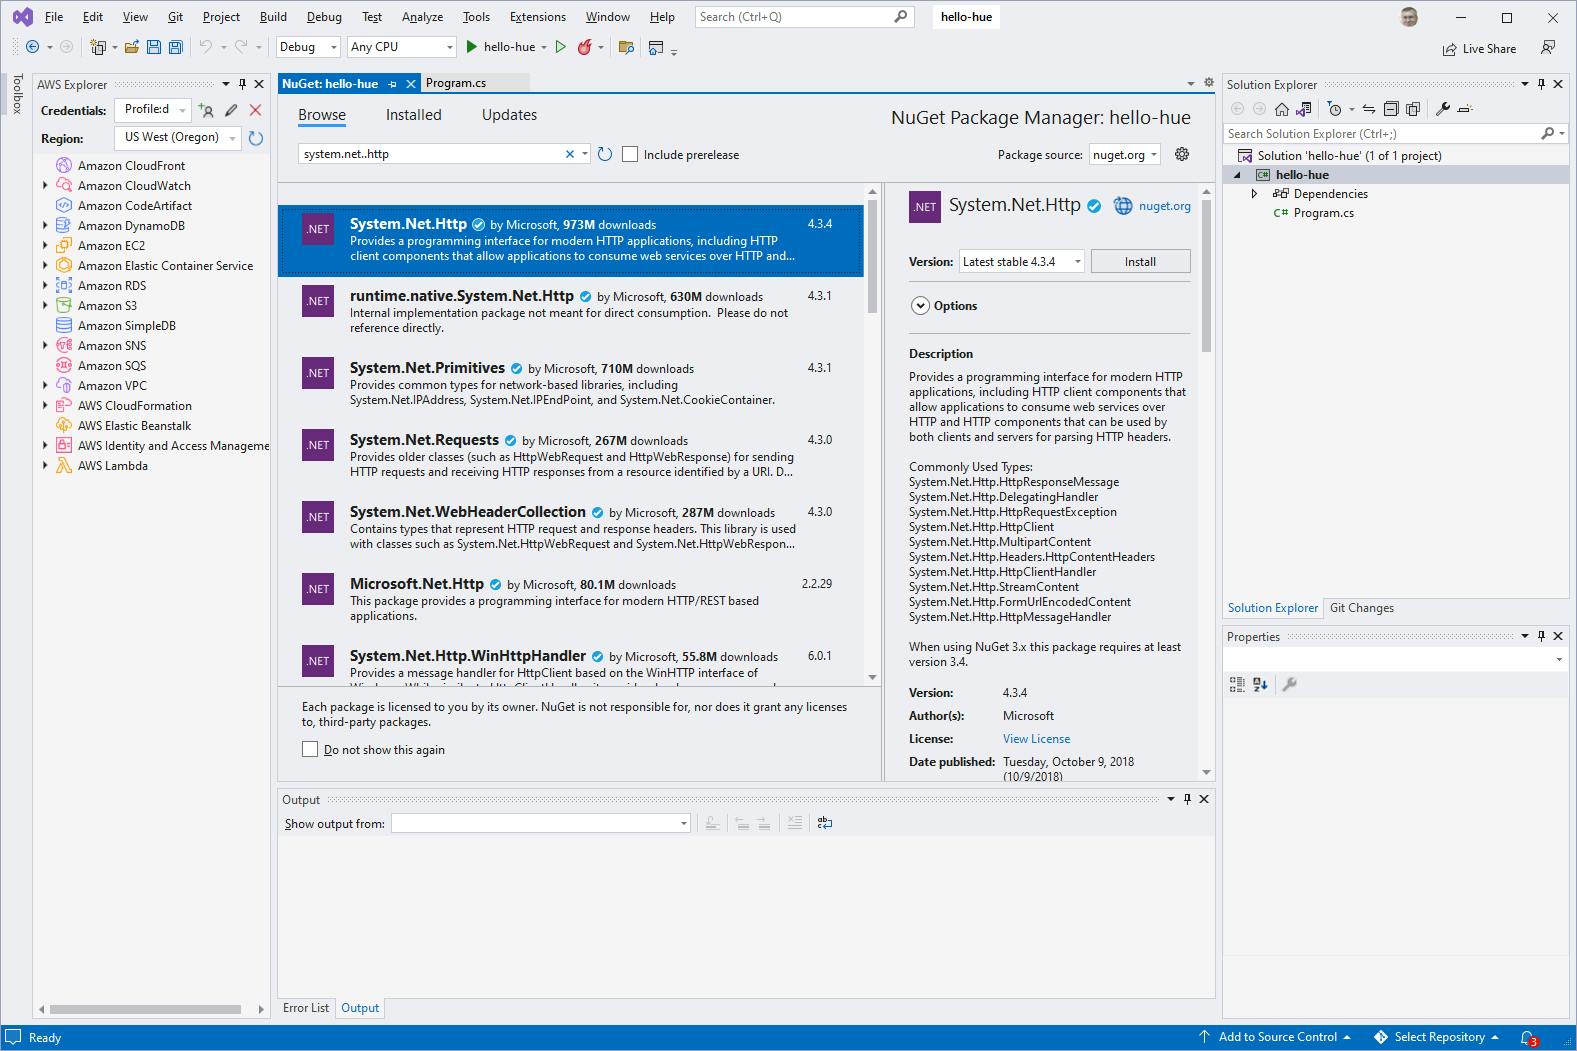
Add packages.
A. In Solution Explorer, right click the
hello-hueproject and select Manage NuGet Packages....B. Search for and install these packages: System.Net.Http, Microsoft.Extensions.Configuration, and Microsoft.Extensions.Configuration.Json.
Open Program.cs in the code editor, and replace with the code below at the end of this step.
Add a settings file named appsettings.json to the project.
A. In Solution Explorer, right-click the project and select Add New. Add a JSON file, and name it appsettings.json.
B. Set file's properties to Copy if newer.
C. Open
appsettings.jsonin the code editor, and replace with the code below at the end of this step. Replace<bridge-IP-address>with the IP address for your Philips Hue. Replace<bridge-username>with the generated username you created earlier with the CLIP API Debugger.Save your changes, and ensure the program builds.
Program.cs
namespace HelloHue
{
    using Microsoft.Extensions.Configuration;

    public class Program
    {
        static string BaseURL = null!;
        static string Username = null!;
        static HttpClient Client = null!;

        static async Task Main(string[] args)
        {
            // Load Philips API Base URL and Username from settings.

            var builder = new ConfigurationBuilder().AddJsonFile($"appsettings.json", true, true);
            var config = builder.Build();
            BaseURL = config["hue:baseUrl"];
            Username = config["hue:username"];

            if (args.Length < 2 || args[0] == "-h")
            {
                Console.WriteLine("Use this command to control your Philips Hue lights.");
                Console.WriteLine("Get the state of a light ................  dotnet run -- <light#> state");
                Console.WriteLine("Turn light ON ...........................  dotnet run -- <light#> on");
                Console.WriteLine("Turn light OFF ..........................  dotnet run -- <light#> off");
                Console.WriteLine("Alert on light for 15 seconds ...........  dotnet run -- <light#> alert");
                Console.WriteLine("Set light color (using color name) ......  dotnet run -- <light#> color red|orange|yellow|green|blue|purple|white");
                Console.WriteLine("Set light hue, brightness, saturation .... dotnet run -- <light#> hbs <hue 0..65280> <brightness 0..254> <saturation 25..200>");
                Environment.Exit(0);
            }

            Client = new HttpClient();
            Client.BaseAddress = new Uri(BaseURL);

            int hue, bri, sat;
            HttpResponseMessage response;

            var ID = args[0];

            switch (args[1])
            {
                // Get the state of a light.
                // syntax:  dotnet run -- <light#> state
                // example: dotnet run -- 1 state
                case "state":
                    Console.WriteLine($"Getting state of Light {ID}");
                    response = await SendAPICommand("GET", $"/api/{Username}/lights/{ID}");
                    if (response.Content != null)
                    {
                        var responseContent = await response.Content.ReadAsStringAsync();
                        Console.WriteLine(responseContent);
                    }
                    break;
                // Turn a light on.
                // syntax:  dotnet run -- <light#> on
                // example: dotnet run -- 1 on
                case "on":
                    Console.WriteLine($"Turning on Light {ID}");
                    response = await SendAPICommand("PUT", $"/api/{Username}/lights/{ID}/state", @"{""on"":true}");
                    break;
                // Turn a light off.
                // syntax:  dotnet run -- <light#> off
                // example: dotnet run -- 1 off
                case "off":
                    Console.WriteLine($"Turning off Light {ID}");
                    response = await SendAPICommand("PUT", $"/api/{Username}/lights/{ID}/state", @"{""on"":false}");
                    break;
                // Perform an alert on a light.
                // syntax:  dotnet run -- <light#> alert
                // example: dotnet run -- 1 alert
                case "alert":
                    Console.WriteLine($"Alerting on Light {ID}");
                    response = await SendAPICommand("PUT", $"/api/{Username}/lights/{ID}/state", @"{""alert"": ""lselect"" }");
                    break;
                // Set a light to a color name.
                // syntax:  dotnet run -- <light#> color red|orange|yellow|green|blue|purple|white
                // example: dotnet run -- 1 blue
                case "color":
                    var color = args[2];
                    hue = 0;
                    bri = 56;
                    sat = 254;
                    Console.WriteLine($"Setting hue-brightness-saturation for color name {color}");
                    switch (color)
                    {
                        case "red":
                            hue = 64634;
                            break;
                        case "purple":
                            hue = 49041;
                            break;
                        case "blue":
                            hue = 44076;
                            break;
                        case "green":
                            hue = 29127;
                             break;
                        case "orange":
                            hue = 4835;
                               break;
                        case "yellow":
                            hue = 10152;
                            break;
                        case "white":
                            hue = 41479;
                            bri = 100;
                            sat = 100;
                            break;
                        default:
                            Console.WriteLine($"Unknown color name: {color}");
                            Environment.Exit(0);
                            break;
                    }
                    Console.WriteLine($"Setting Light {ID} hue-brightness-saturation to {hue} {bri} {sat}");
                    response = await SendAPICommand("PUT", $"/api/{Username}/lights/{ID}/state", $@"{{ ""on"": true, ""bri"": {bri}, ""hue"": {hue}, ""sat"": {sat} }}");
                    break;
                // Set a light hue, brightness, and saturation.
                // syntax:  dotnet run -- <ligh#> hbs <hue 0..65535> <brightness 0..254> <saturation 25..254>
                // example: dotnet run -- 1 hbs 65280 254 200
                case "hbs":
                    hue = Convert.ToInt32(args[2]);
                    bri = Convert.ToInt32(args[3]);
                    sat = Convert.ToInt32(args[4]);
                    Console.WriteLine($"Setting Light {ID} hue-brightness-saturation to {hue} {bri} {sat}");
                    response = await SendAPICommand("PUT", $"/api/{Username}/lights/{ID}/state", $@"{{ ""on"": true, ""bri"": {bri}, ""hue"": {hue}, ""sat"": {sat} }}");
                    break;
                default:
                    Console.WriteLine("Unrecognized command. Type dotnet run -h for help.");
                    break;
            }
        }

        /// <summary>
        /// Send an HTTP action to API, return response
        /// </summary>
        /// <param name="action"></param>
        /// <param name="path"></param>
        /// <param name="request"></param>
        /// <returns>HttpResponseMessage response</returns>
        private static async Task<HttpResponseMessage> SendAPICommand(string action, string path, string request = null!)
        {
            Console.WriteLine($"{action} {path}");
            Console.WriteLine(request);
            HttpResponseMessage response = null!;
            switch(action)
            {
                case "GET":
                    response = await Client.GetAsync(path);
                    break;
                case "PUT":
                    response = await Client.PutAsync(path, new StringContent(request));
                    break;
                case "POST":
                    response = await Client.PostAsync(path, new StringContent(request));
                    break;
            }
            Console.WriteLine(response.StatusCode);
            if (response.StatusCode != System.Net.HttpStatusCode.OK)
            {
                Console.WriteLine(response);
            }
            return response;
        }
    }
}
Understand the Code
Let's take a monent to understand the code.
Lines 13-18: The Main function reads BaseUrl, the bridge API base address, and Username, the generated username, from the application settings file.
20-30: If the command line arguments incude -h, or there are less than 2 arguments, command help is displayed and the program exist.
32-33: An HttpClient is instantiated, and its base address is set to the Philips API IP address.
38: the first argument, which is always the light ID number, is saved in ID.
40: a switch statement carries out different code blocks for the command's actions (state, on, off, color, hbs).
42-53: The state action sends a GET /api/{Username}/Lights/{ID} request to the API, by calling another method, SendAPICommand. The response, JSON properties, are displayed to the console. In those properties we can gell whether the light is on/off and its color (hue, brightness, and saturation).
54-60: The on action sends a PUT/api/{Username}/lights/{ID}/state request to turn a light on, with a request body that sets the on property to true.
61-67: The off action sends a PUT/api/{Username}/lights/{ID}/state request to turn a light off, with a request body that sets the on property to false.
68-74: The alert action sends a PUT/api/{Username}/lights/{ID}/state request to send an alert, with a request body that sets the alert property to lselected (15 second alert).
75-116: The color action figures out what the hue, brightness, and saturation values should be for any of 7 predefined colors. Then a PUT /api/{Username}/lights/{ID}/state call is made, specifying values foron, hue, bri (brightness), and sat (saturation) in the request body.
117-126: The hbs action takes hue, brightness, and saturation values from command line arguments and calls /api/{Username}/lights/{ID}/state to set them.
133-163: The SendAPICommand method takes an action ("GET", "PUT", "POST"), a relative path, and an optional request body string. Calls are made, respectively, to the HttpClient's GetAsync, PutAsyc, or PostAsync method. The request, status code, and error response if any are displayed to the console. The HttpResponse is returned to the caller.
Step 2: Run the Program
In this step, you'll run the program and see it operate your lights.
If your lights are on, turn them off with the mobile Hue app.
Open a command/terminal window and CD to the project folder.
Run each of the commands below to turn on lights 1-4. As you run each command, the corresponding light should turn on, with whatever color it was last set to.
dotnet run -- 1 on
dotnet run -- 2 on
dotnet run -- 3 on
dotnet run -- 4 on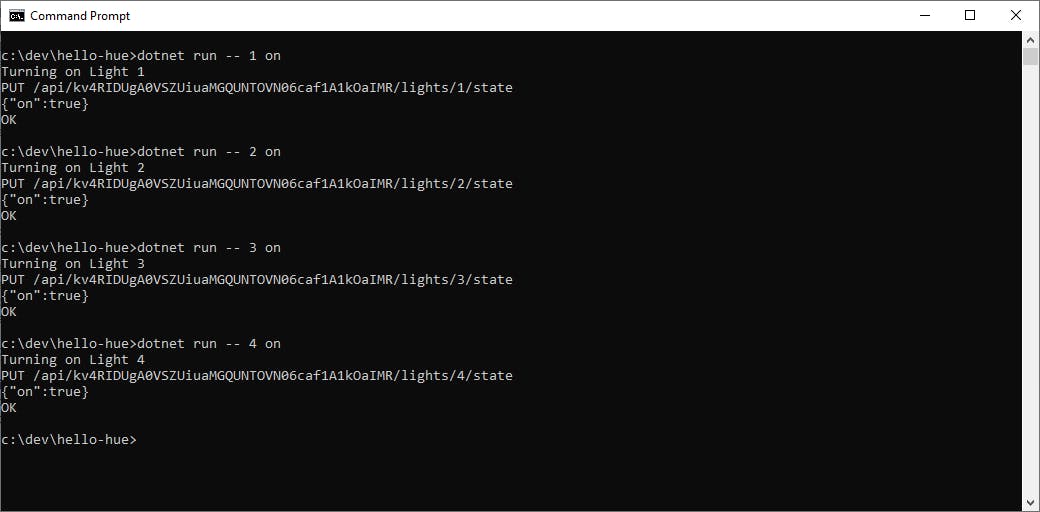
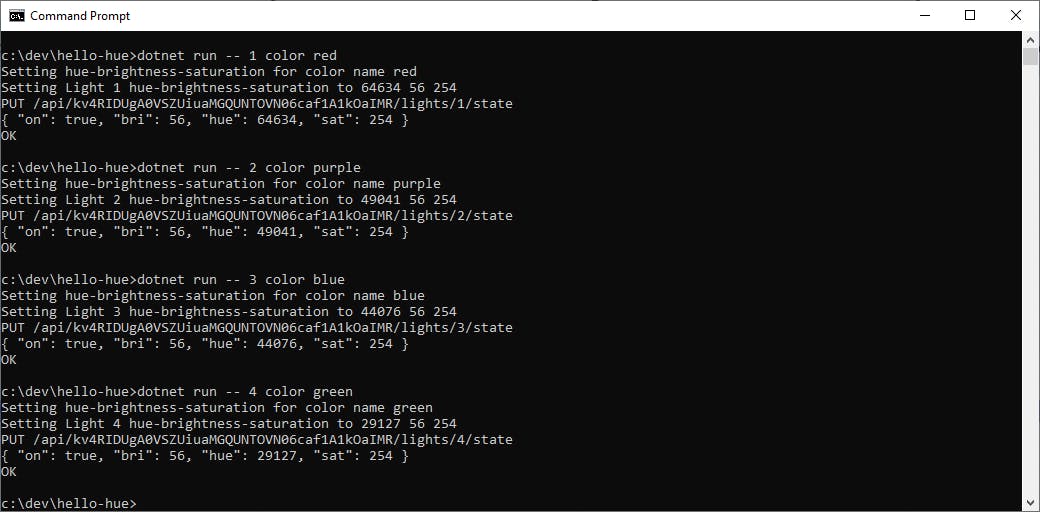
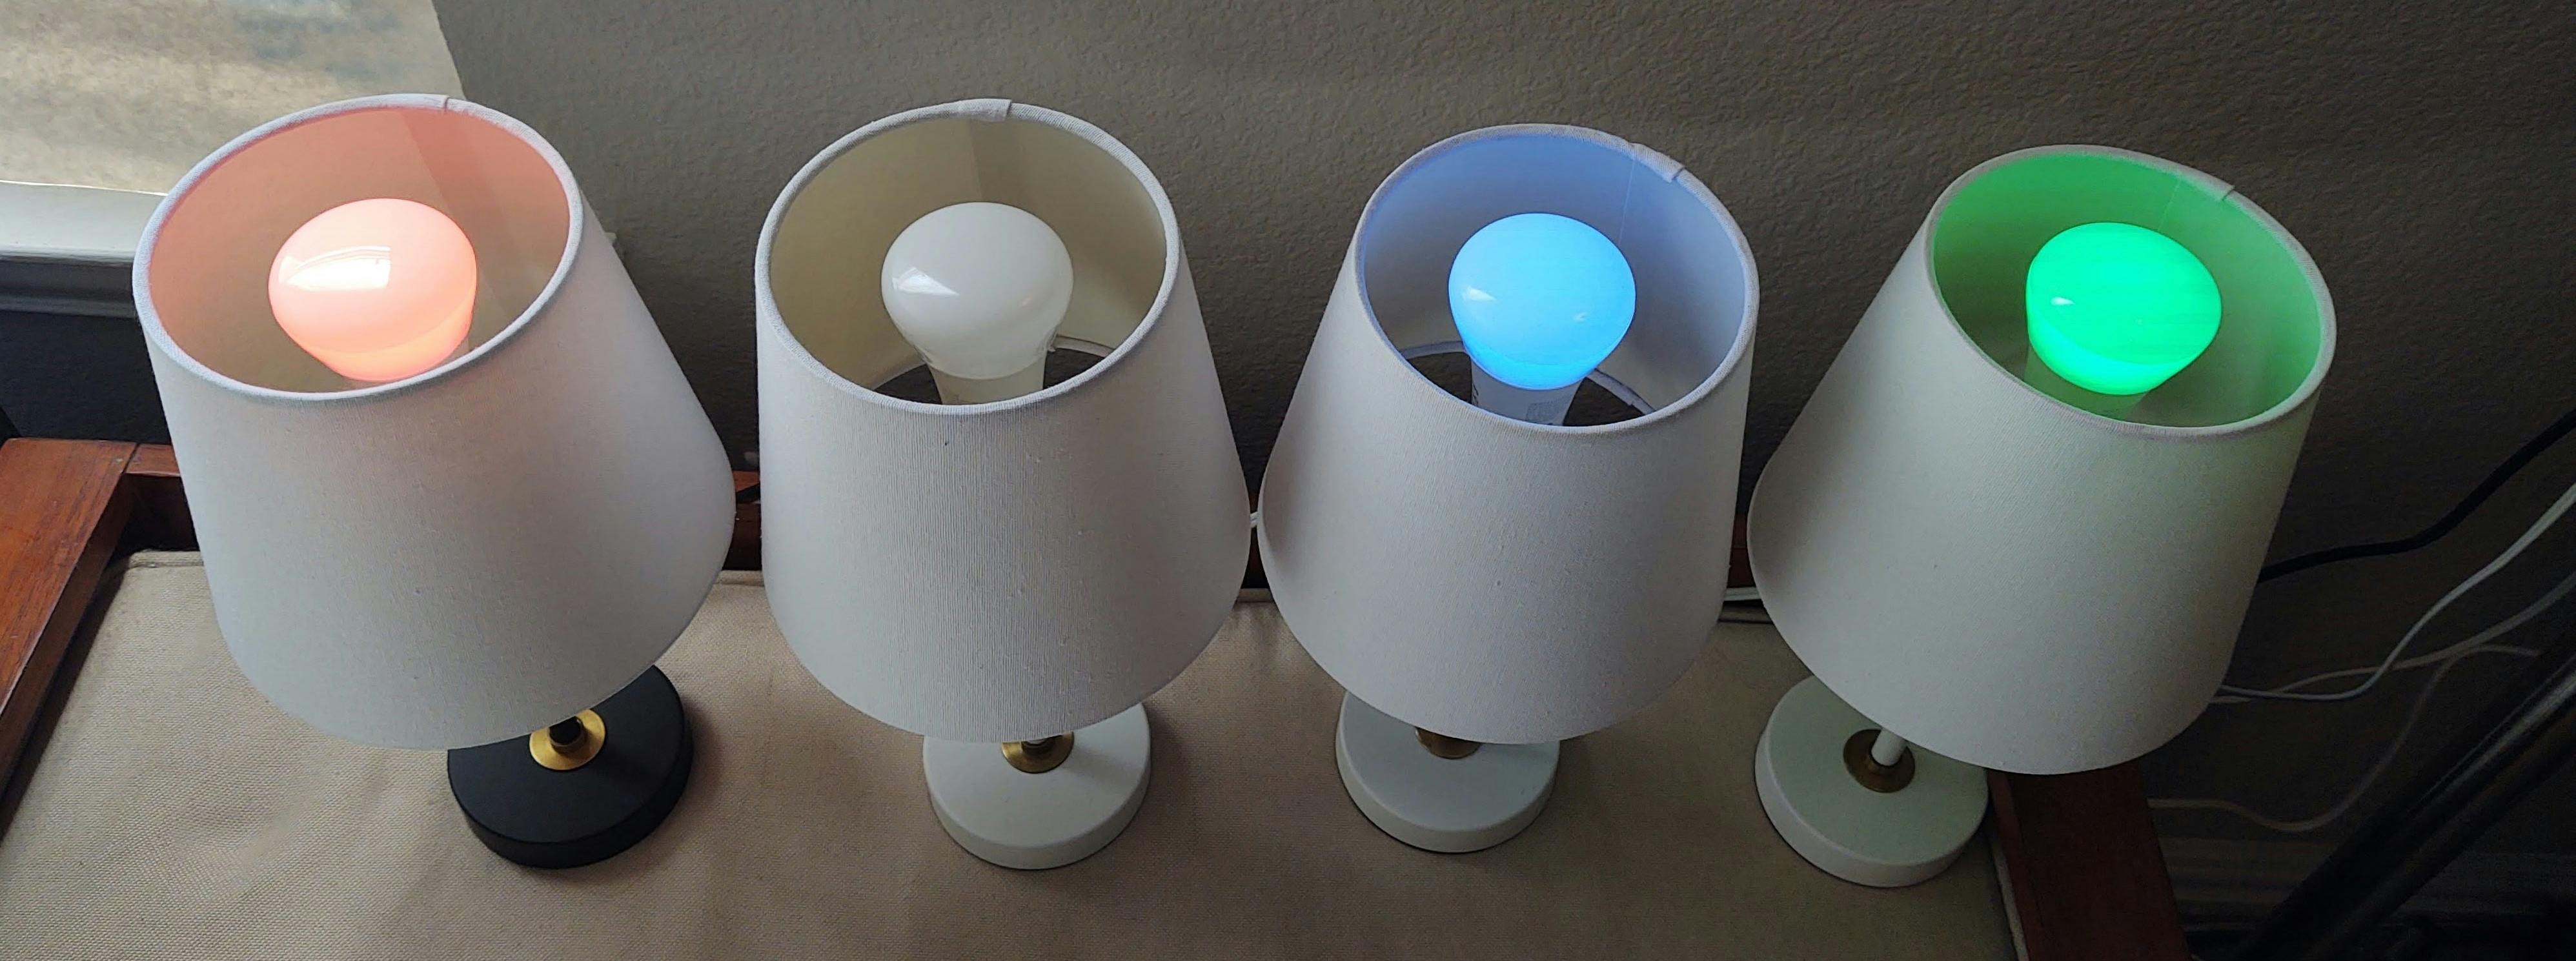
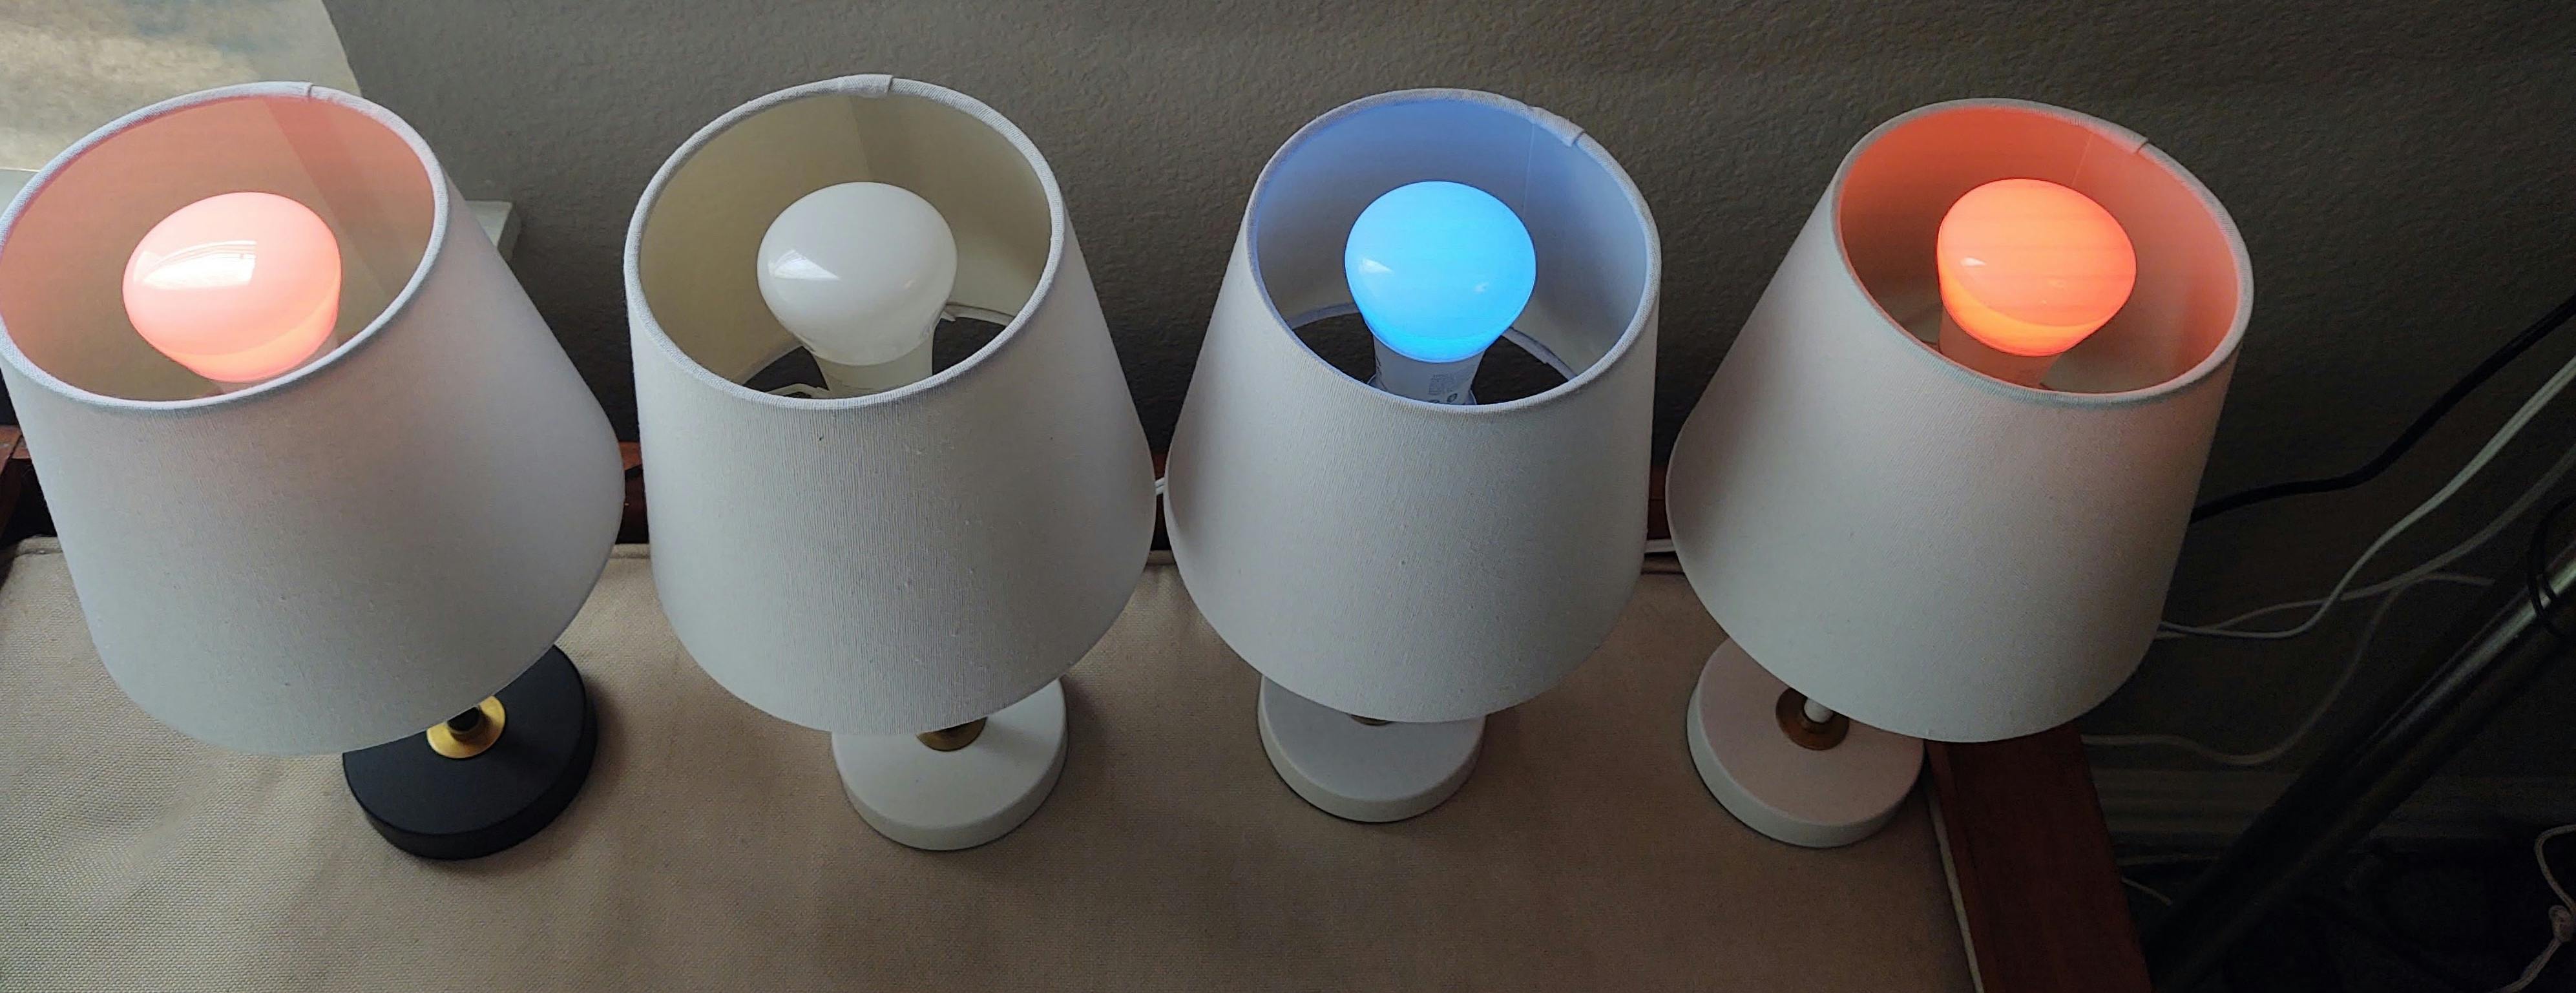
Next, set the light colors. Now each light should be the colors you specified. As the commands execute, you see the hue, brightness, and saturation values sent to the API.
dotnet run -- 1 color red
dotnet run -- 2 color white
dotnet run -- 3 color blue
dotnet run -- 4 color green
Turn off light number 2 with the command below. The white light should go out.
dotnet run -- 2 off
Get the state of light 1, the red light, with the command below. Note the hue, brightness, and saturation values.
dotnet run -- 1 state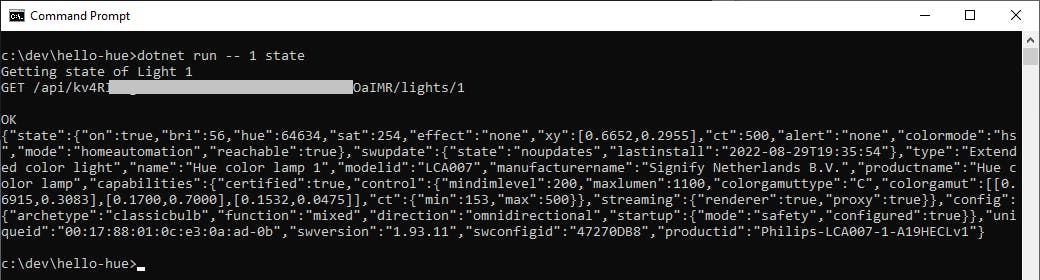
Set Light 4 to the same hue, brightness, and saturation as Light 1 by issuing the command below with the
hbsaction, filling in the values you saw in #6 above. Light 4 should turn the same red as Light 1.dotnet run -- 4 hbs <hue> <brightness> <saturation>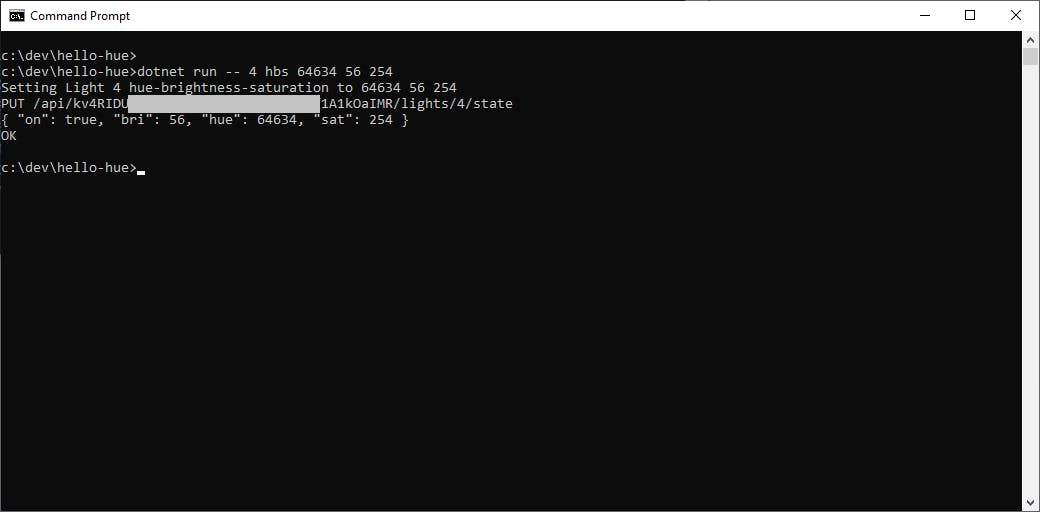
Send an alert to Light 2 with the command below. Light 2 pulses for 15 seconds.
dotnet run -- 2 alert
Step 3: Integrate with an SQS Queue
Now we know how to control our lights, but we have yet to connect them to AWS. In this step, we'll create an AWS Simple Queue Service (SQS) queue and update the console program to read commands from the queue. Our console program has local access to the lights, and can read queue messages and send commands to the lights. This is one simple way to integrate AWS with your local devices. We'll examine other ways in future posts.
Queue
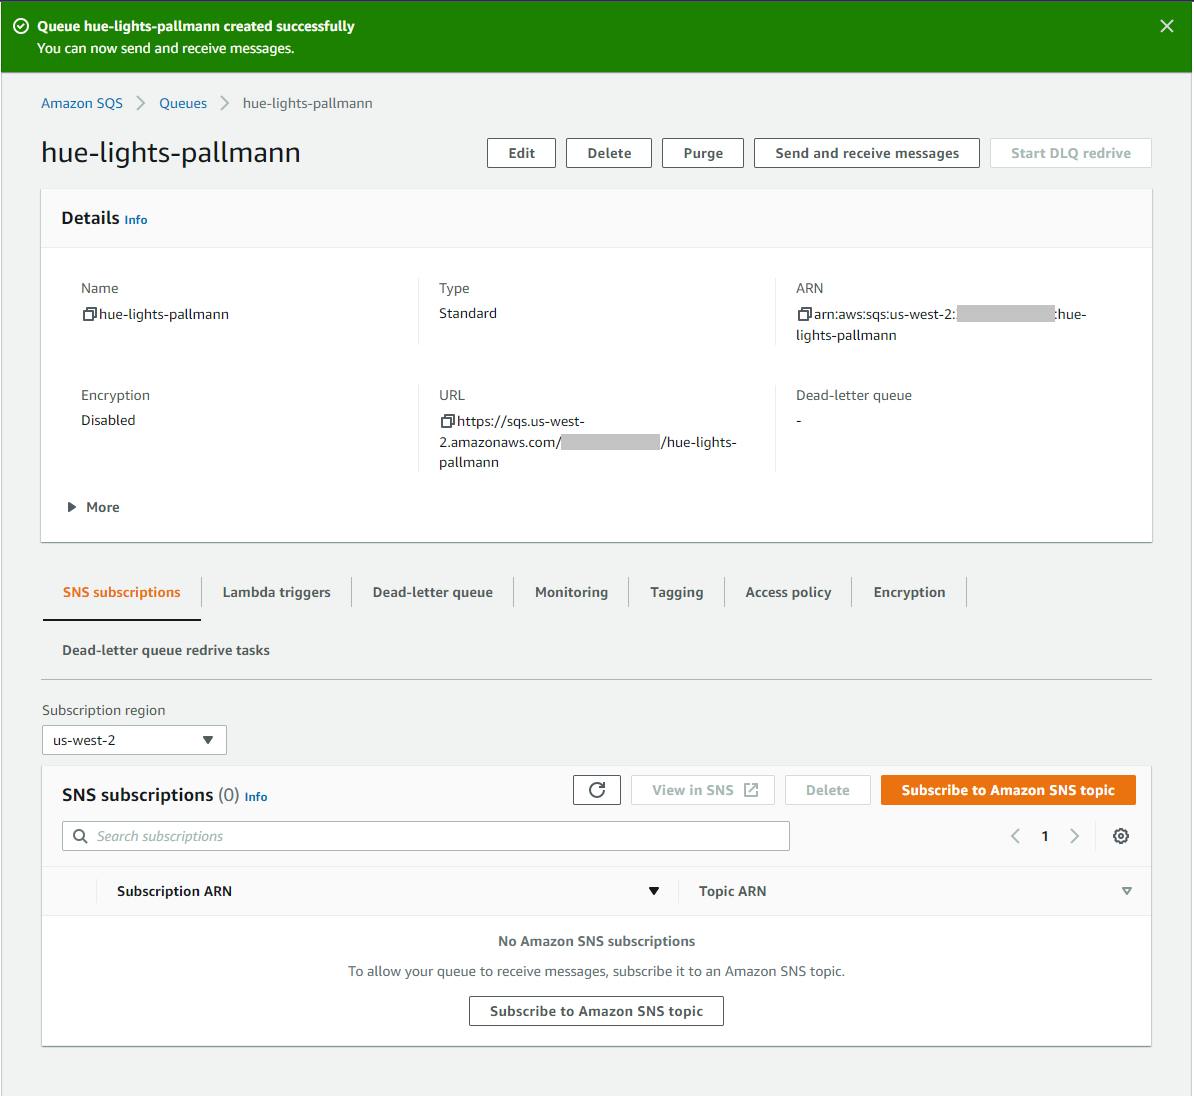
A. Sign in to the AWS console, and select a region nearest to your location. We're using us-west-2 (Oregon).
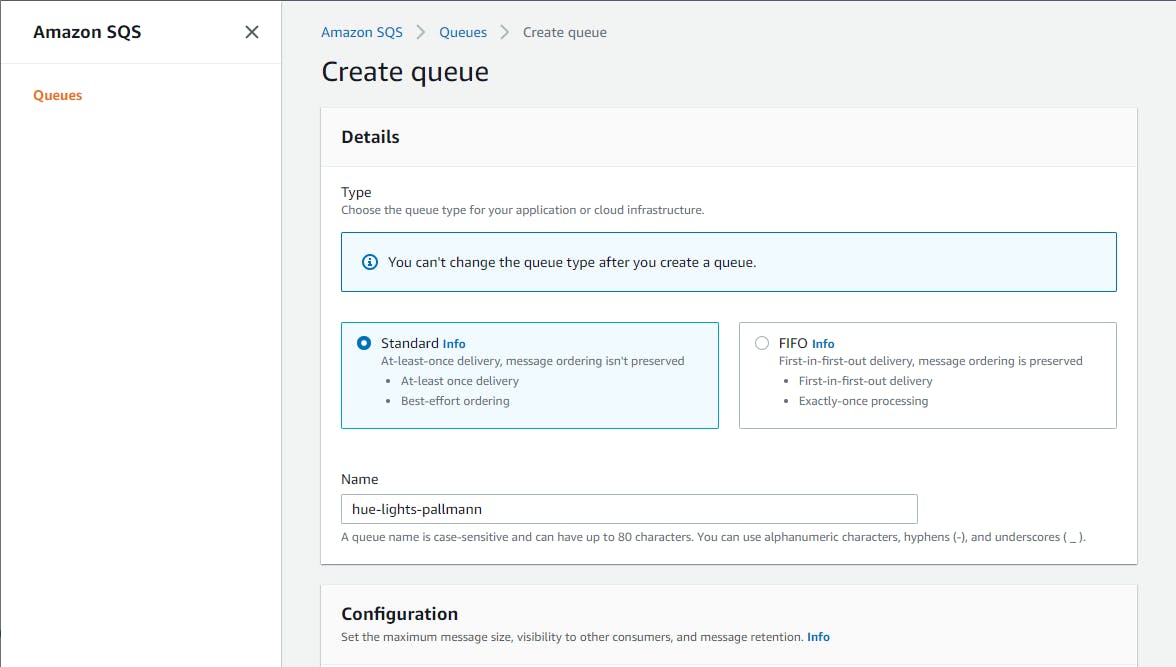
B. Navigate to SQS and click Create queue.
C. Create a Standard queue named hue-lights-yourname. If the name is in use, try a variation.
D. Click Create queue.
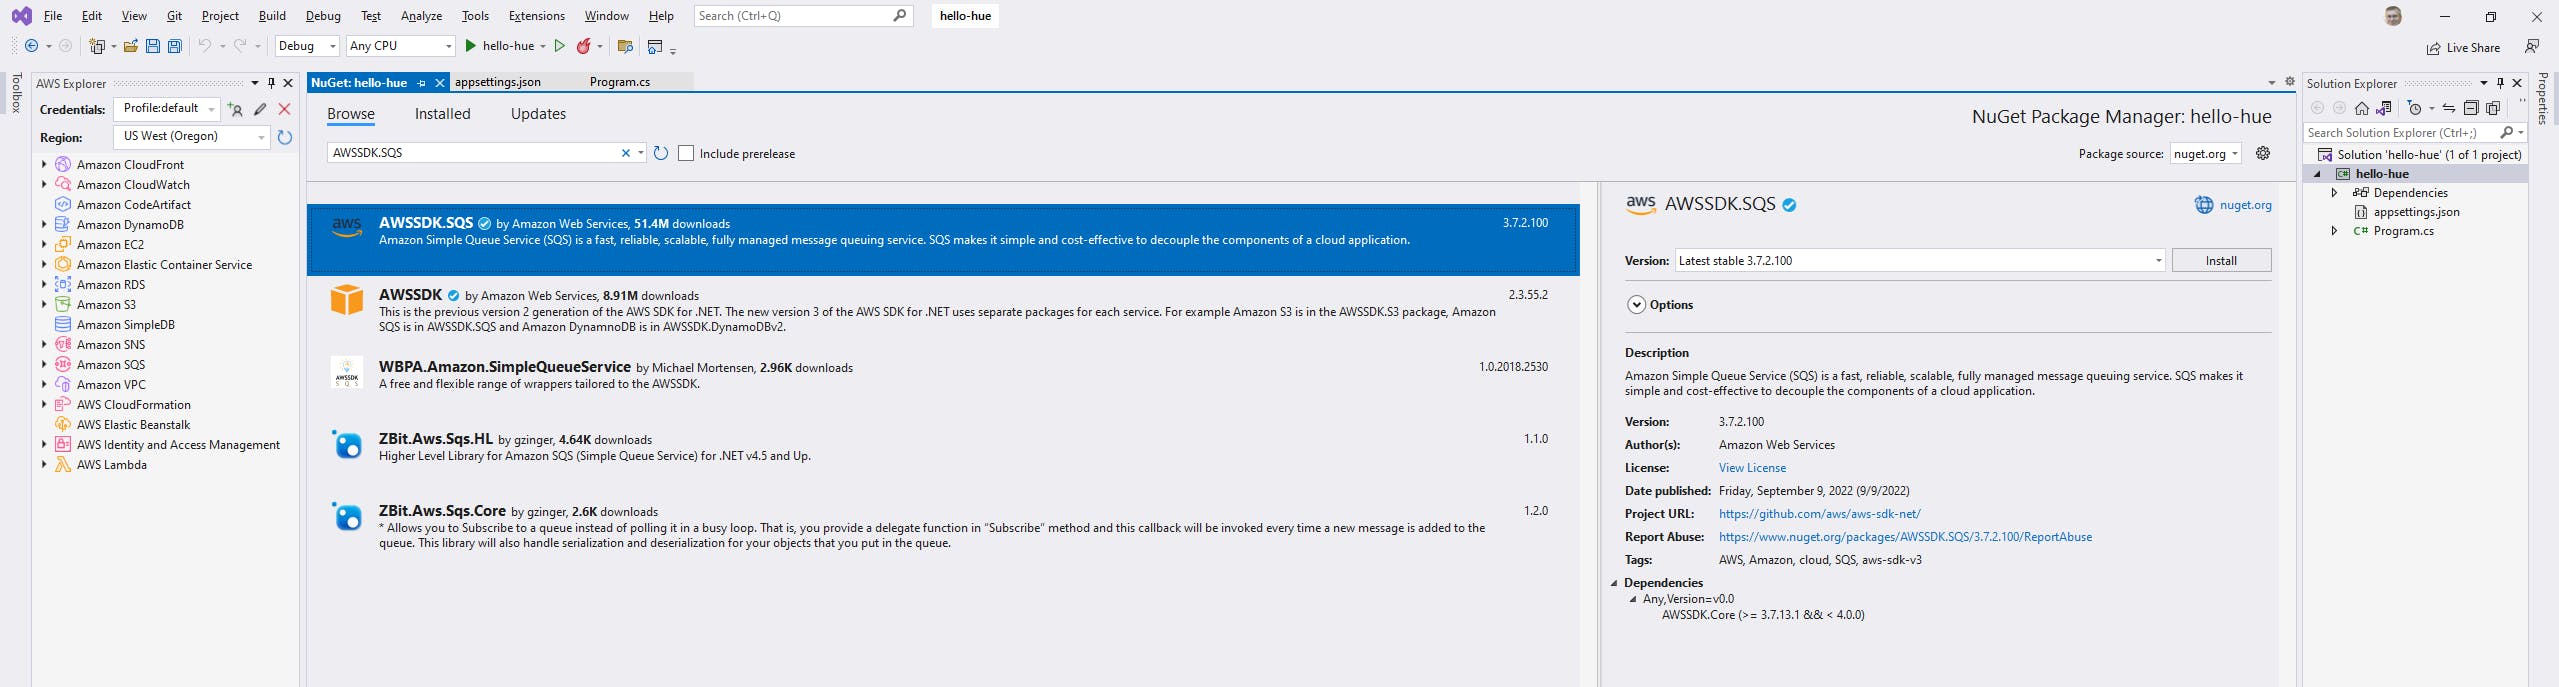
Add the AWSSDK.SQS package to the console program. In Visual Studio Solution Explorer, right-click the hello-hue project and select Manage NuGet Packages.... Search for and install the AWSSDK.SQS package. This will allow our program to interact with the SQS queue we just created.
Open appsettings.json in the code editor, and add the
queueline below, replacinghue-lights-[name]with the name of the queue you created.{ "hue": { "username": "[hue-username]", "baseUrl": "[hue-ip-address]" "queue": "hue-lights-[name]" } }Add code for a new action to process queue messages.
A. In Visual Studio, open Program.cs in the code editor and replace with the expanded version below. This code adds using statements for AWS SQS, reads a new setting QueueName from appsettings.json, and adds a new switch case code block for a new action named
queue.B. Set Region to the region you're using.
C. Save your changes and ensure the program builds.
Program.cs
namespace HelloHue
{
    using Amazon;
    using Amazon.SQS;
    using Amazon.SQS.Model;
      using Microsoft.Extensions.Configuration;

    public class Program
    {
        static string BaseURL = null!;
        static string Username = null!;
        static RegionEndpoint Region = RegionEndpoint.USWest2;
        static string QueueName = null!;
        static HttpClient Client = null!;

        static async Task Main(string[] args)
        {
            // Load Philips API Base URL and Username from settings.

            var builder = new ConfigurationBuilder().AddJsonFile($"appsettings.json", true, true);
            var config = builder.Build();
            BaseURL = config["hue:baseUrl"];
            Username = config["hue:username"];
            QueueName = config["hue:queue"];

            if (args.Length < 1 || args[0] == "-h")
            {
                Console.WriteLine("Use this command to control your Philips Hue lights.");
                Console.WriteLine("Get the state of a light ................  dotnet run -- <light#> state");
                Console.WriteLine("Turn light ON ...........................  dotnet run -- <light#> on");
                Console.WriteLine("Turn light OFF ..........................  dotnet run -- <light#> off");
                Console.WriteLine("Alert on light for 15 seconds ...........  dotnet run -- <light#> alert");
                Console.WriteLine("Set light color (using color name) ......  dotnet run -- <light#> color red|orange|yellow|green|blue|purple|white");
                Console.WriteLine("Set light hue, brightness, saturation .... dotnet run -- <light#> hbs <hue 0..65280> <brightness 0..254> <saturation 25..200>");
                Console.WriteLine("Monitor AWS queue for light commands ..... dotnet run -- queue");
                Environment.Exit(0);
            }

            Client = new HttpClient();
            Client.BaseAddress = new Uri(BaseURL);

            int hue, bri, sat;
            HttpResponseMessage response;

            var ID = args[0];

            var command = args.Length > 1 ? args[1] : args[0];

            switch (command)
            {
                // Get the state of a light.
                // syntax:  dotnet run -- <light#> state
                // example: dotnet run -- 1 state
                case "state":
                    Console.WriteLine($"Getting state of Light {ID}");
                    response = await SendAPICommand("GET", $"/api/{Username}/lights/{ID}");
                    if (response.Content != null)
                    {
                        var responseContent = await response.Content.ReadAsStringAsync();
                        Console.WriteLine(responseContent);
                    }
                    break;
                // Turn a light on.
                // syntax:  dotnet run -- <light#> on
                // example: dotnet run -- 1 on
                case "on":
                    Console.WriteLine($"Turning on Light {ID}");
                    response = await SendAPICommand("PUT", $"/api/{Username}/lights/{ID}/state", @"{""on"":true}");
                    break;
                // Turn a light off.
                // syntax:  dotnet run -- <light#> off
                // example: dotnet run -- 1 off
                case "off":
                    Console.WriteLine($"Turning off Light {ID}");
                    response = await SendAPICommand("PUT", $"/api/{Username}/lights/{ID}/state", @"{""on"":false}");
                    break;
                // Perform an alert on a light.
                // syntax:  dotnet run -- <light#> alert
                // example: dotnet run -- 1 alert
                case "alert":
                    Console.WriteLine($"Alerting on Light {ID}");
                    response = await SendAPICommand("PUT", $"/api/{Username}/lights/{ID}/state", @"{""alert"": ""lselect"" }");
                    break;
                // Set a light to a color name.
                // syntax:  dotnet run -- <light#> color red|orange|yellow|green|blue|purple|white
                // example: dotnet run -- 1 blue
                case "color":
                    var color = args[2];
                    hue = 0;
                    bri = 56;
                    sat = 254;
                    Console.WriteLine($"Setting hue-brightness-saturation for color name {color}");
                    switch (color)
                    {
                        case "red":
                            hue = 64634;
                            break;
                        case "purple":
                            hue = 49041;
                            break;
                        case "blue":
                            hue = 44076;
                            break;
                        case "green":
                            hue = 29127;
                             break;
                        case "orange":
                            hue = 4835;
                               break;
                        case "yellow":
                            hue = 10152;
                            break;
                        case "white":
                            hue = 41479;
                            bri = 100;
                            sat = 100;
                            break;
                        default:
                            Console.WriteLine($"Unknown color name: {color}");
                            Environment.Exit(0);
                            break;
                    }
                    Console.WriteLine($"Setting Light {ID} hue-brightness-saturation to {hue} {bri} {sat}");
                    response = await SendAPICommand("PUT", $"/api/{Username}/lights/{ID}/state", $@"{{ ""on"": true, ""bri"": {bri}, ""hue"": {hue}, ""sat"": {sat} }}");
                    break;
                // Set a light hue, brightness, and saturation.
                // syntax:  dotnet run -- <ligh#> hbs <hue 0..65535> <brightness 0..254> <saturation 25..254>
                // example: dotnet run -- 1 hbs 65280 254 200
                case "hbs":
                    hue = Convert.ToInt32(args[2]);
                    bri = Convert.ToInt32(args[3]);
                    sat = Convert.ToInt32(args[4]);
                    Console.WriteLine($"Setting Light {ID} hue-brightness-saturation to {hue} {bri} {sat}");
                    response = await SendAPICommand("PUT", $"/api/{Username}/lights/{ID}/state", $@"{{ ""on"": true, ""bri"": {bri}, ""hue"": {hue}, ""sat"": {sat} }}");
                    break;
                // Monitor AWS queue and process messages by sending commands to lights.
                case "queue":
                    var queueClient = new AmazonSQSClient(Region);

                    var getQueueUrlResponse = await queueClient.GetQueueUrlAsync(QueueName);
                    var queueUrl = getQueueUrlResponse.QueueUrl;

                    Console.WriteLine($"Monitoring AWS queue {queueUrl} for light commands - Ctrl-C to stop");
                    Console.WriteLine();

                    var request = new ReceiveMessageRequest()
                    {
                        QueueUrl = queueUrl,
                        MaxNumberOfMessages = 10,
                        WaitTimeSeconds = 10
                    };

                    while (true)
                    {
                        var queueResponse = await queueClient.ReceiveMessageAsync(request);
                        if (queueResponse.HttpStatusCode == System.Net.HttpStatusCode.OK)
                        {
                            var messages = queueResponse.Messages;
                            if (messages.Count > 0)
                            {
                                 foreach (var msg in messages)
                                {
                                    try
                                    {
                                        var lightCommand = msg.Body;
                                        if (lightCommand != null)
                                        {
                                            var parameters = lightCommand.Split('|');
                                            var action = parameters[0];
                                            var path = parameters[1].Replace("username", Username);
                                            var body = (parameters.Length > 2) ? parameters[2] : String.Empty;
                                            Console.WriteLine($"Message: {lightCommand}");
                                            Console.WriteLine($"Sending light command {action} {path} {body}");
                                            response = await SendAPICommand(action, path, body);
                                            Console.WriteLine();
                                        }
                                    }
                                    catch (InvalidOperationException ex)
                                    {
                                        Console.WriteLine($"Exception deserializing message: {ex.ToString()}");
                                    }
                                }

                                // Delete queue messages
                                foreach (var msg in messages)
                                {
                                    await queueClient.DeleteMessageAsync(queueUrl, msg.ReceiptHandle);
                                }
                            }
                        }
                        else
                        {
                            Console.WriteLine($"HTTP status {queueResponse.HttpStatusCode}");
                            break;
                        }
                        Thread.Sleep(5*1000);
                    }
                    break;
                default:
                    Console.WriteLine("Unrecognized command. Type dotnet run -h for help.");
                    break;
            }
        }

        /// <summary>
        /// Send an HTTP action to API, return response
        /// </summary>
        /// <param name="action"></param>
        /// <param name="path"></param>
        /// <param name="request"></param>
        /// <returns>HttpResponseMessage response</returns>
        private static async Task<HttpResponseMessage> SendAPICommand(string action, string path, string request = null!)
        {
            Console.WriteLine($"{action} {path}");
            Console.WriteLine(request);
            HttpResponseMessage response = null!;
            switch(action)
            {
                case "GET":
                    response = await Client.GetAsync(path);
                    break;
                case "PUT":
                    response = await Client.PutAsync(path, new StringContent(request));
                    break;
                case "POST":
                    response = await Client.PostAsync(path, new StringContent(request));
                    break;
            }
            Console.WriteLine(response.StatusCode);
            if (response.StatusCode != System.Net.HttpStatusCode.OK)
            {
                Console.WriteLine(response);
            }
            return response;
        }
    }
}
This code repeatedly checks for a queue message and sleeps in between. When a queue message is found, its contents are sent to a light as a command and the queue message is deleted. The action runs until interrupted by the user.
Step 4: Test Queuing a Light Command
In this step, you'll test sending a light command via the SQS queue.
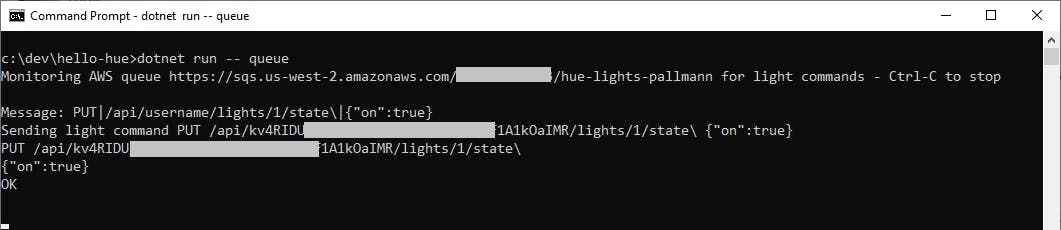
In your command window, run the new action with
dotnet run -- queue:dotnet run -- queueThe code begins monitoring the SQS queue, which is empty at the moment.

Add a queue message
In a moment, you'll send the queue message below to the SQS queue. The message format we're using is HTTP-action|path|body, where username will be replaced at runtime by your configured Hue username.
Send this message to turn on Light 1:
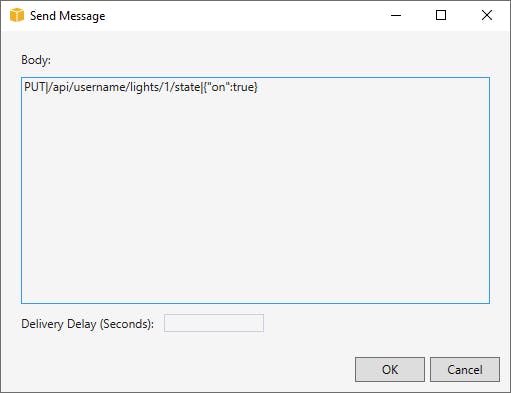
PUT|/api/username/lights/1/state|{"on":true}
You can send the queue message from the AWS console, or from the AWS Explorer in Visual Studio. Do either of the following:
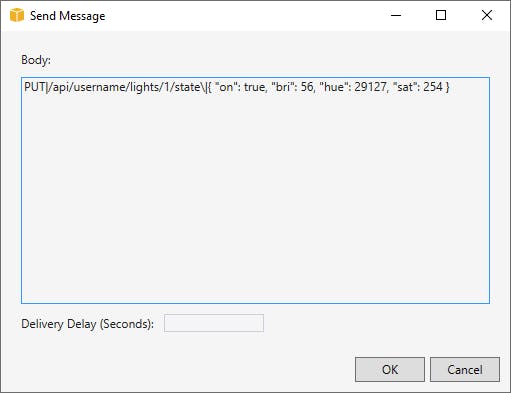
To send a queue message from the AWS console: Navigate to SQS. Click the queue you created earlier to view its detail. Click the Send and receive messages button at top right. In the Send message section, enter a JSON message body, and click Send message.

To send a queue message from Visual Studio: In AWS Explorer, set the region to the region you're using. Expand the Amazon SQS node, and you should see the queue you created earlier. Double-click your queue and click Send. Enter the JSON command listed above, and click OK.
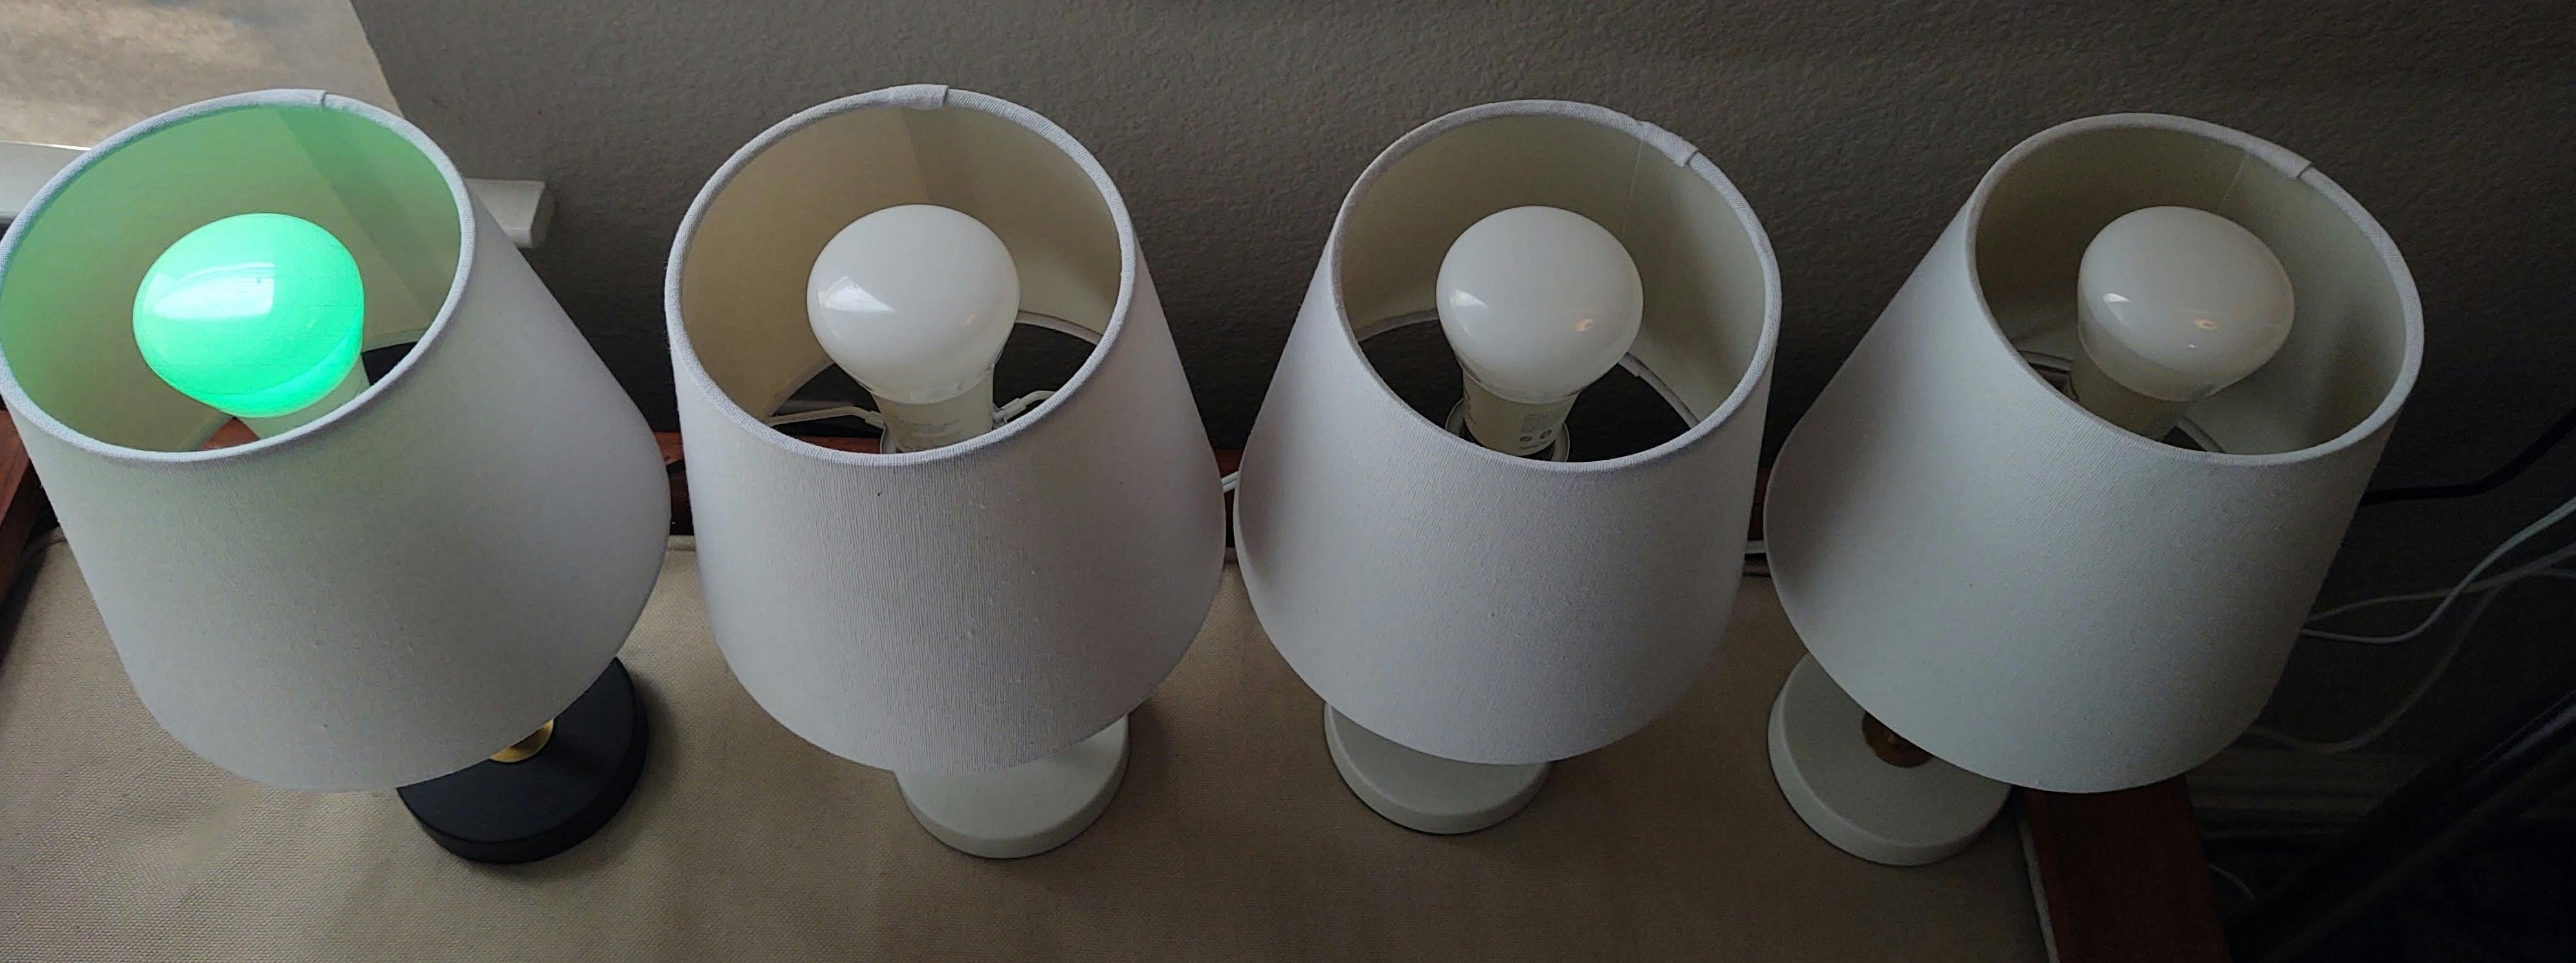
Within a few seconds, the console program should echo the command and send a message to the lights, and light 1 should turn on.
Now send this message to make Light 1 green:
PUT|/api/username/lights/1/state\|{ "on": true, "bri": 56, "hue": 29127, "sat": 254 }
Send more commands, such as these, and see them work. Replace 1 with your target light ID (1-4). You don't have to provide username, the program will take care of that.
| Message | Result |
| PUT|/api/username/lights/1/state\|{"on":true} | turn on light N |
| PUT|/api/username/lights/1/state\|{"on":false} | turn off light N |
| PUT|/api/username/lights/1/state\|{"alert": "lselect" } | send alert on light N |
| PUT|/api/username/lights/1/state\|{ "on": true, "bri": 100, "hue": 41479, "sat": 100 } | set light N color white |
| PUT|/api/username/lights/1/state\|{ "on": true, "bri": 56, "hue": 49041, "sat": 254 } | set light N color purple |
| PUT|/api/username/lights/1/state\|{ "on": true, "bri": 56, "hue": 64634, "sat": 254 } | set light N color red |
| PUT|/api/username/lights/1/state\|{ "on": true, "bri": 56, "hue": 4835, "sat": 254 } | set light N color orange |
| PUT|/api/username/lights/1/state\|{ "on": true, "bri": 56, "hue": 44076, "sat": 254 } | set light N color blue |
| PUT|/api/username/lights/1/state\|{ "on": true, "bri": 56, "hue": 29127, "sat": 254 } | set light N color green |
| PUT\|/api/username/lights/1/state\|{ "on": true, "bri": 56, "hue": 10152, "sat": 254 } | set light N color yellow |
| PUT|/api/username/lights/1/state\|{ "on": true, "bri": 56, "hue": 44076, "sat": 254 } | set light N color blue |
| PUT|/api/username/lights/1/state\|{ "on": true, "bri": 56, "hue": 44076, "sat": 254 } | set light N color blue |
Conclusion
In this post, you learned how to use the Philips API to interact with your Hue lights, first using the CLIP API Debugger. You set up a user, and used the generated username in API calls. You learned how to get the state of a light, turn lights on and off, send alerts, and set colors with hue, brightness, and saturation properties. You learned how to schedule a light action. Then, you wrote a .NET program that performs these actions.
We integrated with AWS in a simple way, using SQS to relay queued light commands from outside the home, with messages processed on your local PC. If you wanted to have this always running, you could take this further and embody the code from this sample in a .NET 6 Windows Service to monitor the queue action all the time.
Now that we know how to control the device from .NET code, we'll be exploring using different AWS services with Philips Hue lights, and other devices, in future articles.
Further Reading
Philips How to Develop for Hue
Philips Develop for Hue - Important Notes
Philips Hue API - Unofficial Reference Documentation
AWS